Coder Social home page Coder Social logo

cloudcompy's Introduction

CloudCompare

Homepage: https://cloudcompare.org

GitHub release

Build

Introduction

CloudCompare is a 3D point cloud (and triangular mesh) processing software. It was originally designed to perform comparison between two 3D points clouds (such as the ones obtained with a laser scanner) or between a point cloud and a triangular mesh. It relies on an octree structure that is highly optimized for this particular use-case. It was also meant to deal with huge point clouds (typically more than 10 million points, and up to 120 million with 2 GB of memory).

More on CloudCompare here

License

This project is under the GPL license: https://www.gnu.org/licenses/gpl-3.0.html

This means that you can use it as is for any purpose. But if you want to distribute it, or if you want to reuse its code or part of its code in a project you distribute, you have to comply with the GPL license. In effect, all the code you mix or link with CloudCompare's code must be made public as well. This code cannot be used in in a closed source software.

Installation

Linux:

Compilation

Supports: Windows, Linux, and macOS

Refer to the BUILD.md file for up-to-date information.

Basically, you have to:

  • clone this repository
  • install mandatory dependencies (OpenGL, etc.) and optional ones if you really need them (mainly to support particular file formats, or for some plugins)
  • launch CMake (from the trunk root)
  • enjoy!

Contributing to CloudCompare

If you want to help us improve CloudCompare or create a new plugin you can start by reading this guide

Supporting the project

If you want to help us in another way, you can make donations via donorbox

Thanks!

cloudcompy's People

Contributors

dgirardeau avatar giplessis avatar prascle avatar yohai-4m avatar

Stargazers

 avatar  avatar  avatar  avatar  avatar  avatar  avatar  avatar  avatar  avatar  avatar  avatar  avatar  avatar  avatar  avatar  avatar  avatar  avatar  avatar  avatar  avatar  avatar  avatar  avatar  avatar  avatar  avatar  avatar  avatar  avatar  avatar  avatar  avatar  avatar  avatar  avatar  avatar  avatar  avatar  avatar  avatar  avatar  avatar  avatar  avatar  avatar  avatar  avatar  avatar  avatar  avatar  avatar  avatar  avatar  avatar  avatar  avatar  avatar  avatar  avatar  avatar  avatar  avatar  avatar  avatar  avatar  avatar  avatar  avatar  avatar  avatar  avatar  avatar  avatar  avatar  avatar  avatar  avatar  avatar  avatar  avatar  avatar  avatar  avatar  avatar  avatar  avatar  avatar  avatar  avatar  avatar  avatar  avatar  avatar  avatar  avatar  avatar  avatar  avatar

Watchers

 avatar  avatar  avatar  avatar  avatar  avatar  avatar  avatar  avatar  avatar  avatar  avatar  avatar

cloudcompy's Issues

Running envCloudComPy.bat before every use

Hi,

Sorry if this is a silly question, I am still relatively new to this.

I can only import cloudcompy after I run envCloudComPy.bat each time I access the CloudComPy39 environment. Is that what it is supposed to do or is there a way to not have to do this every time and I can just use python straight away after I activate the environment?

I am currently operating on windows 10. Please let me know if you need more info.

Thanks!

Error When Using RANSAC_SD

@prascle , Paul thanks for providing the RANSAC functionality.

When trying out your newest release, I keep having (memory?) errors when calling computeRANSAC_SD.

See below for error message
(CloudComPy39) xu-eeb@AS-EEB-XU-02:~/projects/TLS$ python ransac_test.py QSocketNotifier: Can only be used with threads started with QThread /home/paul/projets/CloudComPy/CloudComPy/CloudCompare/libs/qCC_db/src/ccLog.cpp [53] : trace OFF JsonRPCPlugin::JsonRPCPlugin /home/paul/projets/CloudComPy/CloudComPy/CloudCompare/libs/qCC_db/src/ccLog.cpp [48] : trace ON /home/paul/projets/CloudComPy/CloudComPy/boostPython/RANSAC_SD/RANSAC_SDPy.cpp [51] : computeRANSAC_SD free(): corrupted unsorted chunks Aborted

I am attaching my code example and the data I used. Could you help to check with this?

Thanks!
ransac_test.zip

How to compute split distances in C2C distance computation?

Hello, thanks for your great work.

I want to get split distances per dimension X, Y and Z in C2C distances computation and use dimension Z distance for filtering cloud by value.
There are setSplitDistances() and getSplitDistance() in params. But I found no way to use these params to get split distances. Could you please tell me how to get split distances dimension X, Y and Z in C2C distances computation, if it is possible?

With best regards

Memory Leak in ExtractConnectedComponents

Hi, I think there is a memory leak problem in the cc.ExtractConnectedComponents function.

I attach a simple script to illustrate the problem. Basically, the script read a point cloud (roughly 52 MB) and called the ExtractConnectedComponents function 5 times. After each call, roughly 45MB is added to the memory. This is becoming an issue for our codes which calls ExtractConnectedComponents hundreds to thousands of times for some big dataset.

(CloudComPy39) xiangtao@Xu-SLS:~/projects/TLS$ python memory_test.py
QSocketNotifier: Can only be used with threads started with QThread
/home/paul/projets/CloudComPy/CloudComPy/CloudCompare/libs/qCC_db/src/ccLog.cpp [53] : trace OFF
JsonRPCPlugin::JsonRPCPlugin
input cloud memory usage: 4636672
iteration 0, f added memory:  0
iteration 0, ExtractConnectedComponents added memory:  7491584
iteration 1, f added memory:  0
iteration 1, ExtractConnectedComponents added memory:  2097152
iteration 2, f added memory:  0
iteration 2, ExtractConnectedComponents added memory:  2097152
iteration 3, f added memory:  0
iteration 3, ExtractConnectedComponents added memory:  2097152
iteration 4, f added memory:  0
iteration 4, ExtractConnectedComponents added memory:  2097152

memory_test.zip

I know memory bugs are usually very tricky... So hopefully you can help to look into this. Thanks in advance!

Get TSL info

Hi,
I have issue by getting the translation matrix or the location of scanner. This property is saved as child number zero but it is not possible to get information about it.
Thank you

Problems on Cloud2MeshDistance

Hi,

I have been exploring calculating C2M distance using CloudComPy.

Following the test09 example, I am using the following code

params = cc.Cloud2MeshDistancesComputationParams()
params.maxThreadCount=8
params.octreeLevel=8
params.signedDistances=False
cc.DistanceComputationTools.computeCloud2MeshDistances(pc_ransac,mesh_primitive,params)

Here, pc_ransac is a point cloud, mesh_primitive is a cylinder mesh.

I got a return value of 1 from the C2M Distance and there is no C2M distance field in pc_ransac. Only a scalar field called "default" and the value is totally off.

Could you help me to find out what is wrong? Thanks!

Issue instantiating classes

I'm trying to use the cloudComPy.GeometricalAnalysisTools and the cloudComPy.CloudSamplingTools classes. I'm working in Jupyter and getting an error saying 'This class cannot be instantiated from Python'.

Could someone comment a short demo on how to get this working in Jupyter?

Thanks,

Tommy

How to access cloud compare cli functions/plugins in cloudComPy?

Hi Paul.

Hope you're doing fine. I am trying to use CloudComPy for a research project in which I want to access some functions like ransac, raster, c2m, and cut etc. Previously it's done with command line and I can see its documentation here. Since it's mentioned on Github that all cli functions are also available in CloudCompy, could you please point me toward the right way of accessing these functions / documentation, if it's possible? I can't find them in python docs.

Best Regards
Nabeel

Calculating Scattering Angles

Hi, I would like to calculate the angle between the normal of the point and the vector made from such point and the sensor.

In CloudCompare this is called Scattering Angles, and it is inside the Sensor options. This is important to detect noise or "veils" made around some objects with laser scanners, and to filter out low presicion points (with scattering angles close to 90 degrees).

I hope you can implement this in CloudComPy. Thanks.

About PointCloud Segmentation

Hi, I really appreciate your effort to develop a Python-API for CC. And I wonder if "segmetation tool" has been implemented ? I have no idea to find this, thanks very much for your reply!

Docker image build processes takes really long

Hi all,

for the first time I'm using docker and CloudComPy.

When I build the docker image I have very long processing times (> 20 min.).
This seems to be particularly due to the following step:

 => => # Collecting package metadata (current_repodata.json): ...working... done
 => => # Solving environment: ...working... failed with initial frozen solve. Retrying with flexible solve.                                                                                                                                                                                           
 => => # Solving environment: ...working... failed with repodata from current_repodata.json, will retry with next repodata source.                                                                                                                                                                    
 => => # Collecting package metadata (repodata.json): ...working... done                                                                                                                                                                                                                              
 => => # Solving environment: ...working... failed with initial frozen solve. Retrying with flexible solve.
 => => # Solving environment: ...working..

Do you have any recommendations on how to make it work faster?

M3C2 plugin parameters question

HI and thank you for this amazing project!
I'm tryng to use the M3C2 algorithm in CloudComPy and it works overall well.

If my code is something like this

....
paramFile = "m3c2_params.txt"
cloud_1 = ...
cloud_2 = ...

cloud_result = cc.M3C2.computeM3C2([ cloud_1 , cloud_2], paramFile)
....

I was wondering if it was possible to automatize to computation paramFile as it can be done in CloucCompare (With the button Guess Param), maybe the this function is somwhere wrapped and I was not able to find it.
I hope my question is clear.
Thank you!

CloudComPy access to the HPR algorithm

I've found the HPR incorporated in CC to be tremendously helpful. I don't see an obvious way of accessing that via CloudComPy's methods.

  1. Is there a way of doing so, that I just haven't been able to find?
  2. Are there plans to enable it? I'd love it.

Thanks for an excellent companion to an excellent program!

Long running time of M3C2 plugin

The M3C2 algorithm in CloudComPy is slow compared to the implementation of CloudCompare.

I put all the files to recreate the experiment here. The timing of the plugins:
Cloudcompare M3C2: ~20 seconds
CoudComPy M3C2: 15 minutes (sometimes it takes longer ~20 min)

This is the code I use:

import os
import sys
import math
os.environ["_CCTRACE_"]="ON"

import cloudComPy as cc
import numpy as np
import time

cc.initCC()  # to do once before using plugins or dealing with numpy

paramFilename = "m3c2_params.txt"

start = time.time()

if cc.isPluginM3C2():
    import cloudComPy.M3C2
    cloud = cc.loadPointCloud('sidewalk_filter.txt')
    cloud1 = cc.loadPointCloud('sidewalk_filter2.txt')

    cloud2 = cc.M3C2.computeM3C2([cloud,cloud1], paramFilename)

    cc.SaveEntities([cloud, cloud1, cloud2], "M3C2.bin")

    end = time.time()
    print(end - start)

Open laz point clouds

Hi,

I'm getting started with cloudcompy. After having successfully installed the program, i am trying to install my first point clouds.
For this I use the loadPointCloud() function. So far, this works only with xyz files. However, my point clouds are in laz format. Is there any way to import the point clouds? Or is there an overview of the supported formats?

Thanks for help!
Tim

Accessing rgb color for point clouds

Hi,

is it possible to access and modify the vertex colors stored in a point cloud file through the python API? I cant see a method to do it.

Thanks

Andrea

Multi-processing ComputeC2C distance?

Hi,

I am currently set maxSearchDist in lots of C2C distance computations, which will not be compatible with multi-threading. I was wondering whether I can improve performance by multi-processing in python? I have tried some test using python's standard multiprocessing library but the total CPU usage is never higher than 100%.

Any suggestions on whether and how I can combine multi-processing with C2C distance?

CSF Filter

Hello,

Thank you for making CloudCompare available as a python library -- it's been extremely helpful. Is the CSF Filter available in CloudCompy? I am not seeing any mention of it in the documentation yet.

Saving a point cloud as las-file

Hi,
I'm very happy that there exist now an option to use CloudCompare via python. So far I started to install everything on my windows machine and tried some operations such as computing volume density. After that I wanted to save the point cloud using res = cloudComPy.SavePointCloud(cloud, "path/to/save/file.las").
Unfortunately no file is written and when I print "res" in spyder the output is CC_FERR_THIRD_PARTY_LIB_EXCEPTION.
I tried to save the point cloud as asc-file and luckily it works. However las-files are actually the things I need.
Any suggestions what I did wrong or where the error might occur?

Thanks in advance!
Tina

Suggestion for adding a new feature: Rasterization using "population to cell" option

Hi,
I would like to ask for adding a new feature to CloudCompy.
In CloudCompare the rasterization allows to set the raster export options 'Export density (population per cell)'. So far I think this is not implemented in ClouComPy. It would be awesome if this can be added in a future version.
I was looking for other workarounds to obtain the same result but didn't find any simple solution.

Cheers Tina

Subdividing a point cloud using the triangles of a mesh

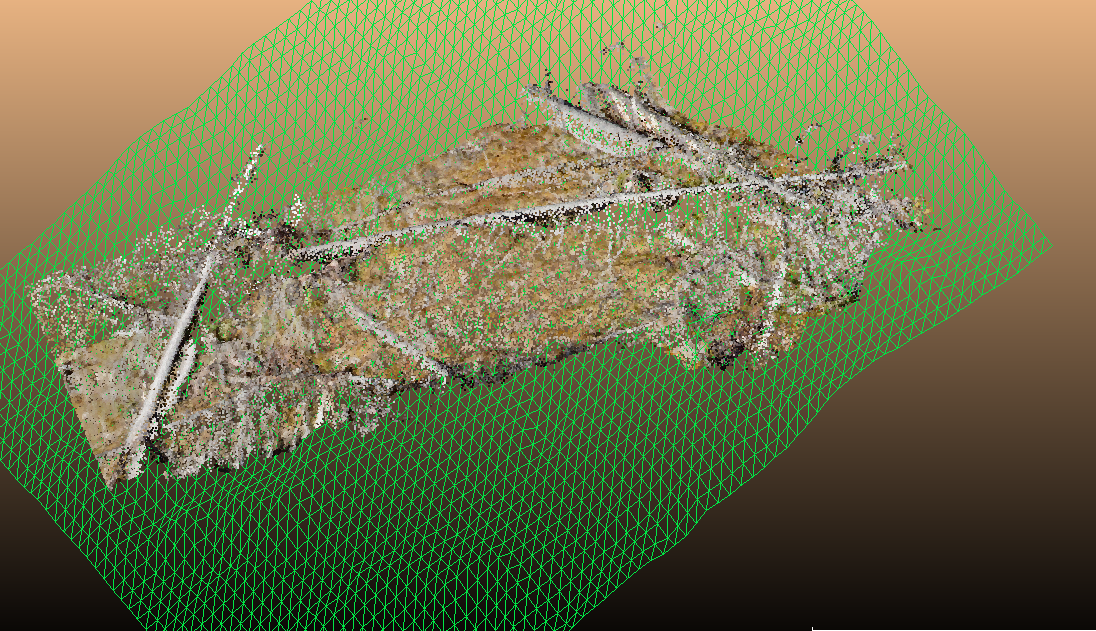
Hello, I am writing here on the advice of Daniel Girardeau. I have created a mesh and would like to use it to divide a cloud of points (as seen in the example figure).
The idea would be to make a subdivision using only the X and Y coordinates, obtaining N sub-clouds where N is the number of triangles.
Basically I'd have to find a way to create a loop of the crop2D command, only I have no experience with meshes and wouldn't even know where to start.
Any advice?

image

Keep E57 structure.

Hello,

I would like to import structured .e57 files, do some treatment on them and then save them as new .e57 files while keeping their structured nature. All of this through CloudComPy only.
I think CloudCompare GUI offers that option, but I was only able to export unstructured files from CloudComPy.
Do you have an idea of how that could be done, if it's even possible ?

Regards

ccGLMatrix constructor

I'm just trying to figure out how to apply a 4x4 transformation matrix to a point cloud, and maybe there's no bug but this seems way more difficult than it needs to be. This may also just be a documentation issue, but surely others will face the same troubles.

My understand of the docs is that I should run ccPointCloud.applyRigidTransformation( ) but I must first create a ccGLMatrix or ccGLMatrixd object from my 4x4 transform. However, I cannot understand the docs for constructing a ccGLMatrix or ccGLMatrixd object. Here's the docs for ccGLMatrixd:

A 4x4 'transformation' matrix (column major order), double precision (double).

Transformation (M) is composed by a rotation (R) and a translation (T):
M*X = R*X + T. See OpenGL transformations.

Available operators: += -= *= *

Default constructor (no parameter) gives identity.
Alternate constructor:

:param tuple X: 3 first elements of the 1st column (last one is 0)
:param tuple Y: 3 first elements of the 2nd column (last one is 0)
:param tuple Z: 3 first elements of the 3rd column (last one is 0)
:param tuple Tr: 3 first elements of the last column (last one is 1)

This what I tried, starting with a string-formatted 4x4 matrix from the CC gui and trying to format it as close to the parameters as possible:

transform_matrix="""
-0.974817395210 -0.222850158811 -0.008290924132 1.879103064537
0.222860082984 -0.974850356579 -0.000282019377 -9.134336471558
-0.008019514382 -0.002122662961 0.999965190887 -0.138696298003
0.000000000000 0.000000000000 0.000000000000 1.000000000000
"""

matrix_row_major = [row.split() for row in transform_matrix.split('\n') if len(row)>0]
matrix_col_major = [[float(matrix_row_major[j][i]) for j in range(4)] for i in range(4)]
transform_cc=cc.ccGLMatrixd(tuple(transform_colm[0]),Y=tuple(transform_colm[1]),Z=tuple(transform_colm[2]),Tr=tuple(transform_colm[3]))

Return:

ArgumentError: Python argument types in
    ccGLMatrixd.__init__(ccGLMatrixd)
did not match C++ signature:
    __init__(struct _object * __ptr64, class ccGLMatrixTpl<double>)
    __init__(struct _object * __ptr64)

I tried several other formatting options, but got similar errors every time. Alternatively, it would be much nicer if you could just use a row-major numpy array instead of the ccGLMatrix object. For example:

transform_matrix="""
-0.974817395210 -0.222850158811 -0.008290924132 1.879103064537
0.222860082984 -0.974850356579 -0.000282019377 -9.134336471558
-0.008019514382 -0.002122662961 0.999965190887 -0.138696298003
0.000000000000 0.000000000000 0.000000000000 1.000000000000

matrix_np = numpy.array([row.split() for row in transform_matrix.split('\n') if len(row)>0])

matrix_cc = ccGLMatrixd(matrix_np[:-1])

my_cloud.applyRigidTransformation(matrix_cc)
""" 

Python setup in IDE

Dear Team, I was looking at various instructions given on CloudComPy wrapper in GitHub to install cloudComPy, however I am unsuccessful. I want to install cloudComPy in one of the Anaconda IDE (For. e.g. Spyder, Jupyter). I am quite new to python, however know few package installations techniques like conda install/ pip install / adding the path in Tool>PythonPath Manager.
My intention is to repeat below steps done in software in python, as I need to do it for more than 10 such pair of stl files.
Steps to automate in cloud compare:

  1. Import two stl files (reference, new model)
  2. Fine registration (ICP) (default settings with 100% final overlap)
  3. Save the Registration info image/csv respective new model location
  4. Measure cloud/mesh distance with default settings
  5. Compute stat. params(active SF) gaussian distribution fitting
  6. Save gaussian distribution plot in respective new model location
  7. Save new model modified stl (which was transformed for step 2 by the software)
    I know how to loop these steps in python. I am unable to import cloudCompy as cc to try building my steps in python. Do you think these steps can be done in python wrapper of the software?
    Any suggestion is welcome.

Potential memory leak when running in a loop

Hello,

I'm running the M3C2 algorithm in a loop on a large number of point cloud files, using the following code:

tile_tqdm = tqdm(all_tiles, unit='tile', smoothing=0)

for tile in tile_tqdm:
    [...]
    
    cloud1 = cc.loadPointCloud(path1, cc.CC_SHIFT_MODE.NO_GLOBAL_SHIFT)
    cloud2 = cc.loadPointCloud(path2, cc.CC_SHIFT_MODE.NO_GLOBAL_SHIFT)

    m3c2_cloud = cc.M3C2.computeM3C2([cloud1, cloud2], param_file)

    if m3c2_cloud is None:
        continue

    cc.SavePointCloud(m3c2_cloud, path_m3c2)

On every iteration of this loop, the RAM usage goes up by approximately 10MB (the size of the two input clouds varies but is usually around 0.5 MB, and the resulting M3C2 cloud is around 1.5MB. Only restarting the kernel frees up the RAM.

Any idea what is going on?

Slice mesh with 2d polygon

Thank you for the useful wrapper.
I'm working on slicing the mesh with 2d footprint. I could find a function in the point cloud called crop2d which is exactly what I want, but it is unavailable in mesh. My purpose is to slice the mesh as well as its texture. Can you help me with that? Thank you.

2D polygon (Fit)

Dear developer,

Thanks for implementing a Python-API for CC.
Is the function "2D polygon" already implemented for CloudComPy? If not, I would really appreciate your effort.

Load Mesh files, Export histogram computation as .csv ad plot

Hello!
Thanks for developing this CloudComPy API for CloudCompare. I am using CloudComPy to try the following:

  • Open/load ".fbx" mesh filetype - I couldn't figure out the API to load a mesh (But, I see that the ccMesh class exists with many functionalities)
  • Export the results of distance computation (i.e, Histogram of the cloud to cloud distance computation and export these results as .csv file and .png fig
    image

It would be great if you could let me know whether these functionalities are there in CloudComPy, or, intended to be developed sooner.
Thank you!

List of commands and parameters

Hello together,
I am quite new to Python and especially to CloudComPy. I recently got it running and I am able to run the testfiles over spyder - great success for me, as it was my first installation of a wrapper :D
anyway: Is there a list of all implemented CloudCompare-Commands and their parameters? I do not succeed with the help() command.
I would be very thankful for any kind of help.
Best regards
Hendrik

Assigning RGB colors to a point cloud does not work

Version:
CloudComPy39_20220409
grafik

I am not able to assign a RGB color to a point cloud (using the code from the tests).
Neither with colorize nor with setColor.

cloud = cc.loadPointCloud(getSampleCloud(5.0))
if cloud.hasColors():
    raise RuntimeError

cloud.colorize(0.2, 0.3, 0.4, 1.0) 
if not cloud.hasColors():
    raise RuntimeError

col = cc.QColor.fromRgb(32,48,64) 
if not cloud.setColor(col):
    raise RuntimeError

When I save the cloud to a bin file and open it in the CC version that comes with the plugin, the color is wrong (the default one is used).
And the drop down shows None.
grafik

The drop down shows that RGB is available, but it is not set.
grafik

With the scalar field it works as expected. When I assign one, then it is activated and the plot shows the expected colors.

PCL WRAPPER - Fast global Registration

Hello,
I am currently trying CloudComPy, however I cannot find any information regarding PCL Wrapper (Fast Global Registration).
Could you please help me or send me a code doing the same this ?

Thanks a lot !

issue using CloudComPy39 within Spyder | no issue with anaconda

Hello,
the package CloudComPy39 is running fine in anaconda prompt.

but if I want to use the Syder IDE [Spyder] in that environment

image

then I've got an issue with qt pluging.

image

i tried to force reinstallation of both package below

image

image

still, SPYDER returns a issue when I execute my python code. this is not the case with anaconda prompt....

CloudComPy Install

Hello!
I'm having a lot of issues getting CloudComPy to work, iwanted to use it for my master thesis, i need to visualize and maybe do "queries" on a classified pointcloud that i classified in cloudcompare using .las 1.4 and then saving everything in ASCII format.

Can anyone give me a easier to understand method to get CLoudComPy to work? i have install evertything needed.

Subsampling a pointcloud

I am struggling to subsample a point cloud using CloudComPy. My problem seems to be this 'GenericIndexedCloudPersist' class that is needed as input. Can anyone indicates me on how to convert a ccPointCloud into a genericIndexedCloudPersist?

Many thanks!

CloudComPy via Pip

Hi,

I really struggle with the installation of CloudComPy. Sometimes it's working and sometimes the wrapper cannot be successfully launched.
I think it would be much easier (for me and many others) to install CloudComPy via Pip.
Is that feasible?

With best regards

Functionality to Load Entities?

@prascle. Hi Paul. Is there any plan to have an IO functionality to enable reading multiple point clouds from a same entity .bin file?

Currently, I am using RANSAC to generate hundreds of small point clouds and I find writing/reading these files is becoming a throttle for the performance of my little program...

How are the Distance Computation Tools used correctly?

How are the Distance Computation Tools (computeCloud2MeshDistances) used correctly?

Previous Steps:

  • Docker environment to use CloudComPy on Linux with miniconda
  • Tested with version 8-cloudcompy-conda39-linux64-20211018

Used script:

    import cloudComPy as cc
    cc.initCC()

    cloud = cc.loadPointCloud( "cloud.asc" )
    ref_mesh = cc.loadMesh( "mesh.obj" )

    ret_cloud = cc.ccPointCloud()

    para = cc.Cloud2MeshDistancesComputationParams()
    para.flipNormals = False
    para.CPSet = ret_cloud

    cc.DistanceComputationTools.computeCloud2MeshDistances(cloud, ref_mesh, para)

    cc.SavePointCloud(ret_cloud, "out.asc")

I get the following error:

    TypeError: No to_python (by-value) converter found for C++ type: CCCoreLib::PointCloud*

Documentary read:

Install CloudComPy with pip in a virtual environment

Hi Guys,

Do you know whether it is possible to install CloudCompPy and have a python binding with pip in a virtual environment? My plan is to compile it from source and then possibly getting a setup.py should do the trick.

However, I am not sure whether it would work or you have tried to install the lib that way.

Thanks.

Update a package of the environnement

Hey,

I'm working with CloudComPy on python. CloudCompy uses the 2.3.0 package pdal while the most recent version of this package is the 2.4.2. I'm using pdal to do other treatment that needs the lastest version.
Is it possible to update the pdal package of the CloudComPy environment ?

Thank's !

Charly

a simple test with C2C command after installing cloudComPy

hello
I have followed the guideline to install the package with anaconda3
following that post https://github.com/CloudCompare/CloudComPy/blob/master/doc/BuildWindowsConda.md#build-on-windows-10-with-anaconda3-or-miniconda

When I launch a simple code like attached, I've got the following error. Any idea of my mistake ?

Capture

code
import cloud1ComPy as cc # import the CloudComPy module
cc.initCC() # to do once before dealing with plugins

cloud1 = cc.loadPointCloud("C:\Users\billault.ATGT.001\Documents__TRASH\test\MMS_SNCF\perline\line1.laz") # read the first point cloud1 from a file
print("first cloud name: %s"%cloud1.getName())

cloud2 = cc.loadPointCloud("C:\Users\billault.ATGT.001\Documents__TRASH\test\MMS_SNCF\perline\line2.laz") # read the first point cloud1 from a file
print("second cloud name: %s"%cloud2.getName())

res=DistanceComputationTools(cloud1,cloud2,maxSearchDist=1) # compute C2C between the 2 ptsclouds

res=cc.SavePointCloud(filteredCloud,"C:\Users\billault.ATGT.001\Documents__TRASH\test\MMS_SNCF\perline\myC2C_Cloud.bin")

Recent updates on conda packages are not compatible with CloudComPy binaries

For Windows and Linux CloudComPy conda binaries,
after installing a new conda environment for CloudComPy, or reinstalling it, following the instructions in the README, neither CloudCompare nor CloudComPy works any more (missing librairies or import problems).
This is due to recent updates of the Conda packages, incompatible with the CloudComPy binaries.

The solution is to impose the versions of the conda packages.
The following works for Windows

conda update -y -n base -c defaults conda
conda activate
conda create -y --name CloudComPy39 python=3.9
   # --- erase previous env if existing
conda activate CloudComPy39
conda config --add channels conda-forge
conda config --set channel_priority strict
conda install -y "boost=1.72" "cgal=5.0" cmake "ffmpeg=4.3" "gdal=3.3" "jupyterlab=3.2" "matplotlib=3.5" "mysql=8.0" "numpy=1.22" "opencv=4.5" "openmp=8.0" "pcl=1.11" "pdal=2.3" "psutil=5.9" "qt=5.12" "scipy=1.8" "sphinx_rtd_theme=1.0" "spyder=5.2" "tbb=2021.5" "tbb-devel=2021.5" "xerces-c=3.2"

For Linux, a similar solution is beeing tested and will be proposed as soon as possible.
Paul

How to get an extra feature from point clouds and set it as a scalar field?

Hi, thanks for your great work.

I have a problem about coloring the point cloud using an extra feature.

Normally, I can set a feature of point cloud, e.g., "label" as a scalar field to manually color the point cloud in cloudcompare.

But when I used this library, I found no way to extract the "label" field from the point cloud and set it as a scalar field.

The class "ccPointCloud" only provides functions to get the arrays of positions and colors.

Another finding is that if I saved the scalar field in cloudcompare, I could directly get the feature values using pcd.getScalarField(0).toNpArray().

But not all files are saved with a scalar field in advance. How can I get the "label" field and set it as a scalar field using cloudcompy?

Have I missed some parts of the library?

Hope you can give me some help.

Many thanks,

Eric.

I've made a small minimal Dockerfile to test CloudComPy

I wanted to test CloudComPy but the install instructions were quite convoluted to get to the point, so I wrapped up a self-contained Dockerfile that setup a minimal environment based on continuum.io anaconda images that passes all the tests in headless mode.

This could be useful to document install steps on linux but also for CI.

Now it uses binary packages from https://www.simulation.openfields.fr/, but it could be improved to build the required tools.

FROM continuumio/miniconda3:master

RUN . /opt/conda/etc/profile.d/conda.sh && \
    conda activate && \
    conda create --name CloudComPy39 python=3.9 && \
    conda activate CloudComPy39 && \
    conda config --add channels conda-forge && \
    conda config --set channel_priority strict && \
    conda install qt numpy psutil boost xerces-c pcl gdal cgal cmake pdal opencv ffmpeg mysql "qhull=2019.1" matplotlib "eigen=3.3.9" tbb openmp

RUN mkdir -p /opt/cloudcompy && \
    wget "https://www.simulation.openfields.fr/index.php/download-binaries/send/2-cloudcompy-binaries/8-cloudcompy-conda39-linux64-20211018-tgz" && \
    tar -xvzf "8-cloudcompy-conda39-linux64-20211018-tgz" -C /opt/cloudcompy && \
    rm "8-cloudcompy-conda39-linux64-20211018-tgz"

RUN apt-get update && apt-get install -y libgl1

RUN echo "#!/bin/bash\n\
\n\
. /opt/conda/etc/profile.d/conda.sh\n\
conda activate CloudComPy39\n\
export LD_LIBRARY_PATH=/opt/conda/envs/CloudComPy39/lib:\${LD_LIBRARY_PATH}\n\
export LD_LIBRARY_PATH=/opt/cloudcompy/installConda39/lib/cloudcompare:\${LD_LIBRARY_PATH}\n\
export LD_LIBRARY_PATH=/opt/cloudcompy/installConda39/lib/cloudcompare/plugins:\${LD_LIBRARY_PATH}\n\
export QT_QPA_PLATFORM=offscreen\n\
cd /opt/cloudcompy/installConda39/doc/PythonAPI_test\n\
ctest" > /entrypoint.sh && chmod +x /entrypoint.sh

ENTRYPOINT ["/entrypoint.sh"]

output:

Test project /opt/cloudcompy/installConda39/doc/PythonAPI_test
      Start  1: PYCC_test001
 1/25 Test  #1: PYCC_test001 .....................   Passed    5.60 sec
      Start  2: PYCC_test002
 2/25 Test  #2: PYCC_test002 .....................   Passed   11.40 sec
      Start  3: PYCC_test003
 3/25 Test  #3: PYCC_test003 .....................   Passed    3.22 sec
      Start  4: PYCC_test004
 4/25 Test  #4: PYCC_test004 .....................   Passed    1.89 sec
      Start  5: PYCC_test005
 5/25 Test  #5: PYCC_test005 .....................   Passed    2.52 sec
      Start  6: PYCC_test006
 6/25 Test  #6: PYCC_test006 .....................   Passed    5.30 sec
      Start  7: PYCC_test007
 7/25 Test  #7: PYCC_test007 .....................   Passed    3.19 sec
      Start  8: PYCC_test008
 8/25 Test  #8: PYCC_test008 .....................   Passed    2.54 sec
      Start  9: PYCC_test009
 9/25 Test  #9: PYCC_test009 .....................   Passed    3.31 sec
      Start 10: PYCC_test010
10/25 Test #10: PYCC_test010 .....................   Passed   10.84 sec
      Start 11: PYCC_test011
11/25 Test #11: PYCC_test011 .....................   Passed    3.20 sec
      Start 12: PYCC_test012
12/25 Test #12: PYCC_test012 .....................   Passed    1.18 sec
      Start 13: PYCC_test013
13/25 Test #13: PYCC_test013 .....................   Passed    2.10 sec
      Start 14: PYCC_test014
14/25 Test #14: PYCC_test014 .....................   Passed    9.72 sec
      Start 15: PYCC_test015
15/25 Test #15: PYCC_test015 .....................   Passed    1.36 sec
      Start 16: PYCC_test016
16/25 Test #16: PYCC_test016 .....................   Passed    2.83 sec
      Start 17: PYCC_test017
17/25 Test #17: PYCC_test017 .....................   Passed    3.30 sec
      Start 18: PYCC_test018
18/25 Test #18: PYCC_test018 .....................   Passed    2.29 sec
      Start 19: PYCC_test019
19/25 Test #19: PYCC_test019 .....................   Passed    5.23 sec
      Start 20: PYCC_test020
20/25 Test #20: PYCC_test020 .....................   Passed    5.40 sec
      Start 21: PYCC_test021
21/25 Test #21: PYCC_test021 .....................   Passed   19.16 sec
      Start 22: PYCC_test022
22/25 Test #22: PYCC_test022 .....................   Passed    4.59 sec
      Start 23: PYCC_test023
23/25 Test #23: PYCC_test023 .....................   Passed    3.12 sec
      Start 24: PYCC_test024
24/25 Test #24: PYCC_test024 .....................   Passed   22.46 sec
      Start 25: PYCC_test025
25/25 Test #25: PYCC_test025 .....................   Passed    3.61 sec

100% tests passed, 0 tests failed out of 25

Total Test time (real) = 139.37 sec

Recommend Projects

  • React photo React

    A declarative, efficient, and flexible JavaScript library for building user interfaces.

  • Vue.js photo Vue.js

    🖖 Vue.js is a progressive, incrementally-adoptable JavaScript framework for building UI on the web.

  • Typescript photo Typescript

    TypeScript is a superset of JavaScript that compiles to clean JavaScript output.

  • TensorFlow photo TensorFlow

    An Open Source Machine Learning Framework for Everyone

  • Django photo Django

    The Web framework for perfectionists with deadlines.

  • D3 photo D3

    Bring data to life with SVG, Canvas and HTML. 📊📈🎉

Recommend Topics

  • javascript

    JavaScript (JS) is a lightweight interpreted programming language with first-class functions.

  • web

    Some thing interesting about web. New door for the world.

  • server

    A server is a program made to process requests and deliver data to clients.

  • Machine learning

    Machine learning is a way of modeling and interpreting data that allows a piece of software to respond intelligently.

  • Game

    Some thing interesting about game, make everyone happy.

Recommend Org

  • Facebook photo Facebook

    We are working to build community through open source technology. NB: members must have two-factor auth.

  • Microsoft photo Microsoft

    Open source projects and samples from Microsoft.

  • Google photo Google

    Google ❤️ Open Source for everyone.

  • D3 photo D3

    Data-Driven Documents codes.