
This project satisfies the requirements for both the Advanced Lane Finding project and the Vehicle Detection project for Udacity's Self-Driving Car Engineer nanodegree. Primary goals include detecting the lane lines, determining the curvature of the lane as well as the car's position within the lane, and detecting other vehicles.
I chose to use convolutional neural networks to detect lane lines and cars, rather than the gradient and SVM-based approaches recommended for these projects. I annotated training images with the correct answers by adding extra layers to indicate which parts of the picture were part of lane lines or cars, then trained convolutional neural networks to produce such image masks for other images from the video. The process of curating training data and training convolutional neural networks will be discussed further later in this document.
See presentation slides for presentation at Ft Lauderdale Machine Learning Meetup.
Note: Find the latest version of this project on Github.
The goals / steps of this project are the following:
- Compute the camera calibration matrix and distortion coefficients given a set of chessboard images.
- Apply a distortion correction to raw images.
- Create thresholded binary images representing pixels of interest: lane markings and cars.
- Apply a perspective transform to rectify binary image ("birds-eye view").
- Detect lane pixels and fit to find the lane boundary.
- Determine the curvature of the lane and vehicle position with respect to center.
- Warp the detected lane boundaries back onto the original image.
- Output visual display of the lane boundaries and numerical estimation of lane curvature and vehicle position.
- Detect vehicle pixels and place bounding boxes around each detected vehicle.
The first step was to calibrate the camera, correcting for distortions. I used pictures of chessboard taken from various angles, with the assumptions that the chessboard was made up of perfectly aligned grid squares, to characterize the lens distortions. I then applied the resulting calibration to the calibration images to confirm that all visible distortions had been removed. See the calibrate_chessboard function in main.py.
| Original Image | Undistorted Image |
|---|---|
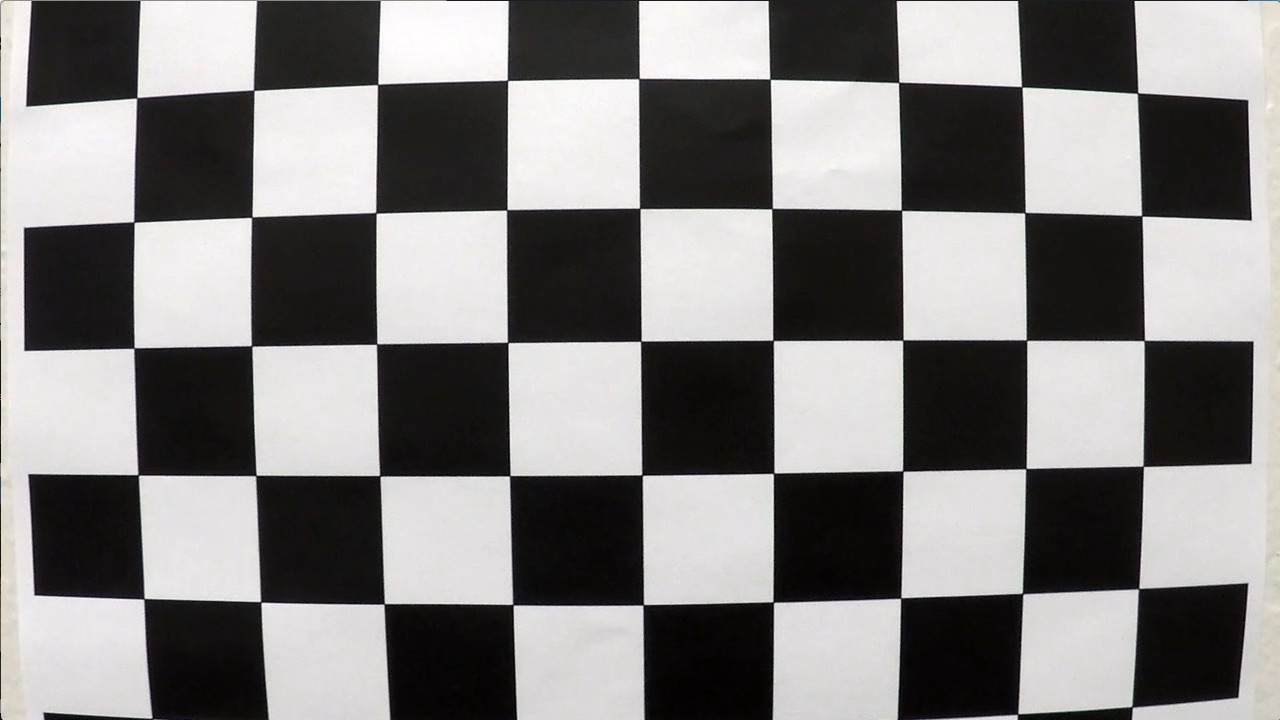 |
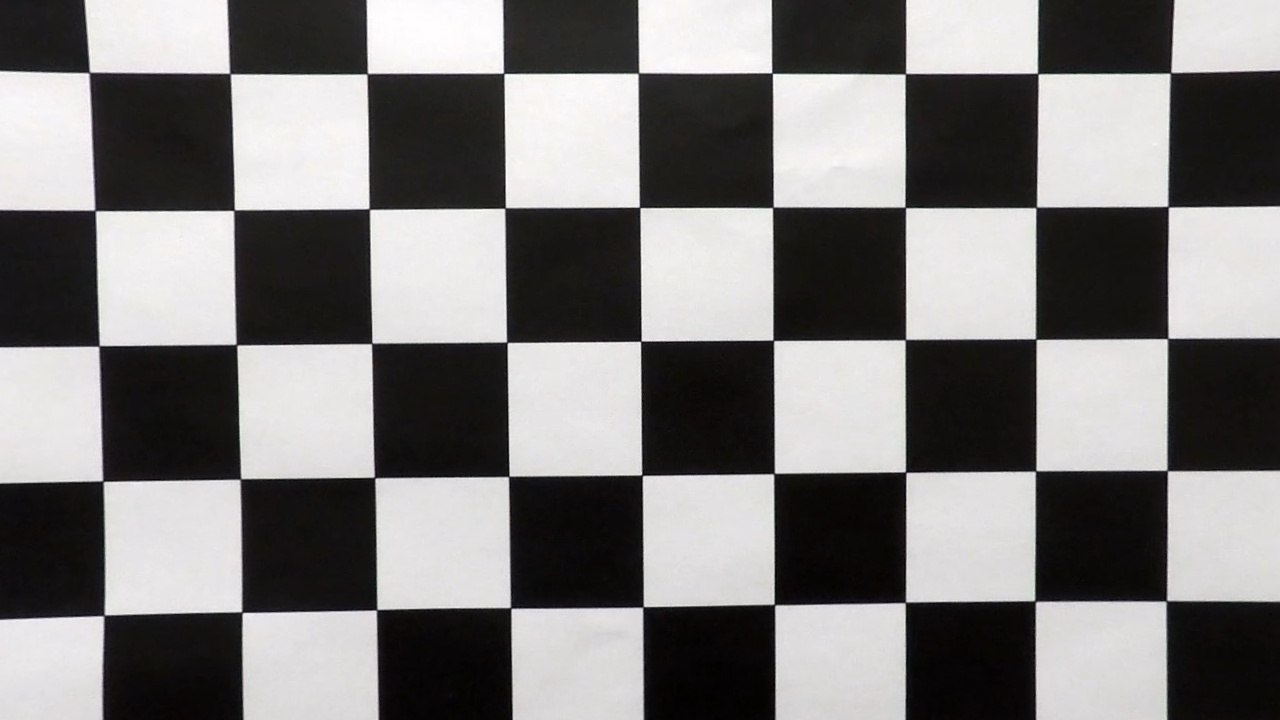 |
I applied the same calibration to undistort images from the dashboard camera. The effect is subtle - note the difference in shape around the left and right edges of the car hood in the images below.
| Original Image | Undistorted Image |
|---|---|
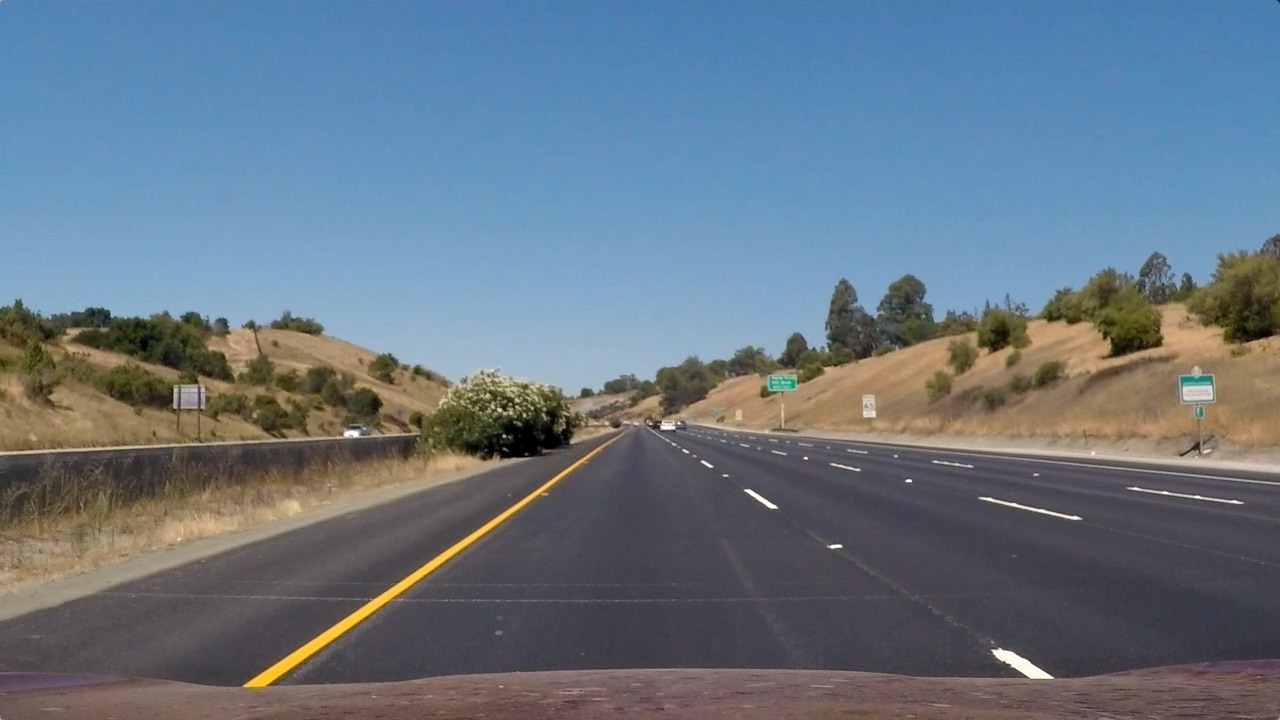 |
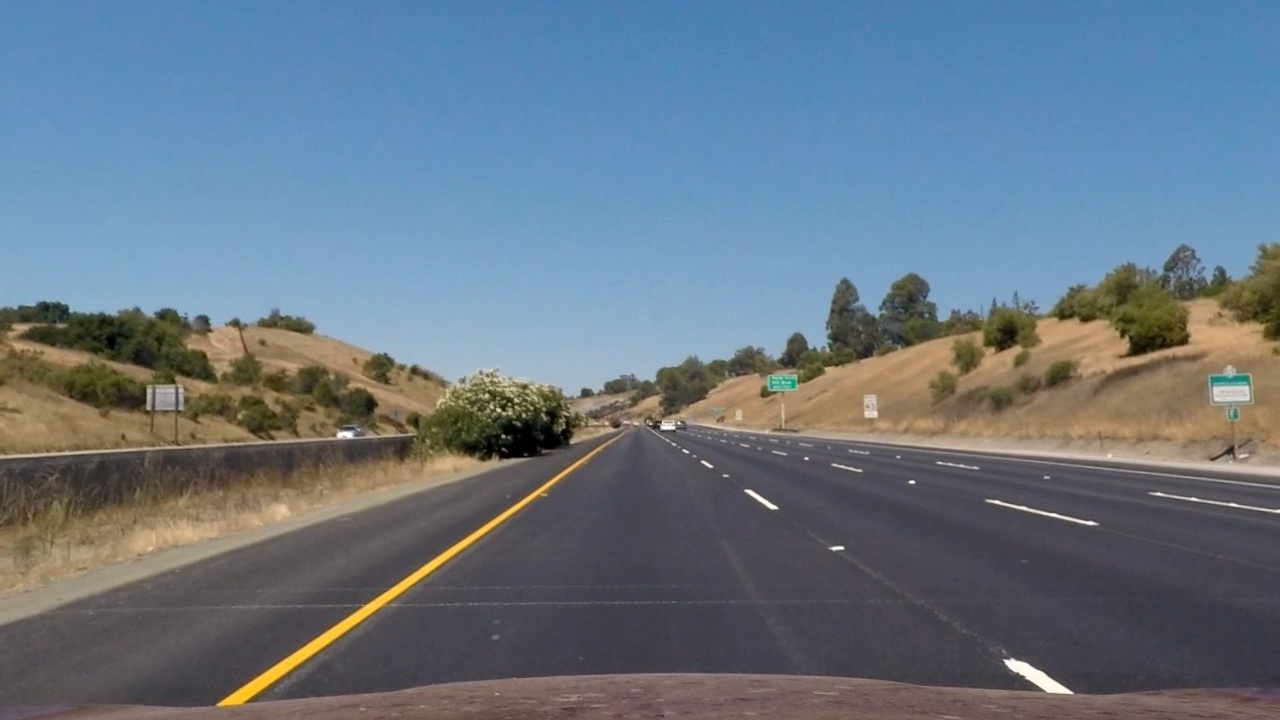 |
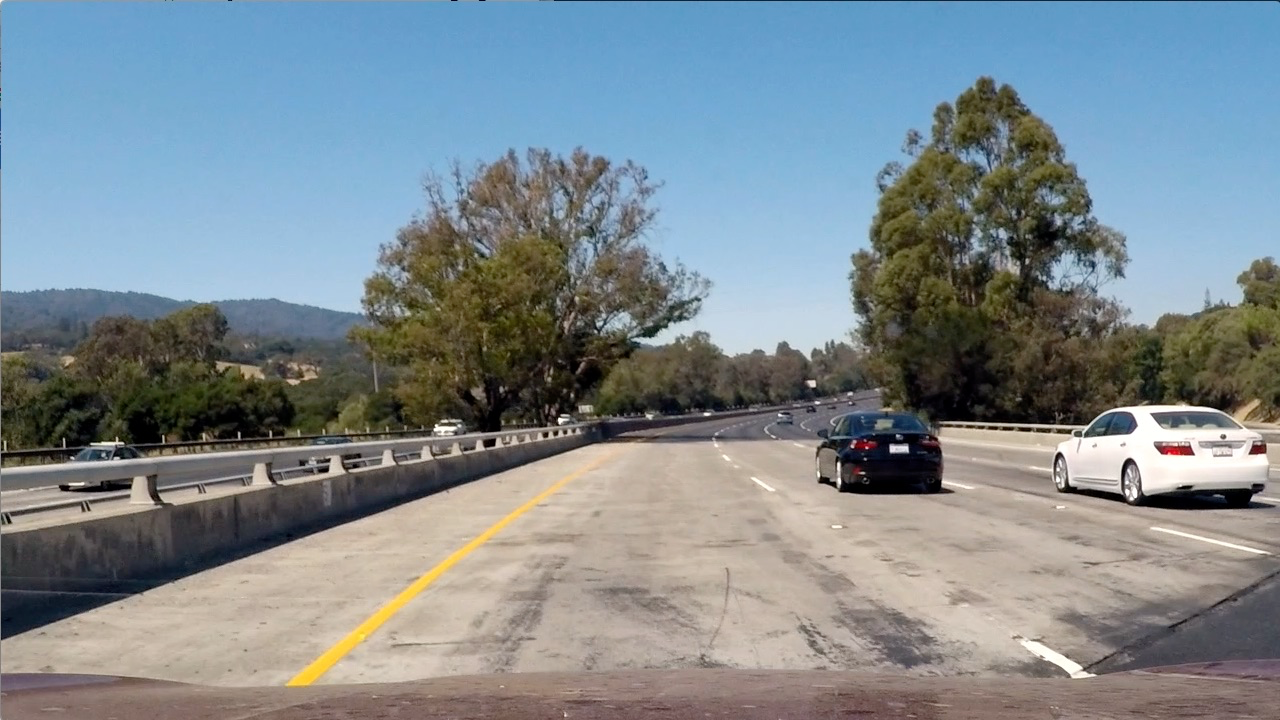
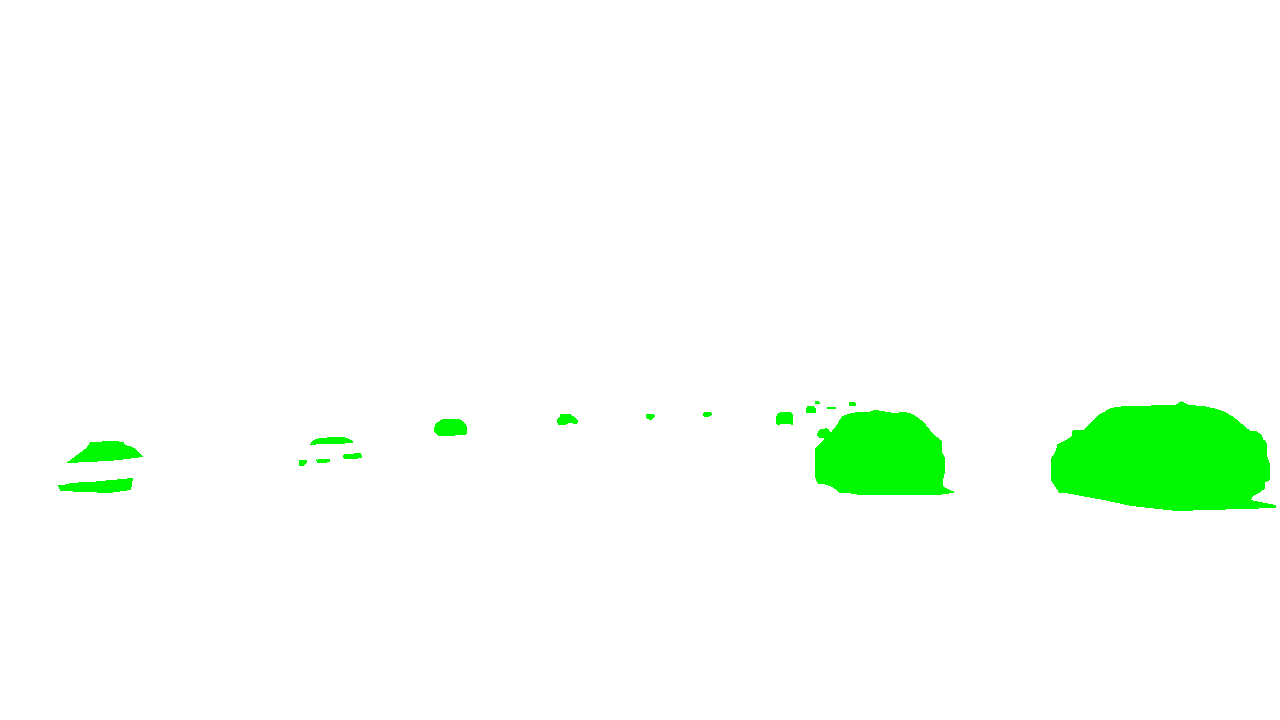
The original images used for training are in the test_images directory. These include 8 images provided as examples by Udacity and 6 images extracted from the project video.
I copied each of these images to the training directory, for annotation. I converted the images to Pixen format, added layers to represent lane markings and cars, and created image masks in those layers to indicate the locations of lane markings and cars. I saved each layer separately with filenames ending in "x", "lanes", and "cars" so they could easily be imported into Python for training convolutional neural networks.
| Original Image | Cars Layer | Lanes Layer |
|---|---|---|
 |
 |
 |
Note: Annotation accuracy is important. With only 14 images, it's okay to annotate slowly and focus on accuracy. Zoom in to paint individual pixels around the edge of a lane line, ensuring pixel-perfect accuracy at the edges. Then use the fill tool to finish the center of the lane line quickly.
All images are cropped to rectangular regions of interest (mostly just cutting out the sky) as well as scaled down by a factor of two both vertically and horizontally. Both cropping and scaling are primarily intended to save memory during training.
All images are gaussian blurred and scaled to a range of -0.5 to 0.5, both of which are intended to improve convergence for convolutional neural network training.
The lane markings and cars are identified by separate (but architecturally identical) convolutional neural networks. All layers use SAME border mode (with no flattening) so that the network's output (after thresholding) is an image of the same dimensions as the input. The lane model produces an image mask indicating which pixels are part of lane markings. The car model produces an image mask indicating which pixels are part of cars.
The neural network architecture consists of 7 convolutional layers. The input has 3 channels for R, G, and B. Hidden convolutions have depths of 20, 30, 30, 30, 20, and 10. The output layer has a depth of only 1 to produce a single-channel image mask. Dropouts of 50% are applied after each hidden layer to prevent over-fitting.
Lane lines and cars are both under-represented classes compared to the background, so I used a custom loss function called weighted_binary_crossentropy to increase the weight of minority classes by a factor of 50.
You can see in the image below that the convolutional neural networks for cars can identify cars on the horizon or cars that are barely visible over the barrier on the left. The pink overlay is the thresholded output from the lane markings convolutional network. The cyan overlay is the thresholded output from the cars convolutional network. (There is also one false positive, part of the fence on the right.)
| Original Image | Annotated by Conv Net |
|---|---|
 |
 |
After identifying lane marking pixels, I needed to transform those marking positions into a bird's eye view for further analysis. I identified fixed points on the lane lines in the following image with straight lane lines: two points near the car and two points near the horizon. These points form a trapezoid in the image but a rectangle seen from above. I used proportions from the Udacity project description, 3.7 meter lane width and 30 meter visible distance, to define a transformation into a bird's eye view. Relevant functions include perspective_matrices and perspective_transform.
| Annotated Image |
|---|
 |
| Bird's Eye | Detected Markings | Parabolic Fit |
|---|---|---|
 |
 |
 |
With the identified lane markings transformed into an overhead perspective, I could fit parabolas to each lane, then calculate curvature and position of the car within the lane. Relevant functions include find_lane_lines, draw_lane_lines, radius_of_lane_lines, and offset_from_lane_center.
| Annotated Image |
|---|
 |
| Bird's Eye | Detected Markings | Parabolic Fit |
|---|---|---|
 |
 |
 |
When annotating a video, rather than an image, there is an opportunity to take advantage of information from previous frames. I chose to stabilize the lane fitting by blending the identified lane markings from a random sample of 10 out of the previous 30 frames, fitting lane lines based on pixels that were identified as lane pixels in at least 3 of the 10 frames. See the video_processor class for details.
| Project Video |
|---|
 |
Both lane detection and vehicle detection depend on neural network models trained on 14 example images. These models are unlikely to work on roads with different lane appearances, or even on different car models. This could be fixed just by collecting images on which the models performed poorly, adding labels, and including these new images in the training set.
The search algorithm for lane lines in this project assumes that the car is fairly close to the center of the lanes. That search algorithm would need to be modified to find lane lines in arbitrary positions with respect to the car.
The perspective transformation assumes that the road is flat. That algorithm would not be useable on hills.
- Clone the repository
git clone https://github.com/ericlavigne/CarND-Detect-Lane-Lines-And-Vehicles- Setup virtualenv.
cd CarND-Detect-Lane-Lines-And-Vehicles
virtualenv -p python3 env
source env/bin/activate
pip install -r requirements-cpu.txt (or requirements-gpu.txt if CUDA is available)
deactivatecd CarND-Detect-Lane-Lines-And-Vehicles
source env/bin/activate
python main.py
deactivatecd CarND-Detect-Lane-Lines-And-Vehicles
source env/bin/activate
pip freeze > requirements.txt (or requirements-gpu.txt if CUDA is available)
deactivate


