[TOC]
内存:2GB或更多RAM
CPU: 2核CPU或更多CPU
硬盘: 30GB或更多
**操作系统:**CentOS 7.9
**内核版本:**3.10.0-1160
master: 192.168.110.101
node01: 192.168.110.102
node02: 192.168.110.103
k8s:1.18.20
# 关闭防火墙
systemctl stop firewalld && systemctl disable firewalld && iptables -F
# 关闭selinux
sed -i 's/enforcing/disabled/' /etc/selinux/config && setenforce 0# 临时关闭
swapoff -a
# 永久关闭swap
sed -ri 's/.*swap.*/#&/' /etc/fstab3.1设置主机名(不设置也可以,但是要保证主机名不相同)
master上
hostnamectl set-hostname master.local node01
hostnamectl set-hostname node01.localnode02
hostnamectl set-hostname node02.local3.2修改本地hosts文件(全部节点)
vi /etc/hosts 添加如下内容
192.168.110.11 master.local master
192.168.110.12 node01.local node01
192.168.110.13 node02.local node02cat > /etc/sysctl.d/k8s.conf << EOF
net.bridge.bridge-nf-call-ip6tables = 1
net.bridge.bridge-nf-call-iptables = 1
net.ipv4.ip_forward = 1
EOF
sysctl --system如果kube-proxy 模式为ip_vs则必须加载,本文采用iptables
modprobe ip_vs
modprobe ip_vs_rr
modprobe ip_vs_wrr
modprobe ip_vs_sh
modprobe nf_conntrack_ipv4
设置下次开机自动加载
cat > /etc/modules-load.d/ip_vs.conf << EOF
ip_vs
ip_vs_rr
ip_vs_wrr
ip_vs_sh
nf_conntrack_ipv4
EOF在master节点生成ssh密钥,分发公钥到各节点。
如果新加入其他节点需分发此密钥到新节点。
# master节点执行

# 生成ssh密钥,直接一路回车
ssh-keygen -t rsa

# 复制刚刚生成的密钥到各节点可信列表中,需分别输入各主机密码
ssh-copy-id [email protected]
ssh-copy-id [email protected]
ssh-copy-id [email protected]

# 配置完成后使用下面命令查看是否可以登录到目标服务器
ssh 'root@master'
# 退出
exityum install wget -y
wget https://mirrors.aliyun.com/docker-ce/linux/centos/docker-ce.repo -O /etc/yum.repos.d/docker-ce.repo
# yum install docker-ce docker-ce-cli -y
yum -y install docker-ce-19.03.9-3.el7 docker-ce-cli-19.03.9-3.el7编辑/etc/docker/daemon.json
mkdir /etc/docker/
cat > /etc/docker/daemon.json << EOF
{
"registry-mirrors": ["https://gqs7xcfd.mirror.aliyuncs.com","https://hub-mirror.c.163.com"],
"exec-opts": ["native.cgroupdriver=systemd"],
"log-driver": "json-file",
"log-opts": {
"max-size": "100m"
},
"storage-driver": "overlay2"
}
EOFsystemctl daemon-reload && systemctl enable docker && systemctl start docker列出所有docker版本
yum list docker-ce.x86_64 --showduplicates |sort
选择一个你想要的版本进行安装,这里安装docker 19.03.9版本
yum -y install docker-ce-19.03.9-3.el7 docker-ce-cli-19.03.9-3.el7# 所有节点服务器执行
lsmod | grep overlay
lsmod | grep br_netfilter若上面的命令无返回值输出或提示文件不存在,需要执行以下命令:
# 所有节点服务器执行

cat > /etc/modules-load.d/docker.conf <<EOF
overlay
br_netfilter
EOF

modprobe overlay
modprobe br_netfilter# 所有节点服务器执行
cat > /etc/sysctl.d/k8s.conf <<EOF
net.bridge.bridge-nf-call-ip6tables = 1
net.bridge.bridge-nf-call-iptables = 1
EOF
sysctl --system
# 验证是否生效,下面两个命令结果需均返回 1
sysctl -n net.bridge.bridge-nf-call-iptables
sysctl -n net.bridge.bridge-nf-call-ip6tablescat <<EOF > /etc/yum.repos.d/kubernetes.repo
[kubernetes]
name=Kubernetes
baseurl=https://mirrors.aliyun.com/kubernetes/yum/repos/kubernetes-el7-x86_64/
enabled=1
gpgcheck=0
repo_gpgcheck=0
gpgkey=https://mirrors.aliyun.com/kubernetes/yum/doc/yum-key.gpg https://mirrors.aliyun.com/kubernetes/yum/doc/rpm-package-key.gpg
EOF
指定其他版本也可照做,只需指定相应的版本即可,比如安装 1.16.9
yum install -y kubelet-1.18.20 kubeadm-1.18.20 kubectl-1.18.20
# yum install -y kubelet-1.16.9 kubeadm-1.16.9 kubectl-1.16.9 由于不知道默认安装的最新版,国内的阿里云镜像站同步会有延迟,导致无法拉取镜像。如果你可以拉去到最新的镜像那请随意。
systemctl enable kubelet
yum list kubelet --showduplicates
# 所有节点服务器均执行
# 安装bash自动补全插件
yum install bash-completion -y
# 设置kubectl与kubeadm命令补全,下次login生效
kubectl completion bash >/etc/bash_completion.d/kubectl
kubeadm completion bash > /etc/bash_completion.d/kubeadm由于国内网络因素,kubernetes镜像需要从mirrors站点或通过dockerhub用户推送的镜像拉取。
# 所有节点服务器均执行
# 查看执行kubernetes版本需要哪些镜像
kubeadm config images list --kubernetes-version v1.18.20
# 结果如下
k8s.gcr.io/kube-apiserver:v1.18.20
k8s.gcr.io/kube-controller-manager:v1.18.20
k8s.gcr.io/kube-scheduler:v1.18.20
k8s.gcr.io/kube-proxy:v1.18.20
k8s.gcr.io/pause:3.2
k8s.gcr.io/etcd:3.4.3-0
k8s.gcr.io/coredns:1.6.7
[root@master yum.repos.d]# kubeadm config images list --kubernetes-version v1.18.20
W0611 13:20:51.714124 1872 configset.go:202] WARNING: kubeadm cannot validate component configs for API groups [kubelet.config.k8s.io kubeproxy.config.k8s.io]
k8s.gcr.io/kube-apiserver:v1.18.20
k8s.gcr.io/kube-controller-manager:v1.18.20
k8s.gcr.io/kube-scheduler:v1.18.20
k8s.gcr.io/kube-proxy:v1.18.20
k8s.gcr.io/pause:3.2
k8s.gcr.io/etcd:3.4.3-0
k8s.gcr.io/coredns:1.6.7
在/root/k8s目录下新建脚本get-k8s-images.sh,命令如下:
# 所有节点服务器均执行
cd /root/
mkdir k8s
cd k8s/
# 创建脚本文件,文件内容如下一代码段所示
vim get-k8s-images.sh
#!/bin/bash
# Script For Quick Pull K8S Docker Images
# by Hellxz Zhang <[email protected]>
KUBE_VERSION=v1.18.20
PAUSE_VERSION=3.2
CORE_DNS_VERSION=1.6.7
ETCD_VERSION=3.4.3-0
# pull kubernetes images from hub.docker.com
docker pull kubeimage/kube-proxy-amd64:$KUBE_VERSION
docker pull kubeimage/kube-controller-manager-amd64:$KUBE_VERSION
docker pull kubeimage/kube-apiserver-amd64:$KUBE_VERSION
docker pull kubeimage/kube-scheduler-amd64:$KUBE_VERSION
# pull aliyuncs mirror docker images
docker pull registry.cn-hangzhou.aliyuncs.com/google_containers/pause:$PAUSE_VERSION
docker pull registry.cn-hangzhou.aliyuncs.com/google_containers/coredns:$CORE_DNS_VERSION
docker pull registry.cn-hangzhou.aliyuncs.com/google_containers/etcd:$ETCD_VERSION
# retag to k8s.gcr.io prefix
docker tag kubeimage/kube-proxy-amd64:$KUBE_VERSION k8s.gcr.io/kube-proxy:$KUBE_VERSION
docker tag kubeimage/kube-controller-manager-amd64:$KUBE_VERSION k8s.gcr.io/kube-controller-manager:$KUBE_VERSION
docker tag kubeimage/kube-apiserver-amd64:$KUBE_VERSION k8s.gcr.io/kube-apiserver:$KUBE_VERSION
docker tag kubeimage/kube-scheduler-amd64:$KUBE_VERSION k8s.gcr.io/kube-scheduler:$KUBE_VERSION
docker tag registry.cn-hangzhou.aliyuncs.com/google_containers/pause:$PAUSE_VERSION k8s.gcr.io/pause:$PAUSE_VERSION
docker tag registry.cn-hangzhou.aliyuncs.com/google_containers/coredns:$CORE_DNS_VERSION k8s.gcr.io/coredns:$CORE_DNS_VERSION
docker tag registry.cn-hangzhou.aliyuncs.com/google_containers/etcd:$ETCD_VERSION k8s.gcr.io/etcd:$ETCD_VERSION
# untag origin tag, the images won't be delete.
docker rmi kubeimage/kube-proxy-amd64:$KUBE_VERSION
docker rmi kubeimage/kube-controller-manager-amd64:$KUBE_VERSION
docker rmi kubeimage/kube-apiserver-amd64:$KUBE_VERSION
docker rmi kubeimage/kube-scheduler-amd64:$KUBE_VERSION
docker rmi registry.cn-hangzhou.aliyuncs.com/google_containers/pause:$PAUSE_VERSION
docker rmi registry.cn-hangzhou.aliyuncs.com/google_containers/coredns:$CORE_DNS_VERSION
docker rmi registry.cn-hangzhou.aliyuncs.com/google_containers/etcd:$ETCD_VERSION给脚本添加可执行权限,执行脚本拉去镜像。
# 所有节点服务器均执行;或者下载一份再导出,再导入到其他服务器;也可建立私有镜像仓库
# 添加脚本执行权限
chmod +x get-k8s-images.sh
# 执行脚本
./get-k8s-images.sh脚本执行结束后,执行docker iamges命令确认镜像。
本小节中代码仅需master节点服务器执行此步骤。
# master节点服务器执行
mkdir /var/lib/kubelet
cat > /var/lib/kubelet/config.yaml <<EOF
apiVersion: kubelet.config.k8s.io/v1beta1
kind: KubeletConfiguration
cgroupDriver: systemd
EOF
systemctl restart kubelet[可选],仅当需要自定义初始化配置时用,此时我们应该在/root/k8s目录下。
# master节点服务器执行
kubeadm config print init-defaults > init.default.yamlWARNING是正常的。
# master节点服务器执行
kubeadm init phase preflight
# 原始命令:kubeadm init phase preflight [--config kubeadm-init.yaml]
# 命令执行结束如果出现warning是正常的,一般会出现防火墙、无法连接k8s站点的警告。
# 如果出现无法从k8s拉去镜像的错误属于正常的,在执行初始化时优先使用我们本地Docker中的镜像,如果本地镜像不存在才会从k8s站点拉取。10.244.0.0/16是flannel固定使用的IP段,设置取决于网络组件要求。
# master节点服务器执行
# 原始命令:kubeadm init --pod-network-cidr=10.244.0.0/16 --kubernetes-version=v1.18.5 [--config kubeadm-init.yaml]
#kubeadm init --pod-network-cidr=10.244.0.0/16 --kubernetes-version=v1.18.5
kubeadm init \
--kubernetes-version 1.18.20 \
--apiserver-advertise-address=0.0.0.0 \
--service-cidr=10.96.0.0/16 \
--pod-network-cidr=10.245.0.0/16
# --image-repository registry.aliyuncs.com/google_containers
#参数说明
#--kubernetes-version v1.18.8 指定版本
#--apiserver-advertise-address 为通告给其它组件的IP,一般应为master节点的IP地址
#--service-cidr 指定service网络,不能和node网络冲突
#--pod-network-cidr 指定pod网络,不能和node网络、service网络冲突
#--image-repository registry.aliyuncs.com/google_containers 指定镜像源,由于默认拉取镜像地址k8s.gcr.io国内无法访问,这里指定阿里云镜像仓库地址。
#如果k8s版本比较新,可能阿里云没有对应的镜像,就需要自己从其它地方获取镜像了。
#--control-plane-endpoint 标志应该被设置成负载均衡器的地址或 DNS 和端口(可选)
#注意点:版本必须和上边安装的kubelet,kubead,kubectl保持一致
初始化执行结果如下:
[root@master k8s]# kubeadm init \
> --kubernetes-version 1.18.20 \
> --apiserver-advertise-address=0.0.0.0 \
> --service-cidr=10.96.0.0/16 \
> --pod-network-cidr=10.245.0.0/16
W0611 14:33:52.621688 18561 configset.go:202] WARNING: kubeadm cannot validate component configs for API groups [kubelet.config.k8s.io kubeproxy.config.k8s.io]
[init] Using Kubernetes version: v1.18.20
[preflight] Running pre-flight checks
[preflight] Pulling images required for setting up a Kubernetes cluster
[preflight] This might take a minute or two, depending on the speed of your internet connection
[preflight] You can also perform this action in beforehand using 'kubeadm config images pull'
[kubelet-start] Writing kubelet environment file with flags to file "/var/lib/kubelet/kubeadm-flags.env"
[kubelet-start] Writing kubelet configuration to file "/var/lib/kubelet/config.yaml"
[kubelet-start] Starting the kubelet
[certs] Using certificateDir folder "/etc/kubernetes/pki"
[certs] Generating "ca" certificate and key
[certs] Generating "apiserver" certificate and key
[certs] apiserver serving cert is signed for DNS names [master.local kubernetes kubernetes.default kubernetes.default.svc kubernetes.default.svc.cluster.local] and IPs [10.96.0.1 192.168.110.11]
[certs] Generating "apiserver-kubelet-client" certificate and key
[certs] Generating "front-proxy-ca" certificate and key
[certs] Generating "front-proxy-client" certificate and key
[certs] Generating "etcd/ca" certificate and key
[certs] Generating "etcd/server" certificate and key
[certs] etcd/server serving cert is signed for DNS names [master.local localhost] and IPs [192.168.110.11 127.0.0.1 ::1]
[certs] Generating "etcd/peer" certificate and key
[certs] etcd/peer serving cert is signed for DNS names [master.local localhost] and IPs [192.168.110.11 127.0.0.1 ::1]
[certs] Generating "etcd/healthcheck-client" certificate and key
[certs] Generating "apiserver-etcd-client" certificate and key
[certs] Generating "sa" key and public key
[kubeconfig] Using kubeconfig folder "/etc/kubernetes"
[kubeconfig] Writing "admin.conf" kubeconfig file
[kubeconfig] Writing "kubelet.conf" kubeconfig file
[kubeconfig] Writing "controller-manager.conf" kubeconfig file
[kubeconfig] Writing "scheduler.conf" kubeconfig file
[control-plane] Using manifest folder "/etc/kubernetes/manifests"
[control-plane] Creating static Pod manifest for "kube-apiserver"
[control-plane] Creating static Pod manifest for "kube-controller-manager"
W0611 14:33:58.272522 18561 manifests.go:225] the default kube-apiserver authorization-mode is "Node,RBAC"; using "Node,RBAC"
[control-plane] Creating static Pod manifest for "kube-scheduler"
W0611 14:33:58.273075 18561 manifests.go:225] the default kube-apiserver authorization-mode is "Node,RBAC"; using "Node,RBAC"
[etcd] Creating static Pod manifest for local etcd in "/etc/kubernetes/manifests"
[wait-control-plane] Waiting for the kubelet to boot up the control plane as static Pods from directory "/etc/kubernetes/manifests". This can take up to 4m0s
[apiclient] All control plane components are healthy after 23.004586 seconds
[upload-config] Storing the configuration used in ConfigMap "kubeadm-config" in the "kube-system" Namespace
[kubelet] Creating a ConfigMap "kubelet-config-1.18" in namespace kube-system with the configuration for the kubelets in the cluster
[upload-certs] Skipping phase. Please see --upload-certs
[mark-control-plane] Marking the node master.local as control-plane by adding the label "node-role.kubernetes.io/master=''"
[mark-control-plane] Marking the node master.local as control-plane by adding the taints [node-role.kubernetes.io/master:NoSchedule]
[bootstrap-token] Using token: gio8lf.jc9isglifk68qzts
[bootstrap-token] Configuring bootstrap tokens, cluster-info ConfigMap, RBAC Roles
[bootstrap-token] configured RBAC rules to allow Node Bootstrap tokens to get nodes
[bootstrap-token] configured RBAC rules to allow Node Bootstrap tokens to post CSRs in order for nodes to get long term certificate credentials
[bootstrap-token] configured RBAC rules to allow the csrapprover controller automatically approve CSRs from a Node Bootstrap Token
[bootstrap-token] configured RBAC rules to allow certificate rotation for all node client certificates in the cluster
[bootstrap-token] Creating the "cluster-info" ConfigMap in the "kube-public" namespace
[kubelet-finalize] Updating "/etc/kubernetes/kubelet.conf" to point to a rotatable kubelet client certificate and key
[addons] Applied essential addon: CoreDNS
[addons] Applied essential addon: kube-proxy
Your Kubernetes control-plane has initialized successfully!
To start using your cluster, you need to run the following as a regular user:
mkdir -p $HOME/.kube
sudo cp -i /etc/kubernetes/admin.conf $HOME/.kube/config
sudo chown $(id -u):$(id -g) $HOME/.kube/config
You should now deploy a pod network to the cluster.
Run "kubectl apply -f [podnetwork].yaml" with one of the options listed at:
https://kubernetes.io/docs/concepts/cluster-administration/addons/
Then you can join any number of worker nodes by running the following on each as root:
kubeadm join 192.168.110.11:6443 --token gio8lf.jc9isglifk68qzts \
--discovery-token-ca-cert-hash sha256:5d0340ae2180cd5f4bb6ceb07ca2d6bc040e02b7654e559f8f9206e01f8adb43
以服务器节点的另一个用户(zgs)为例说明;也可用直接使用 root 账号(参考:7. root 配置kubectl )
# master节点服务器执行
# 如果用户不在管理员组,则需要添加管理员权限
[root@master k8s]# usermod -g root zgs
[root@master k8s]# su zgs
[zgs@master k8s]$ mkdir -p $HOME/.kube
[zgs@master k8s]$ sudo cp -i /etc/kubernetes/admin.conf $HOME/.kube/admin.conf
[sudo] password for zgs:
[zgs@master k8s]$ sudo chown $(id -u):$(id -g) $HOME/.kube/admin.conf
[zgs@master k8s]$ echo "export KUBECONFIG=$HOME/.kube/admin.conf" >> ~/.bashrc
[zgs@master k8s]$ exit
exit如果在执行过程中出现权限相关问题,可能时因为没有将zgs用户添加至sudo权限组中,执行下面命令。
执行时需要切换至root用户下。
[root@master k8s]# su -
Last login: Wed Aug 26 11:06:42 CST 2020 from 192.168.43.130 on pts/1
[root@master ~]# chmod u+w /etc/sudoers
[root@master ~]# vim /etc/sudoers
# 在文件内找到:"root ALL=(ALL) ALL"在起下面添加XXX ALL=(ALL) ALL"
# (这里的XXX是我的用户名),然后保存退出。
[root@master ~]# chmod u-w /etc/sudoers
[root@master ~]# exit# master节点服务器执行
echo 'export KUBECONFIG=/etc/kubernetes/admin.conf' >> /etc/profile
. /etc/profile如果不配置这个,会提示如下提示:
The connection to the server localhost:8080 was refused - did you specify the right host or port?此时,mastaer节点已经初始化成功,但是还没有安装网络组件,还无法与其他节点通讯。
就是执行初始化成功后输出的那三条命令
mkdir -p $HOME/.kube
cp -i /etc/kubernetes/admin.conf $HOME/.kube/config
chown $(id -u):$(id -g) $HOME/.kube/config
以flannel为例。
# master节点服务器执行
cd ~/k8s/
yum install -y wget
#下载最新的flannel配置文件
wget https://raw.githubusercontent.com/coreos/flannel/master/Documentation/kube-flannel.yml
kubectl apply -f kube-flannel.yml运行结果如下:
[root@master k8s]# kubectl apply -f kube-flannel.yml
podsecuritypolicy.policy/psp.flannel.unprivileged created
clusterrole.rbac.authorization.k8s.io/flannel created
clusterrolebinding.rbac.authorization.k8s.io/flannel created
serviceaccount/flannel created
configmap/kube-flannel-cfg created
daemonset.apps/kube-flannel-ds-amd64 created
daemonset.apps/kube-flannel-ds-arm64 created
daemonset.apps/kube-flannel-ds-arm created
daemonset.apps/kube-flannel-ds-ppc64le created
daemonset.apps/kube-flannel-ds-s390x created# master节点服务器执行
kubectl get nodes运行结果如下:
[root@master k8s]# kubectl get nodes
NAME STATUS ROLES AGE VERSION
master Ready master 44m v1.18.8在master节点将镜像备份出来,便于后续传输给其他node节点,当然有镜像仓库更好。
# master节点服务器执行
k8s.gcr.io/kube-apiserver:v1.18.20
k8s.gcr.io/kube-controller-manager:v1.18.20
k8s.gcr.io/kube-scheduler:v1.18.20
k8s.gcr.io/kube-proxy:v1.18.20
k8s.gcr.io/pause:3.2
k8s.gcr.io/etcd:3.4.3-0
k8s.gcr.io/coredns:1.6.7
docker save k8s.gcr.io/kube-proxy:v1.18.20 \
k8s.gcr.io/kube-apiserver:v1.18.20 \
k8s.gcr.io/kube-controller-manager:v1.18.20 \
k8s.gcr.io/kube-scheduler:v1.18.20 \
k8s.gcr.io/pause:3.2 \
k8s.gcr.io/coredns:1.6.7 \
k8s.gcr.io/etcd:3.4.3-0 > k8s-imagesV1.18.20.tar将会在/root/k8s目录下创建k8s-imagesV1.18.5.tar文件,里面为k8s所使用的docker image。
[root@master k8s]# ll -h
total 694M
-rwxr-xr-x. 1 root docker 2.1K Aug 26 14:35 get-k8s-images.sh
-rw-r--r--. 1 root docker 826 Aug 26 14:52 init.default.yaml
-rw-r--r--. 1 root docker 694M Aug 26 15:52 k8s-imagesV1.18.5.tar
-rw-r--r--. 1 root docker 15K Aug 26 15:45 kube-flannel.yml
BASH 复制 全屏各个node节点也要进行 二三四步骤的操作,然后才能加入集群
kubeadm join 192.168.110.11:6443 --token gio8lf.jc9isglifk68qzts \
--discovery-token-ca-cert-hash sha256:5d0340ae2180cd5f4bb6ceb07ca2d6bc040e02b7654e559f8f9206e01f8adb43 kubectl get nodes可以看到 STATUS状态都是NotReady, 这是因为确实网络插件导致的,等安装好网络插件就好了
wget https://raw.githubusercontent.com/kubernetes/dashboard/v2.6.0/aio/deploy/recommended.yaml-
修改kubernetes-dashboard的service类型为NodePort类型,使用nodeport方式访问Dashboard 。
-
删除 自动生成的证书
-
删除两处 seccompProfile
---
kind: Service
apiVersion: v1
metadata:
labels:
k8s-app: kubernetes-dashboard
name: kubernetes-dashboard
namespace: kubernetes-dashboard
spec:
type: NodePort #增加
ports:
- port: 443
targetPort: 8443
nodePort: 30000 #增加
selector:
k8s-app: kubernetes-dashboard
---
# (未执行)
#因为自动生成的证书很多浏览器无法使用,所以我们自己创建,注释掉kubernetes-dashboard-certs对象声明
#apiVersion: v1
#kind: Secret
#metadata:
# labels:
# k8s-app: kubernetes-dashboard
# name: kubernetes-dashboard-certs
# namespace: kubernetes-dashboard
#type: Opaque
---
---
# 删除两处 seccompProfile 配置信息,在 190,276 行
# securityContext:
# seccompProfile:
# type: RuntimeDefault
--

kubectl apply -f ./recommended.yaml
[root@master k8s]# kubectl get pod,svc -n kubernetes-dashboard
NAME READY STATUS RESTARTS AGE
pod/dashboard-metrics-scraper-d86bd9646-hcrjd 1/1 Running 0 30m
pod/kubernetes-dashboard-6d96d6f767-5dqs6 1/1 Running 0 30m
NAME TYPE CLUSTER-IP EXTERNAL-IP PORT(S) AGE
service/dashboard-metrics-scraper ClusterIP 10.96.139.74 <none> 8000/TCP 30m
service/kubernetes-dashboard NodePort 10.96.192.251 <none> 443:30443/TCP 42m
认Dashboard为最小RBAC权限,添加集群管理员权限以便从Dashboard操作集群资源
创建dashboard-admin.yaml文件。
vim dashboard-admin.yaml 文件的内容如下所示。
apiVersion: v1
kind: ServiceAccount
metadata:
labels:
k8s-app: kubernetes-dashboard
name: dashboard-admin
namespace: kubernetes-dashboard保存退出后执行如下命令创建管理员。
kubectl create -f ./dashboard-admin.yaml创建dashboard-admin-bind-cluster-role.yaml文件。
vim dashboard-admin-bind-cluster-role.yaml文件内容如下所示。
apiVersion: rbac.authorization.k8s.io/v1
kind: ClusterRoleBinding
metadata:
name: dashboard-admin-bind-cluster-role
labels:
k8s-app: kubernetes-dashboard
roleRef:
apiGroup: rbac.authorization.k8s.io
kind: ClusterRole
name: cluster-admin
subjects:
- kind: ServiceAccount
name: dashboard-admin
namespace: kubernetes-dashboard保存退出后执行如下命令为用户分配权限。kubectl create -f ./dashboard-admin-bind-cluster-role.yaml
[root@master k8s]# kubectl -n kubernetes-dashboard describe secret $(kubectl -n kubernetes-dashboard get secret | grep dashboard-admin | awk '{print $1}')
Name: dashboard-admin-token-82bhj
Namespace: kubernetes-dashboard
Labels: <none>
Annotations: kubernetes.io/service-account.name: dashboard-admin
kubernetes.io/service-account.uid: 1b24fb01-7f3c-4aa9-a80d-b03efcc2930f
Type: kubernetes.io/service-account-token
Data
====
namespace: 20 bytes
token: eyJhbGciOiJSUzI1NiIsImtpZCI6ImJzbllXb1RfUENRZG1LSFhVUWxmUndRRVZuYllVWFFDQVBUeDNYQmRpVWMifQ.eyJpc3MiOiJrdWJlcm5ldGVzL3NlcnZpY2VhY2NvdW50Iiwia3ViZXJuZXRlcy5pby9zZXJ2aWNlYWNjb3VudC9uYW1lc3BhY2UiOiJrdWJlcm5ldGVzLWRhc2hib2FyZCIsImt1YmVybmV0ZXMuaW8vc2VydmljZWFjY291bnQvc2VjcmV0Lm5hbWUiOiJkYXNoYm9hcmQtYWRtaW4tdG9rZW4tODJiaGoiLCJrdWJlcm5ldGVzLmlvL3NlcnZpY2VhY2NvdW50L3NlcnZpY2UtYWNjb3VudC5uYW1lIjoiZGFzaGJvYXJkLWFkbWluIiwia3ViZXJuZXRlcy5pby9zZXJ2aWNlYWNjb3VudC9zZXJ2aWNlLWFjY291bnQudWlkIjoiMWIyNGZiMDEtN2YzYy00YWE5LWE4MGQtYjAzZWZjYzI5MzBmIiwic3ViIjoic3lzdGVtOnNlcnZpY2VhY2NvdW50Omt1YmVybmV0ZXMtZGFzaGJvYXJkOmRhc2hib2FyZC1hZG1pbiJ9.kk4m3cCiK3fGtqH_3_ogPmVuhI6dYwZ5f3EEGPR7yDqN6eF6FTBWcepDqo7FO3Oqhdjseq40ltBM5A1AYqtE60RO1svqf8mRLFNu44x5a6ZakTGP6a3EN8m8vOGc0cCXvd1lJWz9chZp39UWoBMlYEnJQGqMH6jsj7VVOyjNADkYIRITQxq0RS7xAgCc8zlrUYIJ0iF60fAjZFDtBtfhcPzYpRRKhc43912bqmi5jyE0FYKN3mDEBDlWzvNCNwcV4NEN9ByT1TBJACBzftDSOAMkWNC1xYTdj6X_4NCGnysfLG3keIZSm308x-NXw1iK4laZUkiCOxfPD9JdnKWAfw
ca.crt: 1025 bytes
可以看到,此时的Token值为:
eyJhbGciOiJSUzI1NiIsImtpZCI6ImJzbllXb1RfUENRZG1LSFhVUWxmUndRRVZuYllVWFFDQVBUeDNYQmRpVWMifQ.eyJpc3MiOiJrdWJlcm5ldGVzL3NlcnZpY2VhY2NvdW50Iiwia3ViZXJuZXRlcy5pby9zZXJ2aWNlYWNjb3VudC9uYW1lc3BhY2UiOiJrdWJlcm5ldGVzLWRhc2hib2FyZCIsImt1YmVybmV0ZXMuaW8vc2VydmljZWFjY291bnQvc2VjcmV0Lm5hbWUiOiJkYXNoYm9hcmQtYWRtaW4tdG9rZW4tODJiaGoiLCJrdWJlcm5ldGVzLmlvL3NlcnZpY2VhY2NvdW50L3NlcnZpY2UtYWNjb3VudC5uYW1lIjoiZGFzaGJvYXJkLWFkbWluIiwia3ViZXJuZXRlcy5pby9zZXJ2aWNlYWNjb3VudC9zZXJ2aWNlLWFjY291bnQudWlkIjoiMWIyNGZiMDEtN2YzYy00YWE5LWE4MGQtYjAzZWZjYzI5MzBmIiwic3ViIjoic3lzdGVtOnNlcnZpY2VhY2NvdW50Omt1YmVybmV0ZXMtZGFzaGJvYXJkOmRhc2hib2FyZC1hZG1pbiJ9.kk4m3cCiK3fGtqH_3_ogPmVuhI6dYwZ5f3EEGPR7yDqN6eF6FTBWcepDqo7FO3Oqhdjseq40ltBM5A1AYqtE60RO1svqf8mRLFNu44x5a6ZakTGP6a3EN8m8vOGc0cCXvd1lJWz9chZp39UWoBMlYEnJQGqMH6jsj7VVOyjNADkYIRITQxq0RS7xAgCc8zlrUYIJ0iF60fAjZFDtBtfhcPzYpRRKhc43912bqmi5jyE0FYKN3mDEBDlWzvNCNwcV4NEN9ByT1TBJACBzftDSOAMkWNC1xYTdj6X_4NCGnysfLG3keIZSm308x-NXw1iK4laZUkiCOxfPD9JdnKWAfw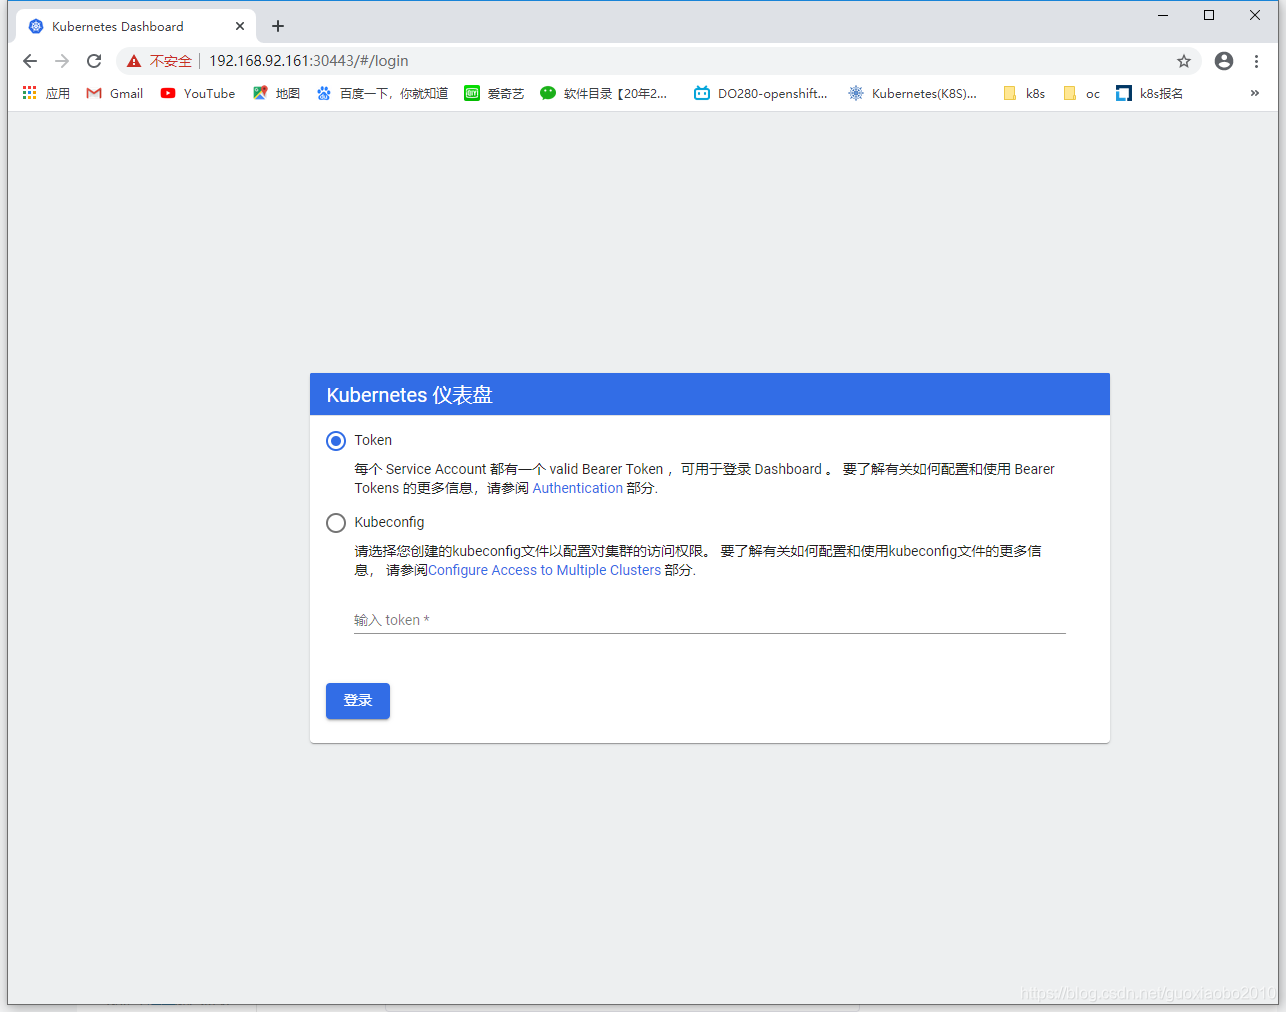
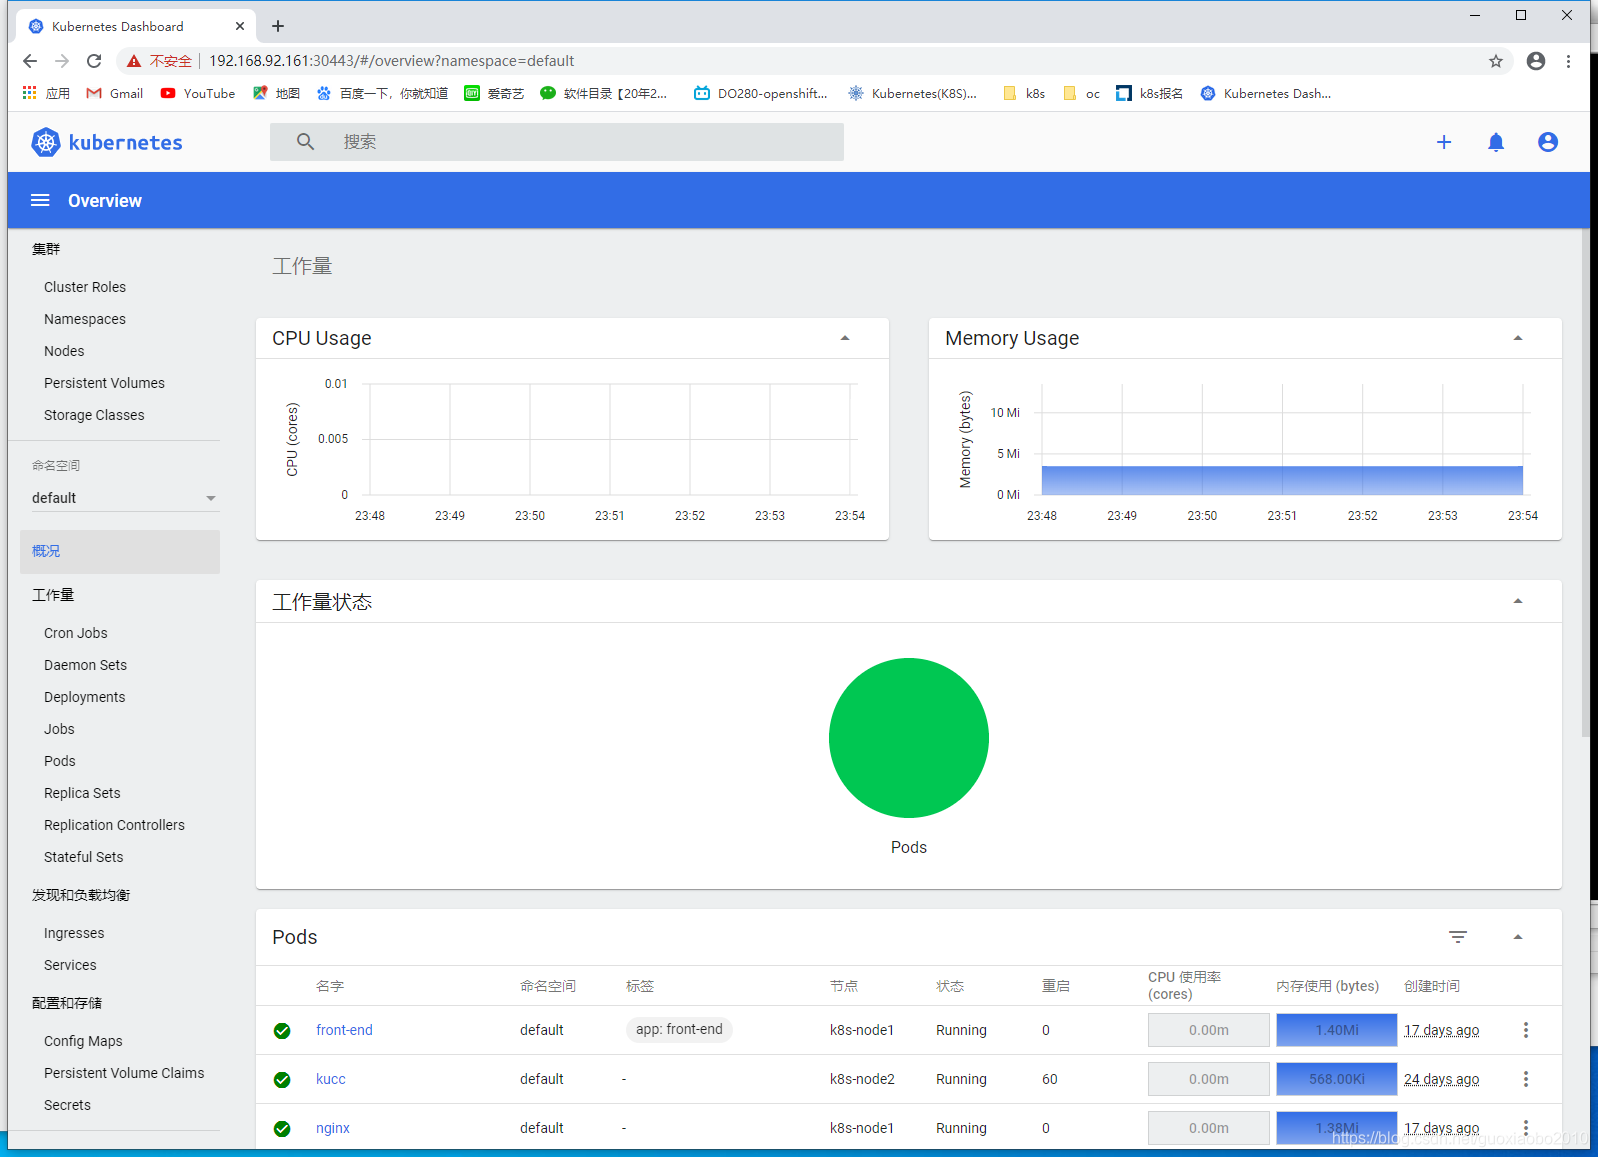
这里,我们选择Token方式登录,并输入在命令行获取到的Token,如下所示。(PS 此时,无CPU 及内存统计,[需要单独安装](https://www.cnblogs.com/binghe001/p/12821804.html ,https://github.com/kubernetes-sigs/metrics-server/releases)
参考资料https://github.com/kubernetes/dashboard/tree/v2.0.0/docs
https://mirrors.aliyun.com/kubernetes/yum/repos/kubernetes-el7-x86_64/repodata/repomd.xml: [Errno -1] repomd.xml signature could not be verified for kubernetes
Trying other mirror.
One of the configured repositories failed (Kubernetes),
and yum doesn't have enough cached data to continue. At this point the only
safe thing yum can do is fail. There are a few ways to work "fix" this:
1. Contact the upstream for the repository and get them to fix the problem.
2. Reconfigure the baseurl/etc. for the repository, to point to a working
upstream. This is most often useful if you are using a newer
distribution release than is supported by the repository (and the
packages for the previous distribution release still work).
3. Run the command with the repository temporarily disabled
yum --disablerepo=kubernetes ...
4. Disable the repository permanently, so yum won't use it by default. Yum
will then just ignore the repository until you permanently enable it
again or use --enablerepo for temporary usage:
yum-config-manager --disable kubernetes
or
subscription-manager repos --disable=kubernetes
5. Configure the failing repository to be skipped, if it is unavailable.
Note that yum will try to contact the repo. when it runs most commands,
so will have to try and fail each time (and thus. yum will be be much
slower). If it is a very temporary problem though, this is often a nice
compromise:
yum-config-manager --save --setopt=kubernetes.skip_if_unavailable=true
failure: repodata/repomd.xml from kubernetes: [Errno 256] No more mirrors to try.
https://mirrors.aliyun.com/kubernetes/yum/repos/kubernetes-el7-x86_64/repodata/repomd.xml: [Errno -1] repomd.xml signature could not be verified for kubernetes
参考资料:
由于官网未开放同步方式, 可能会有索引gpg检查失败的情况, 这时请用 yum install -y --nogpgcheck kubelet kubeadm kubectl 安装
解决办法:
cat <<EOF > /etc/yum.repos.d/kubernetes.repo
[kubernetes]
name=Kubernetes
baseurl=https://mirrors.aliyun.com/kubernetes/yum/repos/kubernetes-el7-x86_64/
enabled=1
gpgcheck=0
repo_gpgcheck=0
gpgkey=https://mirrors.aliyun.com/kubernetes/yum/doc/yum-key.gpg https://mirrors.aliyun.com/kubernetes/yum/doc/rpm-package-key.gpg
EOF
Kubernetes 镜像
https://developer.aliyun.com/mirror/kubernetes
[root@master ~]# kubeadm init phase preflight
I0611 13:57:58.976355   14057 version.go:255] remote version is much newer: v1.24.1; falling back to: stable-1.18
W0611 13:58:00.795608   14057 configset.go:202] WARNING: kubeadm cannot validate component configs for API groups [kubelet.config.k8s.io kubeproxy.config.k8s.io]
[preflight] Running pre-flight checks
	[WARNING IsDockerSystemdCheck]: detected "cgroupfs" as the Docker cgroup driver. The recommended driver is "systemd". Please follow the guide at https://kubernetes.io/docs/setup/cri/
	[WARNING SystemVerification]: this Docker version is not on the list of validated versions: 20.10.17. Latest validated version: 19.03
	[WARNING Service-Kubelet]: kubelet service is not enabled, please run 'systemctl enable kubelet.service'
[preflight] Pulling images required for setting up a Kubernetes cluster
[preflight] This might take a minute or two, depending on the speed of your internet connection
[preflight] You can also perform this action in beforehand using 'kubeadm config images pull'
默认安装docker 版本太新了
# 卸载
systemctl stop docker
yum remove docker-ce \
           docker-ce-cli \
           containerd
# 删除目录
rm -rf /etc/systemd/system/docker.service.d
rm -rf /etc/systemd/system/docker.service
rm -rf /var/lib/docker
rm -rf /var/run/docker
rm -rf /usr/local/docker
rm -rf /etc/docker
rm -rf /usr/bin/docker* /usr/bin/containerd* /usr/bin/runc /usr/bin/ctr


# 安装 19.03.9-3.el7
yum -y install docker-ce-19.03.9-3.el7 docker-ce-cli-19.03.9-3.el7
# 启动docker服务
systemctl daemon-reload && systemctl enable docker && systemctl start docker```bash I0611 14:18:41.743164 16899 version.go:255] remote version is much newer: v1.24.1; falling back to: stable-1.18 W0611 14:18:42.899282 16899 configset.go:202] WARNING: kubeadm cannot validate component configs for API groups [kubelet.config.k8s.io kubeproxy.config.k8s.io] [preflight] Running pre-flight checks [preflight] Pulling images required for setting up a Kubernetes cluster [preflight] This might take a minute or two, depending on the speed of your internet connection [preflight] You can also perform this action in beforehand using 'kubeadm config images pull'
参考资料:[linux(centos8):配置docker的cgroup driver为systemd](https://www.cnblogs.com/architectforest/p/12988488.html)


修改docker的cgroup driver为systemd

```bash

编辑docker的配置文件,如果不存在就创建

[root@centos8 ~]# vi /etc/docker/daemon.json
内容如下:

{
...
"exec-opts": ["native.cgroupdriver=systemd"]
}

修改完成后重启docker服务

[root@centos8 ~]# systemctl restart docker


查看修改的效果


[root@centos8 ~]# docker info
Client:
 Debug Mode: false

Server:
 Containers: 2
  Running: 0
  Paused: 0
  Stopped: 2
 Images: 10
 Server Version: 19.03.8
 Storage Driver: overlay2
  Backing Filesystem: <unknown>
  Supports d_type: true
  Native Overlay Diff: true
 Logging Driver: json-file
 Cgroup Driver: systemd
 Plugins:
...

可以看到修改成功,当前Cgroup Driver已修改为systemd
coredns-66bff467f8-kbnnj 0/1 ContainerCreating
[root@master01 ~]# kubectl logs -f -n kubernetes-dashboard  kubernetes-dashboard-7b544877d5-5bdk9


Getting list persistent volumes claims
2022/06/11 19:45:45 Non-critical error occurred during resource retrieval: configmaps is forbidden: User "system:anonymous" cannot list resource "configmaps" in API group "" in the namespace "default"
2022/06/11 19:45:45 [2022-06-11T19:45:45Z] Outcoming response to 10.245.1.0:2319 with 200 status code
2022/06/11 19:45:45 Non-critical error occurred during resource retrieval: persistentvolumeclaims is forbidden: User "system:anonymous" cannot list resource "persistentvolumeclaims" in API group "" in the namespace "default"
参考资料:https://www.kubernetes.org.cn/7189.html
解决方法:
[root@master01 ~] kubectl create clusterrolebinding serviceaccount-cluster-admin --clusterrole=cluster-admin --group=system:serviceaccount

# clusterrolebinding.rbac.authorization.k8s.io/serviceaccount-cluster-admin createdJun 12 00:13:27 node02.local systemd[1]: kubelet.service holdoff time over, scheduling restart.
Jun 12 00:13:27 node02.local systemd[1]: Stopped kubelet: The Kubernetes Node Agent.
-- Subject: Unit kubelet.service has finished shutting down
-- Defined-By: systemd
-- Support: http://lists.freedesktop.org/mailman/listinfo/systemd-devel
--
-- Unit kubelet.service has finished shutting down.
Jun 12 00:13:27 node02.local systemd[1]: Started kubelet: The Kubernetes Node Agent.
-- Subject: Unit kubelet.service has finished start-up
-- Defined-By: systemd
-- Support: http://lists.freedesktop.org/mailman/listinfo/systemd-devel
--
-- Unit kubelet.service has finished starting up.
--
-- The start-up result is done.
Jun 12 00:13:27 node02.local kubelet[8619]: Flag --cgroup-driver has been deprecated, This parameter should be set via the config file specified by the Kubelet's --config flag. See https://kubernetes.io/docs/tasks/administer-cluster/kubelet-config-file/ for more information.
Jun 12 00:13:27 node02.local kubelet[8619]: Flag --cgroup-driver has been deprecated, This parameter should be set via the config file specified by the Kubelet's --config flag. See https://kubernetes.io/docs/tasks/administer-cluster/kubelet-config-file/ for more information.
Jun 12 00:13:27 node02.local kubelet[8619]: I0612 00:13:27.513911 8619 server.go:417] Version: v1.18.20
Jun 12 00:13:27 node02.local kubelet[8619]: I0612 00:13:27.514189 8619 plugins.go:100] No cloud provider specified.
Jun 12 00:13:27 node02.local kubelet[8619]: I0612 00:13:27.514205 8619 server.go:838] Client rotation is on, will bootstrap in background
Jun 12 00:13:27 node02.local kubelet[8619]: I0612 00:13:27.534297 8619 certificate_store.go:130] Loading cert/key pair from "/var/lib/kubelet/pki/kubelet-client-current.pem".
Jun 12 00:13:27 node02.local kubelet[8619]: I0612 00:13:27.537594 8619 dynamic_cafile_content.go:167] Starting client-ca-bundle::/etc/kubernetes/pki/ca.crt
Jun 12 00:13:27 node02.local kubelet[8619]: I0612 00:13:27.693726 8619 server.go:647] --cgroups-per-qos enabled, but --cgroup-root was not specified. defaulting to /
Jun 12 00:13:27 node02.local kubelet[8619]: I0612 00:13:27.695145 8619 container_manager_linux.go:266] container manager verified user specified cgroup-root exists: []
Jun 12 00:13:27 node02.local kubelet[8619]: I0612 00:13:27.695226 8619 container_manager_linux.go:271] Creating Container Manager object based on Node Config: {RuntimeCgroupsName: SystemCgroupsName: KubeletCgroupsName: ContainerRuntime:docker CgroupsPerQOS:true CgroupRoot:/ CgroupDriver:cgroupfs KubeletRootDir:/var/lib/kubelet ProtectKernelDefaults:false NodeAllocatableConfig:{KubeReservedCgroupName: SystemReservedCgroupName: ReservedSystemCPUs: EnforceNodeAllocatable:map[pods:{}] KubeReserved:map[] SystemReserved:map[] HardEvictionThresholds:[{Signal:imagefs.available Operator:LessThan Value:{Quantity:<nil> Percentage:0.15} GracePeriod:0s MinReclaim:<nil>} {Signal:memory.available Operator:LessThan Value:{Quantity:100Mi Percentage:0} GracePeriod:0s MinReclaim:<nil>} {Signal:nodefs.available Operator:LessThan Value:{Quantity:<nil> Percentage:0.1} GracePeriod:0s MinReclaim:<nil>} {Signal:nodefs.inodesFree Operator:LessThan Value:{Quantity:<nil> Percentage:0.05} GracePeriod:0s MinReclaim:<nil>}]} QOSReserved:map[] ExperimentalCPUManagerPolicy:none ExperimentalCPUManagerReconcilePeriod:10s ExperimentalPodPidsLimit:-1 EnforceCPULimits:true CPUCFSQuotaPeriod:100ms ExperimentalTopologyManagerPolicy:none}
Jun 12 00:13:27 node02.local kubelet[8619]: I0612 00:13:27.695419 8619 topology_manager.go:126] [topologymanager] Creating topology manager with none policy
Jun 12 00:13:27 node02.local kubelet[8619]: I0612 00:13:27.695442 8619 container_manager_linux.go:301] [topologymanager] Initializing Topology Manager with none policy
Jun 12 00:13:27 node02.local kubelet[8619]: I0612 00:13:27.695451 8619 container_manager_linux.go:306] Creating device plugin manager: true
Jun 12 00:13:27 node02.local kubelet[8619]: I0612 00:13:27.695582 8619 client.go:75] Connecting to docker on unix:///var/run/docker.sock
Jun 12 00:13:27 node02.local kubelet[8619]: I0612 00:13:27.695602 8619 client.go:92] Start docker client with request timeout=2m0s
Jun 12 00:13:27 node02.local kubelet[8619]: W0612 00:13:27.719474 8619 docker_service.go:567] Hairpin mode set to "promiscuous-bridge" but kubenet is not enabled, falling back to "hairpin-veth"
Jun 12 00:13:27 node02.local kubelet[8619]: I0612 00:13:27.719569 8619 docker_service.go:239] Hairpin mode set to "hairpin-veth"
Jun 12 00:13:27 node02.local kubelet[8619]: I0612 00:13:27.749110 8619 docker_service.go:254] Docker cri networking managed by cni
Jun 12 00:13:27 node02.local kubelet[8619]: I0612 00:13:27.768712 8619 docker_service.go:261] Docker Info: &{ID:MECX:62IE:UTZH:6DXA:OA25:5NGS:RB7U:XAJH:EYON:YRNB:GFNZ:VROX Containers:13 ContainersRunning:0 ContainersPaused:0 ContainersStopped:13 Images:12 Driver:overlay2 DriverStatus:[[Backing Filesystem xfs] [Supports d_type true] [Native Overlay Diff true]] SystemStatus:[] Plugins:{Volume:[local] Network:[bridge host ipvlan macvlan null overlay] Authorization:[] Log:[awslogs fluentd gcplogs gelf journald json-file local logentries splunk syslog]} MemoryLimit:true SwapLimit:true KernelMemory:true KernelMemoryTCP:true CPUCfsPeriod:true CPUCfsQuota:true CPUShares:true CPUSet:true PidsLimit:true IPv4Forwarding:true BridgeNfIptables:true BridgeNfIP6tables:true Debug:false NFd:22 OomKillDisable:true NGoroutines:35 SystemTime:2022-06-12T00:13:27.751558775-04:00 LoggingDriver:json-file CgroupDriver:systemd NEventsListener:0 KernelVersion:3.10.0-1160.66.1.el7.x86_64 OperatingSystem:CentOS Linux 7 (Core) OSType:linux Architecture:x86_64 IndexServerAddress:https://index.docker.io/v1/ RegistryConfig:0xc0002a6310 NCPU:2 MemTotal:3878424576 GenericResources:[] DockerRootDir:/var/lib/docker HTTPProxy: HTTPSProxy: NoProxy: Name:node02.local Labels:[] ExperimentalBuild:false ServerVersion:19.03.9 ClusterStore: ClusterAdvertise: Runtimes:map[runc:{Path:runc Args:[]}] DefaultRuntime:runc Swarm:{NodeID: NodeAddr: LocalNodeState:inactive ControlAvailable:false Error: RemoteManagers:[] Nodes:0 Managers:0 Cluster:<nil> Warnings:[]} LiveRestoreEnabled:false Isolation: InitBinary:docker-init ContainerdCommit:{ID:10c12954828e7c7c9b6e0ea9b0c02b01407d3ae1 Expected:10c12954828e7c7c9b6e0ea9b0c02b01407d3ae1} RuncCommit:{ID:v1.1.2-0-ga916309 Expected:v1.1.2-0-ga916309} InitCommit:{ID:fec3683 Expected:fec3683} SecurityOptions:[name=seccomp,profile=default] ProductLicense: Warnings:[]}
Jun 12 00:13:27 node02.local kubelet[8619]: F0612 00:13:27.768824 8619 server.go:274] failed to run Kubelet: misconfiguration: kubelet cgroup driver: "cgroupfs" is different from docker cgroup driver: "systemd"
Jun 12 00:13:27 node02.local systemd[1]: kubelet.service: main process exited, code=exited, status=255/n/a
Jun 12 00:13:27 node02.local systemd[1]: Unit kubelet.service entered failed state.
Jun 12 00:13:27 node02.local systemd[1]: kubelet.service failed.
参考资料:https://blog.csdn.net/weixin_44559544/article/details/123497742
解决办法:
kubelet配置/var/lib/kubelet/config.yaml添加cgroupDriver
这个里要修改3个配置文件为systemd

1.vim /etc/docker/daemon.json
“exec-opts”: [“native.cgroupdriver=systemd”]

2.vim /usr/lib/systemd/system/kubelet.service.d/10-kubeadm.conf
在KUBELET_KUBECONFIG_ARGS 后面追加 --cgroup-driver=systemd

Environment="KUBELET_KUBECONFIG_ARGS=--bootstrap-kubeconfig=/etc/kubernetes/bootstrap-kubelet.conf --kubeconfig=/etc/kubernetes/kubelet.conf --cgroup-driver=systemd"

3.vim /var/lib/kubelet/kubeadm-flags.env
KUBELET_KUBEADM_ARGS="--cgroup-driver=systemd --network-plugin=cni --pod-infra-container-image=registry.aliyuncs.com/google_containers/pause:3.2"


systemctl daemon-reload
systemctl restart docker
systemctl restart kubelet
检查 docker info|grep “Cgroup Driver” 是否输出 Cgroup Driver: systemd
 [root@master k8s]# kubectl apply -f ./recommended.yaml
namespace/kubernetes-dashboard created
serviceaccount/kubernetes-dashboard created
service/kubernetes-dashboard created
secret/kubernetes-dashboard-certs created
secret/kubernetes-dashboard-csrf created
secret/kubernetes-dashboard-key-holder created
configmap/kubernetes-dashboard-settings created
role.rbac.authorization.k8s.io/kubernetes-dashboard created
clusterrole.rbac.authorization.k8s.io/kubernetes-dashboard created
rolebinding.rbac.authorization.k8s.io/kubernetes-dashboard created
clusterrolebinding.rbac.authorization.k8s.io/kubernetes-dashboard created
error: error validating "./recommended.yaml": error validating data: ValidationError(Deployment.spec.template.spec.securityContext): unknown field "seccompProfile" in io.k8s.api.core.v1.PodSecurityContext; if you choose to ignore these errors, turn validation off with --validate=false
参考资料https://www.cnblogs.com/only-me/articles/14278688.html
解决办法
比如我kubectl create -f coredns.yaml时候报错
error: error validating "coredns.yaml": error validating data: ValidationError(Deployment.spec.template.spec.securityContext): unknown field "seccompProfile" in io.k8s.api.core.v1.PodSecurityContext; if you choose to ignore these errors, turn validation off with --validate=false


查看报错信息,问题出在seccompProfile字段,结合官方模版对比,官方模版里已经没有这个字段了,所以删除即可

一共两处,在 190,276 行

#      securityContext:
#        seccompProfile:
# type: RuntimeDefault卸载组件
#某个节点 卸载管理组件
yum erase -y kubelet kubectl kubeadm kubernetes-cni
查询命令
## 查询命名空间 kube-system 下的全部 pods
kubectl -n kube-system get pods -o wide
## 查看集群信息
kubectl cluster-info


## 监控服务启动日志
journalctl -xefu kubelet- 使用 kubeadm 引导集群 https://kubernetes.io/zh-cn/docs/setup/production-environment/tools/kubeadm/
- CentOS 8搭建Kubernetes-k8s集群-1.18.5 https://www.cnblogs.com/zhang-guansheng/p/13566060.html#%E9%A2%84%E6%8B%89%E5%8F%96kubernetes%E9%95%9C%E5%83%8F
- 安装Kubernetes(k8s) https://www.cnblogs.com/Sunzz/p/15184167.html
- 安装Kubernetes(k8s)保姆级教程---无坑版 https://www.cnblogs.com/Sunzz/p/15184167.html
- Kubernetes 18.04集群安装教程(基于Centos7) https://learnku.com/docs/go-micro-build/1.0/kubernetes-1804-cluster-installation-tutorial-based-on-centos7/8877
- 【kubernetes】史上最简单的k8s安装教程,一键安装 https://juejin.cn/post/7055180924681453582
- Kubernetes 集群的关闭与重启 https://www.data2clouds.com/?p=210
- K8S master ha cluster 离线一键安装教程 http://team.jiunile.com/pro/k8s/install-ha/
kubernetes 1.18离线安装 一键安装 https://blog.csdn.net/github_35614077/article/details/105687931商业软件最丝滑的k8s部署工具Sealos,你说香不香 https://blog.51cto.com/u_15127513/2657970商业软件
Dashboard
- 使用kubeadm在Centos8上部署kubernetes1.18 https://www.kubernetes.org.cn/7189.html
- kubernetes1.18安装Dashboard https://www.cnblogs.com/guoxiaobo/p/15025312.html
- **【K8S】K8S 1.18.2安装dashboard(基于kubernetes-dashboard 2.0.0版本)**https://www.cnblogs.com/binghe001/p/12823763.html
- 【K8S】K8S部署Metrics-Server服务 https://www.cnblogs.com/binghe001/p/12821804.html