This document contains instructions to:
- provision OpenShift Service Mesh using Kubernetes operators
- configure it to use the sample Bookinfo project - found on the upstream Istio site
- demonstrate the various capabilities of OpenShift Service Mesh in traffic microservice management and visualisation.
You'll need Admin access to a Red Hat OpenShift cluster - or the single node version on your laptop Code Ready Containers. You'll also need the OpenShift Command Line (CLI) tool, oc.
Log into your OpenShift cluster as administrator - both on the terminal using oc and web interfaces. We use Kubernetes operators to install the service mesh. Provisioning of Operators requires admin access. Consumption of operators - typically by developers does not. But for speed we'll use the same admin user for both provisioning and use.
We need to install 4 Operators - from the OpenShift Operator Hub. Navigate to the OpenShift Operator Hub:
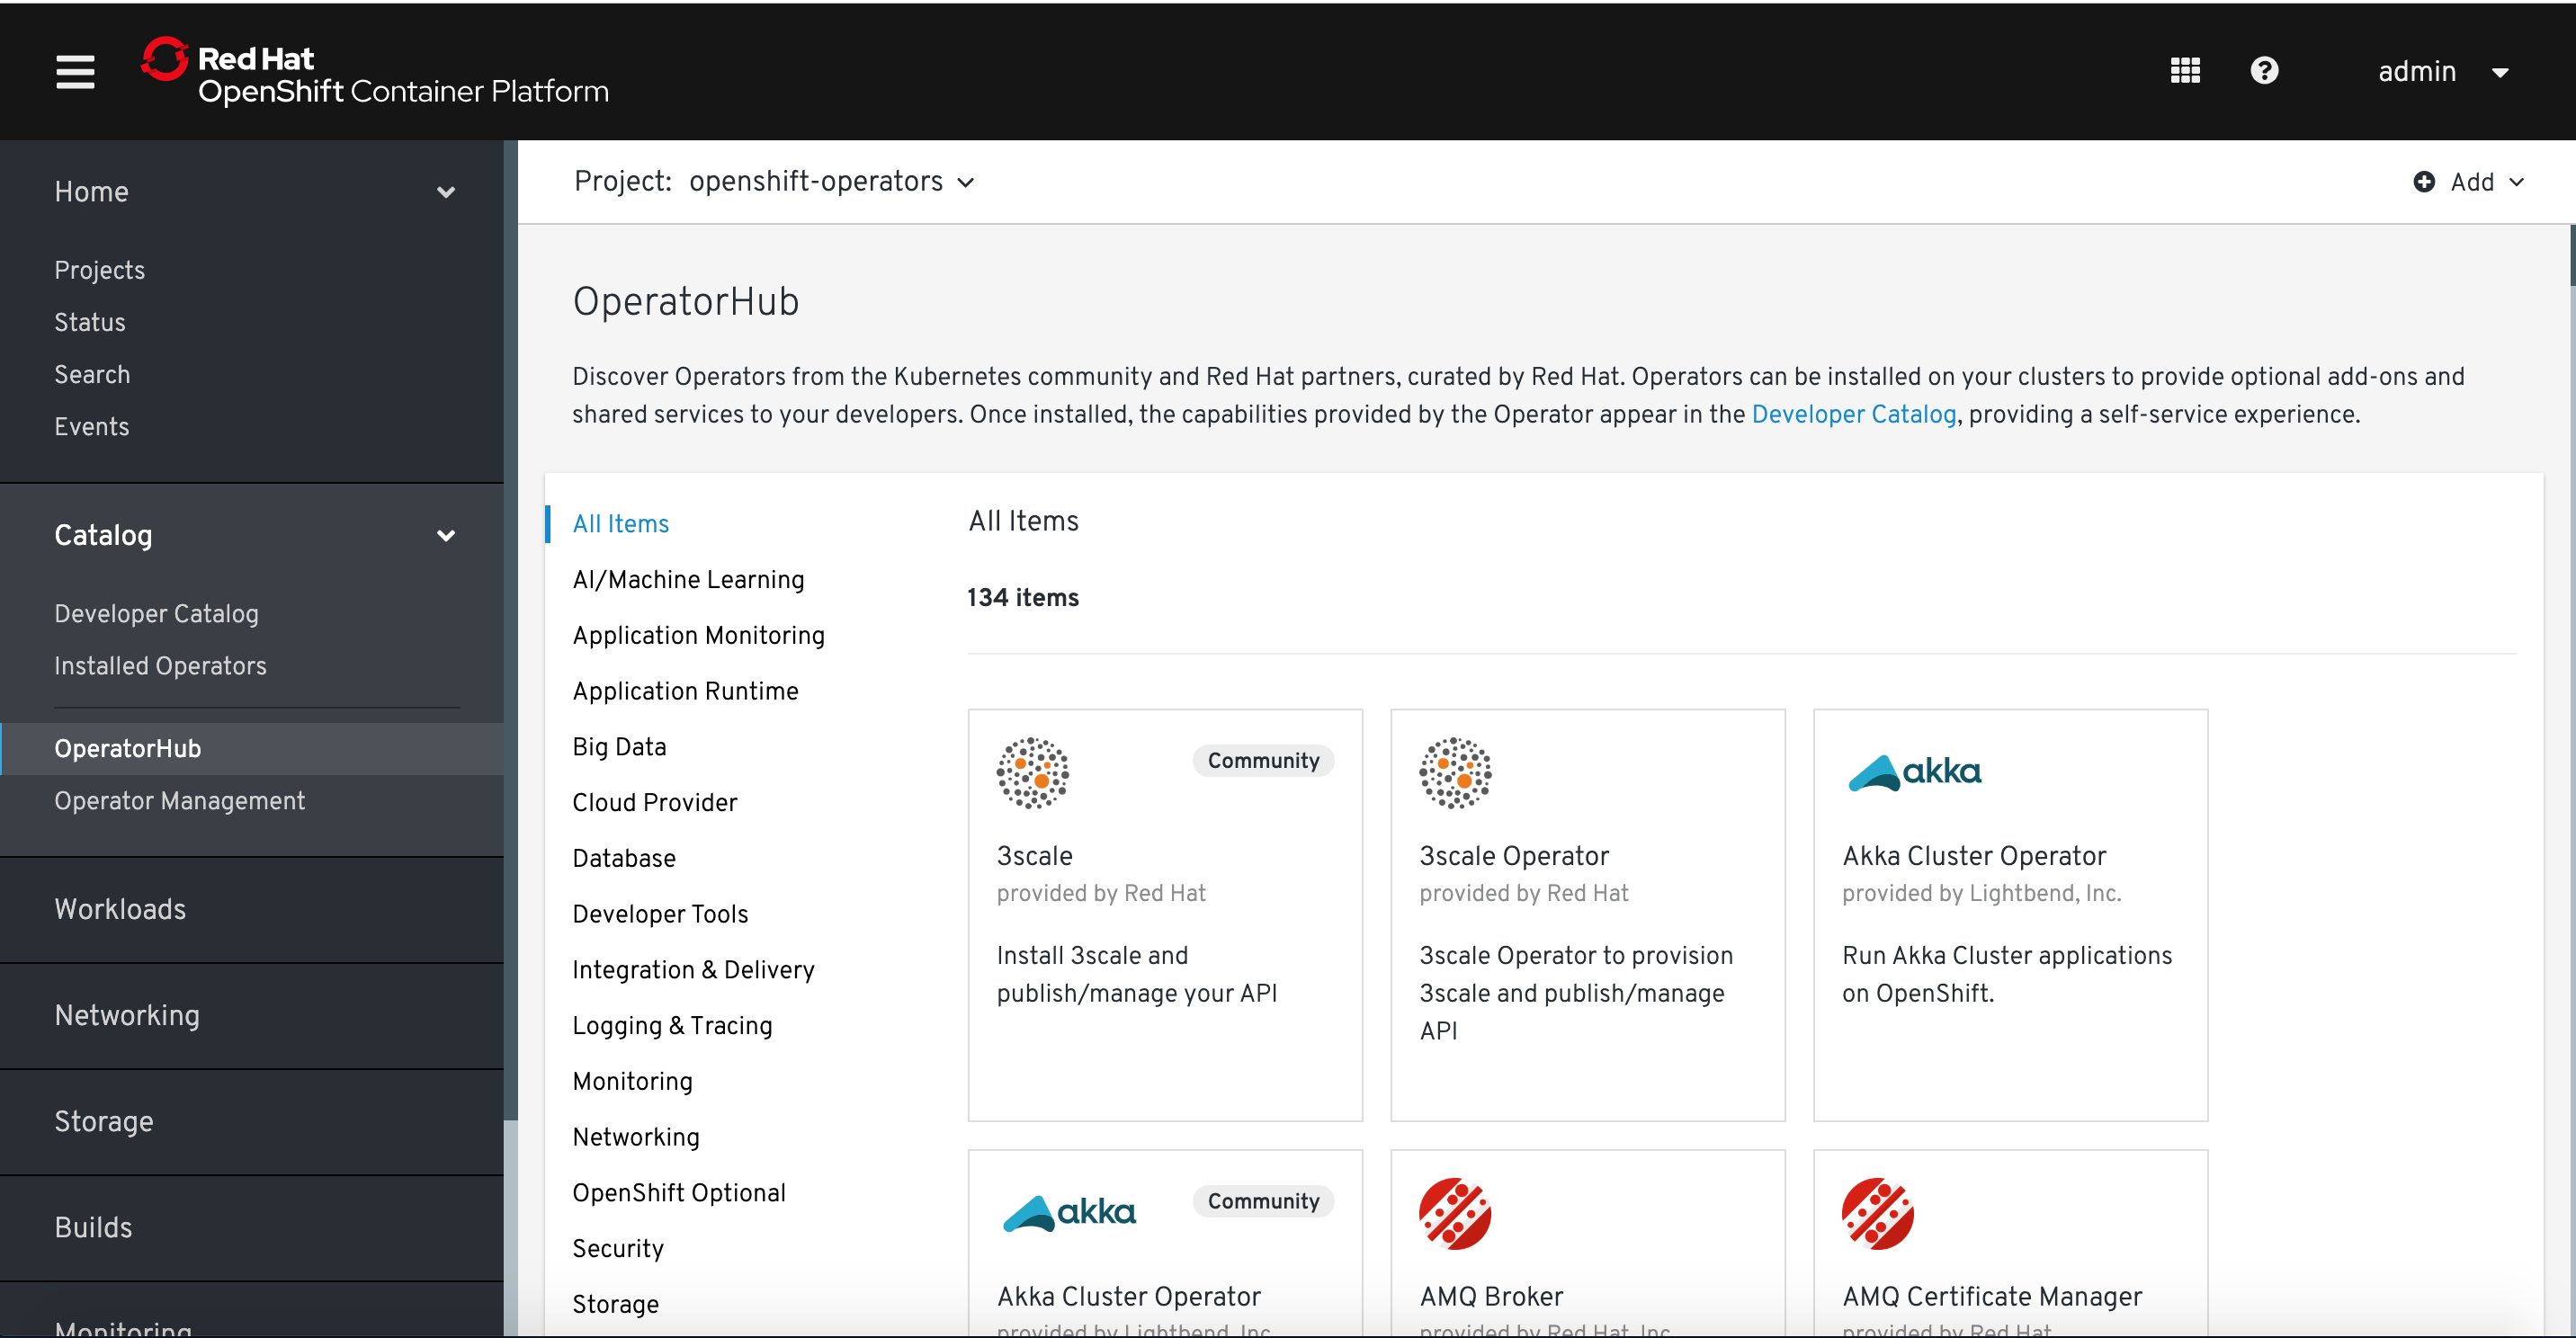
We'll install 4 operators. The first 3 support the main one, the Red Hat OpenShift Service Mesh Operator
- Elasticsearch
- Jaeger - for distributed tracing
- Kiali - for Service Mesh topology visualisation
- Red Hat OpenShift Service Mesh Operator
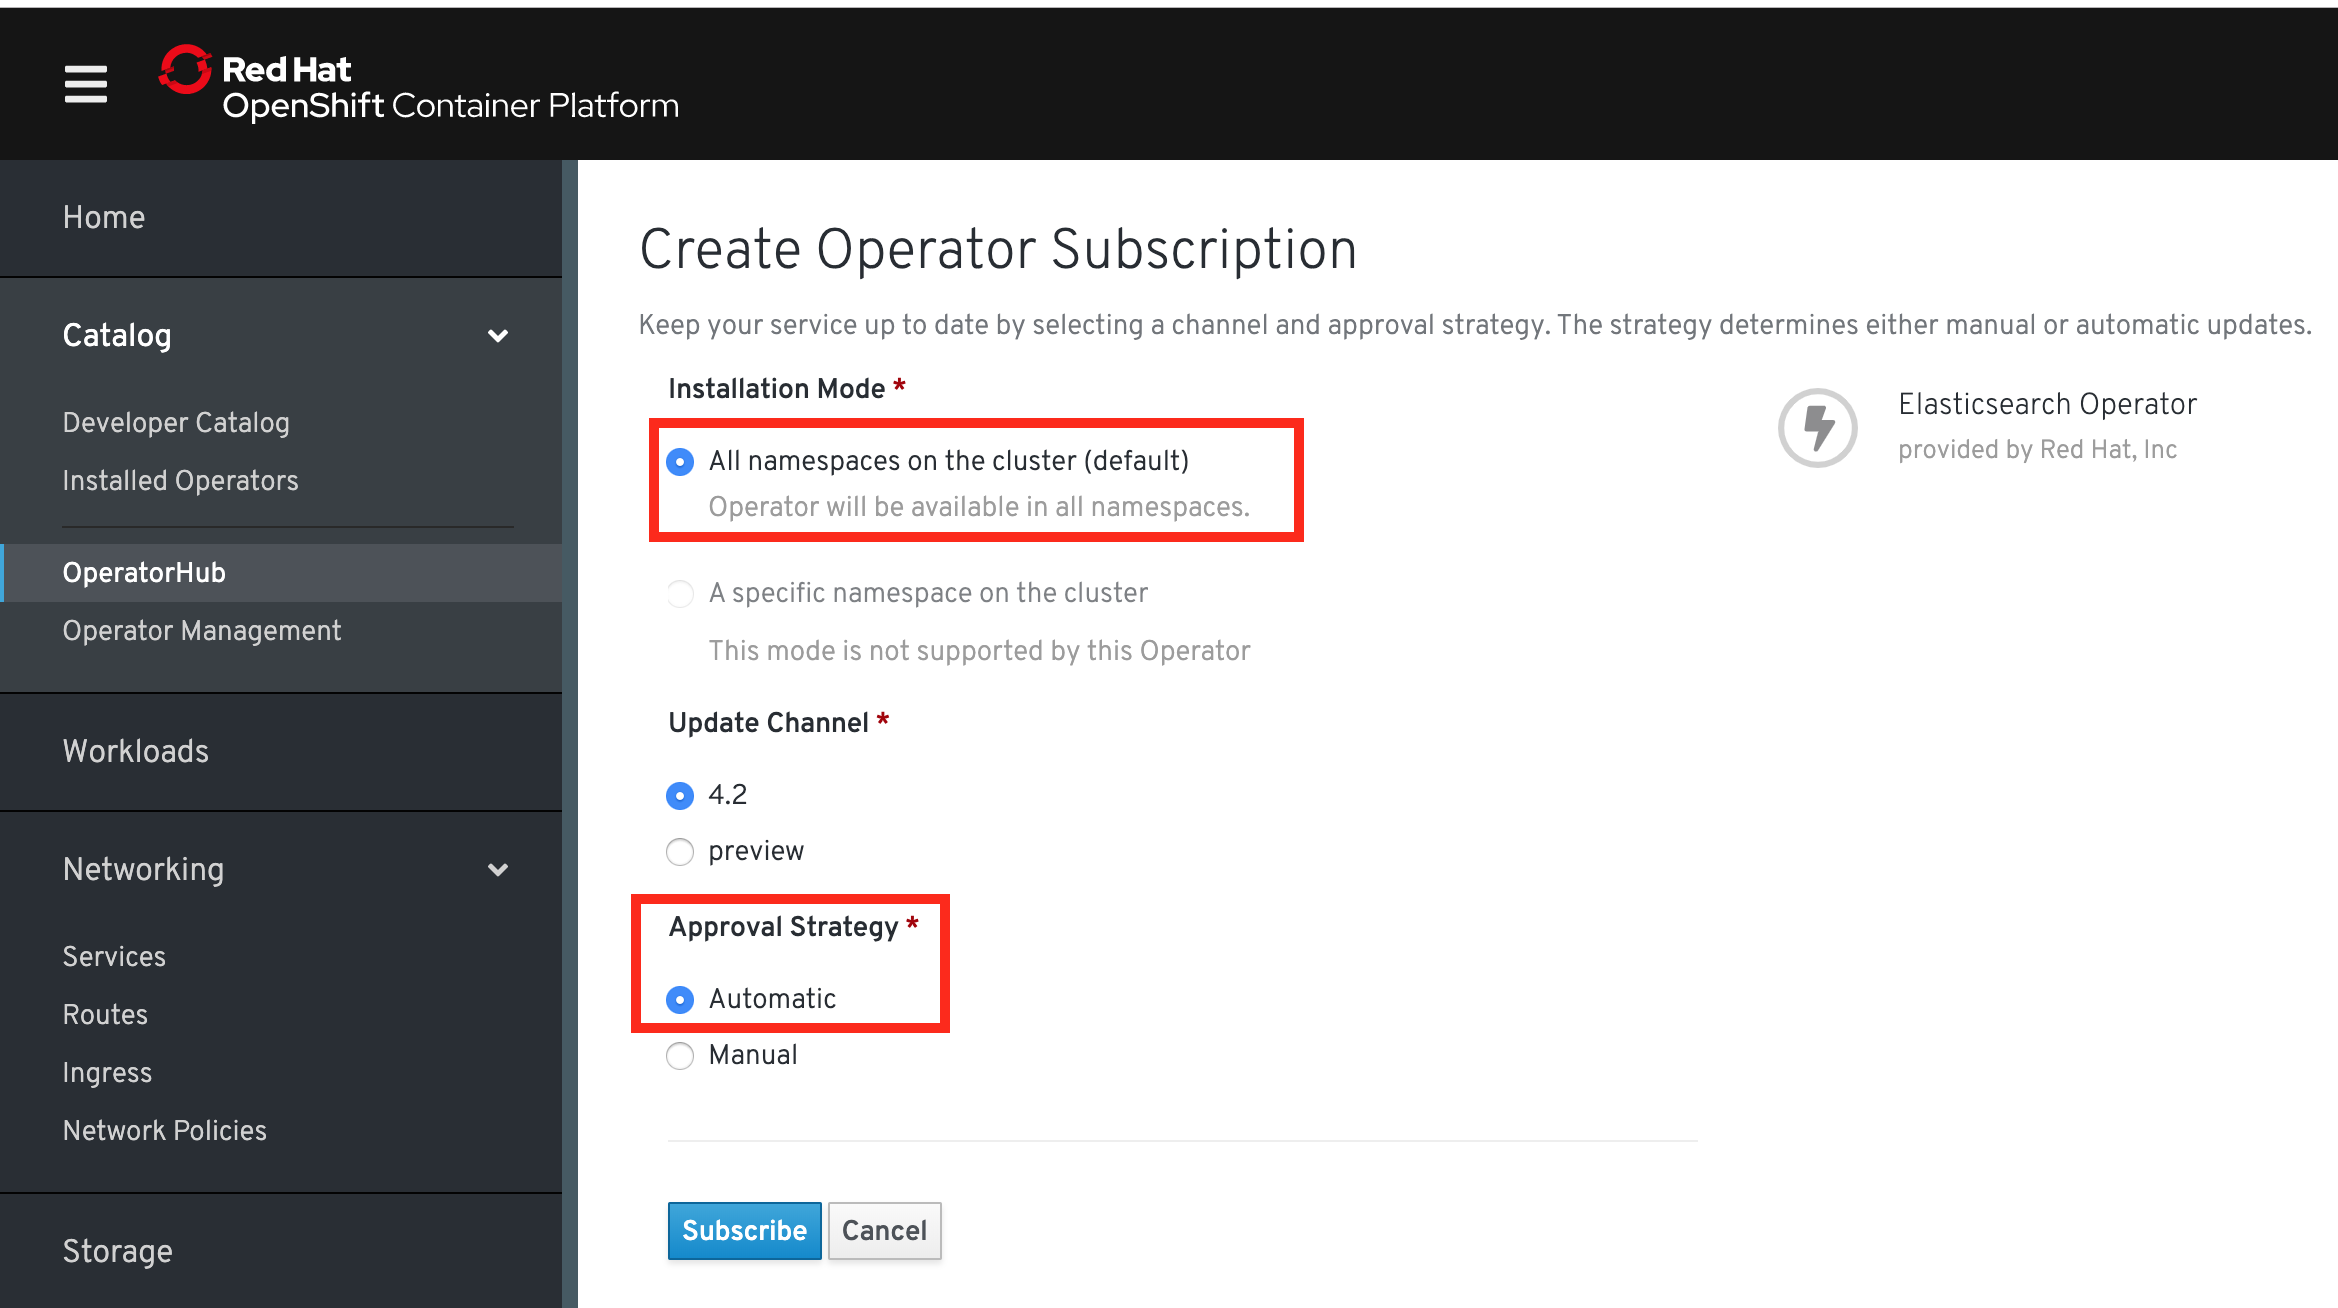
Find each one in the Operator Hub. Click into each and select Install. Choose Cluster scope and Automatic approval for each of the 4 operators - as shown here for Elasticsearch:
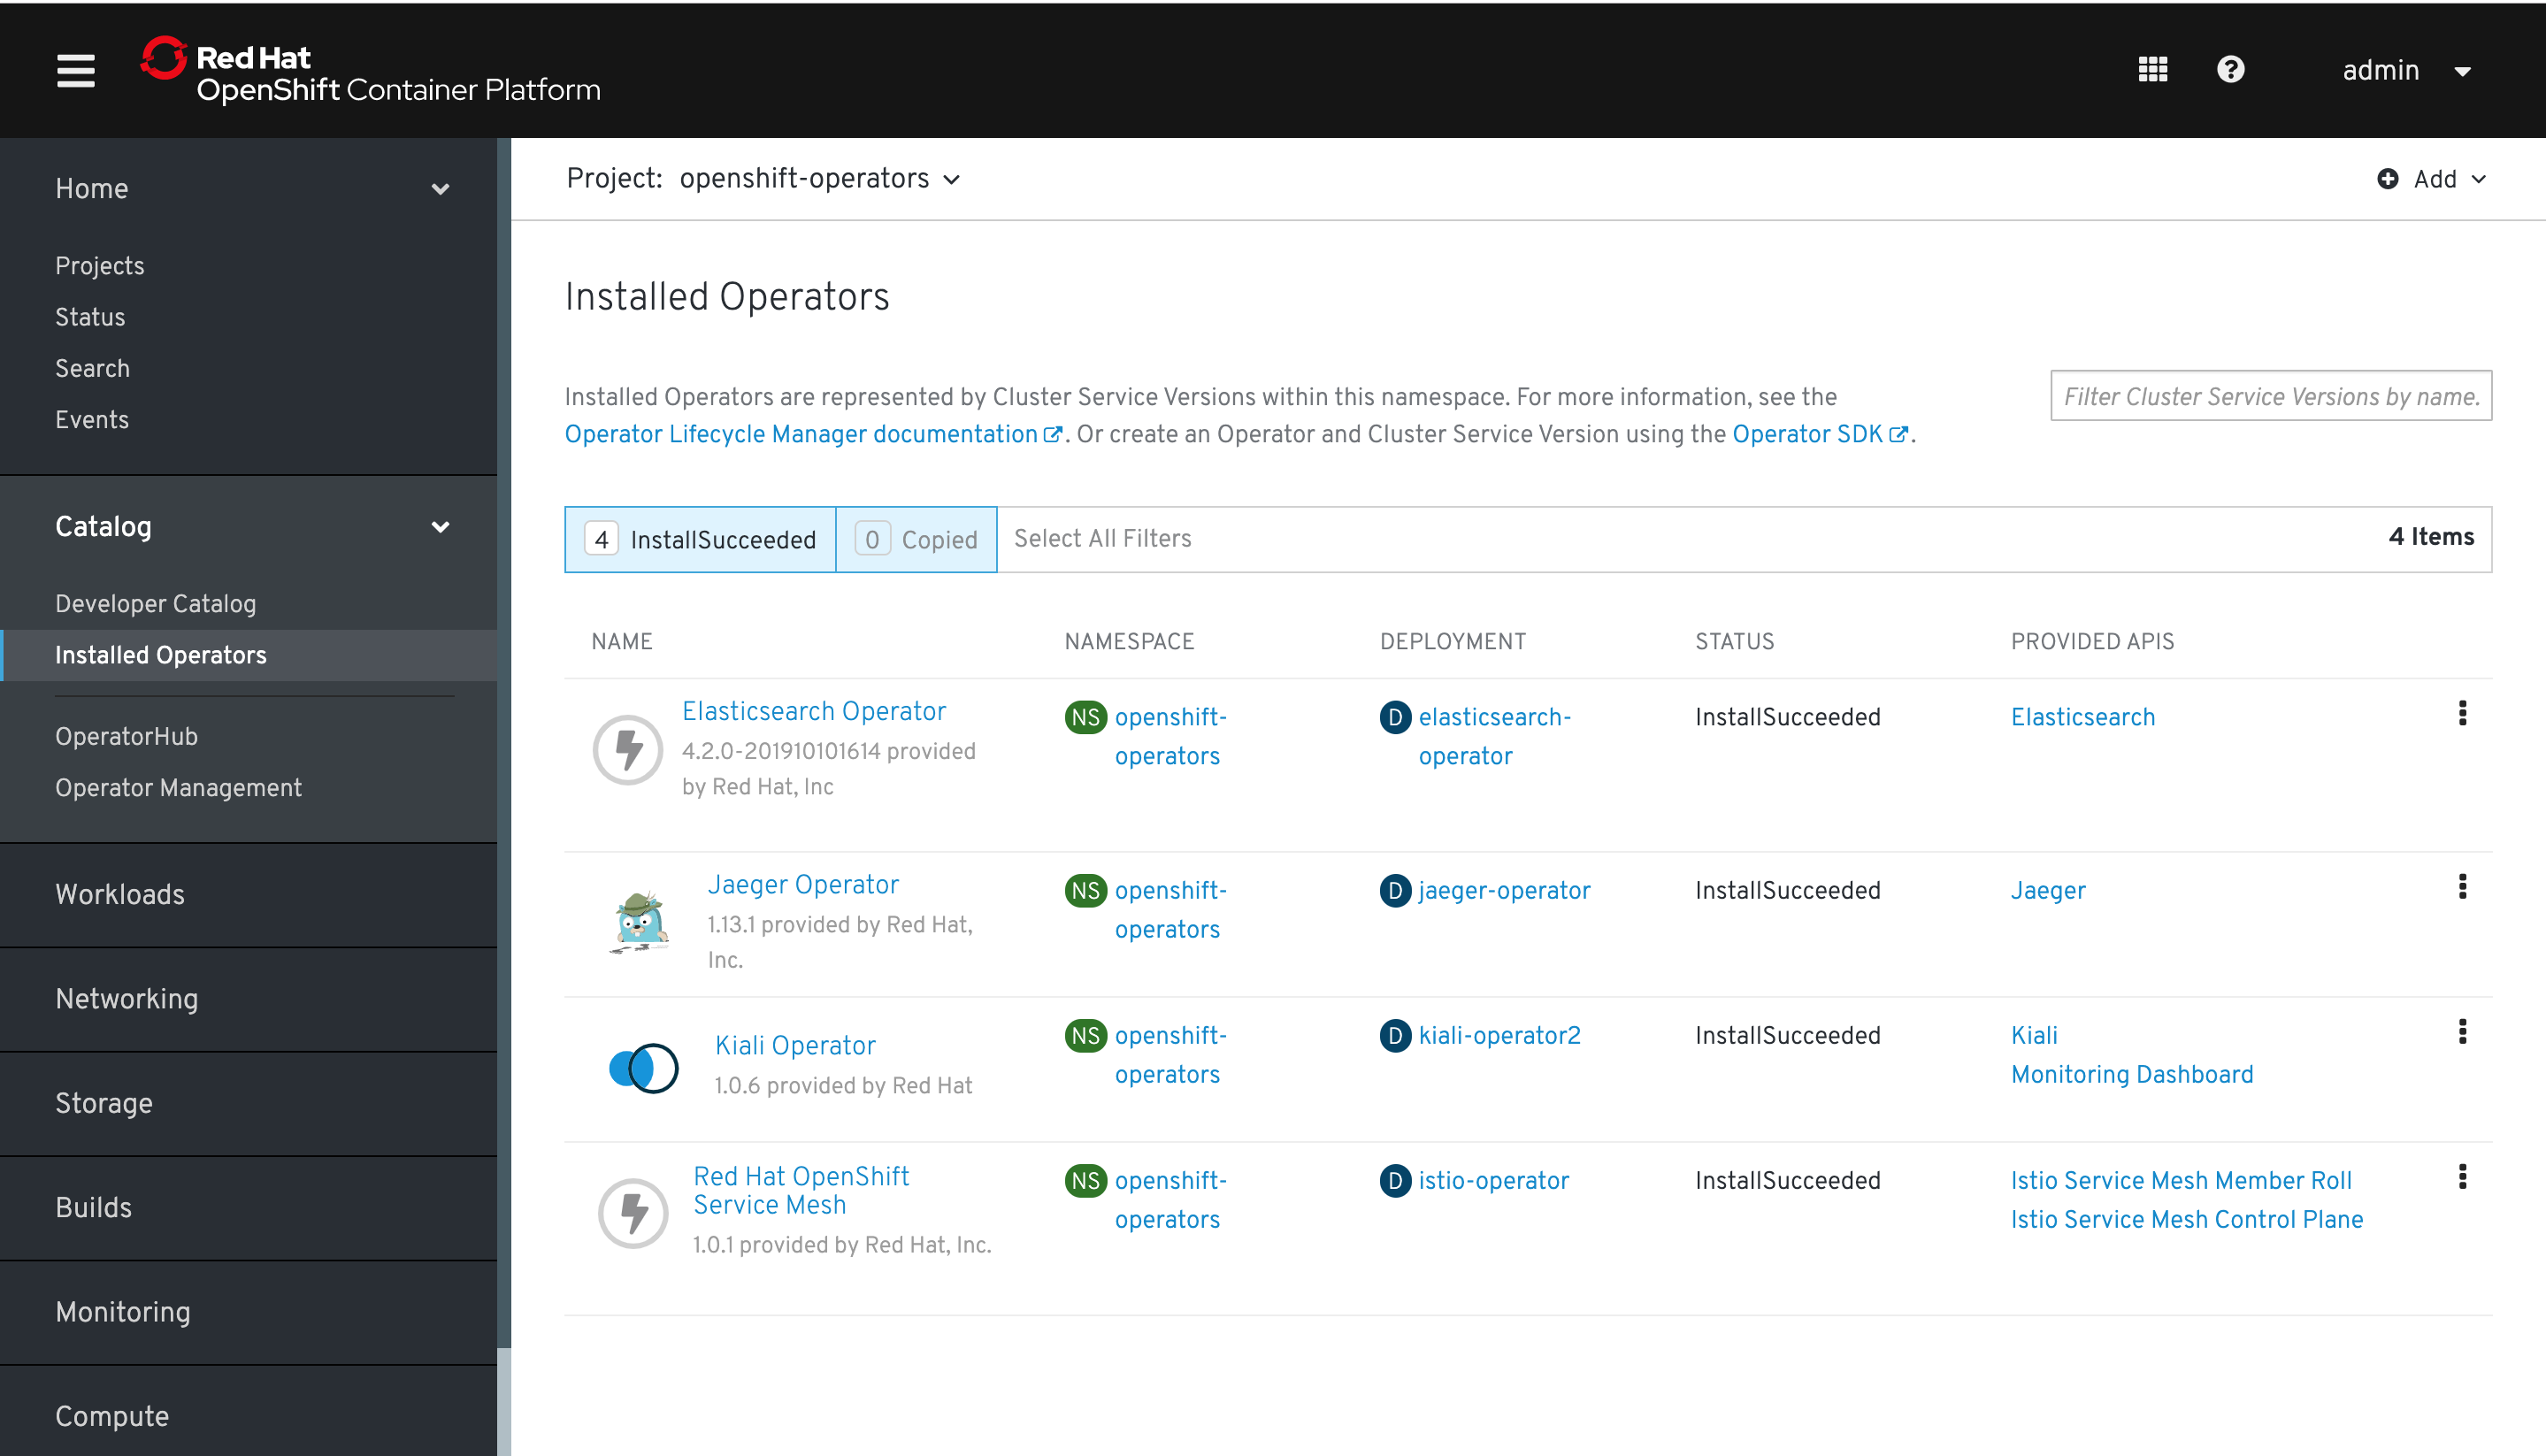
After a few minutes the operators will be installed. They'll appear as follows:
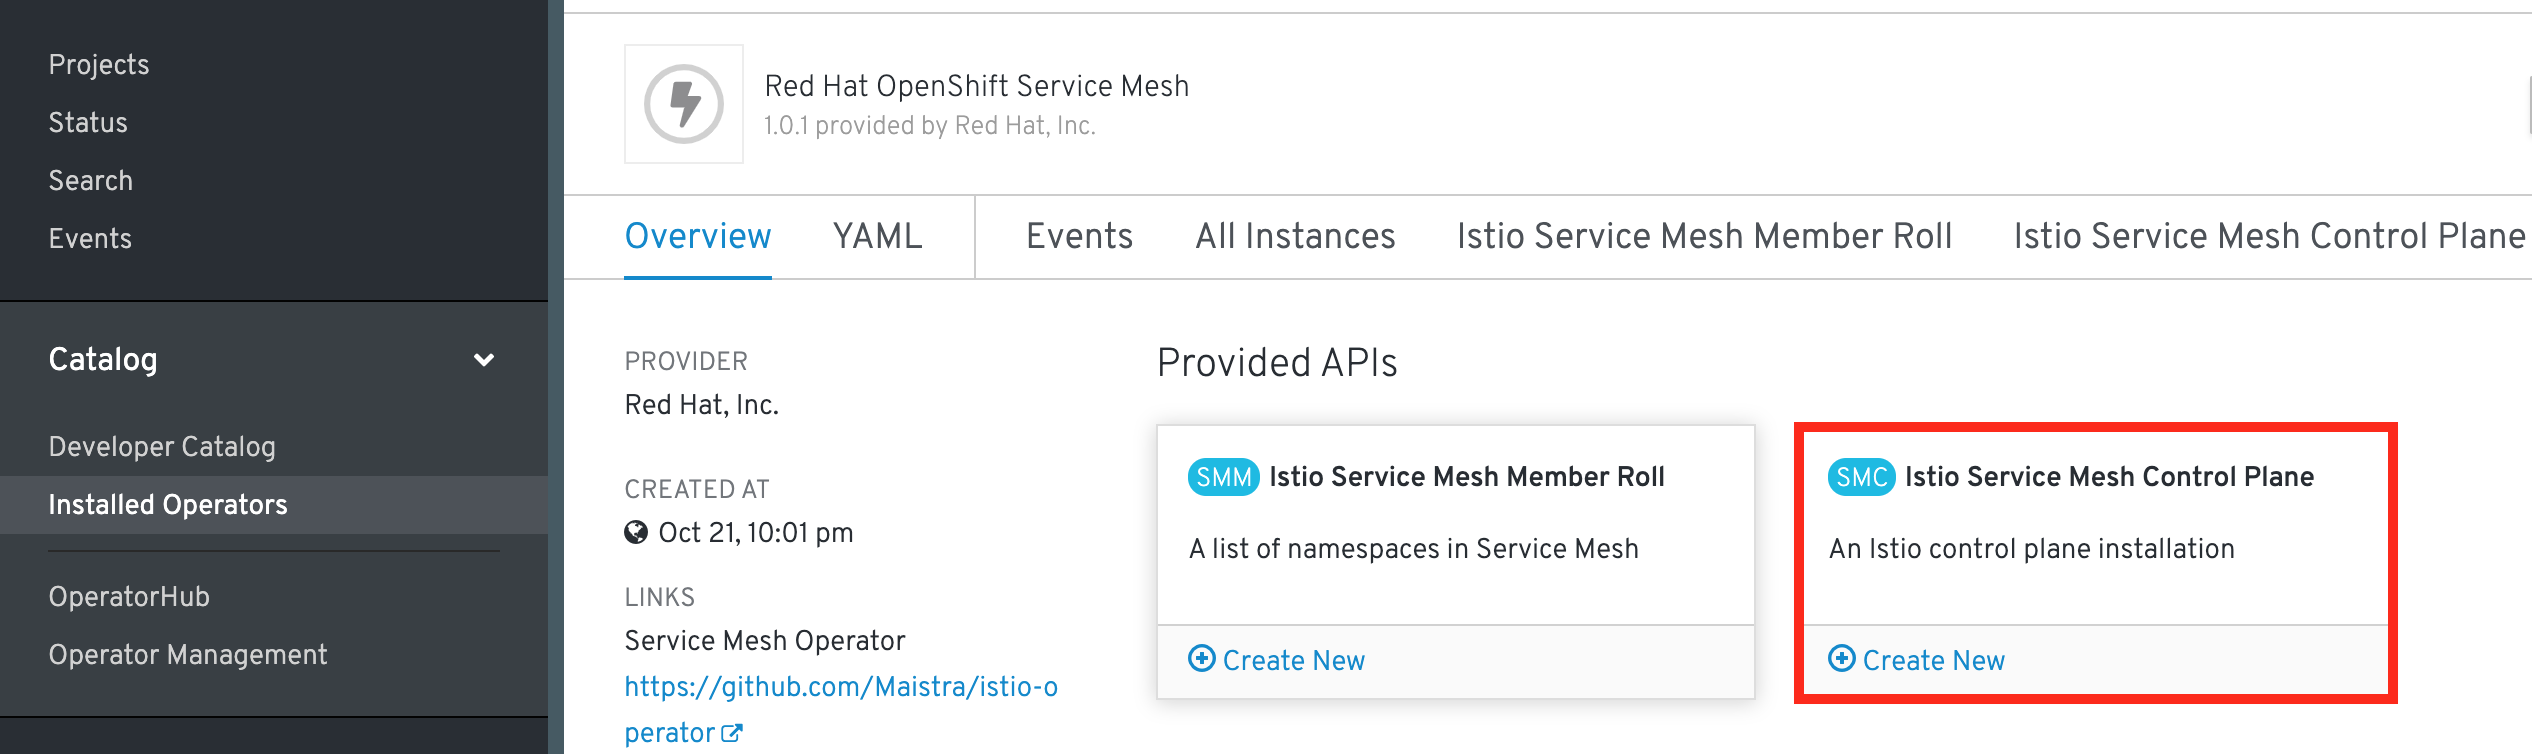
Next you create a Service Mesh from the Service Mesh operator. Create a project (namespace) called istio-system
to hold the Service Mesh application. With istio-system selected, click into the Red Hat OpenSHift Service Mesh Operator. Then create a new Istio Service Mesh Control Plane in my namespace istio-system as shown:
There are varios tunables here on screen - regarding the various components of Service Mesh. Stick with the defaults.
After a short time later, the Service Mesh application and its components are installed. You can verify it on screen or in the command line as shown:
oc project istio-system
oc get pods -w
As soon as all are ready and running, you can continue.
Now we're ready to apply Service Mesh control to a microservices Application. We'll use the Sample BookInfo application - available from the upstream Istio website.
Here's a diagram of the application:
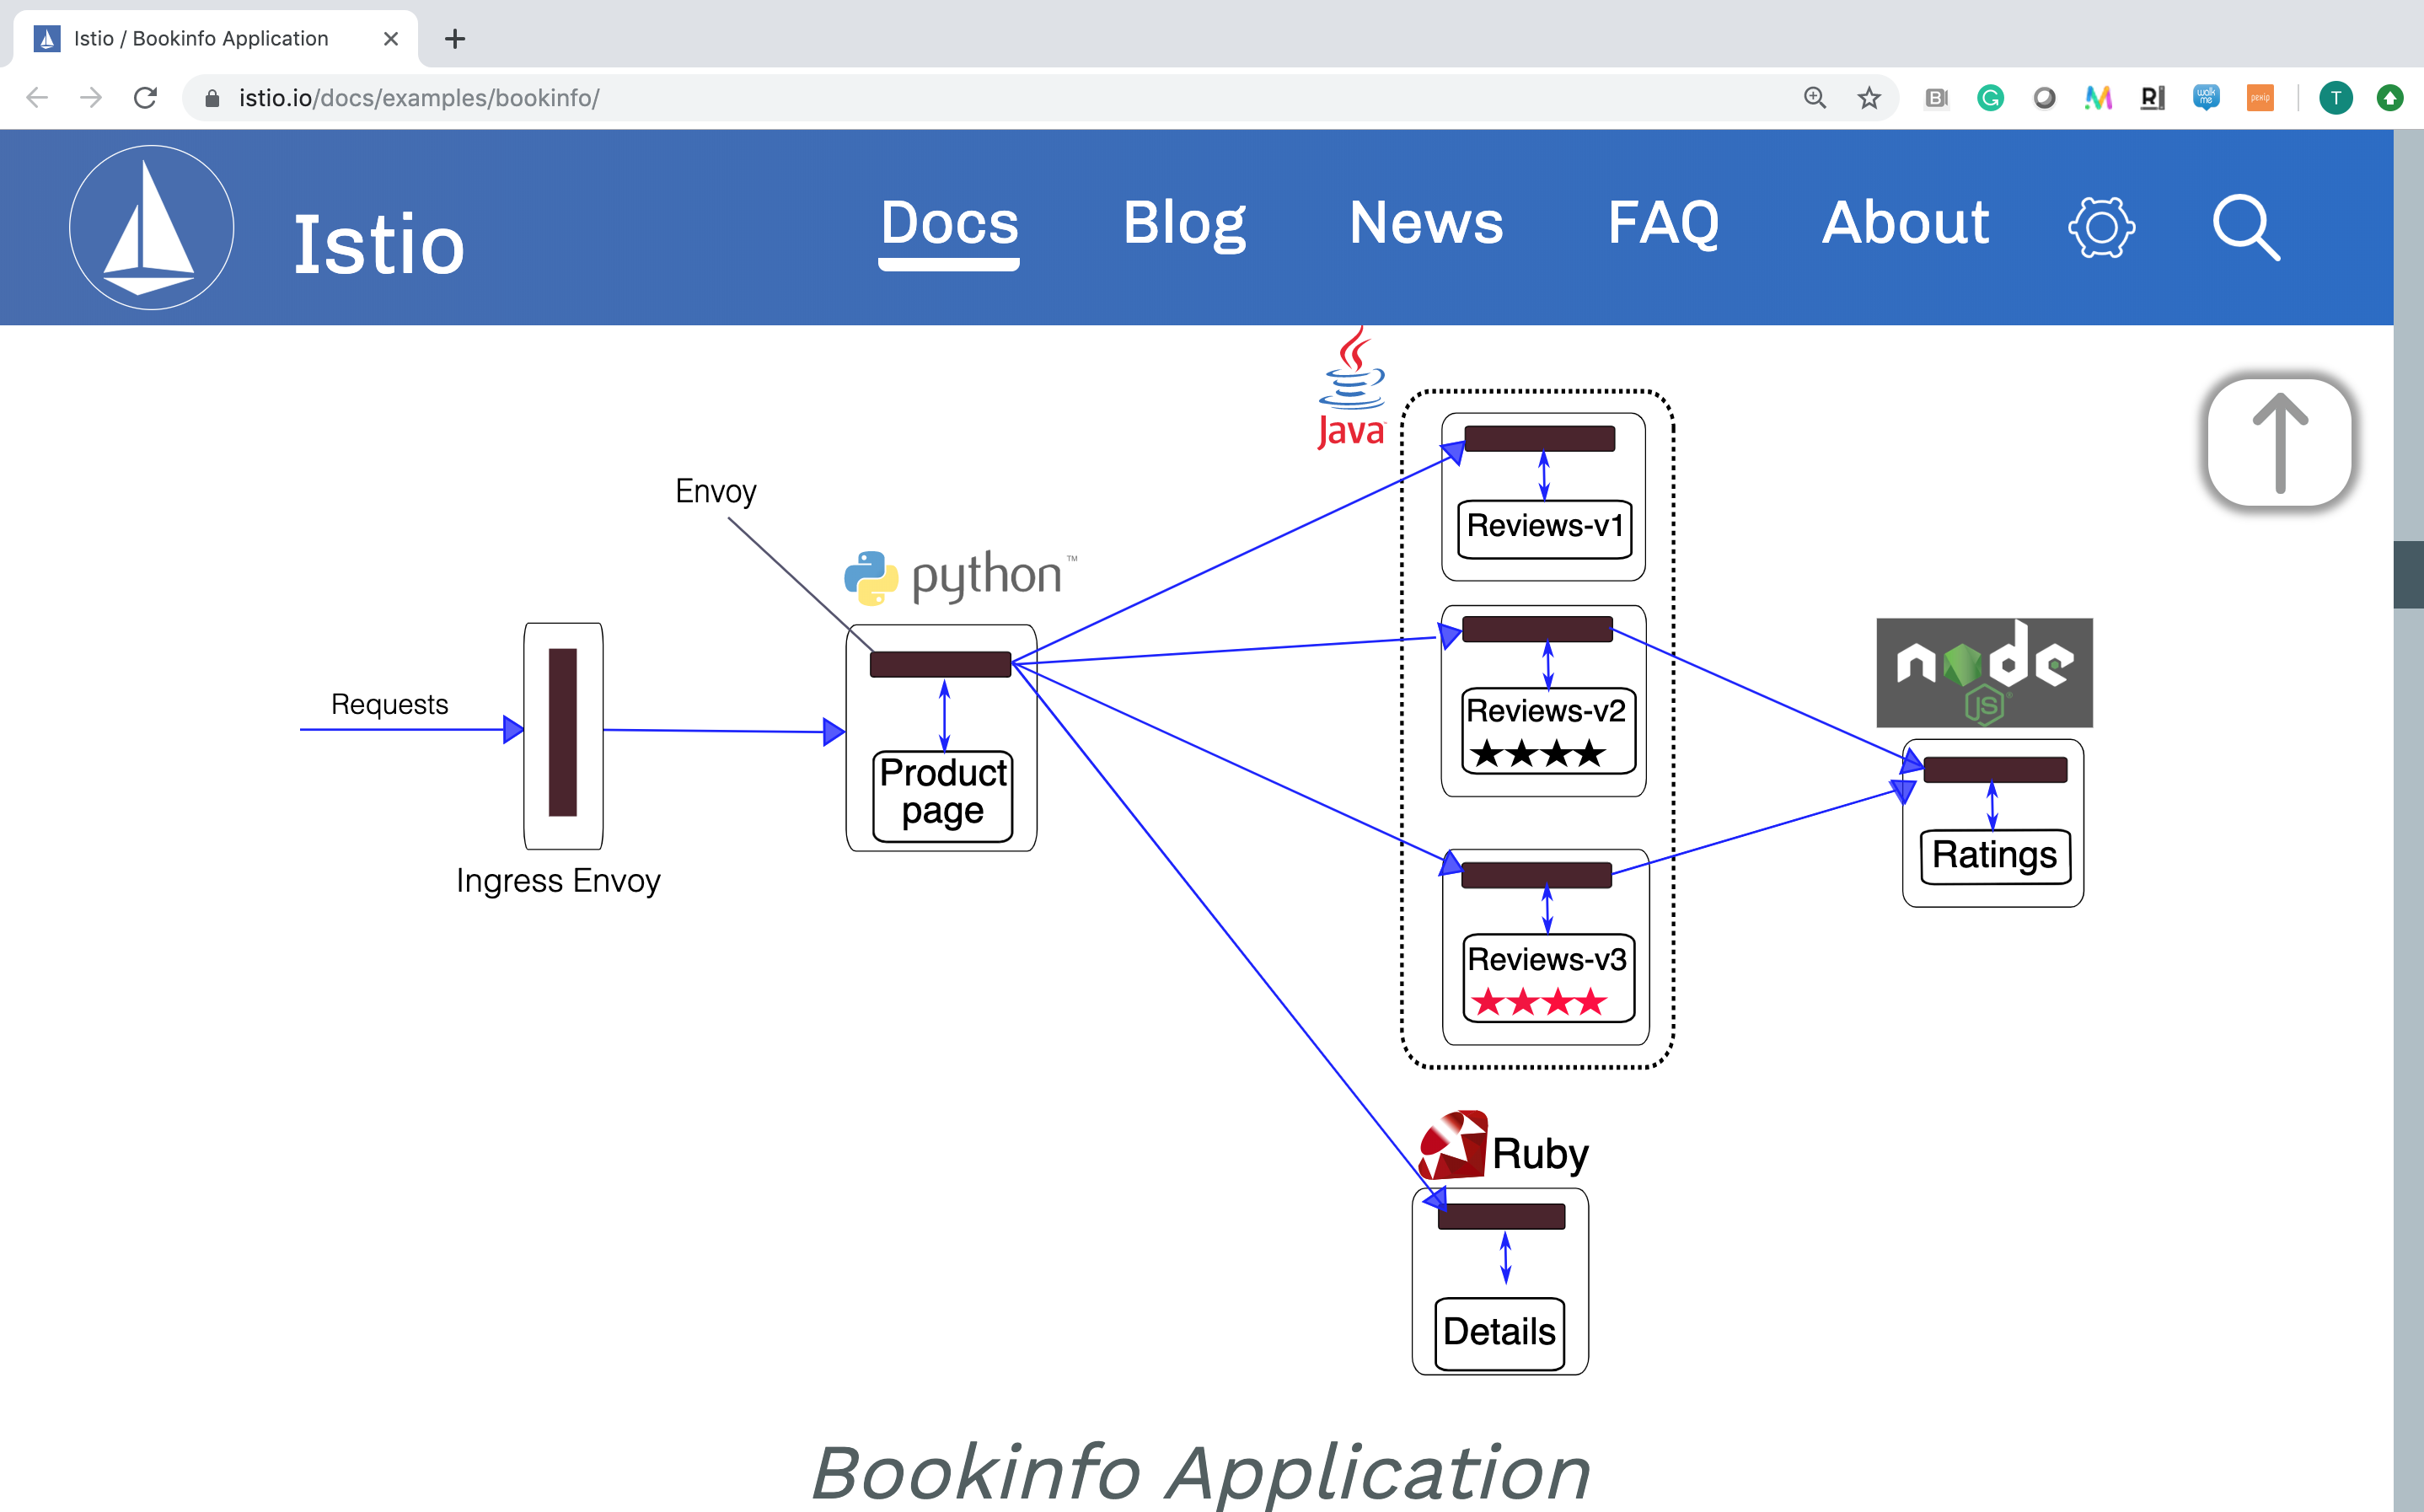
It's a very basic application - a webpage called productpage. On the left hand side of the screen will be displayed the result of the details page. Of most interest to us are the 3 reviews microservices - the results of which will appear on the right hand side of the webpage.
- when v1 of reviews is called - ratings is not called and NO stars are shown
- when v2 of reviews is called - ratings are called and BLACK stars are shown
- when v3 of reviews is called - ratings are called and RED stars are shown
At this point, we need to do 3 things:
- The first step is to create namespace for the bookinfo application - call it bookinfo. I can do this either on the GUI or the command line - let's do it on the command line:
oc new-project bookinfo
-
The next step is to create a Service Mesh Member Roll on the same screen you created a new Istio Service Mesh Control Plane about - this essentially dictates which namespaces we'll apply Service Mesh control to. Just enter bookinfo.
-
Finally I install my bookinfo microservices application - which my Service Mesh Member Roll is looking out to apply control to. I'll do that by applying some yaml that installs the Bookinfo Microservices application. As soon as this is created, the Service Mesh Member Roll will apply Service Mesh control to it. Execute the following:
oc project bookinfo
oc apply -f https://raw.githubusercontent.com/istio/istio/release-1.3/samples/bookinfo/platform/kube/bookinfo.yaml
Wait till it completes.
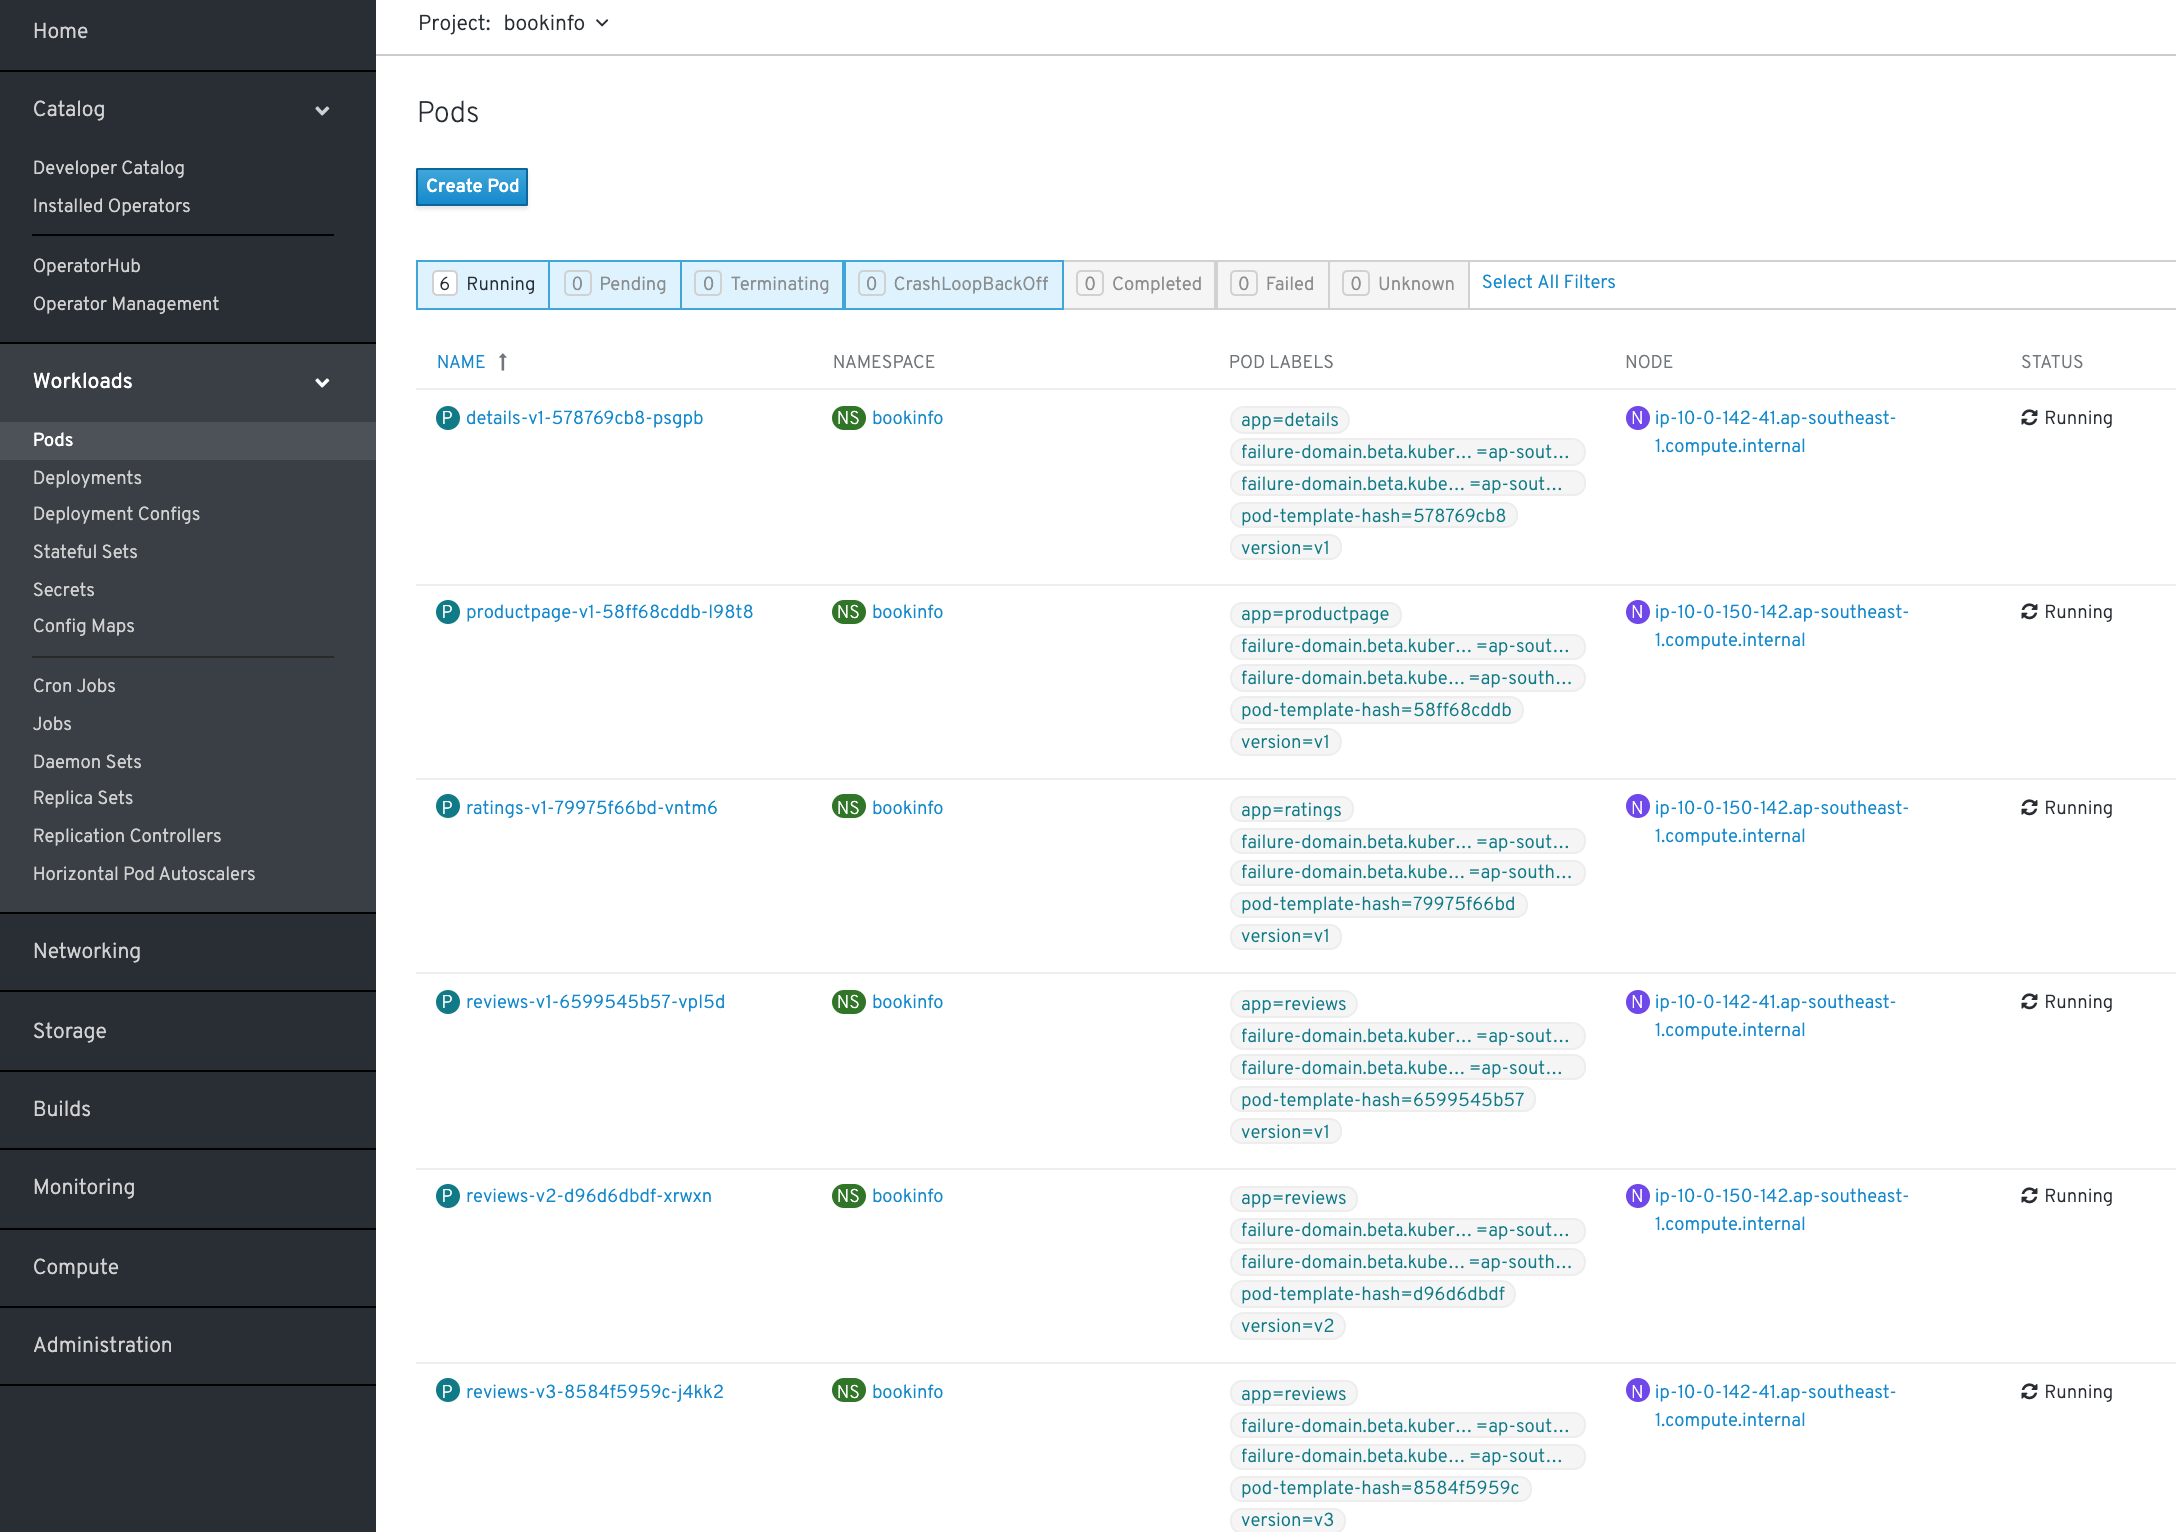
A couple of minutes later, our Bookinfo Microservices application is installed with Service Mesh control
as we can see:
Next we need to setup some Service Mesh constructs, inherited from Upstream Istio, for Service Mesh control. First the Envoy based side car proxies and the microservices to apply them to:
oc apply -n bookinfo -f https://raw.githubusercontent.com/Maistra/bookinfo/maistra-1.0/bookinfo.yaml
Next an Istio gateway - representing the port and protocol at the ingress point to the mesh(in our case HTTP and port 80):
oc apply -n bookinfo -f https://raw.githubusercontent.com/Maistra/bookinfo/maistra-1.0/bookinfo-gateway.yaml
Next the Istio Destination rules, that is addressible services and their versions:
oc apply -n bookinfo -f https://raw.githubusercontent.com/istio/istio/release-1.1/samples/bookinfo/networking/destination-rule-all.yaml
Now, output the Gateway URL:
export GATEWAY_URL=$(oc -n istio-system get route istio-ingressgateway -o jsonpath='{.spec.host}')
echo $GATEWAY_URL
Append the path /productpage to this gateway URL to view our Product Page under Service Mesh control. Hit it in a browser:
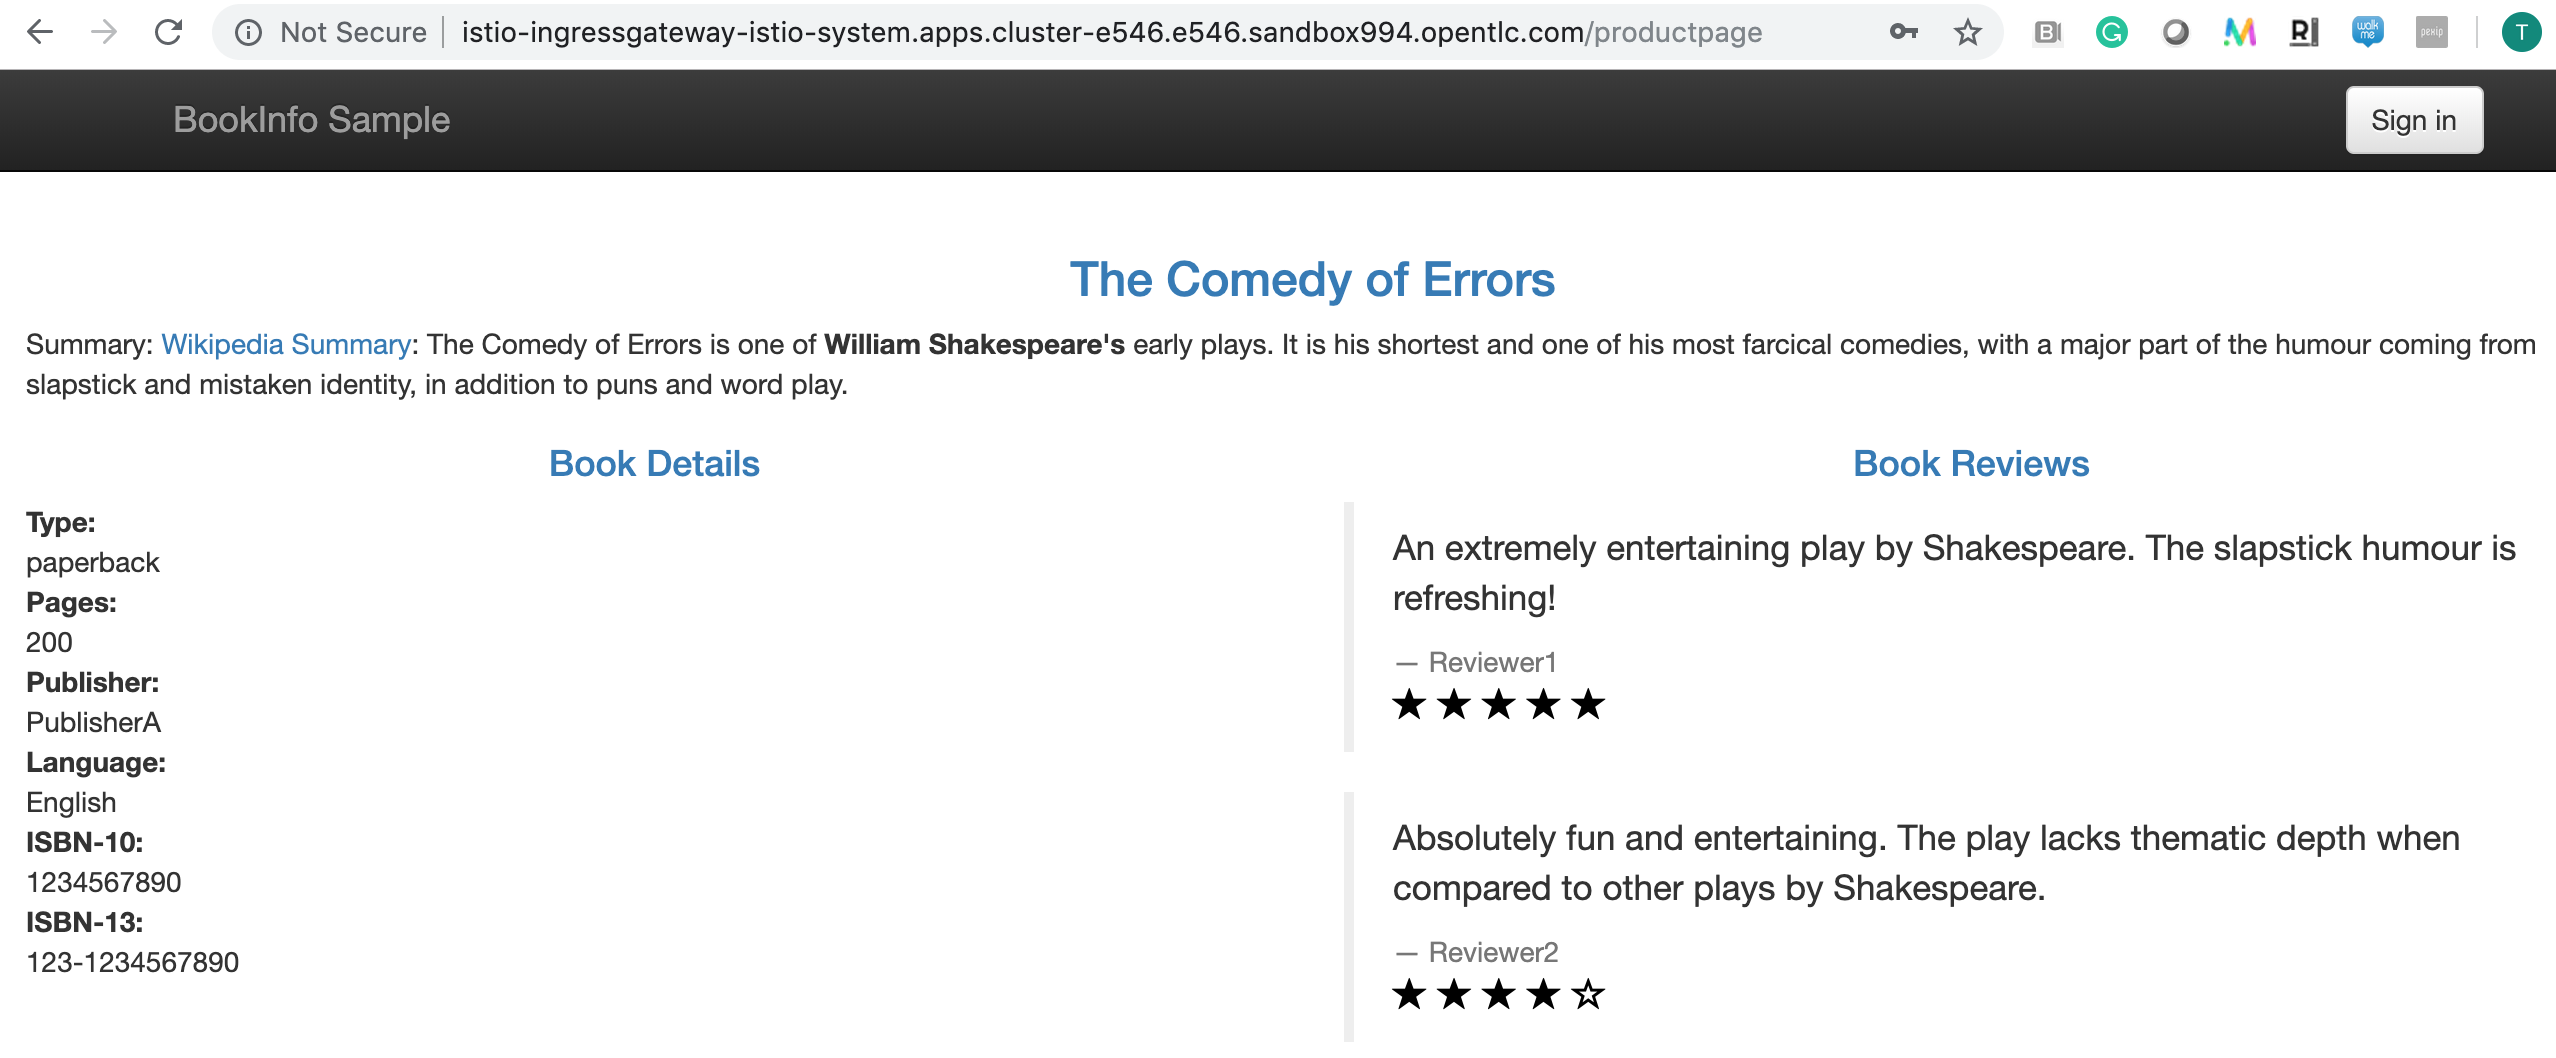
If we refresh this page several times we can see that it loops through the Review Microservice versions - showing
- black stars
- no stars
- red stars
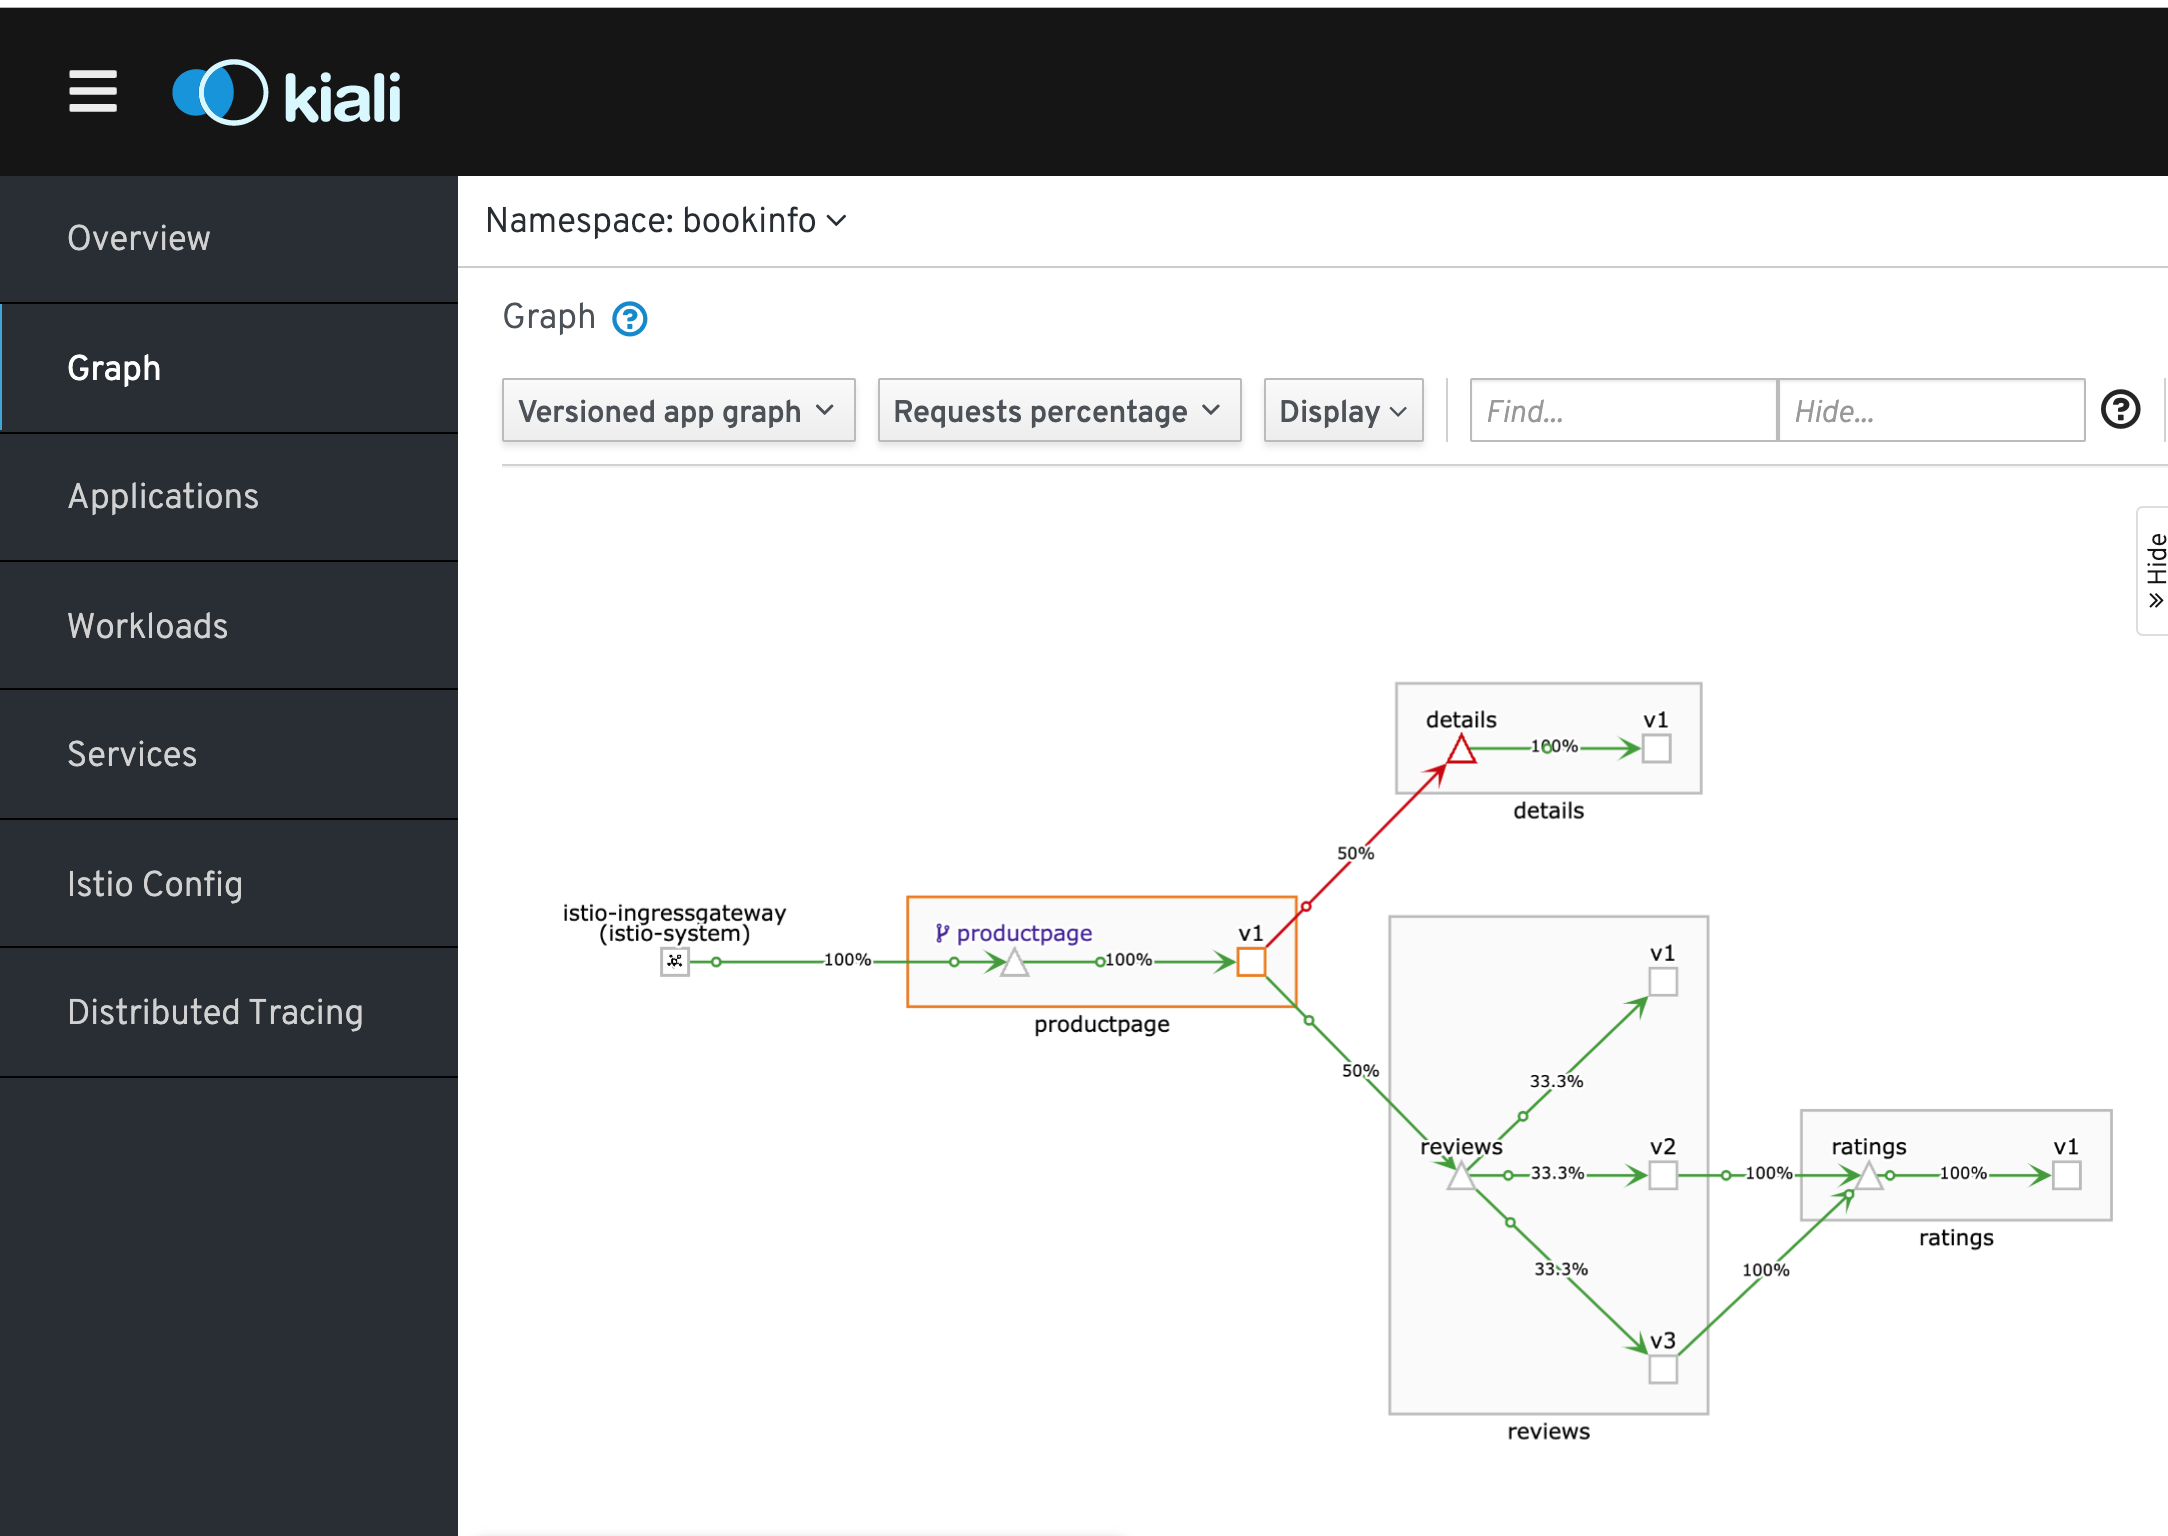
Now lets's move to our topology visualisation tool - Kiali. Navigate to: Istio-system -> Networking -> Routes -> and open the Kiali route (use your OpenShift Admin credentials)

Once logged into Kiali:
- choose namespace: bookinfo
- left hand side: Graph
- Top
- versioned app
- Requests %
- Display Traffic Animation
- Select every 15 seconds - last 1 or 5 minutes
Now let's start to apply traffic control. First, apply version 1 of everything. We do this with virtual services. A virtual service defines a set of traffic routing rules to apply when a host is addressed. This includes the service version ( in our case version 1 of all services ) So let's apply this
oc apply -f https://raw.githubusercontent.com/istio/istio/master/samples/bookinfo/networking/virtual-service-all-v1.yaml
Let's hit the webpage maybe 10 times. We'll only see version 1 of Reviews, with no stars.
If we switch to Kiali we'll also only see traffic flowing to Reviews version 1.
Next, let's demonstrate how Service Mesh can distinguish individual users in its routing decisions. This can be useful for Canary releases - where we only want to release a particular version to a particular group of users.
First let's apply that rule
oc replace -f https://raw.githubusercontent.com/istio/istio/master/samples/bookinfo/networking/virtual-service-reviews-jason-v2-v3.yaml
Login as with credentials jason/jason. Refresh the webpage several times. You'll only see version 2 black stars. Then logout. You'll only see version 3 red stars.
After a couple minutes if we hit Kiali - it shows only version 2 and 3 as expected.
Now let's say we want to retire version 1 and we're still not sure about whether we want to proceed with version 2 or 3. So we're going to send 50% to both, regeardless of who's logged in:
oc replace -f https://raw.githubusercontent.com/istio/istio/master/samples/bookinfo/networking/virtual-service-reviews-v2-v3.yaml
Refresh the webpage repeatedly. We see half the results show red and half with black stars as expected.
Now let's say we're happy with version 3 and we want to roll it out to 100% of traffic. Let's go ahead and do that:
oc replace -f https://raw.githubusercontent.com/istio/istio/master/samples/bookinfo/networking/virtual-service-reviews-v3.yaml
First hit the webpage repeatedly to verify. Then couple of minutes later, you'll see Kiali reflecting this.
Finally let's demonstrate another feature of Service Mesh - Fault Injection. Netflix famously have a chaos monkey - that randomly just kills nodes and applications. In service mesh we can do this also - to ensure your system recovers from faults. So we'll apply a fault injection - on our details microservice to always return an error - a HTTP status of 555. Let's apply this:
oc apply -f https://raw.githubusercontent.com/istio/istio/master/samples/bookinfo/networking/fault-injection-details-v1.yaml
Refresh webpage repeatedly. We can see details on the left is always returning an error. A couple of minutes later we can see Kiali also representing this as an error:
So this has been a demo on installing and using OpenShift Service Mesh - based on the upstream Istio project. We've only scratched the surface on what's possible - but hopefully you get a glimpse of its powerful traffic control and visualisation capabilities.
For a video recording of this demo - see https://youtu.be/D0qzyKc8mns
