In this exercise, the goal is to apply as many as possible of the concepts you've just learned:
- when and how to setup react in your application,
- ways of using react.
- Fork this repo
- Clone this repo
Whenever you create a first significant change, you should make your first commit.
- Follow these guidelines to add, commit and push changes.
In this exercise, you will try to setup the react application. As you can see react is a javascript library to create super cool reusable UI. Our goal is to understand the ways in which you can include react to your application.
We will divide our work into three parts:
-
part I - Include react library in your html file
-
part II - Use JSX and babel compiler
-
Part III - CREATE REACT APP
So let's get started!
Your task in this iteration is just to finish the react setup. To do this, let's use the same html file what we created and create a div with an id called react container. You have included the react libraries to your javascript file. But we have to include our react element to your index.html. To do this create a file called app.js and include it in your html file.
<body>
    <!-- Create a div to setup a react container -->
   <div id="react-container"></div>

    <!-- Load the React Library  -->
    <!-- React and React DOM -->
    <script src="https://unpkg.com/react@16/umd/react.development.js" crossorigin></script>
    <script src="https://unpkg.com/react-dom@16/umd/react-dom.development.js" crossorigin></script>

   <!-- Include the react element -->
    <script src="./app.js"></script>
</body>
You're ready to move to the next iteration. 🙌
Your task in this iteration is to check whether you have successfully setup react in your application. To do it inside the app.js, get the div tag like how you get the element using it's id.
const container = document.getElementById('react-container');
Now the most important step, How to make a difference between Javascript and React. ReactDOM is the place where you render the output. Now how to render using ReactDOM. Kindly look into the code snippet given below.
ReactDOM.render("Hello! Welcome to React",container);
If you do the above, you need to get an output similar to this.

If you get the above output, you can ensure that the react is completely setup in your system.
The component can be a functional component or class component. Now before moving to the class component let us try to use the same example given above and try to convert it as a functional component.
This is going to be our output.

To get the above it is quite simple. Check the code snippet given below. There is no modification required in the index.html. React.createElement has three attributes (component,props,children) Component can be a react component - reusable piece of UI. Props are properties of the component or element. children can be a nested component or html element.
In the below code when you check the react element it has a div tag followed by null and a string called Hey Kalvians! Welcome to React Learning. The div tag refers to the component. null refers to the property and the statement is the children. When you inspect the element you can see a output similar to this. The next div tag is the children.
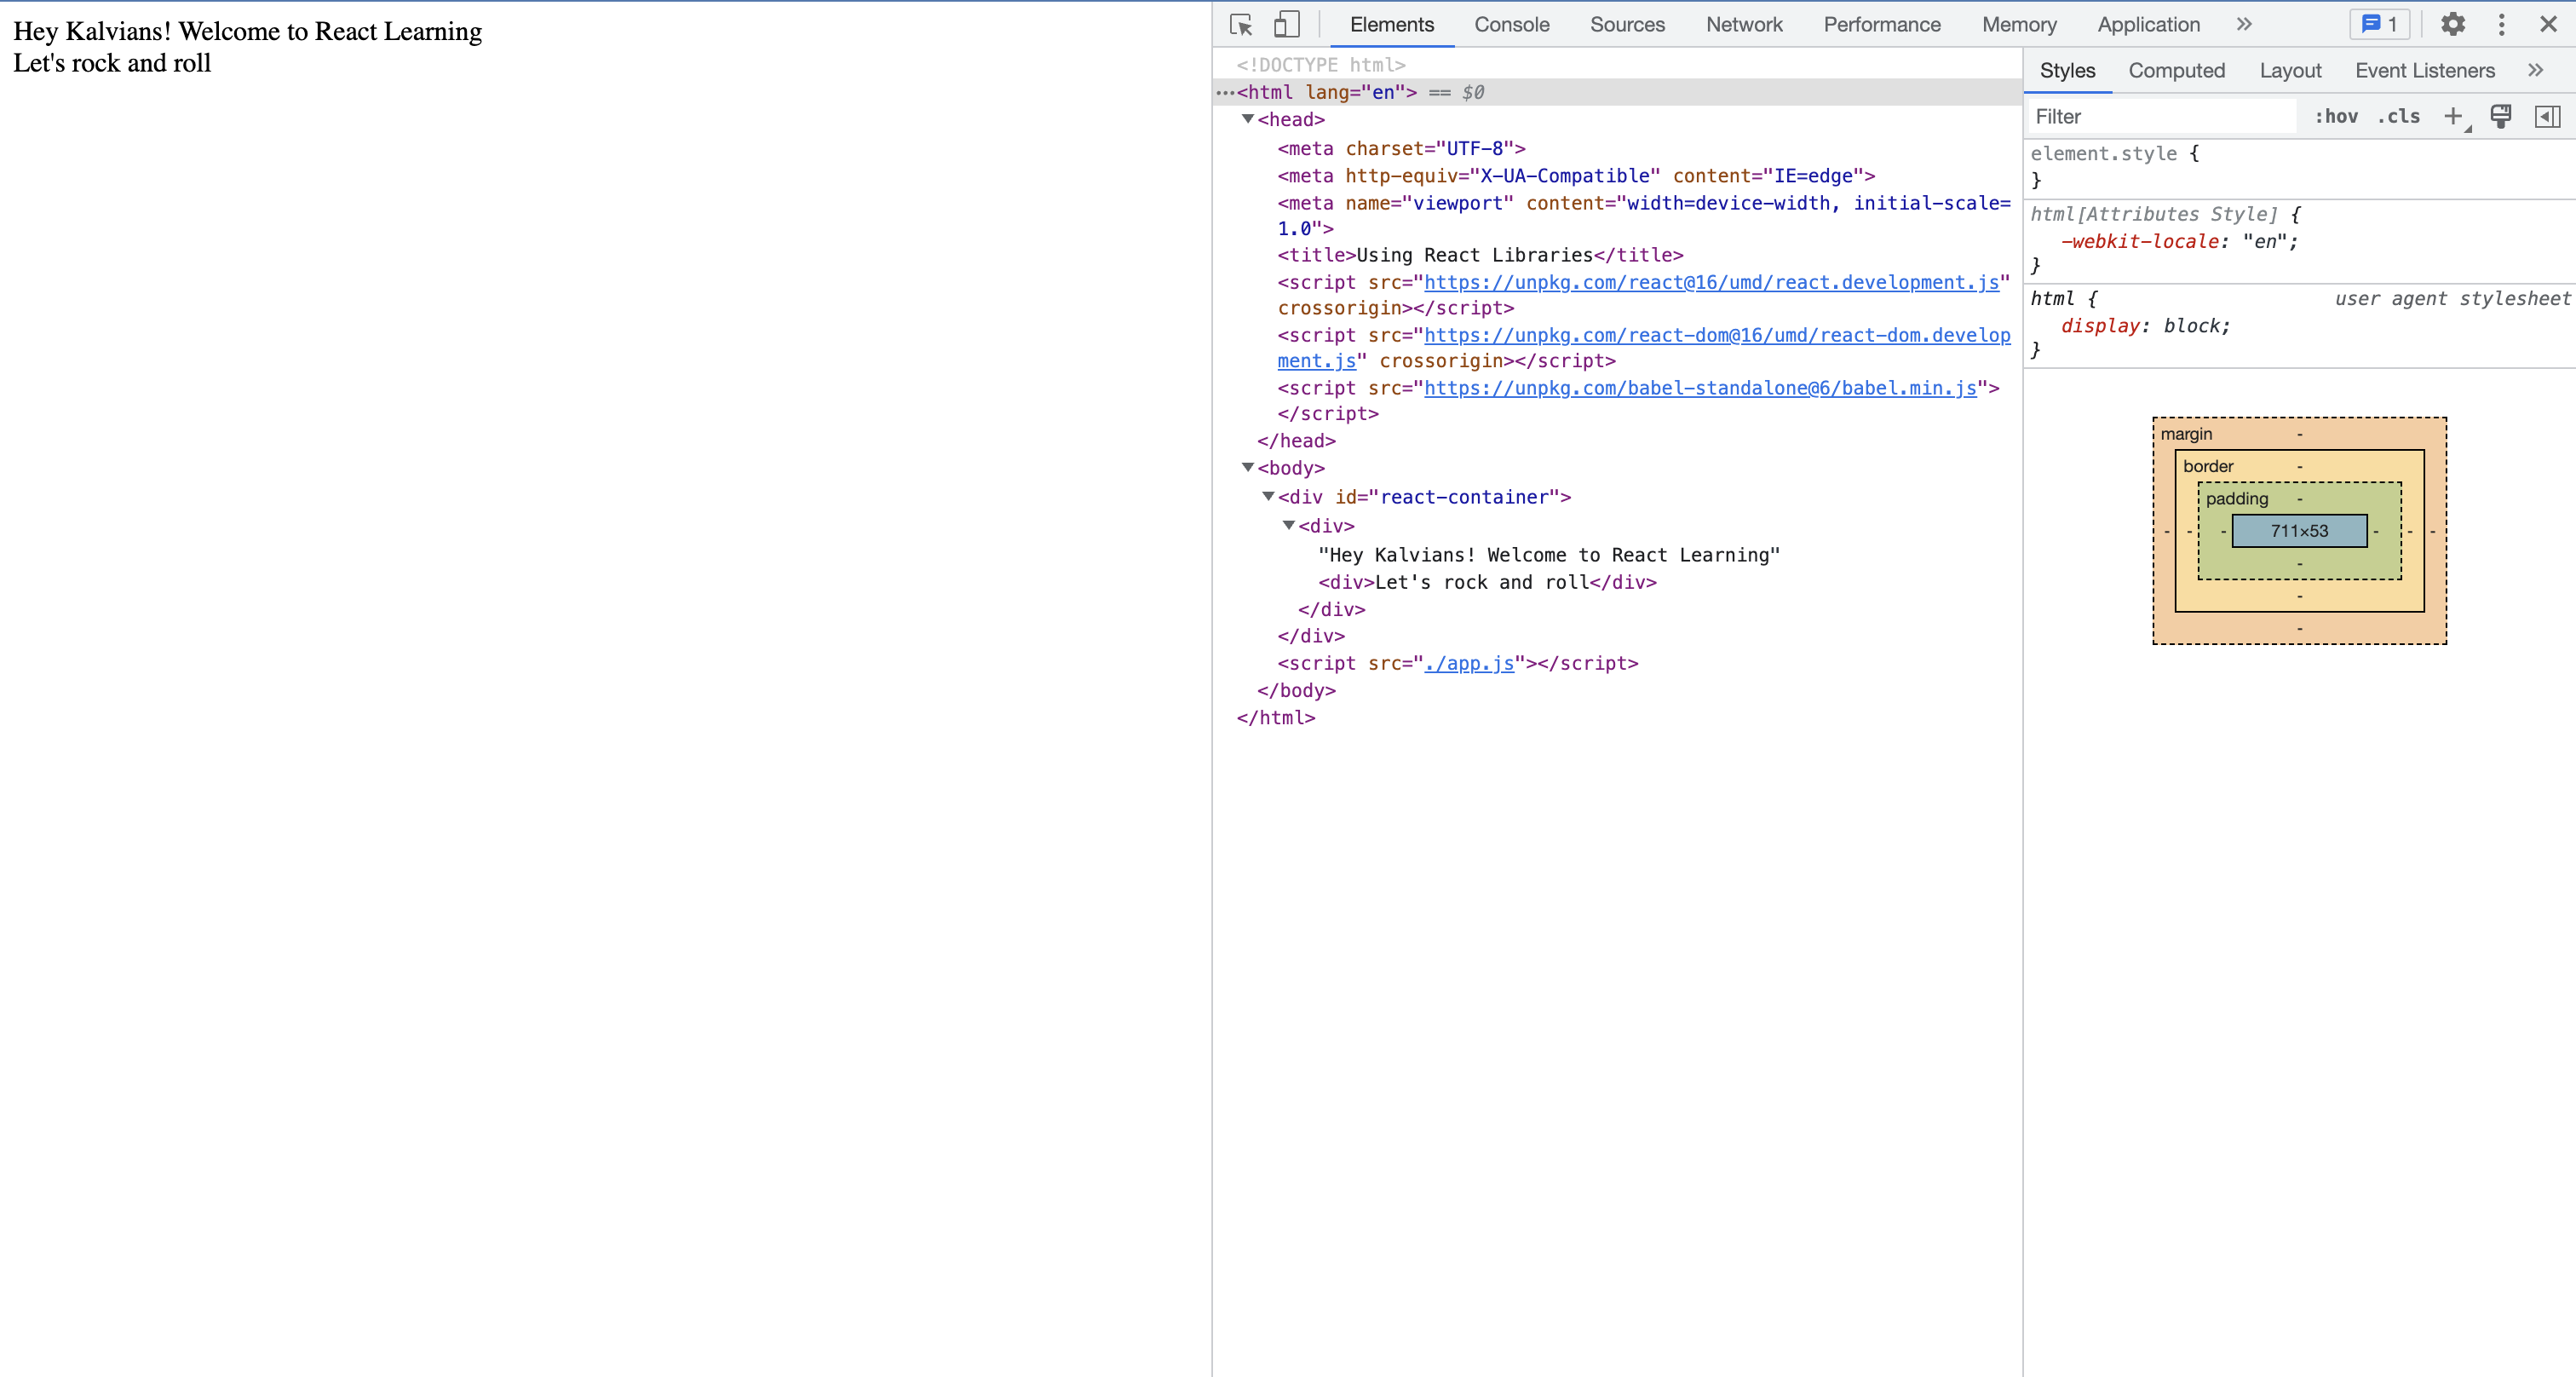
// Functional component
const Container = () =>{
    return React.createElement(`div`,null,`Hey Kalvians! Welcome to React Learning`,
       React.createElement(`div`,null,`Let's rock and roll`)
       );
}
// Render the Container
const container = document.getElementById('react-container');
ReactDOM.render(React.createElement(Container),container);
Now in this iteration we will try working with the class component. To define a class component. We are going to replicate the same output what we got in function component. Check the code snippet below. Replace the above code instead of functional components and you can see that it should print
Hey Kalvians Let's rock and roll
class ReactContainer extends React.Component{
  // constructor - to initialize the state

  // render method to render the react dom
    render(){
        return React.createElement(`div`,null,`Hey Kalvians`,
        React.createElement(`div`,null,`Let's rock and roll with classes`)
        );
    }

}
const container = document.getElementById('react-container');
ReactDOM.render(React.createElement(ReactContainer),container);

You're ready to move to the next iteration. 🙌
In the progressions above, we only relied on features that are natively supported by the browsers. This is why we used a JavaScript function call to tell React what to display: However, React also offers an option to use JSX instead.JSX stands for Javascript XML,
So far whatever we have used we did it directly without the use of Babel compiler. Babel is a very powerful javascript complier which converts react script to Browser acceptable Javascript. As you have learnt that react uses virtual dom and babel helps to transpile to browser javascript.
The quickest way to try JSX in your project is to add this <script> tag to your page:
    <!-- Include babel compiler -->
    <script src="https://unpkg.com/babel-standalone@6/babel.min.js"></script>
Now you can use JSX in any <script> tag by adding type="text/babel" attribute to it.
    class ReactContainer extends React.Component{
    // JSX tags
    // JSX there should be one parent element
      render(){
          return (
          <div>Hello! Welcome to Kalvium
             <div>This is babel</div>
         </div> )
      };
  }

const container = document.getElementById('react-container');
// Direclty pass the component to render
ReactDOM.render(<ReactContainer/>,container);
Your output should look something like this:

Isn't the above one so easy. So instead of too many React.createElement you can use JSX which is super cool to use.
This is a project aimed at getting you up to speed with React in no time. It provides a ready-made React application starter, so you can dive into building your app without having to deal with Webpack and Babel configurations.
It provides out of the box:
I. A development server with hot reloading
II. Provides a testing environment with Jest
III. Allows to build the React app
IV. Ready for ES6+ syntax
V. Bundles all your JavaScript and assets
VI. Comes with CSS autoprefixer, SASS and CSS Modules support
When you run npm create vite@latest <app-name>, npm is going to download the most recent release, run it, and then remove it from your system. This is great because you will never have an outdated version on your system, and every time you run it, you’re getting the latest and greatest code available.
To create the app :
npm create vite@latest <your-react-app-name>
Then choose react framework and then javascript option and enter.
To run it open the console and go to the application directory
cd your-react-app-name
, and just type
npm run dev
Your task is to display hello Kalvium --> using this method.
For each part - create a new repository and share your GitHub links as instructed in assignment.
In this exercise, you've learnt various ways of setting up react in your system. If you managed to do it, good job! 🏆
This concludes the React setup. We are proud of you!
Happy Coding ❤️!
