Estimated reading time: 7 minutes
The guide is aimed to give a reader common knowledge about using Docker and Gitlab CI/CD for Django project deployment.
Default demo-project contains: Django + PostgreSQL + Celery + RabbitMQ + nginx
Docker, Docker-Compose and GitLab CI/CD are also used for the project continuous delivery.
Create a blank GitLab project,
push your project from local machine to GitLab. After that you will probably get something like that

For the guide I will use following project URL:
https://gitlab.com/your_username/your_project_name/
You have to replace your_username and your_project_name in the source code to make it work.
Source file: Dockerfile
The second step is creating a Django & Celery image. A Docker image is a file, comprised of multiple layers,
used to execute code in a Docker container. A Docker image is described in Dockerfile by default. The most interesting commands is:
FROM python:3.6creates a layer from the python:3.6 Docker image. You can use other versions of Python (3.5, 3.4, 2.7, ...)RUN pip3 install -r ${APP_ROOT}/requirements.txtinstalls Python dependenciesCMD ['python3 manage.py collectstatic --noinput', '&&', '/bin/sh','-c','python manage.py runserver']is used to set a default command for the image. However it will be over-written by a Docker-compose file.
Source file: docker-compose.yml
Using Docker-Compose is the one of the most easiest way to orchestrate all containers.
For each part of the project you must create an image, there are images which described in docker-compose.yml:
nginxpulls an image from Docker Hub. The volume section overrides a default nginx config with thedevops/nginx.confwebis the main Django application's service that uses a Docker image created in the Docker chapterpostgresservice. Using all default settingsrabbitusesrabbitmq:3.7-managementwhich automatically run RabbitMQ admin web interfaceceleryservice also using an previously createdDockerfile
Source file: .env
A module called envparse will be used to export environment variables.
First of all, add it to requirements.txt. Then create .env at the root of the project:
POSTGRES_DB=postgres
POSTGRES_USER=postgres
POSTGRES_PASSWORD=postgres
POSTGRES_HOST=postgres
POSTGRES_PORT=5432
CELERY_BROKER_URL=amqp://rabbitmq:rabbitmq@rabbit:5672/
DJANGO_SETTINGS_MODULE=conf.settings
Source file: .gitlab-ci.yml
For the education purposes .gitlab-ci.yml contains only 2 basic steps:
buildstep builds Django application image and push it to a private registry. Substitute a registry URL by your own link.deploystep logins to a server via ssh and pulls changes from registry
The deploy step uses a devops/deploy.sh file. You have to change it: replace 47.47.47.47 to your remote address IP
and replace registry URL:
docker pull registry.gitlab.com/your_username/your_project_name:latest
Push all new files and directories (Dockerfile, docker-compose.yml, .gitlab-ci.yml, devops/) to the branch master.
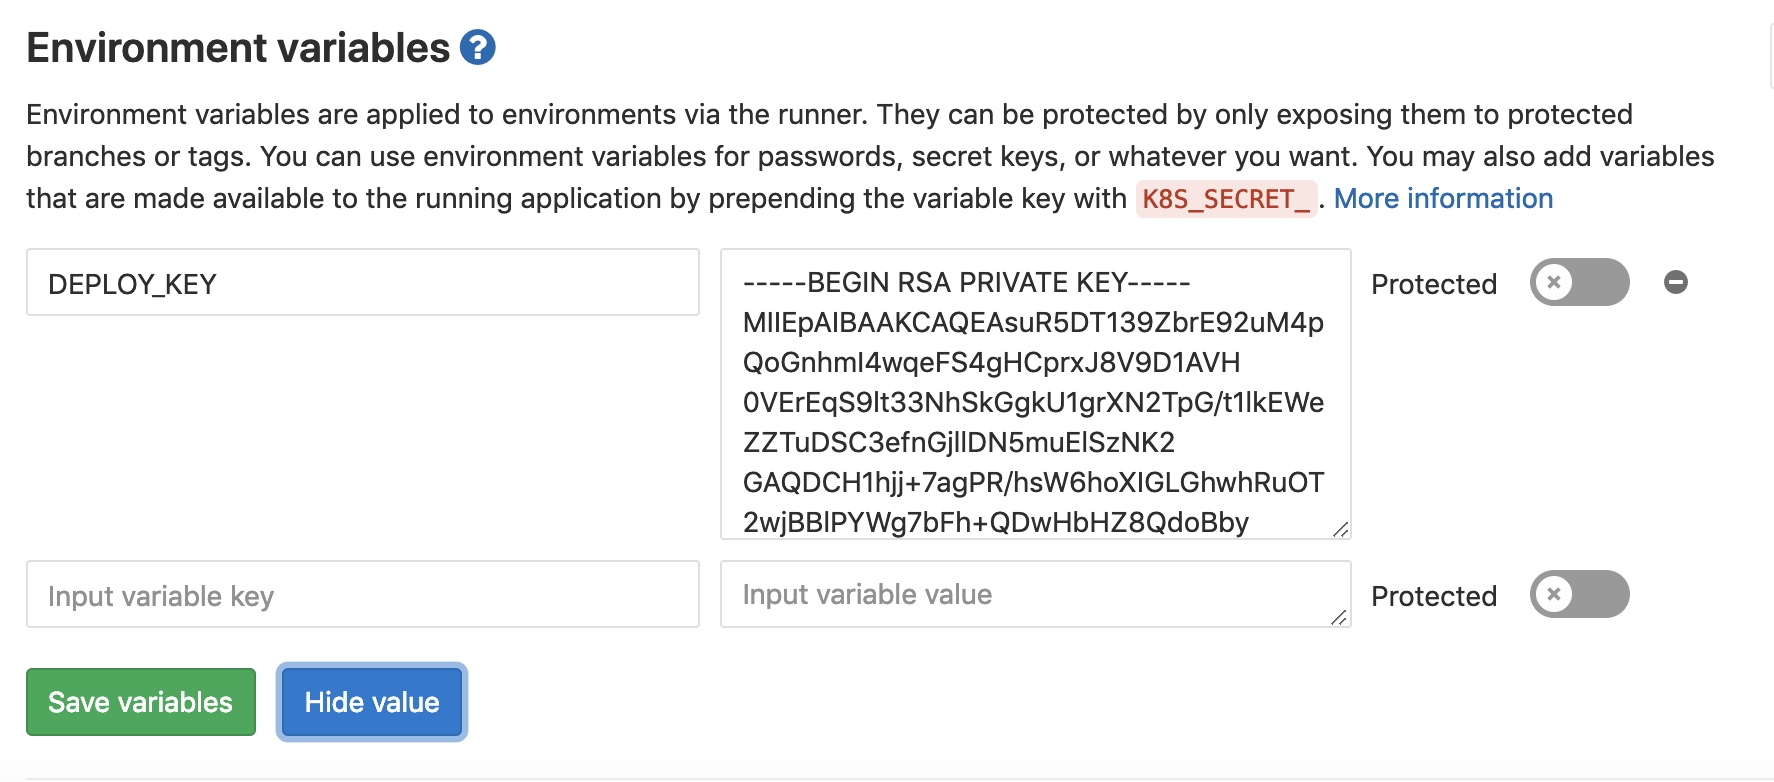
Locally run a command ssh-keygen -t rsa, it will prompt you to enter passphrase - leave it blank.
The command generates two files with two keys: public and private.
Copy the public key to your server ~/.ssh/authorized_keys file.
Also you must to set a CI/CD environment variable called DEPLOY_KEY to your private key.
Go to GitLab project page - Settings - CI / CD - Environment variables and create a variable
Log in the remote server via ssh and clone a project at the root:
git clone https://gitlab.com/your_username/your_project_name.git
Or create an issue to make me now that the guide has a mistake
