Coder Social home page Coder Social logo

tttapa / midi_controller Goto Github PK

View Code? Open in Web Editor NEW
396.0 53.0 68.0 529 KB

This is a library for creating a MIDI controller using an Arduino or Teensy board.

License: GNU General Public License v3.0

C++ 96.57% Shell 1.80% C 1.63%
midi-controller arduino midi teensy potentiometer button arduino-midi usb-midi

midi_controller's Introduction

MIDI controller

This is a library for creating a MIDI controller using an Arduino board.
It enables you to easily create MIDI controllers or instruments with very few lines of code. It supports digital inputs, like pushbuttons and switches, analog inputs, like faders, potentiometers, light sensors, and rotary encoders, like jogwheels. The library works on pretty much all Arduino and Teensy boards, like the Arduino Uno, Mega, Zero, Due, Leonardo, Micro, Teensy 3.2, ...

It uses a MIDI-over-USB connection to connect to your computer, and can be used in your favourite DJ or DAW software.

Control Surface

The MIDI Controller library has been obsoleted by its successor, the Control Surface library.

It has more features, a better architecture, unit tests, continuous integration, clearer documentation, support for more and newer Arduino boards, etc.
It adds support for MIDI input, SysEx, the Mackie Control Universal protocol, VU meters, LEDs, OLED displays, audio over USB, MIDI over Bluetooth, MIDI routing ...

https://github.com/tttapa/Control-Surface


Support

I no longer offer support for the MIDI Controller library, and I won't be adding any new features.
For new projects, it is highly recommended to use the Control Surface library instead of the MIDI Controller library.
Control Surface is well-supported, and new features are added regularly. It completely replaces MIDI Controller.
If you need help porting your existing MIDI Controller project to Control Surface, feel free to open an issue.

Download

Download the latest stable version here.
Please read the installation instructions first.

Features

Analog inputs

The library can take input from a variety of analog devices, such as variable resistors, potentiometers, linear faders, light sensors ...
It filters the inputs and applies hysteresis, to get smooth transitions and to reduce noise.
You have full control over the value mapping, control curves, and the range of the inputs.
Accuracy up to 10 bits supported using pitch bend events.

Analog inputs can be mapped to controls like volume, balance, effect parameters, EQ ...

Digital inputs

The library can be used with a wide range of digital inputs as well, like pushbuttons, latching switches, footswitches ...
Buttons are debounced and can be inverted if necessary.

Digital inputs can be mapped to controls like transport control (play/pause/stop/cue/... buttons), mute/solo/rec buttons, effect enable/disable, looping options, sample triggers ...

Button matrices

There is support for matrices of buttons as well. This allows you to use a very large number of buttons with only a limited number of IO pins.
Just like with Digital inputs, these buttons can be mapped to controls like transport control (play/pause/stop/cue/... buttons), mute/solo/rec buttons, effect enable/disable, looping options, sample triggers ...

Rotary encoders

Another way to input continuous values is by using rotary encoders or jog wheels. Unlike potentiometers, they can turn indefinitely, and allow for more precise controls.
The library has many settings for accuracy and speed.
Different MIDI modes are available for compatibility with a huge range of music production, DJ or DAW software.

Rotary encoders can be mapped to controls like volume, balance, effect parameters, EQ, jog wheels, timeline scrolling, library scrolling ...

MIDI over USB

The library will automatically detect what kind of Arduino-compatible board you are using, and it will use the USB connection for MIDI communication (if available). This means that you can just plug it into your computer or tablet (PC, Mac, Linux, iOS, Android ...), it will be automatically detected as a MIDI device, and you can start playing right away.
If your board doesn't support MIDI over USB, it will default to the Serial USB interface. More information on the MIDI over USB Wiki page.

For maximum flexibility, you can use the MIDI functions to send your own custom MIDI events, without having to worry about compatibility issues between different boards.
The debug mode allows you to print the MIDI events in the serial monitor for easier developing, testing and debugging.
MIDI interfaces on hardware serial ports as well as SoftwareSerial ports are supported as well, to use the controller with MIDI devices that use a 5-pin DIN MIDI connector.

Extended IO

Use analog multiplexers and shift registers to save IO pins. Using the Extended IO classes and the ExtIO namespace, you can treat them as if they were normal input/output pins, without having to worry about the actual implementation.

New in version 3.1.0

  • Improved filtering
  • Header-only rotary encoder classes to remove Encoder.h dependency

New in version 3.0.0

  • Completely reworked library structure
  • Added more MIDI interface options
  • Added ButtonMatrix control element
  • Added debounce for buttons
  • Automatically average analog inputs
  • Added Bank and BankSelector classes instead of bank() method per class
  • Added files containing constants to use Control Change controller names instead of magic numbers
  • Automatically refresh all MIDI Control elements at once
  • Added support for analog multiplexers and shift registers using Extended IO classes

New in version 2.1.0

  • Cleaner and more efficient code
  • Bank functionality for rotary encoders
  • Minor bug fixes

New in version 2.0.0

  • Easier access to debug mode using USBMidiController.begin(baud, true);
  • More examples
  • Minor bug fixes

Installation

Installing the MIDI_controller library

To install this library, download the latest version as a .ZIP file. Then open the Arduino IDE, go to Sketch > Include Library > Add .ZIP library, and open the .ZIP file you just downloaded.

Dependencies

The MIDI_controller library depends on the PJRC Encoder library for using rotary encoders and jog wheels. Download the .ZIP library from GitHub and install it.

If you are using an Arduino with native USB support, like the Leonardo, Due, Zero, Micro ... you'll need to install the MIDIUSB library. Install it using the Arduino IDE's library manager (Sketch > Include Library > Manage Libraries). Search for 'MIDIUSB', and install it. Alternatively, download the .ZIP library from GitHub and install it.

If you're using a Teensy board, you have to install the Arduino core for Teensy (aka Teensyduino). Download it here, if you haven't already.

Installing Atmel Flip or DFU-programmer (Uno and Mega only)

The Arduino Uno and Mega don't have native USB support, so they need extra firmware to be installed to the USB-to-Serial chip in order to work as a MIDI device. To flash this firmware, you have to install a DFU programmer. On Windows, you can use Atmel Flip. On OSX and Linux, install dfu-programmer.
Windows: Download and install Atmel Flip:

  1. Download the latest Java Runtime Environment from the Java site.
  2. Run the java installer.
  3. Click 'install'.
  4. Close the installer when finished.
  5. Download 'Flip' from the Atmel site.
  6. Run the installer.
  7. Click 'next'.
  8. Accept the terms in the License agreement and click 'next'.
  9. Click 'next'.
  10. Click 'install'.
  11. Click 'next' when completed.
  12. Click 'finished'.

Mac:
sudo port install dfu-programmer

Linux:
sudo apt-get install dfu-programmer

More information can be found here.


Using the library

Arduino boards with native USB support

Open one of the example sketches, connect your Arduino, select the right port from the Tools menu, and hit upload.

Teensy boards

Open one of the example sketches, connect your Teensy, select the right port from the Tools menu, select 'MIDI' (or 'Serial + MIDI') as the USB type, and hit upload.

Arduino Uno or Mega

Open one of the example sketches, connect your Arduino, select the right port from the Tools menu, and hit upload. When the upload is complete, take a ballpoint pen (or anything conductive) and reset the ATmega16U2 by connecting the reset pin of the 6-pin ISP header (next to the USB connector) to ground, as shown in the following picture. DFU-resetting the ATmega16U2

Windows

Install the drivers for the ATmega16U2:

  1. Make sure you have reset the ATmega16U2 to put it in DFU mode (Device Firmware Update). Read more here.
  2. Go to the Control Panel in Windows. Click 'Hardware and Sound'.
  3. Under 'Devices and Printers', click 'Device Manager'.
  4. In Device Manager, there is a category 'Other devices'. In this category, there should be something like 'Arduino Uno DFU' or 'ATmega16U2 DFU'. Right click the device, and select 'Update Driver Software'.
  5. Choose 'Browse my computer for driver software'
  6. Then hit 'Browse...' and browse to C:\Program Files\Atmel\Flip 3.4.7\usb in the new window.
  7. Make sure 'Include subfolders' is checked, then click 'Next'.
  8. In the Windows Security window that pops up, click 'Install'.
  9. You should get a notification that Windows has successfully updated the driver software for 'AT90USB162'.

Download the ATmega16U2 firmware:

  1. Download the Arduino firmware from the Arduino GitHub page: Arduino-usbserial-atmega16u2-Uno-Rev3.hex or Arduino-usbserial-atmega16u2-Mega2560-Rev3.hex
  2. Download Dimitri Diakopoulos's HIDUINO firmware from his GitHub page: arduino_midi.hex

Flash the MIDI firmware:

  1. Open the Flip software.
  2. Hit CTRL+S to select a device, choose 'ATmega16U2', and click 'OK'.
  3. Hit CTRL+U, and click 'Open' to open the USB connection.
  4. Hit CTRL+L to load a HEX file.
  5. Browse to your Downloads folder and load the 'arduino_midi.hex' file you just downloaded.
  6. Make sure all 4 boxes on the left hand side are checked, and click 'Run'.
  7. Once this is finished, you can unplug the Arduino. Now it is no longer in DFU mode.
  8. Go back to the Device Manager, and check if the Arduino shows up as a MIDI device, under 'Sound, video and game controllers'.
  9. Now your Arduino is a working MIDI controller!
  10. To upload a new program, just repeat these same steps again, but use the Arduino firmware you downloaded previously.

OSX

==TODO==
(probably just transcoding the Linux Bash scripts to OSX Bash)

Linux

Go to the folder where you installed this library (usually ~/Arduino/libraries/MIDI_controller) and go to 'DFU scripts/Linux' and open it in a terminal. Then allow execution of the scripts:
chmod +x *

And run the script to flash the MIDI firmware:
./MIDI*
Type 'y' to confirm, and enter your root password if necessary. The script will download and install the firmware to the Arduino. When the script is finished, unplug the Arduino and plug it back in: your computer should now recognize it as a MIDI device.

Now that the MIDI firmware is running on the USB-to-Serial converter, you can't upload new sketches to the Arduino. To upload a new sketch, install the Arduino Serial firmware again: put the Arduino into DFU mode again, by connecting the reset pin to ground, and run the second script in the 'DFU scripts/Linux' folder:
./Serial*
This script will download the Arduino Serial firmware and install it to the Arduino. When it's finished, unplug the Arduino, plug it back in, and upload your new sketch.
Then you can install the MIDI firmware again.

MIDI over USB

Read more on how different boards use differents methods to send MIDI over USB in the Wiki.

Documentation

You can find the entire library documentation with a description of all available functions in the Wiki.

Hardware

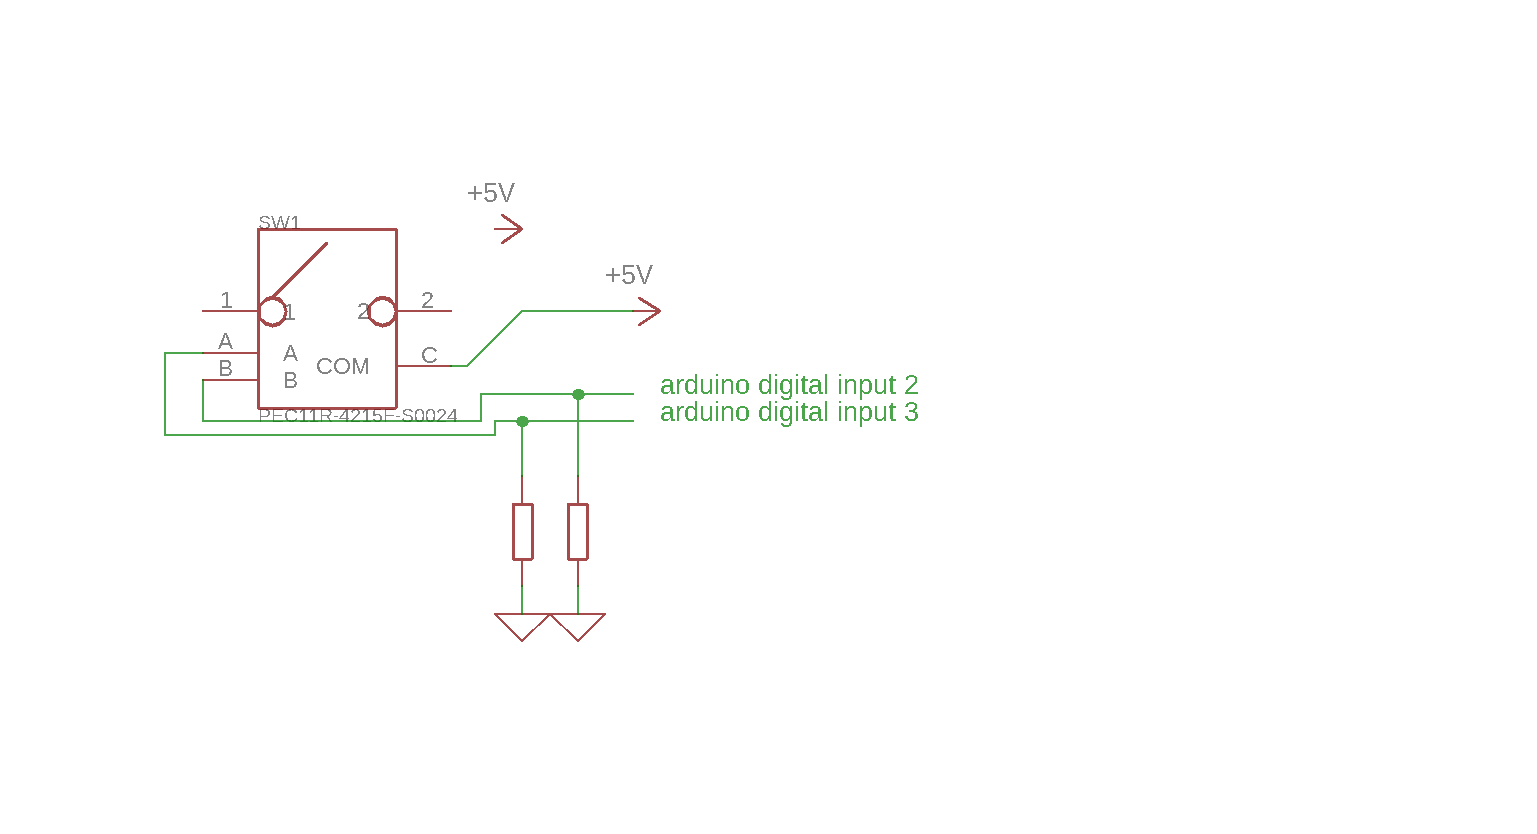
In the Wiki, you can also find a page that explains how to connect the hardware, like pusbuttons, potentiometers and rotary encoders.

Examples

The library includes a whole lot of example sketches that demonstrate the usage of the library. You can find them under File > Examples > Examples from custom libraries > MIDI Controller or in the examples folder on GitHub.

Tested boards

I have tested this library with an Arduino Uno, an Arduino Leonardo and a Teensy 3.2.
Other users have successfully used the library with an Arduino Mega 2560 and an Arduino Micro.

Boards that use an FTDI USB-to-Serial chip (like the Nano and some older boards) do not support MIDI over USB, but can still use Serial MIDI.

If you try this library with a different board, please let me know whether it works or not. If it doesn't, please open an issue. Thanks!

midi_controller's People

Contributors

per1234 avatar tttapa avatar

Stargazers

 avatar  avatar  avatar  avatar  avatar  avatar  avatar  avatar  avatar  avatar  avatar  avatar  avatar  avatar  avatar  avatar  avatar  avatar  avatar  avatar  avatar  avatar  avatar  avatar  avatar  avatar  avatar  avatar  avatar  avatar  avatar  avatar  avatar  avatar  avatar  avatar  avatar  avatar  avatar  avatar  avatar  avatar  avatar  avatar  avatar  avatar  avatar  avatar  avatar  avatar  avatar  avatar  avatar  avatar  avatar  avatar  avatar  avatar  avatar  avatar  avatar  avatar  avatar  avatar  avatar  avatar  avatar  avatar  avatar  avatar  avatar  avatar  avatar  avatar  avatar  avatar  avatar  avatar  avatar  avatar  avatar  avatar  avatar  avatar  avatar  avatar  avatar  avatar  avatar  avatar  avatar  avatar  avatar  avatar  avatar  avatar  avatar  avatar  avatar  avatar

Watchers

 avatar  avatar  avatar  avatar  avatar  avatar  avatar  avatar  avatar  avatar  avatar  avatar  avatar  avatar  avatar  avatar  avatar  avatar  avatar  avatar  avatar  avatar  avatar  avatar  avatar  avatar  avatar  avatar  avatar  avatar  avatar  avatar  avatar  avatar  avatar  avatar  avatar  avatar  avatar  avatar  avatar  avatar  avatar  avatar  avatar  avatar  avatar  avatar  avatar  avatar  avatar  avatar  avatar

midi_controller's Issues

Digital buttons to MIDI CC

In some cases it is necessary to assign a MIDI controller to a digital button, but in this library can only be assigned MIDI notes.
Is it possible to implement this function without having to connect buttons to the analog inputs?

Flashing back to serial - firmware not found

The script to flash Arduino back to serial F/W fails. Looks like the firmware image it is trying to download has moved

$ wget  "https://raw.githubusercontent.com/arduino/Arduino/master/hardware/arduino/avr/firmwares/atmegaxxu2/arduino-usbserial/Arduino-usbserial-atmega16u2-Uno-Rev3.hex"
--2018-06-28 19:19:15--  https://raw.githubusercontent.com/arduino/Arduino/master/hardware/arduino/avr/firmwares/atmegaxxu2/arduino-usbserial/Arduino-usbserial-atmega16u2-Uno-Rev3.hex
Resolving raw.githubusercontent.com (raw.githubusercontent.com)... 151.101.52.133
Connecting to raw.githubusercontent.com (raw.githubusercontent.com)|151.101.52.133|:443... connected.
HTTP request sent, awaiting response... 404 Not Found
2018-06-28 19:19:17 ERROR 404: Not Found.

Is it looking for this....?
https://raw.githubusercontent.com/arduino/ArduinoCore-avr/master/firmwares/atmegaxxu2/UNO-dfu_and_usbserial_combined.hex

Mackie Protocol

I have a prototype for mackie protocol controller that has multiple encoders controlling the same V-Pot output (controller 0x10 -0x17) but in different modes. (V-Pot is just mackie's name for the 8 encoders on a mackie control and modes are changed with a midi note)

Library works great thanks. But I have to add a note on command before each of my encoders sends a CC, this works fine...except in JOG mode where the note commands overwhelm the CC.

So really I just want to send the note commad each time a NEW controller is touched not before each CC command.

I added a variable to the function like this in RotaryEncoder.cpp and RotaryEncoder.h

RotaryEncoder::RotaryEncoder(uint8_t pinA, uint8_t pinB, uint8_t controllerNumber, uint8_t channel, int speedMultiply, uint8_t pulsesPerStep, relativeCCmode mode, int mackieID)

Where MackieID is the note command that would normally change the V-Pot mode for the 8 encoders on a mackie control.

so I have this in RotaryEncoder.cpp:

value = enc.read();
void RotaryEncoder::refresh() // Check if the encoder position has changed since last time, if so, send the relative movement over MIDI
{
  long value = enc.read();
  long difference = (value - oldVal) / pulsesPerStep;   
  if (difference != 0)
    {
    USBMidiController.send(0x80, 1, mackieID, 127); // Send note to change the function of CCs 0x10 to 0x17 
    }

 while  (difference != 0)
   {
    if (difference > 15) // constrain relative movement to +/-15 for Mackie Control Universal compatibility
      difference = 15;
    if (difference < -15)
      difference = -15;
    uint8_t msgVal = mapRelativeCC(difference * speedMultiply, mode);
    if (bankEnabled && !digitalRead(bankPin))                        // if the bank mode is enabled, and the bank switch is in the 'alternative' position (i.e. if the switch is on (LOW))                                                                
      USBMidiController.send(CC, altChannel, altController, msgVal); // send a Control Change MIDI event with the 'alternative' channel and controller number
    else                                                             // if the bank mode is disabled, or the bank switch is in the normal position
      USBMidiController.send(CC, channel, controllerNumber, msgVal); // send a Control Change MIDI event with the normal, original channel and controller number
      oldVal += difference * pulsesPerStep; // If difference was in [-15, 15], difference * pulsesPerStep == value,
    // otherwise difference * pulsesPerStep == the value on the computer (after receiving the MIDI event above)
value = enc.read();
difference = (value - oldVal) / pulsesPerStep;
   }
}

I have tried adding another variable to store the lastSentMackieID either globally or for each instance of the RotaryEncoder class but can't seem to get it working. Any ideas would be greatly appreciated.

Compilation error

Hi,
I'm trying to use your projet for mine.

when I want to upload an exemple (Analog_array_exemple.ino), the arduino IDE display an error message :

Arduino : 1.8.3 (Mac OS X), Carte : "Arduino/Genuino Uno"

In file included from /Users/vjdobermann/Documents/Arduino/libraries/MIDI_controller-master/src/MIDI_controller.h:9:0,
                 from /Users/vjdobermann/Documents/Arduino/libraries/MIDI_controller-master/examples/Analog_array_example/Analog_array_example.ino:14:
/Users/vjdobermann/Documents/Arduino/libraries/MIDI_controller-master/src/RotaryEncoder.h:6:21: fatal error: Encoder.h: No such file or directory
 #include "Encoder.h"
                     ^
compilation terminated.
exit status 1
Erreur de compilation pour la carte Arduino/Genuino Uno

what does it means ?

Can I receive values over midi?

Can I receive values over MIDI?

Is there a way to receive MIDI values? As I can see in the examples, they all just send values over MIDI. But I can not find a example to receive values...

I want to have a kind of feedback. If my midi software changes a value, I want to receive this and light up some LEDs.
f.e. I want a LED-ring around my rotary encoder and want to highlight the current value.

Steps to reproduce the problem

Hardware

Arduino board: Arduino MEGA, Teensy 3.2

Software versions:

MIDI Controller library: 3.0.0

thanks for this library

Before opening a new issue, please read the installation instructions in the README. Also check if your question is answered in the Wiki or in a previous issue.
If you do create a new issue, please follow the template below.
--- (delete these first lines) ---

Description of the problem or question

no actual problem, I was having a lot of issues getting a midi controller up and running and this guide/library was pretty comprehensive to get a simple controller going. Just wanted to say thanks, sorry if this isn't the correct place for that, fairly new to github as well

Steps to reproduce the problem

Hardware

Arduino board: ? Arduino UNO, Arduino Leonardo, Arduino DUE, Arduino MEGA, Arduino Micro, Teensy 3.2, ... ?
Schematic: ?

Software versions:

MIDI Controller library: ? 3.0.0 ?
Arduino IDE: ? 1.8.4 ?
Operating System: ? Windows, OSX, Ubuntu, ... ?
Operating System version: ? 10, 16.04, ... ?
(Teensyduino): ? 1.39 ?
(Encoder library): ? 1.4.1 ?
(MIDIUSB library): ? 1.0.3 ?

Settings in the IDE

Full code

// Your code here

Steps taken to try to diagnose or solve the problem

? Tried the MIDI debug mode, used a MIDI monitor, ... ?

The goal of your project and aditional information

Cannot compile RotaryEncoder

When attempting to use "Single_potentiometer" within the IDE, the following error occurs:
In file included from /Users/username/Documents/Arduino/libraries/MIDI_controller-2.1.0/src/MIDI_controller.h:9:0, from /Users/username/Documents/Arduino/libraries/MIDI_controller-2.1.0/examples/Single_potentiometer/Single_potentiometer.ino:14: /Users/username/Documents/Arduino/libraries/MIDI_controller-2.1.0/src/RotaryEncoder.h:6:21: fatal error: Encoder.h: No such file or directory #include "Encoder.h" ^ compilation terminated.
https://github.com/tttapa/MIDI_controller/blob/master/src/RotaryEncoder.h#L6

Changing "Encoder.h" to "RotaryEncoder.h" matches the filename in the subdirectory, but then throws the following:
In file included from /Users/username/Documents/Arduino/libraries/MIDI_controller-2.1.0/src/MIDI_controller.h:9:0, from /Users/username/Documents/Arduino/libraries/MIDI_controller-2.1.0/examples/Single_potentiometer/Single_potentiometer.ino:14: /Users/username/Documents/Arduino/libraries/MIDI_controller-2.1.0/src/RotaryEncoder.h:45:3: error: 'Encoder' does not name a type Encoder enc; ^

Any suggestions?

Add LED on/off with MIDI send

Hello,
I've decided to use your great library in guitar foot controller for Guitar Rig 5 project.
May I ask how to turn on/off LED for momentary button during MIDI send? For example for Delay on/off or Reverb on/off. I button pressed, MIDI is send do Guitar Rig, LED is turned on. Press button again send MIDI and LED is turned off.

Regards
devwmbr

MIDI signals non-stop

I have sporadic behavior when I go to tinker daily on this project. My faders (10k fader pots) have stopped working all together, although at one time I was able to get a logarithmic response from them.

I have ordered a multimeter and will be testing my hardware, but is there any reason for this that could be software related? The following screenshot shows the flow of midi signals, never stopping.

capture_midi

I am using code mentioned in other issues I've opened:


/*
This is an example of the "Analog" class of the MIDI_controller library.
Connect a potentiometer to analog pin A0. This will be the MIDI channel volume of channel 1.
Map it in your DAW or DJ software.
Set 'minimumValue' to the analog value read when the potentiometer is in the minimum position.
Set 'maximumValue' to the analog value read when the potentiometer is in the maximum position.
Written by Pieter P, 20-09-2017
https://github.com/tttapa/MIDI_controller
*/

#include <MIDI_Controller.h> // Include the library

// Create a new instance of the class 'Analog', called 'potentiometer', on pin A0, 
// that sends MIDI messages with controller 7 (channel volume) on channel 1
Analog potentiometer_A(A0, MIDI_CC::Sound_Controller_1, 1);
Analog potentiometer_B(A1, MIDI_CC::Sound_Controller_2, 1);
Analog potentiometer_C(A2, MIDI_CC::Sound_Controller_3, 1);
Analog potentiometer_D(A3, MIDI_CC::Sound_Controller_4, 1);
Analog potentiometer_E(A4, MIDI_CC::Sound_Controller_5, 1);


void setup() {

}

void loop() {
  // Refresh the MIDI controller (check whether the potentiometer's input has changed since last time, if so, send the new value over MIDI)
  MIDI_Controller.refresh();
}

Update

I wired all inputs to the same pot (position 1 on my breadboard). All 5 messages were being received by MIDI-OX just fine. When I took the input for the second channel and put it to the second pot, the diarrhea began for that channel only. Same for the 3rd 4th and 5th. Any channel peeled off the first pot and put on its own pot become non-sense.

So I thought maybe I only have one good pot, since all the inputs on the arduino are fine. So I took the pot from position 2 and put it in position 1. I wired all the inputs to the output of this fader 2 in position 1 and they worked. I went down the line and they all worked in position 1.

I hope this makes sense. So this leads me believe 2 things. Unlikely, but is the code getting confused by having 5 unique inputs? Surely not. Another thing is maybe the wiring on my breadboard is wrong. There must be a configuration issue because each pot and each input on the arduino has proven it can work.

I have a 5v going straight to the +bus bar and GND going to the negative and have each pot's pins jumping directly to that busbar. This really has me baffled - because the wiring works but only on a seemingly arbitrary place on the breadboard! Can distance from the 5v terminal cause a problem?

Update 2

I took everything off the breadboard and rewired the 5 pots to their own channels.
Pots 1 2 & 3 were able to control their values but 4 and 5 (A3 and A4) were doing the diarrhea thing.
I took a jumper and went from the corner where the initial 5v jump point is on the breadboard over to the other side near 4 and 5 and the diarrhea stopped, however they do not control their inputs, but have gone silent. I am totally baffled.

Could the power supply be an issue? I can reliably operate the first three inputs, 4 and 5 are sporadic but if I gang them onto pot 1 I can control their inputs that way.

SainsMart MEGA 2560 strange behavior

I am using a SainSmart Mega 2560 ( https://www.sainsmart.com/sainsmart-mega2560-development-board-for-arduino.html ). The board is working fine at least on 3 other projects I tested. When I use this piece of code ( from your examples ):

#include <MIDI_controller.h>
const static byte velocity = 127;
const static int  latchTime = 100;
const static byte E0 = 16;

DigitalLatch switch1(2, E0,   1, velocity, latchTime);

void setup(){
  USBMidiController.blink(LED_BUILTIN);
  USBMidiController.setDelay(15);
  USBMidiController.begin();
  delay(1000);
}

void loop(){
  switch1.refresh();
}

The board keeps flooding the midi channel with a PitchBend command. Let me explain in depth what I am doing.

  1. Upload code to Mega with Arduino IDE.
  2. Enter DFU mode.
  3. Upload HIDUINO firmware with FLIP.

Am I doing something wrong here? The board is fine. As I mentioned earlier I tested it with 3 other projects ( none is related to midi though ) and it works fine. Arduino IDE identifies the board correctly as well. Verifying and compiling is done with no errors.

Thank you in advance for all your hard work to this project!
Kostas

errors with installation

Hey there, I followed every step in your install instruction and I get an error when
trying to update the drivers for ATmega16U2 which prevents me from updating the firmware.
I get "windows could not find the drivers for the device" every time I specify the path
c:/Windows/program files(x86)/ATMEL/FLIP 2.4.6/usb. I'm using Windows 10 64bit, latest MIDI version and an Arduino UNO.
I noticed your instructions use flip 3.4.7, I thought maybe I got the wrong version but as far
as I can tell, 2.4.6 is the latest flip version for Windows. I did lots of research and I can't seem
to find anyone else with this issue. Any ideas?

appleMIDI Ethernet

How to using this library with AppleMIDI Library? Im not to good In arduino stuff, I hope can help me trough it.

I dont know where to put the
"const uint8_t velocity = 0b1111111;
const uint8_t C4 = 60; "

and

"Digital button(2, C4, 1, velocity);"

and

"MIDI_Controller.refresh();"

Im using Arduino Uno with Ethernet Shield

Library version 3.0.1 and AppleMIDI

Please dont judge or laugh because my stupid code I made

#include <MIDI_Controller.h>

#include <Ethernet.h>

#include "AppleMidi.h"

// Enter a MAC address for your controller below.
// Newer Ethernet shields have a MAC address printed on a sticker on the shield
byte mac[] = {
  0xDE, 0xAD, 0xBE, 0xEF, 0xFE, 0xED
};

unsigned long t0 = millis();
bool isConnected = false;

APPLEMIDI_CREATE_DEFAULT_INSTANCE(); // see definition in AppleMidi_Defs.h

// Code size:
//
// IDE 1.8.3
//
// Arduino Ethernet / Uno
// Sketch uses 23976 bytes (74%) of program storage space. Maximum is 32256 bytes.
// Global variables use 969 bytes (47%) of dynamic memory, leaving 1079 bytes for local variables. Maximum is 2048 bytes.
const uint8_t velocity = 0b1111111; // Maximum velocity (0b1111111 = 0x7F = 127)
const uint8_t C4 = 60;              // Note number 60 is defined as middle C in the MIDI specification
Digital button(2, C4, 1, velocity);
 
void setup()
{
  // Serial communications and wait for port to open:
  Serial.begin(115200);
  while (!Serial) {
    ; // wait for serial port to connect. Needed for Leonardo only
  }

  Serial.print(F("Getting IP address..."));

  if (Ethernet.begin(mac) == 0) {
    Serial.println();
    Serial.println(F("Failed DHCP, check network cable & reboot"));
    for (;;)
      ;
  }

  Serial.println();
  Serial.print(F("IP address is "));
  Serial.println(Ethernet.localIP());

  Serial.println(F("OK, now make sure you an rtpMIDI session that is Enabled"));
  Serial.print(F("Add device named Arduino with Host/Port "));
  Serial.print(Ethernet.localIP());
  Serial.println(F(":5004"));
  Serial.println(F("Then press the Connect button"));
  Serial.println(F("Then open a MIDI listener (eg MIDI-OX) and monitor incoming notes"));

  // Create a session and wait for a remote host to connect to us
  AppleMIDI.begin("test");

Digital button(2, C4, 1, velocity);

}

void loop()
{
  // Listen to incoming notes
  AppleMIDI.run();

  MIDI_Controller.refresh();

Thank You

cd4067be multiplexer and others

Hello,

I would like to ask multiple questions:

-Is cd4067be supported? If so, what should be the reason I am unable to connect it? I have potentiometers connected with one of those mux and as soon as i turn the pot on it goes to 100%
-Can I use encoders like this?
`AnalogMultiplex multiplexers[] = {
{A0, {10, 11, 12, 13}},
};

RotaryEncoder encoder[] = {
{multiplexers[0].pin(1), multiplexer[0].pin(2), Controller, Channel, speedMultiply, JOG, TWOS_COMPLEMENT},
};
`
-Can I connect buttons to a AnalogMultiplex ? If so, should it be connected to an analog pin as well?
-Is there any way to convert a log pot into a linear pot? I could really use this functionality!

Thank you so much for your time!!! You are amazing

No midi output over usb Teensy

Hello, I was trying your encoder example, and everything compiled fine but i don't get midi output.
Im using a Teensy 3.1 with MIDI as the Usb type and all the needed libraries and software installed.
The Led lights up when i move the encoder so the enc.refresh(); seems to work.
I'm used to send midi using the pjrc library, like usbMIDI.sendControlChange for example.
How does your library send midi over USB?
Do i need to setup anything else?

Please add support for CD74HC4067 ! CD74HC4051 provide only 1-8pins

Please add support for CD74HC4067 ! I want to use banksellector with this mux like i can do it now with CD74HC4051. Also option for DigitalMultiplexor will be nice.

Bank pots(16);  
BankSelector bankselector(pots, 10, LED_BUILTIN, BankSelector::MOMENTARY); 

AnalogMultiplex multiplexer(A0, { 2, 3, 4, 5 } ); //CD74HC4067
// Create 8 new instances of the class 'Analog', on the 8 pins of the multiplexer,
// that send MIDI messages with controller 7 (channel volume) on channels 1 - 8
Analog potentiometers[] = {
  {multiplexer.pin(0), MIDI_CC::Channel_Volume, 1},
  {multiplexer.pin(1), MIDI_CC::Channel_Volume, 2},
  {multiplexer.pin(2), MIDI_CC::Channel_Volume, 3},
  {multiplexer.pin(3), MIDI_CC::Channel_Volume, 4},
  {multiplexer.pin(4), MIDI_CC::Channel_Volume, 5},
  {multiplexer.pin(5), MIDI_CC::Channel_Volume, 6},
  {multiplexer.pin(6), MIDI_CC::Channel_Volume, 7},
  {multiplexer.pin(7), MIDI_CC::Channel_Volume, 8},
  {multiplexer.pin(8), MIDI_CC::Channel_Volume, 9},
  {multiplexer.pin(9), MIDI_CC::Channel_Volume, 10},
  {multiplexer.pin(10), MIDI_CC::Channel_Volume, 11},
  {multiplexer.pin(11), MIDI_CC::Channel_Volume, 12},
  {multiplexer.pin(12), MIDI_CC::Channel_Volume, 13},
  {multiplexer.pin(13), MIDI_CC::Channel_Volume, 14},
  {multiplexer.pin(14), MIDI_CC::Channel_Volume, 15},
  {multiplexer.pin(15), MIDI_CC::Channel_Volume, 16}
};
void setup() {
pots.add(potentiometers, Bank::CHANGE_ADDRESS); // Add the control elements to the bank
}

CD74HC4067 :

pin4 pin3 pin2 pin1 Channel
on on on on 1
on on on off 2
on on off on 3
on on off off 4
on off on on 5
on off on off 6
on off off on 7
on off off off 8
off on on on 9
off on on off 10
off on off on 11
off on off off 12
off off on on 13
off off on off 14
off off off on 15
off off off off 16

Maybe you can add something like "if (numPinsOut > 8) pinMode(5, OUTPUT);" , and
both 4051 and 4067 will be supported at the same time.
Also will be so cool if there is a any way to use encoders thru those multiplexers!
If you make this work I will be so happy :) I believe many other ppl too!
Thank you very much I know i will be easy task for you! Best regards!

Is it possible setup 2 encoder? I apologize for the previous post

I apologize to you. Your library works very well. I had to reinstall arduino IDE and clean register. Now it works good. Thank you, I'm very sorry but now I vahe another problem. It's possible use two encoder with this library? I try to create this two string:
RotaryEncoder enc1(0,1).....
Rotary Encoder enc2(2,3)......
but in this way it doesn't work. I will be very happy if you could help me. Thank you so much

Decrease pots sensitivity

Hello,
I've finished guitar foot controller based on tttapa's great MIDI Controller library for my guitarist friend. Looks like below short videos.
I have question about decrease potentiometers sensitivity. On below video is shown blinking display. In normal working propably is not a problem, but during asign switch and pots in Overloud TH3, Guitar Rig it assigns this blinking pot instead of pushed for example Reverb switch. In other words, in Midi Ox monitor a whole time is sending notes from blinking pot.

https://drive.google.com/file/d/1qXyTYLM5AGzayc1-zTkMs7Enlz78njW-/view?usp=drivesdk

Internal video
https://drive.google.com/file/d/11Jp1qv7-3ur8xd8AzJKZVy0HtVcqouQQ/view?usp=drivesdk

Faders jump when I push through 50%

Hello,

I built a big MIDI controller with 16 faders, 150 buttons and 8 rotary encoders.
I used Tennsy 3.5 and 10k faders.

I have a little problem: when I push the faders through 50% they jump to maximum (or minimum depend on push direction) for a very short time.

How could I solve this? With programing or this is hardware problem?

Firmware link

Dear tttapa,

I'm very interrested in your project.

It is to be used on a Arduino Mega. So I have to flash the firmware.

But the link to the Arduino firmware is not working. I can't find the Atmega16u2 firmware on the arduino github site either.

I'v found one on another site but I'm not sure if that is the correct firmware.

Would you know where I can download the software.

With regards

buttons multiplexer

Hello,

first off all thanks for this wonderful libary! I'im a noob in programming and this helps a lot!!!

I was wondering if we can simply use multiplexer with buttons..?

I'm trying to modify the exemple: Ex.12.AnalogMultiplex

to make it work with buttons...without success.

Is it possible?

Thanks

Variable steps of rotary encoders

This could be useful if rotary encoders could have variable value according to speed of rotation. Seems to be very usefull. Is it possible?

This library is great btw

Rotary Encoder outputing strange things

Description of the problem or question

When i am using rotary encoders. They dont send Control Change, but some random stuff like timing clocks etc.

Steps to reproduce the problem

I used the example with RotaryEncoder

Hardware

Arduino Uno
schema

Software versions:

**MIDI Controller library> latest
Arduino IDE: ? 1.8.4 ?
Operating System: ? Windows
**Operating System version 10

Settings in the IDE

Full code

/*
  This is an example of the "RotaryEncoder" class of the MIDI_controller library.
  Connect the A and B pins of the encoder to 2 interrupt pins (2 and 3). 
  It's recommended to use 100nF capacitors between the A and B pins and ground (hardware debounce).
  Connect the common (C) pin to the ground. Pull-up resistors are not necessary, since the internal ones will be used.
  Map the control change message 0x14 to the right control in your DJ or DAW software, 
  and select 'relative' instead of 'absolute'.

  If you are using a jog wheel, use JOG, if you are using a normal encoder 
  (for normal controls like EQ or volume etc.) use NORMAL_ENCODER.
  If you have strange results in your software, try a different relative mode: 
  TWOS_COMPLEMENT, BINARY_OFFSET or SIGN_MAGNITUDE.
  If the control works, but it goes in the wrong direction, swap the pins A and B of the encoder 
  (either physically, or by swapping the pin numbers in the RotaryEncoder constructor).

  Written by Pieter P, 22-08-2017
  https://github.com/tttapa/MIDI_controller
*/
#define USE_ROTARY_ENCODER
#include <MIDI_Controller.h>

const uint8_t Channel = 1;       // MIDI channel 1
const uint8_t Controller = 20; // MIDI Control Change controller number
const int speedMultiply = 1;     // No change in speed of the encoder (number of steps is multiplied by 1)

// Create a new instance of the class 'RotaryEncoder', called 'enc', on pin 2 and 3, controller number 0x14, on channel1,
// no change in speed (speed is multiplied by 1), it's used as a jog wheel, and the sign mode is set to two's complement.
RotaryEncoder encoder(2, 3, Controller, Channel, speedMultiply, JOG, TWOS_COMPLEMENT);

void setup() {}

void loop() {
  // Refresh the encoder (check whether the position has changed since last time, if so, send the difference over MIDI)
  MIDI_Controller.refresh();
}

Steps taken to try to diagnose or solve the problem

? Tried the MIDI debug mode, used a MIDI monitor, ... ?

The goal of your project and aditional information

reporting midi control change values into pc and the using them in light room
schema

RAM problem

Hello,

First of all thank you so much for your work, this is amazing!

I want to build a MIDI device with around 150 buttons, 17 faders and 5 encoders. You said in a previous issue that this consumes alot of RAM. Would an arduino mega be able to manage this? Or should I go for another board? If so, which one specifically?

Keep up the awesome work and thank you for bringing so much to the community!!

Yours faithfuly

Pot values not stable

Good afternoon, I have a problem building my own version of the MIDI controller.
I used a 4051 multiplexer to have 8 potentiometers connected to my Arduino Uno. I followed all the steps described in the wiki, but when I try to use the Midi device in a Daw it's like all the potentiometers are sending data (not always, but very often), even if I don't touch the pots. I've already controlled I have connected all the pins well. I don't know what to do and MIDI monitor and serial monitor confirm the problem. Here are the specs:

Hardware: 8 pots (10k) and a 4051 multiplexer
Arduino board: Arduino UNO rev3

Software versions:
MIDI Controller library: 3.0.1
Arduino IDE: 1.8.5
Operating System: Windows 10
MIDIUSB library: 1.0.3

Full code:
#include <MIDI_Controller.h> // Include the library
AnalogMultiplex multiplexer(A0, { 2, 3, 4 } );
Analog potentiometers[] = {
{multiplexer.pin(0), 24, 1},
{multiplexer.pin(1), 25,1},
{multiplexer.pin(2), 26,1},
{multiplexer.pin(3), 27,1},
{multiplexer.pin(4), 28,1},
{multiplexer.pin(5), 29,1},
{multiplexer.pin(6), 30,1},
{multiplexer.pin(7), 31,1}
};
void setup() {
}

void loop() {
MIDI_Controller.refresh(); //controllo se le posizioni dei potenziometri sono cambiate

}

The goal of my project is to build a MIDI controller with 13 pots and 9 switches, but first of all I would
like to solve this problem.

Here are the schematics and a shoot at the MIDI monitor.

untitled sketch 2_bb

B0 1E 57 Control Change Control 30 87 Channel 1
B0 1C 7F Control Change Control 28 127 Channel 1
B0 1E 58 Control Change Control 30 88 Channel 1
B0 1E 57 Control Change Control 30 87 Channel 1
B0 1C 7E Control Change Control 28 126 Channel 1
B0 1E 58 Control Change Control 30 88 Channel 1
B0 1C 7F Control Change Control 28 127 Channel 1
B0 1C 7E Control Change Control 28 126 Channel 1
B0 1C 7F Control Change Control 28 127 Channel 1
B0 1C 7E Control Change Control 28 126 Channel 1
B0 1E 57 Control Change Control 30 87 Channel 1
B0 1C 7F Control Change Control 28 127 Channel 1
B0 1C 7E Control Change Control 28 126 Channel 1
B0 1E 58 Control Change Control 30 88 Channel 1
B0 1C 7F Control Change Control 28 127 Channel 1
B0 1C 7E Control Change Control 28 126 Channel 1
B0 1E 57 Control Change Control 30 87 Channel 1
B0 1C 7F Control Change Control 28 127 Channel 1
B0 1E 58 Control Change Control 30 88 Channel 1
B0 1E 57 Control Change Control 30 87 Channel 1
B0 1E 58 Control Change Control 30 88 Channel 1
B0 1C 7E Control Change Control 28 126 Channel 1
B0 1E 57 Control Change Control 30 87 Channel 1
B0 1C 7F Control Change Control 28 127 Channel 1
B0 1E 58 Control Change Control 30 88 Channel 1
B0 1E 57 Control Change Control 30 87 Channel 1

MIDI read

Hello,

I was eondering how I can do a MIDI.read() (or something similar) to read the MIDI messages that Traktor sends to the Arduino and then use it.

In my void setup I inicialized with MIDI.begin();
So now only with MIDI.read() can I get the MIDI messages that Traktor send to the Arduino?

Thank you so much!

Errors uploading with multiple inputs and logarithm/linear adjustments and the main-branch library

I was having strange crosstalk and sporadic functionality on A0-A4 so I decided to load the new library from the main branch. I also noticed the pots were functioning logarithmic, so I found your calibration example and implemented that into my sketch. I am using:

MIDI CONTOLLER: main branch
Arduino IDE 1.8.5
Arduino Leonardo

CODE

This is an example of the "Analog" class of the MIDI_controller library.
Connect a potentiometer to analog pin A0. This will be the MIDI channel volume of channel 1.
Map it in your DAW or DJ software.
Set 'minimumValue' to the analog value read when the potentiometer is in the minimum position.
Set 'maximumValue' to the analog value read when the potentiometer is in the maximum position.
Written by Pieter P, 20-09-2017
https://github.com/tttapa/MIDI_controller
*/

#include <MIDI_Controller.h> // Include the library

// Create a new instance of the class 'Analog', called 'potentiometer', on pin A0, 
// that sends MIDI messages with controller 7 (channel volume) on channel 1
Analog potentiometer_A(A0, MIDI_CC::Sound_Controller_1, 1);
Analog potentiometer_B(A1, MIDI_CC::Sound_Controller_2, 1);
Analog potentiometer_C(A2, MIDI_CC::Sound_Controller_3, 1);
Analog potentiometer_D(A3, MIDI_CC::Sound_Controller_4, 1);
Analog potentiometer_E(A4, MIDI_CC::Sound_Controller_5, 1);

const int minimumValue = 3;    // the analog value read when the potentiometer is in the minimum position.
const int maximumValue = 1020; // the analog value read when the potentiometer is in the maximum position.

int mapCalibrated(int value) {
  value = constrain(value, minimumValue, maximumValue); // make sure that the analog value is between the minimum and maximum value
  return map(value, minimumValue, maximumValue, 0, 1023); // map the value from [minimumValue, maximumValue] to [0, 1023]
}

void setup() {
  potentiometer_A.map(mapCalibrated); // apply the 'mapCalibrated' function on the analog input of 'potentiometer'
  potentiometer_B.map(mapCalibrated); // apply the 'mapCalibrated' function on the analog input of 'potentiometer'
  potentiometer_C.map(mapCalibrated); // apply the 'mapCalibrated' function on the analog input of 'potentiometer'
  potentiometer_D.map(mapCalibrated); // apply the 'mapCalibrated' function on the analog input of 'potentiometer'
  potentiometer_E.map(mapCalibrated); // apply the 'mapCalibrated' function on the analog input of 'potentiometer'
}

void loop() {
  // Refresh the MIDI controller (check whether the potentiometer's input has changed since last time, if so, send the new value over MIDI)
  MIDI_Controller.refresh();
}

ERRORS

C:\Program Files (x86)\Arduino\arduino-builder -dump-prefs -logger=machine -hardware C:\Program Files (x86)\Arduino\hardware -hardware C:\Users\admin\AppData\Local\Arduino15\packages -tools C:\Program Files (x86)\Arduino\tools-builder -tools C:\Program Files (x86)\Arduino\hardware\tools\avr -tools C:\Users\admin\AppData\Local\Arduino15\packages -built-in-libraries C:\Program Files (x86)\Arduino\libraries -libraries C:\Users\admin\Documents\Arduino\libraries -fqbn=arduino:avr:leonardo -ide-version=10805 -build-path C:\Users\admin\AppData\Local\Temp\arduino_build_843959 -warnings=none -build-cache C:\Users\admin\AppData\Local\Temp\arduino_cache_265514 -prefs=build.warn_data_percentage=75 -prefs=runtime.tools.arduinoOTA.path=C:\Users\admin\AppData\Local\Arduino15\packages\arduino\tools\arduinoOTA\1.1.1 -prefs=runtime.tools.avrdude.path=C:\Users\admin\AppData\Local\Arduino15\packages\arduino\tools\avrdude\6.3.0-arduino9 -prefs=runtime.tools.avr-gcc.path=C:\Users\admin\AppData\Local\Arduino15\packages\arduino\tools\avr-gcc\4.9.2-atmel3.5.4-arduino2 -verbose C:\Users\admin\Documents\Arduino\61318\61318.ino
C:\Program Files (x86)\Arduino\arduino-builder -compile -logger=machine -hardware C:\Program Files (x86)\Arduino\hardware -hardware C:\Users\admin\AppData\Local\Arduino15\packages -tools C:\Program Files (x86)\Arduino\tools-builder -tools C:\Program Files (x86)\Arduino\hardware\tools\avr -tools C:\Users\admin\AppData\Local\Arduino15\packages -built-in-libraries C:\Program Files (x86)\Arduino\libraries -libraries C:\Users\admin\Documents\Arduino\libraries -fqbn=arduino:avr:leonardo -ide-version=10805 -build-path C:\Users\admin\AppData\Local\Temp\arduino_build_843959 -warnings=none -build-cache C:\Users\admin\AppData\Local\Temp\arduino_cache_265514 -prefs=build.warn_data_percentage=75 -prefs=runtime.tools.arduinoOTA.path=C:\Users\admin\AppData\Local\Arduino15\packages\arduino\tools\arduinoOTA\1.1.1 -prefs=runtime.tools.avrdude.path=C:\Users\admin\AppData\Local\Arduino15\packages\arduino\tools\avrdude\6.3.0-arduino9 -prefs=runtime.tools.avr-gcc.path=C:\Users\admin\AppData\Local\Arduino15\packages\arduino\tools\avr-gcc\4.9.2-atmel3.5.4-arduino2 -verbose C:\Users\admin\Documents\Arduino\61318\61318.ino
Using board 'leonardo' from platform in folder: C:\Users\admin\AppData\Local\Arduino15\packages\arduino\hardware\avr\1.6.21
Using core 'arduino' from platform in folder: C:\Users\admin\AppData\Local\Arduino15\packages\arduino\hardware\avr\1.6.21
Detecting libraries used...
"C:\Users\admin\AppData\Local\Arduino15\packages\arduino\tools\avr-gcc\4.9.2-atmel3.5.4-arduino2/bin/avr-g++" -c -g -Os -w -std=gnu++11 -fpermissive -fno-exceptions -ffunction-sections -fdata-sections -fno-threadsafe-statics  -flto -w -x c++ -E -CC -mmcu=atmega32u4 -DF_CPU=16000000L -DARDUINO=10805 -DARDUINO_AVR_LEONARDO -DARDUINO_ARCH_AVR  -DUSB_VID=0x2341 -DUSB_PID=0x8036 '-DUSB_MANUFACTURER="Unknown"' '-DUSB_PRODUCT="Arduino Leonardo"' "-IC:\Users\admin\AppData\Local\Arduino15\packages\arduino\hardware\avr\1.6.21\cores\arduino" "-IC:\Users\admin\AppData\Local\Arduino15\packages\arduino\hardware\avr\1.6.21\variants\leonardo" "C:\Users\admin\AppData\Local\Temp\arduino_build_843959\sketch\61318.ino.cpp" -o "nul"
"C:\Users\admin\AppData\Local\Arduino15\packages\arduino\tools\avr-gcc\4.9.2-atmel3.5.4-arduino2/bin/avr-g++" -c -g -Os -w -std=gnu++11 -fpermissive -fno-exceptions -ffunction-sections -fdata-sections -fno-threadsafe-statics  -flto -w -x c++ -E -CC -mmcu=atmega32u4 -DF_CPU=16000000L -DARDUINO=10805 -DARDUINO_AVR_LEONARDO -DARDUINO_ARCH_AVR  -DUSB_VID=0x2341 -DUSB_PID=0x8036 '-DUSB_MANUFACTURER="Unknown"' '-DUSB_PRODUCT="Arduino Leonardo"' "-IC:\Users\admin\AppData\Local\Arduino15\packages\arduino\hardware\avr\1.6.21\cores\arduino" "-IC:\Users\admin\AppData\Local\Arduino15\packages\arduino\hardware\avr\1.6.21\variants\leonardo" "-IC:\Users\admin\Documents\Arduino\libraries\MIDI_controller-master\src" "C:\Users\admin\AppData\Local\Temp\arduino_build_843959\sketch\61318.ino.cpp" -o "nul"
"C:\Users\admin\AppData\Local\Arduino15\packages\arduino\tools\avr-gcc\4.9.2-atmel3.5.4-arduino2/bin/avr-g++" -c -g -Os -w -std=gnu++11 -fpermissive -fno-exceptions -ffunction-sections -fdata-sections -fno-threadsafe-statics  -flto -w -x c++ -E -CC -mmcu=atmega32u4 -DF_CPU=16000000L -DARDUINO=10805 -DARDUINO_AVR_LEONARDO -DARDUINO_ARCH_AVR  -DUSB_VID=0x2341 -DUSB_PID=0x8036 '-DUSB_MANUFACTURER="Unknown"' '-DUSB_PRODUCT="Arduino Leonardo"' "-IC:\Users\admin\AppData\Local\Arduino15\packages\arduino\hardware\avr\1.6.21\cores\arduino" "-IC:\Users\admin\AppData\Local\Arduino15\packages\arduino\hardware\avr\1.6.21\variants\leonardo" "-IC:\Users\admin\Documents\Arduino\libraries\MIDI_controller-master\src" "-IC:\Users\admin\Documents\Arduino\libraries\MIDIUSB\src" "C:\Users\admin\AppData\Local\Temp\arduino_build_843959\sketch\61318.ino.cpp" -o "nul"
"C:\Users\admin\AppData\Local\Arduino15\packages\arduino\tools\avr-gcc\4.9.2-atmel3.5.4-arduino2/bin/avr-g++" -c -g -Os -w -std=gnu++11 -fpermissive -fno-exceptions -ffunction-sections -fdata-sections -fno-threadsafe-statics  -flto -w -x c++ -E -CC -mmcu=atmega32u4 -DF_CPU=16000000L -DARDUINO=10805 -DARDUINO_AVR_LEONARDO -DARDUINO_ARCH_AVR  -DUSB_VID=0x2341 -DUSB_PID=0x8036 '-DUSB_MANUFACTURER="Unknown"' '-DUSB_PRODUCT="Arduino Leonardo"' "-IC:\Users\admin\AppData\Local\Arduino15\packages\arduino\hardware\avr\1.6.21\cores\arduino" "-IC:\Users\admin\AppData\Local\Arduino15\packages\arduino\hardware\avr\1.6.21\variants\leonardo" "-IC:\Users\admin\Documents\Arduino\libraries\MIDI_controller-master\src" "-IC:\Users\admin\Documents\Arduino\libraries\MIDIUSB\src" "-IC:\Users\admin\AppData\Local\Arduino15\packages\arduino\hardware\avr\1.6.21\libraries\SoftwareSerial\src" "C:\Users\admin\AppData\Local\Temp\arduino_build_843959\sketch\61318.ino.cpp" -o "nul"
Using cached library dependencies for file: C:\Users\admin\Documents\Arduino\libraries\MIDI_controller-master\src\Banks\Bank.cpp
Using cached library dependencies for file: C:\Users\admin\Documents\Arduino\libraries\MIDI_controller-master\src\Banks\BankSelector.cpp
Using cached library dependencies for file: C:\Users\admin\Documents\Arduino\libraries\MIDI_controller-master\src\ExtendedInputOutput\AnalogMultiplex.cpp
Using cached library dependencies for file: C:\Users\admin\Documents\Arduino\libraries\MIDI_controller-master\src\ExtendedInputOutput\ExtendedIOElement.cpp
Using cached library dependencies for file: C:\Users\admin\Documents\Arduino\libraries\MIDI_controller-master\src\ExtendedInputOutput\ExtendedInputOutput.cpp
Using cached library dependencies for file: C:\Users\admin\Documents\Arduino\libraries\MIDI_controller-master\src\ExtendedInputOutput\ShiftRegisterOut.cpp
Using cached library dependencies for file: C:\Users\admin\Documents\Arduino\libraries\MIDI_controller-master\src\Helpers\Hysteresis.cpp
Using cached library dependencies for file: C:\Users\admin\Documents\Arduino\libraries\MIDI_controller-master\src\MIDI_Controller\MIDI_Controller_Class.cpp
Using cached library dependencies for file: C:\Users\admin\Documents\Arduino\libraries\MIDI_controller-master\src\MIDI_Interfaces\MIDI_Interface.cpp
Using cached library dependencies for file: C:\Users\admin\Documents\Arduino\libraries\MIDI_controller-master\src\MIDI_Outputs\Analog.cpp
Using cached library dependencies for file: C:\Users\admin\Documents\Arduino\libraries\MIDI_controller-master\src\MIDI_Outputs\ButtonMatrix.cpp
Using cached library dependencies for file: C:\Users\admin\Documents\Arduino\libraries\MIDI_controller-master\src\MIDI_Outputs\Digital.cpp
Using cached library dependencies for file: C:\Users\admin\Documents\Arduino\libraries\MIDI_controller-master\src\MIDI_Outputs\DigitalCC.cpp
Using cached library dependencies for file: C:\Users\admin\Documents\Arduino\libraries\MIDI_controller-master\src\MIDI_Outputs\DigitalLatch.cpp
Using cached library dependencies for file: C:\Users\admin\Documents\Arduino\libraries\MIDI_controller-master\src\MIDI_Outputs\MIDI_Control_Element.cpp
Using cached library dependencies for file: C:\Users\admin\Documents\Arduino\libraries\MIDIUSB\src\MIDIUSB.cpp
Using cached library dependencies for file: C:\Users\admin\AppData\Local\Arduino15\packages\arduino\hardware\avr\1.6.21\libraries\SoftwareSerial\src\SoftwareSerial.cpp
Generating function prototypes...
"C:\Users\admin\AppData\Local\Arduino15\packages\arduino\tools\avr-gcc\4.9.2-atmel3.5.4-arduino2/bin/avr-g++" -c -g -Os -w -std=gnu++11 -fpermissive -fno-exceptions -ffunction-sections -fdata-sections -fno-threadsafe-statics  -flto -w -x c++ -E -CC -mmcu=atmega32u4 -DF_CPU=16000000L -DARDUINO=10805 -DARDUINO_AVR_LEONARDO -DARDUINO_ARCH_AVR  -DUSB_VID=0x2341 -DUSB_PID=0x8036 '-DUSB_MANUFACTURER="Unknown"' '-DUSB_PRODUCT="Arduino Leonardo"' "-IC:\Users\admin\AppData\Local\Arduino15\packages\arduino\hardware\avr\1.6.21\cores\arduino" "-IC:\Users\admin\AppData\Local\Arduino15\packages\arduino\hardware\avr\1.6.21\variants\leonardo" "-IC:\Users\admin\Documents\Arduino\libraries\MIDI_controller-master\src" "-IC:\Users\admin\Documents\Arduino\libraries\MIDIUSB\src" "-IC:\Users\admin\AppData\Local\Arduino15\packages\arduino\hardware\avr\1.6.21\libraries\SoftwareSerial\src" "C:\Users\admin\AppData\Local\Temp\arduino_build_843959\sketch\61318.ino.cpp" -o "C:\Users\admin\AppData\Local\Temp\arduino_build_843959\preproc\ctags_target_for_gcc_minus_e.cpp"
"C:\Program Files (x86)\Arduino\tools-builder\ctags\5.8-arduino11/ctags" -u --language-force=c++ -f - --c++-kinds=svpf --fields=KSTtzns --line-directives "C:\Users\admin\AppData\Local\Temp\arduino_build_843959\preproc\ctags_target_for_gcc_minus_e.cpp"
Compiling sketch...
"C:\Users\admin\AppData\Local\Arduino15\packages\arduino\tools\avr-gcc\4.9.2-atmel3.5.4-arduino2/bin/avr-g++" -c -g -Os -w -std=gnu++11 -fpermissive -fno-exceptions -ffunction-sections -fdata-sections -fno-threadsafe-statics -MMD -flto -mmcu=atmega32u4 -DF_CPU=16000000L -DARDUINO=10805 -DARDUINO_AVR_LEONARDO -DARDUINO_ARCH_AVR  -DUSB_VID=0x2341 -DUSB_PID=0x8036 '-DUSB_MANUFACTURER="Unknown"' '-DUSB_PRODUCT="Arduino Leonardo"' "-IC:\Users\admin\AppData\Local\Arduino15\packages\arduino\hardware\avr\1.6.21\cores\arduino" "-IC:\Users\admin\AppData\Local\Arduino15\packages\arduino\hardware\avr\1.6.21\variants\leonardo" "-IC:\Users\admin\Documents\Arduino\libraries\MIDI_controller-master\src" "-IC:\Users\admin\Documents\Arduino\libraries\MIDIUSB\src" "-IC:\Users\admin\AppData\Local\Arduino15\packages\arduino\hardware\avr\1.6.21\libraries\SoftwareSerial\src" "C:\Users\admin\AppData\Local\Temp\arduino_build_843959\sketch\61318.ino.cpp" -o "C:\Users\admin\AppData\Local\Temp\arduino_build_843959\sketch\61318.ino.cpp.o"
Compiling libraries...
Compiling library "MIDI_controller-master"
Using previously compiled file: C:\Users\admin\AppData\Local\Temp\arduino_build_843959\libraries\MIDI_controller-master\Banks\Bank.cpp.o
Using previously compiled file: C:\Users\admin\AppData\Local\Temp\arduino_build_843959\libraries\MIDI_controller-master\Banks\BankSelector.cpp.o
Using previously compiled file: C:\Users\admin\AppData\Local\Temp\arduino_build_843959\libraries\MIDI_controller-master\ExtendedInputOutput\AnalogMultiplex.cpp.o
Using previously compiled file: C:\Users\admin\AppData\Local\Temp\arduino_build_843959\libraries\MIDI_controller-master\ExtendedInputOutput\ExtendedIOElement.cpp.o
Using previously compiled file: C:\Users\admin\AppData\Local\Temp\arduino_build_843959\libraries\MIDI_controller-master\ExtendedInputOutput\ExtendedInputOutput.cpp.o
Using previously compiled file: C:\Users\admin\AppData\Local\Temp\arduino_build_843959\libraries\MIDI_controller-master\ExtendedInputOutput\ShiftRegisterOut.cpp.o
Using previously compiled file: C:\Users\admin\AppData\Local\Temp\arduino_build_843959\libraries\MIDI_controller-master\Helpers\Hysteresis.cpp.o
Using previously compiled file: C:\Users\admin\AppData\Local\Temp\arduino_build_843959\libraries\MIDI_controller-master\MIDI_Controller\MIDI_Controller_Class.cpp.o
Using previously compiled file: C:\Users\admin\AppData\Local\Temp\arduino_build_843959\libraries\MIDI_controller-master\MIDI_Interfaces\MIDI_Interface.cpp.o
Using previously compiled file: C:\Users\admin\AppData\Local\Temp\arduino_build_843959\libraries\MIDI_controller-master\MIDI_Outputs\Analog.cpp.o
Using previously compiled file: C:\Users\admin\AppData\Local\Temp\arduino_build_843959\libraries\MIDI_controller-master\MIDI_Outputs\ButtonMatrix.cpp.o
Using previously compiled file: C:\Users\admin\AppData\Local\Temp\arduino_build_843959\libraries\MIDI_controller-master\MIDI_Outputs\Digital.cpp.o
Using previously compiled file: C:\Users\admin\AppData\Local\Temp\arduino_build_843959\libraries\MIDI_controller-master\MIDI_Outputs\DigitalCC.cpp.o
Using previously compiled file: C:\Users\admin\AppData\Local\Temp\arduino_build_843959\libraries\MIDI_controller-master\MIDI_Outputs\DigitalLatch.cpp.o
Using previously compiled file: C:\Users\admin\AppData\Local\Temp\arduino_build_843959\libraries\MIDI_controller-master\MIDI_Outputs\MIDI_Control_Element.cpp.o
Compiling library "MIDIUSB"
Using previously compiled file: C:\Users\admin\AppData\Local\Temp\arduino_build_843959\libraries\MIDIUSB\MIDIUSB.cpp.o
Compiling library "SoftwareSerial"
Using previously compiled file: C:\Users\admin\AppData\Local\Temp\arduino_build_843959\libraries\SoftwareSerial\SoftwareSerial.cpp.o
Compiling core...
Using precompiled core
Linking everything together...
"C:\Users\admin\AppData\Local\Arduino15\packages\arduino\tools\avr-gcc\4.9.2-atmel3.5.4-arduino2/bin/avr-gcc" -w -Os -g -flto -fuse-linker-plugin -Wl,--gc-sections -mmcu=atmega32u4  -o "C:\Users\admin\AppData\Local\Temp\arduino_build_843959/61318.ino.elf" "C:\Users\admin\AppData\Local\Temp\arduino_build_843959\sketch\61318.ino.cpp.o" "C:\Users\admin\AppData\Local\Temp\arduino_build_843959\libraries\MIDI_controller-master\Banks\Bank.cpp.o" "C:\Users\admin\AppData\Local\Temp\arduino_build_843959\libraries\MIDI_controller-master\Banks\BankSelector.cpp.o" "C:\Users\admin\AppData\Local\Temp\arduino_build_843959\libraries\MIDI_controller-master\ExtendedInputOutput\AnalogMultiplex.cpp.o" "C:\Users\admin\AppData\Local\Temp\arduino_build_843959\libraries\MIDI_controller-master\ExtendedInputOutput\ExtendedIOElement.cpp.o" "C:\Users\admin\AppData\Local\Temp\arduino_build_843959\libraries\MIDI_controller-master\ExtendedInputOutput\ExtendedInputOutput.cpp.o" "C:\Users\admin\AppData\Local\Temp\arduino_build_843959\libraries\MIDI_controller-master\ExtendedInputOutput\ShiftRegisterOut.cpp.o" "C:\Users\admin\AppData\Local\Temp\arduino_build_843959\libraries\MIDI_controller-master\Helpers\Hysteresis.cpp.o" "C:\Users\admin\AppData\Local\Temp\arduino_build_843959\libraries\MIDI_controller-master\MIDI_Controller\MIDI_Controller_Class.cpp.o" "C:\Users\admin\AppData\Local\Temp\arduino_build_843959\libraries\MIDI_controller-master\MIDI_Interfaces\MIDI_Interface.cpp.o" "C:\Users\admin\AppData\Local\Temp\arduino_build_843959\libraries\MIDI_controller-master\MIDI_Outputs\Analog.cpp.o" "C:\Users\admin\AppData\Local\Temp\arduino_build_843959\libraries\MIDI_controller-master\MIDI_Outputs\ButtonMatrix.cpp.o" "C:\Users\admin\AppData\Local\Temp\arduino_build_843959\libraries\MIDI_controller-master\MIDI_Outputs\Digital.cpp.o" "C:\Users\admin\AppData\Local\Temp\arduino_build_843959\libraries\MIDI_controller-master\MIDI_Outputs\DigitalCC.cpp.o" "C:\Users\admin\AppData\Local\Temp\arduino_build_843959\libraries\MIDI_controller-master\MIDI_Outputs\DigitalLatch.cpp.o" "C:\Users\admin\AppData\Local\Temp\arduino_build_843959\libraries\MIDI_controller-master\MIDI_Outputs\MIDI_Control_Element.cpp.o" "C:\Users\admin\AppData\Local\Temp\arduino_build_843959\libraries\MIDIUSB\MIDIUSB.cpp.o" "C:\Users\admin\AppData\Local\Temp\arduino_build_843959\libraries\SoftwareSerial\SoftwareSerial.cpp.o" "C:\Users\admin\AppData\Local\Temp\arduino_build_843959/..\arduino_cache_265514\core\core_arduino_avr_leonardo_0c033607377f52217a23fe2cb97e6c36.a" "-LC:\Users\admin\AppData\Local\Temp\arduino_build_843959" -lm
"C:\Users\admin\AppData\Local\Arduino15\packages\arduino\tools\avr-gcc\4.9.2-atmel3.5.4-arduino2/bin/avr-objcopy" -O ihex -j .eeprom --set-section-flags=.eeprom=alloc,load --no-change-warnings --change-section-lma .eeprom=0  "C:\Users\admin\AppData\Local\Temp\arduino_build_843959/61318.ino.elf" "C:\Users\admin\AppData\Local\Temp\arduino_build_843959/61318.ino.eep"
"C:\Users\admin\AppData\Local\Arduino15\packages\arduino\tools\avr-gcc\4.9.2-atmel3.5.4-arduino2/bin/avr-objcopy" -O ihex -R .eeprom  "C:\Users\admin\AppData\Local\Temp\arduino_build_843959/61318.ino.elf" "C:\Users\admin\AppData\Local\Temp\arduino_build_843959/61318.ino.hex"
Using library MIDI_controller-master at version 3.0.1 in folder: C:\Users\admin\Documents\Arduino\libraries\MIDI_controller-master 
Using library MIDIUSB at version 1.0.3 in folder: C:\Users\admin\Documents\Arduino\libraries\MIDIUSB 
Using library SoftwareSerial at version 1.0 in folder: C:\Users\admin\AppData\Local\Arduino15\packages\arduino\hardware\avr\1.6.21\libraries\SoftwareSerial 
Sketch uses 7750 bytes (27%) of program storage space. Maximum is 28672 bytes.
Global variables use 615 bytes (24%) of dynamic memory, leaving 1945 bytes for local variables. Maximum is 2560 bytes.
Forcing reset using 1200bps open/close on port COM4
processing.app.debug.RunnerException
	at cc.arduino.packages.uploaders.SerialUploader.uploadUsingPreferences(SerialUploader.java:160)
	at cc.arduino.UploaderUtils.upload(UploaderUtils.java:78)
	at processing.app.SketchController.upload(SketchController.java:713)
	at processing.app.SketchController.exportApplet(SketchController.java:686)
	at processing.app.Editor$DefaultExportHandler.run(Editor.java:2168)
	at java.lang.Thread.run(Thread.java:748)
Caused by: processing.app.SerialException: Error touching serial port 'COM4'.
	at processing.app.Serial.touchForCDCReset(Serial.java:107)
	at cc.arduino.packages.uploaders.SerialUploader.uploadUsingPreferences(SerialUploader.java:144)
	... 5 more
Caused by: jssc.SerialPortException: Port name - COM4; Method name - openPort(); Exception type - Port not found.
	at jssc.SerialPort.openPort(SerialPort.java:167)
	at processing.app.Serial.touchForCDCReset(Serial.java:101)
	... 6 more

I am enjoying this, again thanks for input.

Multiplexer's enable input control

Hello,

I would like to connect three button multiplexer's output to one pin on an Arduino Leonardo.
I would like to use multiplexer's enable input to select them in sequence.

Is this possible? (I tried to write ,,digitalWrite(Pin, LOW/HIGH)" before each Digital buttonsX[]={.... but not work.)

My code now:

#include <MIDI_Controller.h>
AnalogMultiplex multiplexer1(13, {4,3,12,6,} );
AnalogMultiplex multiplexer2(13, {4,3,12,6,} );
AnalogMultiplex multiplexer3(13, {4,3,12,6,} );

Digital buttons1[] = {
  {multiplexer1.pin(0), 0x1, 1},
  {multiplexer1.pin(1), 0x2, 1},
  {multiplexer1.pin(2), 0x3, 1},
  {multiplexer1.pin(3), 0x4, 1},
  {multiplexer1.pin(4), 0x5, 1},
  {multiplexer1.pin(5), 0x6, 1},
  {multiplexer1.pin(6), 0x7, 1},
  {multiplexer1.pin(7), 0x8, 1},
  {multiplexer1.pin(8), 0x9, 1},
  {multiplexer1.pin(9), 0xA, 1},
  {multiplexer1.pin(10), 0xB, 1},
  {multiplexer1.pin(11), 0xC, 1},
  {multiplexer1.pin(12), 0xD, 1},
  {multiplexer1.pin(13), 0xE, 1},
  {multiplexer1.pin(14), 0xF, 1},
  {multiplexer1.pin(15), 0x10, 1},
};
Digital buttons2[] = {
  {multiplexer2.pin(0), 0x1, 2},
  {multiplexer2.pin(1), 0x2, 2},
  {multiplexer2.pin(2), 0x3, 2},
  {multiplexer2.pin(3), 0x4, 2},
  {multiplexer2.pin(4), 0x5, 2},
  {multiplexer2.pin(5), 0x6, 2},
  {multiplexer2.pin(6), 0x7, 2},
  {multiplexer2.pin(7), 0x8, 2},
  {multiplexer2.pin(8), 0x9, 2},
  {multiplexer2.pin(9), 0xA, 2},
  {multiplexer2.pin(10), 0xB,2},
  {multiplexer2.pin(11), 0xC,2},
  {multiplexer2.pin(12), 0xD, 2},
  {multiplexer2.pin(13), 0xE, 2},
  {multiplexer2.pin(14), 0xF, 2},
  {multiplexer2.pin(15), 0x10,2},
};
Digital buttons3[] = {
  {multiplexer3.pin(0), 0x1, 3},
  {multiplexer3.pin(1), 0x2, 3},
  {multiplexer3.pin(2), 0x3, 3},
  {multiplexer3.pin(3), 0x4, 3},
  {multiplexer3.pin(4), 0x5, 3},
  {multiplexer3.pin(5), 0x6, 3},
  {multiplexer3.pin(6), 0x7, 3},
  {multiplexer3.pin(7), 0x8, 3},
  {multiplexer3.pin(8), 0x9, 3},
  {multiplexer3.pin(9), 0xA, 3},
  {multiplexer3.pin(10), 0xB,3},
  {multiplexer3.pin(11), 0xC, 3},
  {multiplexer3.pin(12), 0xD, 3},
  {multiplexer3.pin(13), 0xE, 3},
  {multiplexer3.pin(14), 0xF, 3},
  {multiplexer3.pin(15), 0x10,3},
};

void setup() {}
void loop() { MIDI_Controller.refresh(); }

Fluxamasynth V3.0 shield uses serial for device so not available for debug.

Before opening a new issue, please read the installation instructions in the README. Also check if your question is answered in the Wiki or in a previous issue.
If you do create a new issue, please follow the template below.
--- (delete these first lines) ---

Description of the problem or question

Serial Print not available for Fluxamasynth because the serial is output to pin 4
to the MIDI Shield at 31250 baud.

Steps to reproduce the problem

Plug Fluxamasynth into Arduino UNO

NOTE:

Modern Dreams has been selling this as SAM2195 since before 2015 until replacement SAM2695 in 2015.
The Dream.fr MIDI chip is difficult to obtain otherwise.
There are significant number of projects online with the earlier version of the shield.
It was never discovered to be documented for use as a MIDI Device.
Recently in 2016, the creator merged with AS220 to increase technical support.

Hardware

Inland Arduino UNO r3 Breadboard Kit 341966
Fluxamasynth from Modern Devices containing Dream SAM2695 MIDI on a chip.

fluxamasynthshieldr3sch

Arduino board: Inland Arduino UNO r3
Schematic:

arduino_uno_rev3-schematic

Software versions:

MIDI Controller library: 3.0.0
Arduino IDE: 1.8.5
Operating System: Ubuntu Studio
Operating System version: 17.10

Settings in the IDE

Add library for Fluxamasynth from Github

Full code

#include "Fluxamasynth.h"


Fluxamasynth synth;    // create a synth object


void setup() {
  // put your setup code here, to run once:
  Serial.begin(31250);    //  Set MIDI baud rate:

  synth.midiReset();            // Do a complete MIDI reset

}

void loop() {
  // put your main code here, to run repeatedly:


}

Steps taken to try to diagnose or solve the problem

Can't begin due to design constraint

Unable to try the MIDI debug mode,
Unable to initiate then use a MIDI monitor such as kmidimon

The goal of your project and additional information

Goal is to create a USB MIDI Device that appears in Rosegarden and other MIDI applications
as a Roland MT-32 used to do with DIN5.
Now using new Roland Go Keys 61k over USB Device and Host for functional comparison.

Uno issue

Hi
Thanks for your work on this.
I have been trying to make an uno work for midi CC, say CC11 and CC01.

I can successfully upload your uno example script (MIDI_Controller_Uno_Analog) and can flash the uno asper your instructions. I amended the script to use just one slide slider (fader) as a test..

#define CHANNEL 1 // Send all messages on channel 1.

int controllers[NUMBER_OF_ANALOG_INPUTS] = {
0x11
};

If I connect to the computer, Midi is sent but as CC17? By changing to 0x11 shouldCC11 be sent?

I'm not going to use more than 4 faders so your script is brilliant, if only I can send the correct midi CC
Could you help steer me in the right direction

Many thanks

Mark

No Midi Messages in Mixx or elsewhere, unable to re-establish connection with Leonardo.

Description of the problem or question

Arduino shows up as a MIDI Contoller, but no MIDI messages being passed into Mixx program during learning. Configured the faders and pots with numerous wiring pinout and still nothing.

Hardware

Arduino Leonardo. B10k pots, B103 faders, breadboard. miniUSB-->Computer

Software versions:

MIDI Controller library: 3.0.1
Arduino IDE: 1.6.8
Operating System: Windows 10
Operating System version: ? 10, 16.04, ... ?
(Teensyduino): latest
(Encoder library): latest
(MIDIUSB library): latest
(THESE LAST THREE ARE SET TO LATEST BECAUSE ANOTHER ISSUE. AFTER UPLOADING THE FIRST TIME I HAVE BEEN UNABLE TO UPLOAD AGAIN AS THE PORT MENU IN ARDUINO IDE IS GREYED OUT. I GET A ERROR MESSAGE ABOUT THE PORT NOT BEING THERE )
WHEN I TRY TO REUPLOAD TO ENSURE LIBRARY VERSIONS ETC I GET:

`Arduino: 1.6.8 (Windows 10), Board: "TeeOnArdu, MIDI, 16 MHz, US English"

C:\Program Files (x86)\Arduino\arduino-builder -dump-prefs -logger=machine -hardware "C:\Program Files (x86)\Arduino\hardware" -hardware "C:\Users\admin\AppData\Local\Arduino15\packages" -tools "C:\Program Files (x86)\Arduino\tools-builder" -tools "C:\Program Files (x86)\Arduino\hardware\tools\avr" -tools "C:\Users\admin\AppData\Local\Arduino15\packages" -built-in-libraries "C:\Program Files (x86)\Arduino\libraries" -libraries "C:\Users\admin\Documents\Arduino\libraries" -fqbn=TeeOnArdu:avr:TeeOnArdu:usb=midi,speed=16,keys=en-us -ide-version=10608 -build-path "C:\Users\admin\AppData\Local\Temp\build05e956ed821e7a998eb94654329edf25.tmp" -warnings=none -prefs=build.warn_data_percentage=75 -verbose "C:\Users\admin\Desktop\MIDI_Controller_Leonardo_-_Analog\MIDI_Controller_Leonardo_-_Analog.ino"
C:\Program Files (x86)\Arduino\arduino-builder -compile -logger=machine -hardware "C:\Program Files (x86)\Arduino\hardware" -hardware "C:\Users\admin\AppData\Local\Arduino15\packages" -tools "C:\Program Files (x86)\Arduino\tools-builder" -tools "C:\Program Files (x86)\Arduino\hardware\tools\avr" -tools "C:\Users\admin\AppData\Local\Arduino15\packages" -built-in-libraries "C:\Program Files (x86)\Arduino\libraries" -libraries "C:\Users\admin\Documents\Arduino\libraries" -fqbn=TeeOnArdu:avr:TeeOnArdu:usb=midi,speed=16,keys=en-us -ide-version=10608 -build-path "C:\Users\admin\AppData\Local\Temp\build05e956ed821e7a998eb94654329edf25.tmp" -warnings=none -prefs=build.warn_data_percentage=75 -verbose "C:\Users\admin\Desktop\MIDI_Controller_Leonardo_-_Analog\MIDI_Controller_Leonardo_-_Analog.ino"
WARNING: Spurious .github folder in 'MIDI controller' library
"C:\Users\admin\AppData\Local\Arduino15\packages\arduino\tools\avr-gcc\4.9.2-atmel3.5.4-arduino2/bin/avr-g++" -c -g -Os -w -std=gnu++11 -fno-exceptions -ffunction-sections -fdata-sections -fno-threadsafe-statics  -w -x c++ -E -CC -mmcu=atmega32u4 -DF_CPU=16000000L -DARDUINO=10608 -DARDUINO_AVR_LEONARDO -DARDUINO_ARCH_AVR  -DUSB_VID=0x2341 -DUSB_PID=0x8036 '-DUSB_MANUFACTURER="Arduino"' '-DUSB_PRODUCT="TeeOnArdu"' -DUSB_MIDI -DLAYOUT_US_ENGLISH "-IC:\Program Files (x86)\Arduino\hardware\TeeOnArdu\avr\cores\TeeOnArdu" "-IC:\Program Files (x86)\Arduino\hardware\TeeOnArdu\avr\variants\leonardo" "C:\Users\admin\AppData\Local\Temp\build05e956ed821e7a998eb94654329edf25.tmp\sketch\MIDI_Controller_Leonardo_-_Analog.ino.cpp" -o "nul"
"C:\Users\admin\AppData\Local\Arduino15\packages\arduino\tools\avr-gcc\4.9.2-atmel3.5.4-arduino2/bin/avr-g++" -c -g -Os -w -std=gnu++11 -fno-exceptions -ffunction-sections -fdata-sections -fno-threadsafe-statics  -w -x c++ -E -CC -mmcu=atmega32u4 -DF_CPU=16000000L -DARDUINO=10608 -DARDUINO_AVR_LEONARDO -DARDUINO_ARCH_AVR  -DUSB_VID=0x2341 -DUSB_PID=0x8036 '-DUSB_MANUFACTURER="Arduino"' '-DUSB_PRODUCT="TeeOnArdu"' -DUSB_MIDI -DLAYOUT_US_ENGLISH "-IC:\Program Files (x86)\Arduino\hardware\TeeOnArdu\avr\cores\TeeOnArdu" "-IC:\Program Files (x86)\Arduino\hardware\TeeOnArdu\avr\variants\leonardo" "C:\Users\admin\AppData\Local\Temp\build05e956ed821e7a998eb94654329edf25.tmp\sketch\MIDI_Controller_Leonardo_-_Analog.ino.cpp" -o "C:\Users\admin\AppData\Local\Temp\build05e956ed821e7a998eb94654329edf25.tmp\preproc\ctags_target_for_gcc_minus_e.cpp"
"C:\Program Files (x86)\Arduino\tools-builder\ctags\5.8-arduino10/ctags" -u --language-force=c++ -f - --c++-kinds=svpf --fields=KSTtzns --line-directives "C:\Users\admin\AppData\Local\Temp\build05e956ed821e7a998eb94654329edf25.tmp\preproc\ctags_target_for_gcc_minus_e.cpp"
"C:\Users\admin\AppData\Local\Arduino15\packages\arduino\tools\avr-gcc\4.9.2-atmel3.5.4-arduino2/bin/avr-g++" -c -g -Os -w -std=gnu++11 -fno-exceptions -ffunction-sections -fdata-sections -fno-threadsafe-statics -MMD -mmcu=atmega32u4 -DF_CPU=16000000L -DARDUINO=10608 -DARDUINO_AVR_LEONARDO -DARDUINO_ARCH_AVR  -DUSB_VID=0x2341 -DUSB_PID=0x8036 '-DUSB_MANUFACTURER="Arduino"' '-DUSB_PRODUCT="TeeOnArdu"' -DUSB_MIDI -DLAYOUT_US_ENGLISH "-IC:\Program Files (x86)\Arduino\hardware\TeeOnArdu\avr\cores\TeeOnArdu" "-IC:\Program Files (x86)\Arduino\hardware\TeeOnArdu\avr\variants\leonardo" "C:\Users\admin\AppData\Local\Temp\build05e956ed821e7a998eb94654329edf25.tmp\sketch\MIDI_Controller_Leonardo_-_Analog.ino.cpp" -o "C:\Users\admin\AppData\Local\Temp\build05e956ed821e7a998eb94654329edf25.tmp\sketch\MIDI_Controller_Leonardo_-_Analog.ino.cpp.o"
"C:\Users\admin\AppData\Local\Arduino15\packages\arduino\tools\avr-gcc\4.9.2-atmel3.5.4-arduino2/bin/avr-gcc" -c -g -x assembler-with-cpp -mmcu=atmega32u4 -DF_CPU=16000000L -DARDUINO=10608 -DARDUINO_AVR_LEONARDO -DARDUINO_ARCH_AVR  -DUSB_VID=0x2341 -DUSB_PID=0x8036 '-DUSB_MANUFACTURER="Arduino"' '-DUSB_PRODUCT="TeeOnArdu"' -DUSB_MIDI -DLAYOUT_US_ENGLISH "-IC:\Program Files (x86)\Arduino\hardware\TeeOnArdu\avr\cores\TeeOnArdu" "-IC:\Program Files (x86)\Arduino\hardware\TeeOnArdu\avr\variants\leonardo" "C:\Program Files (x86)\Arduino\hardware\TeeOnArdu\avr\cores\TeeOnArdu\wiring_pulse.S" -o "C:\Users\admin\AppData\Local\Temp\build05e956ed821e7a998eb94654329edf25.tmp\core\wiring_pulse.S.o"
Using previously compiled file: C:\Users\admin\AppData\Local\Temp\build05e956ed821e7a998eb94654329edf25.tmp\core\WInterrupts.c.o
Using previously compiled file: C:\Users\admin\AppData\Local\Temp\build05e956ed821e7a998eb94654329edf25.tmp\core\hooks.c.o
Using previously compiled file: C:\Users\admin\AppData\Local\Temp\build05e956ed821e7a998eb94654329edf25.tmp\core\keylayouts.c.o
Using previously compiled file: C:\Users\admin\AppData\Local\Temp\build05e956ed821e7a998eb94654329edf25.tmp\core\teensyduino.c.o
Using previously compiled file: C:\Users\admin\AppData\Local\Temp\build05e956ed821e7a998eb94654329edf25.tmp\core\usb.c.o
Using previously compiled file: C:\Users\admin\AppData\Local\Temp\build05e956ed821e7a998eb94654329edf25.tmp\core\wiring.c.o
Using previously compiled file: C:\Users\admin\AppData\Local\Temp\build05e956ed821e7a998eb94654329edf25.tmp\core\wiring_analog.c.o
Using previously compiled file: C:\Users\admin\AppData\Local\Temp\build05e956ed821e7a998eb94654329edf25.tmp\core\wiring_digital.c.o
Using previously compiled file: C:\Users\admin\AppData\Local\Temp\build05e956ed821e7a998eb94654329edf25.tmp\core\wiring_pulse.c.o
Using previously compiled file: C:\Users\admin\AppData\Local\Temp\build05e956ed821e7a998eb94654329edf25.tmp\core\wiring_shift.c.o
Using previously compiled file: C:\Users\admin\AppData\Local\Temp\build05e956ed821e7a998eb94654329edf25.tmp\core\HardwareSerial.cpp.o
Using previously compiled file: C:\Users\admin\AppData\Local\Temp\build05e956ed821e7a998eb94654329edf25.tmp\core\HardwareSerial0.cpp.o
Using previously compiled file: C:\Users\admin\AppData\Local\Temp\build05e956ed821e7a998eb94654329edf25.tmp\core\HardwareSerial1.cpp.o
Using previously compiled file: C:\Users\admin\AppData\Local\Temp\build05e956ed821e7a998eb94654329edf25.tmp\core\HardwareSerial2.cpp.o
Using previously compiled file: C:\Users\admin\AppData\Local\Temp\build05e956ed821e7a998eb94654329edf25.tmp\core\HardwareSerial3.cpp.o
Using previously compiled file: C:\Users\admin\AppData\Local\Temp\build05e956ed821e7a998eb94654329edf25.tmp\core\IPAddress.cpp.o
Using previously compiled file: C:\Users\admin\AppData\Local\Temp\build05e956ed821e7a998eb94654329edf25.tmp\core\Print.cpp.o
Using previously compiled file: C:\Users\admin\AppData\Local\Temp\build05e956ed821e7a998eb94654329edf25.tmp\core\Stream.cpp.o
Using previously compiled file: C:\Users\admin\AppData\Local\Temp\build05e956ed821e7a998eb94654329edf25.tmp\core\Tone.cpp.o
Using previously compiled file: C:\Users\admin\AppData\Local\Temp\build05e956ed821e7a998eb94654329edf25.tmp\core\USBAPI.cpp.o
Using previously compiled file: C:\Users\admin\AppData\Local\Temp\build05e956ed821e7a998eb94654329edf25.tmp\core\WMath.cpp.o
Using previously compiled file: C:\Users\admin\AppData\Local\Temp\build05e956ed821e7a998eb94654329edf25.tmp\core\WString.cpp.o
Using previously compiled file: C:\Users\admin\AppData\Local\Temp\build05e956ed821e7a998eb94654329edf25.tmp\core\abi.cpp.o
Using previously compiled file: C:\Users\admin\AppData\Local\Temp\build05e956ed821e7a998eb94654329edf25.tmp\core\main.cpp.o
Using previously compiled file: C:\Users\admin\AppData\Local\Temp\build05e956ed821e7a998eb94654329edf25.tmp\core\new.cpp.o
"C:\Users\admin\AppData\Local\Arduino15\packages\arduino\tools\avr-gcc\4.9.2-atmel3.5.4-arduino2/bin/avr-ar" rcs  "C:\Users\admin\AppData\Local\Temp\build05e956ed821e7a998eb94654329edf25.tmp\core\core.a" "C:\Users\admin\AppData\Local\Temp\build05e956ed821e7a998eb94654329edf25.tmp\core\wiring_pulse.S.o"
"C:\Users\admin\AppData\Local\Arduino15\packages\arduino\tools\avr-gcc\4.9.2-atmel3.5.4-arduino2/bin/avr-ar" rcs  "C:\Users\admin\AppData\Local\Temp\build05e956ed821e7a998eb94654329edf25.tmp\core\core.a" "C:\Users\admin\AppData\Local\Temp\build05e956ed821e7a998eb94654329edf25.tmp\core\WInterrupts.c.o"
"C:\Users\admin\AppData\Local\Arduino15\packages\arduino\tools\avr-gcc\4.9.2-atmel3.5.4-arduino2/bin/avr-ar" rcs  "C:\Users\admin\AppData\Local\Temp\build05e956ed821e7a998eb94654329edf25.tmp\core\core.a" "C:\Users\admin\AppData\Local\Temp\build05e956ed821e7a998eb94654329edf25.tmp\core\hooks.c.o"
"C:\Users\admin\AppData\Local\Arduino15\packages\arduino\tools\avr-gcc\4.9.2-atmel3.5.4-arduino2/bin/avr-ar" rcs  "C:\Users\admin\AppData\Local\Temp\build05e956ed821e7a998eb94654329edf25.tmp\core\core.a" "C:\Users\admin\AppData\Local\Temp\build05e956ed821e7a998eb94654329edf25.tmp\core\keylayouts.c.o"
"C:\Users\admin\AppData\Local\Arduino15\packages\arduino\tools\avr-gcc\4.9.2-atmel3.5.4-arduino2/bin/avr-ar" rcs  "C:\Users\admin\AppData\Local\Temp\build05e956ed821e7a998eb94654329edf25.tmp\core\core.a" "C:\Users\admin\AppData\Local\Temp\build05e956ed821e7a998eb94654329edf25.tmp\core\teensyduino.c.o"
"C:\Users\admin\AppData\Local\Arduino15\packages\arduino\tools\avr-gcc\4.9.2-atmel3.5.4-arduino2/bin/avr-ar" rcs  "C:\Users\admin\AppData\Local\Temp\build05e956ed821e7a998eb94654329edf25.tmp\core\core.a" "C:\Users\admin\AppData\Local\Temp\build05e956ed821e7a998eb94654329edf25.tmp\core\usb.c.o"
"C:\Users\admin\AppData\Local\Arduino15\packages\arduino\tools\avr-gcc\4.9.2-atmel3.5.4-arduino2/bin/avr-ar" rcs  "C:\Users\admin\AppData\Local\Temp\build05e956ed821e7a998eb94654329edf25.tmp\core\core.a" "C:\Users\admin\AppData\Local\Temp\build05e956ed821e7a998eb94654329edf25.tmp\core\wiring.c.o"
"C:\Users\admin\AppData\Local\Arduino15\packages\arduino\tools\avr-gcc\4.9.2-atmel3.5.4-arduino2/bin/avr-ar" rcs  "C:\Users\admin\AppData\Local\Temp\build05e956ed821e7a998eb94654329edf25.tmp\core\core.a" "C:\Users\admin\AppData\Local\Temp\build05e956ed821e7a998eb94654329edf25.tmp\core\wiring_analog.c.o"
"C:\Users\admin\AppData\Local\Arduino15\packages\arduino\tools\avr-gcc\4.9.2-atmel3.5.4-arduino2/bin/avr-ar" rcs  "C:\Users\admin\AppData\Local\Temp\build05e956ed821e7a998eb94654329edf25.tmp\core\core.a" "C:\Users\admin\AppData\Local\Temp\build05e956ed821e7a998eb94654329edf25.tmp\core\wiring_digital.c.o"
"C:\Users\admin\AppData\Local\Arduino15\packages\arduino\tools\avr-gcc\4.9.2-atmel3.5.4-arduino2/bin/avr-ar" rcs  "C:\Users\admin\AppData\Local\Temp\build05e956ed821e7a998eb94654329edf25.tmp\core\core.a" "C:\Users\admin\AppData\Local\Temp\build05e956ed821e7a998eb94654329edf25.tmp\core\wiring_pulse.c.o"
"C:\Users\admin\AppData\Local\Arduino15\packages\arduino\tools\avr-gcc\4.9.2-atmel3.5.4-arduino2/bin/avr-ar" rcs  "C:\Users\admin\AppData\Local\Temp\build05e956ed821e7a998eb94654329edf25.tmp\core\core.a" "C:\Users\admin\AppData\Local\Temp\build05e956ed821e7a998eb94654329edf25.tmp\core\wiring_shift.c.o"
"C:\Users\admin\AppData\Local\Arduino15\packages\arduino\tools\avr-gcc\4.9.2-atmel3.5.4-arduino2/bin/avr-ar" rcs  "C:\Users\admin\AppData\Local\Temp\build05e956ed821e7a998eb94654329edf25.tmp\core\core.a" "C:\Users\admin\AppData\Local\Temp\build05e956ed821e7a998eb94654329edf25.tmp\core\HardwareSerial.cpp.o"
"C:\Users\admin\AppData\Local\Arduino15\packages\arduino\tools\avr-gcc\4.9.2-atmel3.5.4-arduino2/bin/avr-ar" rcs  "C:\Users\admin\AppData\Local\Temp\build05e956ed821e7a998eb94654329edf25.tmp\core\core.a" "C:\Users\admin\AppData\Local\Temp\build05e956ed821e7a998eb94654329edf25.tmp\core\HardwareSerial0.cpp.o"
"C:\Users\admin\AppData\Local\Arduino15\packages\arduino\tools\avr-gcc\4.9.2-atmel3.5.4-arduino2/bin/avr-ar" rcs  "C:\Users\admin\AppData\Local\Temp\build05e956ed821e7a998eb94654329edf25.tmp\core\core.a" "C:\Users\admin\AppData\Local\Temp\build05e956ed821e7a998eb94654329edf25.tmp\core\HardwareSerial1.cpp.o"
"C:\Users\admin\AppData\Local\Arduino15\packages\arduino\tools\avr-gcc\4.9.2-atmel3.5.4-arduino2/bin/avr-ar" rcs  "C:\Users\admin\AppData\Local\Temp\build05e956ed821e7a998eb94654329edf25.tmp\core\core.a" "C:\Users\admin\AppData\Local\Temp\build05e956ed821e7a998eb94654329edf25.tmp\core\HardwareSerial2.cpp.o"
"C:\Users\admin\AppData\Local\Arduino15\packages\arduino\tools\avr-gcc\4.9.2-atmel3.5.4-arduino2/bin/avr-ar" rcs  "C:\Users\admin\AppData\Local\Temp\build05e956ed821e7a998eb94654329edf25.tmp\core\core.a" "C:\Users\admin\AppData\Local\Temp\build05e956ed821e7a998eb94654329edf25.tmp\core\HardwareSerial3.cpp.o"
"C:\Users\admin\AppData\Local\Arduino15\packages\arduino\tools\avr-gcc\4.9.2-atmel3.5.4-arduino2/bin/avr-ar" rcs  "C:\Users\admin\AppData\Local\Temp\build05e956ed821e7a998eb94654329edf25.tmp\core\core.a" "C:\Users\admin\AppData\Local\Temp\build05e956ed821e7a998eb94654329edf25.tmp\core\IPAddress.cpp.o"
"C:\Users\admin\AppData\Local\Arduino15\packages\arduino\tools\avr-gcc\4.9.2-atmel3.5.4-arduino2/bin/avr-ar" rcs  "C:\Users\admin\AppData\Local\Temp\build05e956ed821e7a998eb94654329edf25.tmp\core\core.a" "C:\Users\admin\AppData\Local\Temp\build05e956ed821e7a998eb94654329edf25.tmp\core\Print.cpp.o"
"C:\Users\admin\AppData\Local\Arduino15\packages\arduino\tools\avr-gcc\4.9.2-atmel3.5.4-arduino2/bin/avr-ar" rcs  "C:\Users\admin\AppData\Local\Temp\build05e956ed821e7a998eb94654329edf25.tmp\core\core.a" "C:\Users\admin\AppData\Local\Temp\build05e956ed821e7a998eb94654329edf25.tmp\core\Stream.cpp.o"
"C:\Users\admin\AppData\Local\Arduino15\packages\arduino\tools\avr-gcc\4.9.2-atmel3.5.4-arduino2/bin/avr-ar" rcs  "C:\Users\admin\AppData\Local\Temp\build05e956ed821e7a998eb94654329edf25.tmp\core\core.a" "C:\Users\admin\AppData\Local\Temp\build05e956ed821e7a998eb94654329edf25.tmp\core\Tone.cpp.o"
"C:\Users\admin\AppData\Local\Arduino15\packages\arduino\tools\avr-gcc\4.9.2-atmel3.5.4-arduino2/bin/avr-ar" rcs  "C:\Users\admin\AppData\Local\Temp\build05e956ed821e7a998eb94654329edf25.tmp\core\core.a" "C:\Users\admin\AppData\Local\Temp\build05e956ed821e7a998eb94654329edf25.tmp\core\USBAPI.cpp.o"
"C:\Users\admin\AppData\Local\Arduino15\packages\arduino\tools\avr-gcc\4.9.2-atmel3.5.4-arduino2/bin/avr-ar" rcs  "C:\Users\admin\AppData\Local\Temp\build05e956ed821e7a998eb94654329edf25.tmp\core\core.a" "C:\Users\admin\AppData\Local\Temp\build05e956ed821e7a998eb94654329edf25.tmp\core\WMath.cpp.o"
"C:\Users\admin\AppData\Local\Arduino15\packages\arduino\tools\avr-gcc\4.9.2-atmel3.5.4-arduino2/bin/avr-ar" rcs  "C:\Users\admin\AppData\Local\Temp\build05e956ed821e7a998eb94654329edf25.tmp\core\core.a" "C:\Users\admin\AppData\Local\Temp\build05e956ed821e7a998eb94654329edf25.tmp\core\WString.cpp.o"
"C:\Users\admin\AppData\Local\Arduino15\packages\arduino\tools\avr-gcc\4.9.2-atmel3.5.4-arduino2/bin/avr-ar" rcs  "C:\Users\admin\AppData\Local\Temp\build05e956ed821e7a998eb94654329edf25.tmp\core\core.a" "C:\Users\admin\AppData\Local\Temp\build05e956ed821e7a998eb94654329edf25.tmp\core\abi.cpp.o"
"C:\Users\admin\AppData\Local\Arduino15\packages\arduino\tools\avr-gcc\4.9.2-atmel3.5.4-arduino2/bin/avr-ar" rcs  "C:\Users\admin\AppData\Local\Temp\build05e956ed821e7a998eb94654329edf25.tmp\core\core.a" "C:\Users\admin\AppData\Local\Temp\build05e956ed821e7a998eb94654329edf25.tmp\core\main.cpp.o"
"C:\Users\admin\AppData\Local\Arduino15\packages\arduino\tools\avr-gcc\4.9.2-atmel3.5.4-arduino2/bin/avr-ar" rcs  "C:\Users\admin\AppData\Local\Temp\build05e956ed821e7a998eb94654329edf25.tmp\core\core.a" "C:\Users\admin\AppData\Local\Temp\build05e956ed821e7a998eb94654329edf25.tmp\core\new.cpp.o"
"C:\Users\admin\AppData\Local\Arduino15\packages\arduino\tools\avr-gcc\4.9.2-atmel3.5.4-arduino2/bin/avr-gcc" -w -Os -Wl,--gc-sections -mmcu=atmega32u4  -o "C:\Users\admin\AppData\Local\Temp\build05e956ed821e7a998eb94654329edf25.tmp/MIDI_Controller_Leonardo_-_Analog.ino.elf" "C:\Users\admin\AppData\Local\Temp\build05e956ed821e7a998eb94654329edf25.tmp\sketch\MIDI_Controller_Leonardo_-_Analog.ino.cpp.o" "C:\Users\admin\AppData\Local\Temp\build05e956ed821e7a998eb94654329edf25.tmp/core\core.a" "-LC:\Users\admin\AppData\Local\Temp\build05e956ed821e7a998eb94654329edf25.tmp" -lm
"C:\Users\admin\AppData\Local\Arduino15\packages\arduino\tools\avr-gcc\4.9.2-atmel3.5.4-arduino2/bin/avr-objcopy" -O ihex -j .eeprom --set-section-flags=.eeprom=alloc,load --no-change-warnings --change-section-lma .eeprom=0  "C:\Users\admin\AppData\Local\Temp\build05e956ed821e7a998eb94654329edf25.tmp/MIDI_Controller_Leonardo_-_Analog.ino.elf" "C:\Users\admin\AppData\Local\Temp\build05e956ed821e7a998eb94654329edf25.tmp/MIDI_Controller_Leonardo_-_Analog.ino.eep"
"C:\Users\admin\AppData\Local\Arduino15\packages\arduino\tools\avr-gcc\4.9.2-atmel3.5.4-arduino2/bin/avr-objcopy" -O ihex -R .eeprom  "C:\Users\admin\AppData\Local\Temp\build05e956ed821e7a998eb94654329edf25.tmp/MIDI_Controller_Leonardo_-_Analog.ino.elf" "C:\Users\admin\AppData\Local\Temp\build05e956ed821e7a998eb94654329edf25.tmp/MIDI_Controller_Leonardo_-_Analog.ino.hex"

Sketch uses 3,020 bytes (10%) of program storage space. Maximum is 28,672 bytes.
Global variables use 197 bytes (7%) of dynamic memory, leaving 2,363 bytes for local variables. Maximum is 2,560 bytes.
Couldn't find a Board on the selected port. Check that you have the correct port selected.  If it is correct, try pressing the board's reset button after initiating the upload.`

Settings in the IDE

Board: TeeOnArdu
Processor: 16MHZ
USB Type: MIDI
NO PORT MENU, GREYED OUT
Programmer: AVRISP mkII

Full code

///* This is the code for the Arduino Leonardo, it will not work on the Uno. */

/* These are constants: If you want to change the number of analog inputs, you can simply do it once on this line, instead of changing it everywhere in your code.*/
#define NUMBER_OF_ANALOG_INPUTS  12 // The Leonardo has 12 analog inputs, we'll use all of them in this example. If you only need 6, change this to 6, and you'll be able to use A6 to A11 as normal I/O pins.

#define CHANNEL  1 //Send all messages on channel 1

/* The list with the corresponding controller numbers: for example, the values of the potentiometer on A0 will be sent as the first controller number in this list, A1 as the second, etc...
  Here's the list with all controller numbers:  http://midi.org/techspecs/midimessages.php#3  You can change them if you want.*/
int controllers[NUMBER_OF_ANALOG_INPUTS] = {
  0x10, 0x11, 0x12, 0x13, 0x14, 0x15, 0x16, 0x17, 0x18, 0x19, 0x1A, 0x1B
};

int analogVal[NUMBER_OF_ANALOG_INPUTS];  // We declare an array for the values from the analog inputs

int analogOld[NUMBER_OF_ANALOG_INPUTS]; // We declare an array for the previous analog values.

void setup() {
  for (int i = 0; i < NUMBER_OF_ANALOG_INPUTS; i++) { // We make the values of analogOld -1, so it will always be different from any possible analog reading.
    analogOld[i] = -1;
  }
  delay(1000);  // Wait 1 second before sending messages, to be sure everything is set up, and to make uploading new sketches easier.
}

void loop() {
  for (int i = 0; i < NUMBER_OF_ANALOG_INPUTS; i++) {                       // Repeat this procedure for every analog input.
    analogVal[i] = analogRead(i + A0) / 8;                                   // The resolution of the Arduino's ADC is 10 bit, and the MIDI message has only 7 bits, 10 - 7 = 3, so we divide by 2^3, or 8.
    if (analogVal[i] != analogOld[i]) {                                   // Only send the value, if it is a different value than last time.
      usbMIDI.sendControlChange(controllers[i], analogVal[i], CHANNEL);
      /* Send the MIDI control change message: choose the i'th controller in the array above, get the right value from the analogVal array, on the predefined channel.
        NOTE: the compiler will not recognize this command if you don't have TeeOnArdu installed, if the board type is not TeeOnArdu, or if the USB type is not set to MIDI.*/
      analogOld[i] = analogVal[i];                                        // Put the analog values in the array for old analog values, so we can compare the new values with the previous ones.
    }
  }

}

Steps taken to try to diagnose or solve the problem

I have been trying to re-establish connection with the Arduino so I can upload some new code/libraries thinking there is probably an error somewhere in the current code. The Arduino does show up as a MIDI controller and has the ANALOG Example uploaded to it. Being locked out of the Arduino has hindered my ability to troubleshoot.

The goal of your project and aditional information

I want 9 Faders, 2 Knobs and an external TRS female jack for an expression pedal. I want this to run an organ VST's drawbars, overdrive, and expression pedal.

Encoder problem only CC or CCW

Hi, I'm new, I'm looking for build my dj controller. I have a problem. My encoder go only in one direction, or CC or CCW. I had try al settings in the example but nothing. Please help me.

Problem with DigitalCC

Hi,
I cannot manage to install the DigitalCC class in order to use the switches as MIDI_CC controls. Is there a release of the MIDI_CONTROLLER library with this class already implemented? Or is there a tutorial that can explain me how to do this? Many thanks.

convert analog data to button activation

Description of the problem or question

I'm repairing a midi dj controler with Arduino board. On the circuit board, buttons are connected to analog mux in serial with resistor between each buttons. On the same mux there is also some potentiometer. I use channel 3 for each mux pin connected to buttons and one cc per mux pin.

I'm looking for a way to read analog mux pin value and convert it to button depending of the value or to do the same thing from each cc in channel 3.

Fox example, I'v got a mux with pin 1 connected to buttons. I set it to CC 1 Channel 3. When I press the first button the value pass from 127 to 2, when I release it the value go back to 127. If I press the second button the value of CC 1 pass from 127 to 12, when I release it the value go back to 127.

I want to be able to convert cc value to button activation like :

If CC1 Chan3 < 10 send note C1 pressure 127
else if CC1 Chan3 >10 & <20 send note D1 pressure 127
else if CC1 Chan3 >20 & <30 send note E1 pressure 127
etc...

I don't know how I can read the CC value or mux pin value on my code in order to convert it to button.

Hardware

Arduino board: ? Arduino MEGA 2560

Schematic: ?
schema

Software versions:

MIDI Controller library: ? 3.0.1
Arduino IDE: ? 1.8.5
Operating System: ? Windows
Operating System version: ? 10

The goal of your project and aditional information

I'm fixing a Gemini G4v which has been connected to 12v instead of 5v. Microcontrollers are dead but button, potentiometer, mux, shift register and led are still alive. The goal is to be able to read the data from every pot/buttons of this controller and send the correct midi data to the computer.

The mux configuration is strange because some mux data output pin are connected to other mux data input in order to use less analog pin on the original configuration. Analog mux are also used to connect multiples buttons

Encoder_example compilation terminated

encoder_example did not compile.
Teensyduino is installed, also MIDIUSB.
Tried it also on fresh installed PC with same results.
Am i missing something?

Arduino: 1.6.5 (Windows 7), TD: 1.36, Platine: "TeeOnArdu (Leo on TeensyCore), MIDI, German"

In file included from C:\Users\DH1KLM\Documents\Arduino\libraries\MIDI_controller-master\src/MIDI_controller.h:9:0,
from Encoder_example.ino:20:
C:\Users\DH1KLM\Documents\Arduino\libraries\MIDI_controller-master\src/RotaryEncoder.h:6:21: fatal error: Encoder.h: No such file or directory
#include "Encoder.h"
^
compilation terminated.
Fehler beim Kompilieren.

Same happens if i change to Teensy.

Play/Pause PushButton like old SendNoteOn-SendNoteOff

Hello, I am developing a MIDI controller that requires some different functions, I have all done but the only thing that I haven't is the Play/Pause assigned to one button, I want to know if there is some way to do it like in the older version with SendNoteOn and SendNoteOff.
I have been looking the switch example but it say that has a limited duration, and I want an undefined duration, that when you press the pushbutton one time it sends a NoteOn, and when you repress the button it sends the NoteOff command.

Thank you so much

Software versions:

MIDI Controller library: 3.0.1
Arduino IDE: 1.8.5

10+1pcs CD74HC4067 multiplexers

Hello,

I would like to build a MIDI Controller with 150 buttons, 16 faders, and 8 encoders.

I would like to multiplex the 150 buttons with 10+1pcs CD74HC4067 multiplexers.
I use Arduino Leonardo.

I have problem:
My code is:

#include <MIDI_Controller.h>
const int speedMultiply = 1;

//BUTTONS
AnalogMultiplex multiplexer(8, { 9, 10, 11, 12, A2, A3, A4, A5 } );
Analog potentiometers[] = {
{multiplexer.pin(0), 0x1, 1},
{multiplexer.pin(1), 0x2, 1},
{multiplexer.pin(2), 0x3, 1},
{multiplexer.pin(3), 0x4, 1},
{multiplexer.pin(4), 0x5, 1},
{multiplexer.pin(5), 0x6, 1},
{multiplexer.pin(6), 0x7, 1},
{multiplexer.pin(7), 0x8, 1},
{multiplexer.pin(8), 0x9, 1},
{multiplexer.pin(9), 0xA, 1},
{multiplexer.pin(10), 0xB, 1},
{multiplexer.pin(11), 0xC, 1},
{multiplexer.pin(12), 0xD, 1},
{multiplexer.pin(13), 0xE, 1},
{multiplexer.pin(14), 0xF, 1},
{multiplexer.pin(15), 0x10, 1},
{multiplexer.pin(16), 0x11, 1},
{multiplexer.pin(17), 0x12, 1},
{multiplexer.pin(18), 0x13, 1},
{multiplexer.pin(19), 0x14, 1},
// {multiplexer.pin(20), 0x15, 1},
{multiplexer.pin(20), 0x16, 1},
{multiplexer.pin(21), 0x17, 1},
{multiplexer.pin(22), 0x18, 1},
{multiplexer.pin(23), 0x19, 1},
{multiplexer.pin(24), 0x1A, 1},
{multiplexer.pin(25), 0x1B, 1},
{multiplexer.pin(26), 0x1C, 1},
{multiplexer.pin(27), 0x1D, 1},
{multiplexer.pin(28), 0x1E, 1},
{multiplexer.pin(29), 0x1F, 1},
{multiplexer.pin(30), 0x20, 1},
{multiplexer.pin(31), 0x21, 1},
{multiplexer.pin(32), 0x22, 1},
{multiplexer.pin(33), 0x23, 1},
{multiplexer.pin(34), 0x24, 1},
{multiplexer.pin(35), 0x25, 1},
{multiplexer.pin(36), 0x26, 1},
{multiplexer.pin(37), 0x27, 1},
{multiplexer.pin(38), 0x28, 1},
{multiplexer.pin(39), 0x29, 1},
{multiplexer.pin(40), 0x2A, 1},
{multiplexer.pin(41), 0x2B, 1},
{multiplexer.pin(42), 0x2C, 1},
{multiplexer.pin(43), 0x2D, 1},
{multiplexer.pin(44), 0x2E, 1},
{multiplexer.pin(45), 0x2F, 1},
{multiplexer.pin(46), 0x30, 1},
{multiplexer.pin(47), 0x31, 1},
{multiplexer.pin(48), 0x32, 1},
{multiplexer.pin(49), 0x33, 1},
{multiplexer.pin(50), 0x34, 1},
{multiplexer.pin(51), 0x35, 1},
{multiplexer.pin(52), 0x36, 1},
{multiplexer.pin(53), 0x37, 1},
{multiplexer.pin(54), 0x38, 1},
{multiplexer.pin(55), 0x39, 1},
{multiplexer.pin(56), 0x3A, 1},
{multiplexer.pin(57), 0x3B, 1},
{multiplexer.pin(58), 0x3C, 1},
{multiplexer.pin(59), 0x3D, 1},
{multiplexer.pin(60), 0x3E, 1},
{multiplexer.pin(61), 0x3F, 1},
{multiplexer.pin(62), 0x40, 1},
{multiplexer.pin(63), 0x41, 1},
{multiplexer.pin(64), 0x42, 1},
{multiplexer.pin(65), 0x43, 1},
{multiplexer.pin(66), 0x44, 1},
{multiplexer.pin(67), 0x45, 1},
{multiplexer.pin(68), 0x46, 1},
{multiplexer.pin(69), 0x47, 1},
{multiplexer.pin(70), 0x48, 1},
{multiplexer.pin(71), 0x49, 1},
{multiplexer.pin(72), 0x4A, 1},
{multiplexer.pin(73), 0x4B, 1},
{multiplexer.pin(74), 0x4C, 1},
{multiplexer.pin(75), 0x4D, 1},
{multiplexer.pin(76), 0x4E, 1},
{multiplexer.pin(77), 0x4F, 1},
{multiplexer.pin(78), 0x50, 1},
{multiplexer.pin(79), 0x51, 1},
{multiplexer.pin(80), 0x52, 1},
{multiplexer.pin(81), 0x53, 1},
{multiplexer.pin(82), 0x54, 1},
{multiplexer.pin(83), 0x55, 1},
{multiplexer.pin(84), 0x56, 1},
{multiplexer.pin(85), 0x57, 1},
{multiplexer.pin(86), 0x58, 1},
{multiplexer.pin(87), 0x59, 1},
{multiplexer.pin(88), 0x5A, 1},
{multiplexer.pin(89), 0x5B, 1},
{multiplexer.pin(90), 0x5C, 1},
{multiplexer.pin(91), 0x5D, 1},
{multiplexer.pin(92), 0x5E, 1},
{multiplexer.pin(93), 0x5F, 1},
{multiplexer.pin(94), 0x60, 1},
{multiplexer.pin(95), 0x61, 1},
{multiplexer.pin(96), 0x62, 1},
{multiplexer.pin(97), 0x63, 1},
{multiplexer.pin(98), 0x64, 1},
{multiplexer.pin(99), 0x65, 1},
{multiplexer.pin(100), 0x66, 1},
{multiplexer.pin(101), 0x67, 1},
{multiplexer.pin(102), 0x68, 1},
{multiplexer.pin(103), 0x69, 1},
{multiplexer.pin(104), 0x6A, 1},
{multiplexer.pin(105), 0x6B, 1},
{multiplexer.pin(106), 0x6C, 1},
{multiplexer.pin(107), 0x6D, 1},
{multiplexer.pin(108), 0x6E, 1},
{multiplexer.pin(109), 0x6F, 1},
{multiplexer.pin(110), 0x70, 1},
{multiplexer.pin(111), 0x71, 1},
{multiplexer.pin(112), 0x72, 1},
{multiplexer.pin(113), 0x73, 1},
{multiplexer.pin(114), 0x74, 1},
{multiplexer.pin(115), 0x75, 1},
{multiplexer.pin(116), 0x76, 1},
{multiplexer.pin(117), 0x77, 1},
{multiplexer.pin(118), 0x78, 1},
{multiplexer.pin(119), 0x79, 1},
{multiplexer.pin(120), 0x7A, 1},
{multiplexer.pin(121), 0x7B, 1},
{multiplexer.pin(122), 0x7C, 1},
{multiplexer.pin(123), 0x7D, 1},
{multiplexer.pin(124), 0x7E, 1},
{multiplexer.pin(125), 0x7F, 1},
{multiplexer.pin(126), 0x1, 2},
{multiplexer.pin(127), 0x2, 2},
{multiplexer.pin(128), 0x3, 2},
{multiplexer.pin(129), 0x4, 2},
{multiplexer.pin(130), 0x5, 2},
{multiplexer.pin(131), 0x6, 2},
{multiplexer.pin(132), 0x7, 2},
{multiplexer.pin(133), 0x8, 2},
{multiplexer.pin(134), 0x9, 2},
{multiplexer.pin(135), 0xA, 2},
{multiplexer.pin(136), 0xB, 2},
{multiplexer.pin(137), 0xC, 2},
{multiplexer.pin(138), 0xD, 2},
{multiplexer.pin(139), 0xE, 2},
{multiplexer.pin(140), 0xF, 2},
{multiplexer.pin(141), 0x10, 2},
{multiplexer.pin(142), 0x11, 2},
{multiplexer.pin(143), 0x12, 2},
{multiplexer.pin(144), 0x13, 2},
{multiplexer.pin(145), 0x14, 2},
{multiplexer.pin(146), 0x15, 2},
{multiplexer.pin(147), 0x16, 2},
{multiplexer.pin(148), 0x17, 2},
{multiplexer.pin(149), 0x18, 2},
{multiplexer.pin(150), 0x19, 2},
};
//FADERS
AnalogMultiplex multiplexerF(A0, { 9, 10, 11, 12,} );
Analog potentiometersF[] = {
{multiplexerF.pin(0), 0x1, 3},
{multiplexerF.pin(1), 0x2, 3},
{multiplexerF.pin(3), 0x4, 3},
{multiplexerF.pin(4), 0x5, 3},
{multiplexerF.pin(5), 0x6, 3},
{multiplexerF.pin(6), 0x7, 3},
{multiplexerF.pin(7), 0x8, 3},
{multiplexerF.pin(8), 0x9, 3},
{multiplexerF.pin(9), 0xA, 3},
{multiplexerF.pin(10), 0xB, 3},
{multiplexerF.pin(11), 0xC, 3},
{multiplexerF.pin(12), 0xD, 3},
{multiplexerF.pin(13), 0xE, 3},
{multiplexerF.pin(14), 0xF, 3},
{multiplexerF.pin(15), 0x10, 3},
};

//ENCODERS
RotaryEncoder enc0 = {1, 0, 0x1, 4, speedMultiply, NORMAL_ENCODER, TWOS_COMPLEMENT};
RotaryEncoder enc1 = {2, 1, 0x2, 4, speedMultiply, NORMAL_ENCODER, TWOS_COMPLEMENT};
RotaryEncoder enc2 = {3, 2, 0x3, 4, speedMultiply, NORMAL_ENCODER, TWOS_COMPLEMENT};
RotaryEncoder enc3 = {4, 3, 0x4, 4, speedMultiply, NORMAL_ENCODER, TWOS_COMPLEMENT};
RotaryEncoder enc4 = {5, 4, 0x5, 4, speedMultiply, NORMAL_ENCODER, TWOS_COMPLEMENT};
RotaryEncoder enc5 = {6, 5, 0x6, 4, speedMultiply, NORMAL_ENCODER, TWOS_COMPLEMENT};
RotaryEncoder enc6 = {7, 6, 0x7, 4, speedMultiply, NORMAL_ENCODER, TWOS_COMPLEMENT};
RotaryEncoder enc7 = {0, 7, 0x8, 4, speedMultiply, NORMAL_ENCODER, TWOS_COMPLEMENT};

void setup() {}
void loop() {MIDI_Controller.refresh();}

I got this message when I tried to Verify:
,,Sketch uses 13276 bytes (46%) of program storage space. Maximum is 28672 bytes.
Global variables use 5392 bytes (210%) of dynamic memory, leaving -2832 bytes for local variables. Maximum is 2560 bytes.
Not enough memory; see http://www.arduino.cc/en/Guide/Troubleshooting#size for tips on reducing your footprint.
Error compiling for board Arduino Leonardo."

What could I do? Do I have to buy a Teensy board? For example Teensy 3.2? Which would be the best?

FeatureReq - Send SysEx message on button press

A little request; to be able to send a SysEx command when a button is pressed.

I imagine that this would be a new definition (say 'DigitalSysEx()') and take a string of hex digits which would be sent each time the button was pressed.

This is respect to creating a start/stop device for the Akai MPC, as seen here:
https://www.youtube.com/watch?v=2PngH1TE_dA

Required SysEx are described here:
https://www.dropbox.com/s/71crq2qvd378zbg/MPC%20and%20MC6%20Editor%20Notes.pdf?dl=0

Thanks,
Simon.

Please help, can't compile at all

Description of the problem or question

First of all I'm noob here, Need advice or suggestion that I can't compile code use this library at all even Example code it just show this warning (testing with example code)

In file included from /Users/nupuan/Documents/Arduino/libraries/MIDI_controller-3.0.1/examples/MIDI_Controller_finished_example/MIDI_Controller_finished_example.ino:20:0: /Users/nupuan/Documents/Arduino/libraries/MIDI_controller-3.0.1/src/MIDI_Controller.h:7:2: error: #error Please select a 'Serial + MIDI' option in the 'Tools > USB Type' menu. #error Please select a 'Serial + MIDI' option in the 'Tools > USB Type' menu. ^ In file included from /Users/nupuan/Documents/Arduino/libraries/MIDI_controller-3.0.1/src/./MIDI_Controller/MIDI_Controller_Class.h:4:0, from /Users/nupuan/Documents/Arduino/libraries/MIDI_controller-3.0.1/src/MIDI_Controller.h:10, from /Users/nupuan/Documents/Arduino/libraries/MIDI_controller-3.0.1/examples/MIDI_Controller_finished_example/MIDI_Controller_finished_example.ino:20: /Users/nupuan/Documents/Arduino/libraries/MIDI_controller-3.0.1/src/./MIDI_Controller/../MIDI_Interfaces/USBMIDI_Interface.h:7:21: fatal error: usb_dev.h: No such file or directory #include <usb_dev.h> ^ compilation terminated. Error compiling for board Teensy 2.0.

it's no MIDI+Serial option there. And I think Iā€™m already install all required.

Hardware

Teensy 2.0

Software versions:

MIDI Controller library: ? 3.0.0 ? 3.0.1
Arduino IDE: ? 1.8.4 ? 1.8.5
Operating System: ? Windows, OSX, Ubuntu, ... ? OSX
Operating System version: ? 10, 16.04, ... ? 10.13.3
(Teensyduino): ? 1.39 ? 1.41
(Encoder library): ? 1.4.1 ? 1.4.1
(MIDIUSB library): ? 1.0.3 ? 1.0.3

Can not compile on Teensy++ 2.0

Description of the problem or question

Can not compile any of your examples on Teensy++ 2.0,
since always it gives the following error:
"Please select a 'Serial + MIDI' option in the 'Tools > USB Type' menu"
But Teensy++ 2.0 did not offer the Serial + MIDI option. This option only exits
from Teensy LC upwards to Teensy 3.6. I can select either USB or Serial.

Teensy MIDI examples installed by Teensyduino Installer are compiling without problems.

FYI: On my Pro Micro your examples are compiling without errors.

Steps to reproduce the problem

Have tested two different PC's using Win 10 and 7, also different Arduino IDE 1.6.x to 1.8.x
and various Teensyduino.
On both PC's the same result. Pro micro > yes, Teensy++ 2.0 >no.

Hardware

Teensy++ 2.0

Software versions:

MIDI Controller library: 3.0.1
Arduino IDE: 1.8.5
Operating System: Windows 7/10
(Teensyduino): 1.4.1
(Encoder library): 1.4.1
(MIDIUSB library): 1.0.3

Full code

for example:

In file included from C:\Users\xxxx\Documents\Arduino\libraries\MIDI_controller-3.0.1\examples\Ex.13.Shift-Register\Ex.13.Shift-Register.ino:18:0:

C:\Users\xxxx\Documents\Arduino\libraries\MIDI_controller-3.0.1\src/MIDI_Controller.h:7:2: error: #error Please select a 'Serial + MIDI' option in the 'Tools > USB Type' menu.

#error Please select a 'Serial + MIDI' option in the 'Tools > USB Type' menu.

^

Fehler beim Kompilieren fĆ¼r das Board Teensy++ 2.0.

MIDI_Controller Issue With 74HC4067 multiplexer

Hi,
First of all thank a lot for your awesome workc ! I've started midi controller building with a teensy 3.2 thank's to MIDIUSB library then i wanted to go for an Arduino Mega 16u2 in order to have more I/O.

I'd rapidly realised that's arduino Mega wasn't natively able to comunicate Midi over usb but thank's to your work and your extremely well explained guide i managed to flash the arduino mega and do some basic stuff with your MIDI controller Library.

The problem occurred when i tried to use 74HC4067 16 channel multipkexer with the Midi controller library. I used this library to Read the multiplexer :
Everything is okay with reading the multiplexer , ( i've had a problem with the multiplexer reading false value, to solve this i've had to connect unused multiplexer pin to ground ) but when i try this the potentiometer work fine but it's sending on all CC 1 to 15.
So despite the potentiometer is intend to send is value on CC 1 it is sending on all CC 1 to 15 .

I dont know where is the error, i'm new into arduino so i hope i didn't make a beginer fault.
Thank's again for your work šŸ‘ Full support From France !

Here is the complete code :

#include <MUX74HC4067.h>
#include <MIDI_Controller.h>

// Setting up the multiplexer with EN,S0,S1,S2,S3 PIN
MUX74HC4067 mux1(35, 47, 46, 45, 44);

//Here i'm creating 2 array that store the value of each potentiometer connected to the 0-15 input of the Multiplexer
//M1 array is for the "old" value and nM1 array is for "freshly readed value"
int M1[] = {0, 0, 0, 0, 0, 0, 0, 0, 0, 0, 0, 0, 0, 0, 0, 0};
int nM1[] = {0, 0, 0, 0, 0, 0, 0, 0, 0, 0, 0, 0, 0, 0, 0, 0};

//here i'm trying to initialize 16 potentiometer element That's send value from the M1 array via CC 1 to 16 on channel 1 (maybe the error is here but i dont know an other way to do this)
Analog M1pot[] = {
  {M1[0], 1, 1},
  {M1[1], 2, 1},
  {M1[2], 3, 1},
  {M1[3], 4, 1},
  {M1[4], 5, 1},
  {M1[5], 6, 1},
  {M1[6], 7, 1},
  {M1[7], 8, 1},
  {M1[8], 9, 1},
  {M1[9], 10, 1},
  {M1[10], 11, 1},
  {M1[11], 12, 1},
  {M1[12], 13, 1},
  {M1[13], 14, 1},
  {M1[14], 15, 1},
  {M1[15], 16, 1},
};

void setup() {
  // Mux Setup : here i'm telling that the multiplexer is used as analog input connected on A0
  mux1.signalPin(A0, INPUT, ANALOG);
}

void loop() {
  // Mux Read
  for (int i = 0; i < 16; ++i) { //here i compare the new value readed with the old one and if it's different i replace the old one
    nM1[i] = mux1.read(i);
    if (abs( nM1[i] - M1[i] ) > 4 ) {
      M1[i] = nM1[i];
    }
  }
  MIDI_Controller.refresh();
}

Calibrating a potentiometer

Hey dude

I'm having some problems calibrating a potentiometer. Some guy online helped me with the code but I can't get it to work. Do you think this is not supported by the library?

Here is the code I used:

#include <MIDI_Controller.h>

AnalogMultiplex multiplexerF(A13, {34, 35, 36, 37} );
Analog potentiometersF[] = {
  { multiplexerF.pin(12), 0x1, 2 },
};

int potentiometerCalibrate(int val) {

  if (val <= 44)
  {
    return map(val, 0, 44, 0, 255);
  }
  if (val > 44 && val < 975)
  {
    return map(val, 45, 974, 255, 767);
  }
  if (val >= 975 )
  {
    return map(val, 975, 1023, 767, 1023);
  }
  
}

void setup() {
    potentiometersF[0].map(potentiometerCalibrate);
  }
void loop() {
  MIDI_Controller.refresh();
}

And here is the potentiometer curve (the blue one, ignore the others):

y axis is analog value and x axis is % of slide.

Serial MIDI

Description of the problem or question

can i send midi data through the Arduino Uno's USB Port?
if so how is this done?

Steps to reproduce the problem

this is just an ordinary question ;)

Hardware

Arduino Uno and a few potentiometers

Software versions:

MIDI Controller library: ? 3.0.1
Arduino IDE: ? 1.8.5
Operating System: Windows
Operating System version: ? 10

Settings in the IDE

Full code

// Your code here

Steps taken to try to diagnose or solve the problem

? Tried the MIDI debug mode, used a MIDI monitor, ... ?

The goal of your project and aditional information

Potentiometer note

Hello,

First I apologize for my previous issue that is now figured out. I came across a situation while adding a potentiometer with your library: how do I select the note for that fader? I have no way to selecting it and found no info on your files. Can you explain how to do this on multiplexer as well?

Thanks for this amazing library and keep up the great work :)

Multiple Interfces Usge

I want to have an additional MIDI Connector besides MIDI USB. As I understand it, I need to add a line to the code: HardwareSerialMIDI_Interface (HardwareSerial & serial, unsigned long baud).

Could you add an example code of using an additional interface? I can not understand how to setup a pin for transmission. Also I can not understand where and with what syntax to interpose a line to connect two interfaces. I think it may be something like this: SoftwareSerial midiSerial(2, 3); but can't find.

Smoothing pots.

Having problems with smoothing a potentiometer, when choosing the hires potentiometer exampe i get signal but it seems rather constant... and i really want single values so i dont loose midi info.

I also had to manually include som librarys it couldn't find when i was trying to compile the code. I dont know why this problem keeps happening. Could it be because i dont have the librarys installed in the default folders.

1 pot

Arduino Leonardo

Schematic: ?

Software versions:

MIDI Controller library: 3.0.0
Arduino IDE: ? 1.8.5
Operating System: Windows
Operating System version: 10
(Teensyduino): ? 1.40 ?
(Encoder library): Where do i find this?
(MIDIUSB library): Where do i find this?

Settings in the IDE

Full code

#include <Encoder.h>

/*
This is an example of the "AnalogHiRes" class of the MIDI_controller library.
Connect a potentiometer to analog pin A0. It will send MIDI Pitch Bend messages on channel 1
Map it in your DAW or DJ software.

Written by Pieter P, 08-09-2017
https://github.com/tttapa/MIDI_controller
*/

#include <MIDI_Controller.h> // Include the library

// Create a new instance of the class 'AnalogHiRes', called 'potentiometer', on pin A0, 
// that sends MIDI Pitch Bend messages on channel 1
AnalogHiRes potentiometer(A0, 1);

void setup() {}

void loop() {
  // Refresh the MIDI controller (check whether the potentiometer's input has changed since last time, if so, send the new value over MIDI)
  MIDI_Controller.refresh();
}

i pretty much just put in the encoder library manually as i was getting errors saying that it couldn't find it.

i want to make a MIDI controller to control my DAW (FL Studio).

How to use HairlessMIDI_Interface

Hi,
First of all, congrats to your MIDI_controller library.

I'm trying to use your library to send a value obtained from a potentiometer to DAW.
Could you please inform me how to instantiate the HairlessMIDI_Interface?

I'm using Arduino Nano with CH340G

Thanks

Hairless Midi isn't able to read data

Description of the problem or question

When I use Hairless MIDI Serial to test my circuit it is not able to read midi data and I have strange messages like bellow :


 +233.822 - Serial In: System Message #14
 +233.826 - Serial In: System Message #14
 +233.899 - Warning: got a status byte when we were expecting 3 more data bytes, sending possibly incomplete MIDI message 0xff
 +233.899 - Serial Says: 
 +233.899 - Warning: got a status byte when we were expecting 3 more data bytes, sending possibly incomplete MIDI message 0xff

This only append with Hairless. When I disable HairlessMIDI_Interface and activate USBDebugMIDI_Interface I'm able to see correct midi data.

I'm doing it to repare a Gemini G4v controller with an arduino, my code is huge but I also tried with only one potentiometer and the issue is the same.

Steps to reproduce the problem

Connect few potentiometers to a mux use HairlessMIDI_Interface. Hairless midi serial is set to 9600baud

Hardware

Arduino board: ? Arduino MEGA 2560

Software versions:

MIDI Controller library: ? 3.0.1
Arduino IDE: ? 1.8.5
Operating System: ? Windows
Operating System version: ? 10

Full code

#include <MIDI_Controller.h>


/*********************************************************

Arduino midi controller
G4v hack

*********************************************************/


//serial debug
//USBDebugMIDI_Interface midiInterface(9600);
//We instantiate an hairlessmidi interface to send midi over serialUSB 
HairlessMIDI_Interface HairlessMidi;

//AnalogMultiplex NAME(pin_t analogPin, { pin_t addressPin1, addressPin2, ... addressPinN } )
AnalogMultiplex MuxD1(A0, {2,3,4,5});
AnalogMultiplex MuxD2(A1, {2,3,4,5});
AnalogMultiplex MuxE1(A2, {2,3,4,5});
AnalogMultiplex MuxE2(A3, {2,3,4,5});
AnalogMultiplex MuxF1(A4, {2,3,4,5});
AnalogMultiplex MuxF2(A5, {2,3,4,5});

//we create an array of multiplexer to convert button value later.
AnalogMultiplex MidiMux[] = {
  MuxD1,
  MuxD2,
  MuxE1,
  MuxE2,
  MuxF1,
  MuxF2
};


/*
 * We define only MUX D, E & F but we define them like a "virtual mux" in order to contain the secondary mux (A,B,C,G,H)
pin 2 & 3 used for the main mux (D, E, F)
pin 4 & 5 used by the secondary mux (A, B, C, G, H)
*/

//create an array for each Mux containing potentiometer
//channel 3 will be used to read button values
Analog D1pot[] = {
  {MuxD1.pin(0), 1, 3},
  {MuxD1.pin(1), 3, 3},
  {MuxD1.pin(2), 4, 3},
  {MuxD1.pin(3), 8, 3},
  {MuxD1.pin(4), 1, 3},
  {MuxD1.pin(5), 3, 3},
  {MuxD1.pin(6), 5, 3},
  {MuxD1.pin(7), 23, 4},
  {MuxD1.pin(8), 1, 3},
  {MuxD1.pin(9), 3, 3},
  {MuxD1.pin(10), 4, 1},
  {MuxD1.pin(11), 24, 4},
  {MuxD1.pin(12), 1, 3},
  {MuxD1.pin(3), 3, 3},
  {MuxD1.pin(14), 5, 1},
  {MuxD1.pin(15), 2, 4}
};

Analog D2pot[] = {
  {MuxD2.pin(0), 2, 3},
  {MuxD2.pin(1), 25, 4},
  {MuxD2.pin(2), 6, 3},
  {MuxD2.pin(3), 9, 3},
  {MuxD2.pin(4), 2, 3},
  {MuxD2.pin(5), 25, 4},
  {MuxD2.pin(6), 7, 3},
  {MuxD2.pin(7), 21, 4},
  {MuxD2.pin(8), 2, 3},
  {MuxD2.pin(9), 25, 4},
  {MuxD2.pin(10), 4, 2},
  {MuxD2.pin(11), 22, 4},
  {MuxD2.pin(12), 2, 3},
  {MuxD2.pin(13), 25, 4},
  {MuxD2.pin(14), 5, 2},
  {MuxD2.pin(15), 1, 1}
};

Analog E1pot[] = {
  {MuxE1.pin(0), 10, 3},
  {MuxE1.pin(1), 1, 2},
  {MuxE1.pin(2), 17, 4},
  {MuxE1.pin(3), 28, 4},
  {MuxE1.pin(4), 10, 3},
  {MuxE1.pin(5), 1, 2},
  {MuxE1.pin(6), 18, 4},
  {MuxE1.pin(7), 28, 4},
  {MuxE1.pin(8), 10, 3},
  {MuxE1.pin(9), 1, 2},
  {MuxE1.pin(10), 19, 4},
  {MuxE1.pin(11), 28, 4},
  {MuxE1.pin(12), 10, 3},
  {MuxE1.pin(13), 1, 2}, 
  {MuxE1.pin(14), 20, 4},
  {MuxE1.pin(15), 28, 4}
};

Analog E2pot[] = {
  {MuxE2.pin(0), 11, 3},
  {MuxE2.pin(1), 1, 1},
  {MuxE2.pin(2), 13, 4},
  {MuxE2.pin(3), 27, 4},
  {MuxE2.pin(4), 11, 3},
  {MuxE2.pin(5), 1, 1},
  {MuxE2.pin(6), 14, 4},
  {MuxE2.pin(7), 27, 4},
  {MuxE2.pin(8), 11, 3},
  {MuxE2.pin(9), 1, 1},
  {MuxE2.pin(10), 15, 4},
  {MuxE2.pin(11), 27, 4},
  {MuxE2.pin(12), 11, 3},
  {MuxE2.pin(13), 1, 1}, 
  {MuxE2.pin(14), 16, 4},
  {MuxE2.pin(15), 27, 4}
};

Analog F1pot[] = {
  {MuxF1.pin(0), 12, 3},
  {MuxF1.pin(1), 2, 2},
  {MuxF1.pin(2), 26, 4},
  {MuxF1.pin(3), 5, 4},
  {MuxF1.pin(4), 12, 3},
  {MuxF1.pin(5), 2, 2},
  {MuxF1.pin(6), 3, 2},
  {MuxF1.pin(7), 6, 4},
  {MuxF1.pin(8), 12, 3},
  {MuxF1.pin(9), 2, 2},
  {MuxF1.pin(11), 7, 4},
  {MuxF1.pin(12), 12, 3},
  {MuxF1.pin(13), 2, 2},
  {MuxF1.pin(14), 4, 4},
  {MuxF1.pin(15), 8, 4}
};

Analog F2pot[] = {
  {MuxF2.pin(0), 13, 3},
  {MuxF2.pin(1), 2, 1},
  {MuxF2.pin(2), 14, 3},
  {MuxF2.pin(3), 9, 4},
  {MuxF2.pin(4), 13, 3},
  {MuxF2.pin(5), 2, 1},
  {MuxF2.pin(6), 3, 1},
  {MuxF2.pin(7), 10, 4},
  {MuxF2.pin(8), 13, 3},
  {MuxF2.pin(9), 2, 1},
  {MuxF2.pin(11), 11, 4},
  {MuxF2.pin(12), 13, 3},
  {MuxF2.pin(13), 2, 1},
  {MuxF2.pin(14), 3, 4},
  {MuxF2.pin(15), 12, 4}
};


void setup() {
  // put your setup code here, to run once:

}

void loop() {

  MIDI_Controller.refresh();

  
}

Steps taken to try to diagnose or solve the problem

Work properly with midi debug and serial terminal.

The goal of your project and aditional information

I'm fixing a Gemini G4v which has been connected to 12v instead of 5v. Microcontrollers are dead but button, potentiometer, mux, shift register and led are still alive. The goal is to be able to read the data from every pot/buttons of this controller and send the correct midi data to the computer.

The mux configuration is strange because some mux data output pin are connected to other mux data input in order to use less analog pin on the original configuration.

Recommend Projects

  • React photo React

    A declarative, efficient, and flexible JavaScript library for building user interfaces.

  • Vue.js photo Vue.js

    šŸ–– Vue.js is a progressive, incrementally-adoptable JavaScript framework for building UI on the web.

  • Typescript photo Typescript

    TypeScript is a superset of JavaScript that compiles to clean JavaScript output.

  • TensorFlow photo TensorFlow

    An Open Source Machine Learning Framework for Everyone

  • Django photo Django

    The Web framework for perfectionists with deadlines.

  • D3 photo D3

    Bring data to life with SVG, Canvas and HTML. šŸ“ŠšŸ“ˆšŸŽ‰

Recommend Topics

  • javascript

    JavaScript (JS) is a lightweight interpreted programming language with first-class functions.

  • web

    Some thing interesting about web. New door for the world.

  • server

    A server is a program made to process requests and deliver data to clients.

  • Machine learning

    Machine learning is a way of modeling and interpreting data that allows a piece of software to respond intelligently.

  • Game

    Some thing interesting about game, make everyone happy.

Recommend Org

  • Facebook photo Facebook

    We are working to build community through open source technology. NB: members must have two-factor auth.

  • Microsoft photo Microsoft

    Open source projects and samples from Microsoft.

  • Google photo Google

    Google ā¤ļø Open Source for everyone.

  • D3 photo D3

    Data-Driven Documents codes.