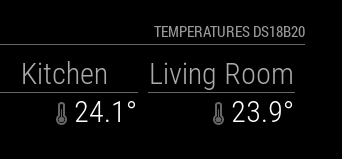
Display DS18B20 sensor's temperature on your MagicMirror


- An installation of MagicMirror2
- ds18x20
- And of course, have DS18B20 sensor(s) !
List DS18B20 sensors IDs:
find /sys/bus/w1/devices/ -name "28-*"Get DS18B20 sensors temperatures:
find /sys/bus/w1/devices/ -name "28-*" -exec cat {}/w1_slave \; | grep "t=" | awk -F "t=" '{print $2/1000}'Navigate into your MagicMirror's modules folder:
cd ~/MagicMirror/modulesClone this repository:
git clone https://github.com/thlb/MMM-temp-ds18b20Navigate to the new MMM-temp-ds18b20 folder and install the node dependencies.
npm installConfigure the module in your config.js file.
To use this module, add it to the modules array in the config/config.js file:
modules: [
   {
       module: 'MMM-temp-ds18b20',
       position: 'top_right',
       header: 'Temperature sensors',
       config: {
            refreshInterval: 10, // in seconds
            displayMode: 'x-stack',
            sensors:[
                {
                    id: "28-800000xxxxxx",
                    label: "Inside"
                },
                {
                    id: "28-800000xxxxxx",
                    label: "Outside"
                }
            ]
        }
    },
]The sensors property contains an array with multiple objects (one per sensor connected the Raspberry). These objects have the following properties:
| Option | Description |
|---|---|
id |
Unique ID of a DS18B20 sensor. This ID always beggin with '28-'. To find the sensor value, go to "Useful commands" section. Required Possible values: 28-XXXXXXXXXXXX |
label |
Sensor name. Required Possible values: Inside, Kitchen, or any String you want. |
The following properties can be configured:
| Option | Description |
|---|---|
refreshInterval |
The refresh interval of sensors values (in seconds). Default value: 10 |
displayMode |
Display in horizontal/vertical mode. Required Possible values: x-stack or y-stackDefault value: y-stack |
displayTempIcon |
Display the "termomether" icon. Possible values: true or falseDefault value: true |
iconSize |
Size of thermometer icon. Possible values: xsmall, small, medium, large, xlargeDefault value: small |
labelSize |
Size of sensor name. Possible values: xsmall, small, medium, large, xlargeDefault value: medium |
tempSize |
Display sensor's temperature value. Possible values: xsmall, small, medium, large, xlargeDefault value: medium |
units |
What units to use. Specified by config.js Possible values: config.units = Specified by config.js, default = Kelvin, metric = Celsius, imperial = FahrenheitDefault value: config.units |
- Raspberry
- DS18B20 sensor(s)
- 4.7kΩ resistor (Yellow, Violet, Red, Gold)
- Breadboard (optionnal)
- Jumper wires (optionnal)
The DS18B20 communicates with the controlling device via the “One-Wire” communication protocol, a proprietary serial communication protocol that uses only one wire to transmit the temperature reading to the microcontroller. There is differents models :
###Technical specifications :
- -55°C to 125°C range
- 3.0V to 5.0V operating voltage
- 750 ms sampling
- 0.5°C (9 bit); 0.25°C (10 bit); 0.125°C (11 bit); 0.0625°C (12 bit) resolution
- 64 bit unique address
- One-Wire communication protocol
This sensor has three pins :
| PIN | DS18B20+ Genuine | DS18B20 Pre-wired waterproof |
|---|---|---|
| GND | PIN 1 (Cf. diagram below) | Black wire |
| DATA | PIN 2 (Cf. diagram below) | Yellow or Blue wire |
| 3.3V power line | PIN 3 (Cf. diagram below) | Red wire |

- Power off the Raspberry.
- Follow this diagram :

Plug multiples sensors on the Raspberry is very easy. With multiples sensors, we still only have three connections to the Raspberry (+3.3V, GND & Data). The single data wire will return the temperature readings from all th sensors. This is possible because each DS18B20 sensor has a unique serial number coded into it which the Raspberry Pi can be used to identify them by.

Edit file /boot/config.txt and add the following line :
dtoverlay=w1-gpio
Load the drivers :
sudo modprobe w1-gpio
sudo modprobe w1-therm
Edit file /etc/modules and add the following lines to auto-load drivers on boot :
w1-therm
w1-gpio
Check that sensors are well recognized by the Raspberry :
find /sys/bus/w1/devices/ -name "28-*"You should see as many lines as sensors plugged. Note that the part 28-xxxxxxxxxxxx is the ID of the sensor.
Now, if you want to check the temperatures value af all your sensors :
find /sys/bus/w1/devices/ -name "28-*" -exec cat {}/w1_slave \; | grep "t=" | awk -F "t=" '{print $2/1000}'
Finnaly, perform a sudo reboot of your Raspberry to check the proper load of the driver on boot. If the previous command still works, the drivers are correctly loaded.


