This Python script aids in mining (claiming) the cryptocurrency "HOT" through the "HereWalletBot", a free-to-use, Telegram-based Web3-enabled app operating on the NEAR Protocol blockchain. To maximize rewards, users need to frequently visit the app to claim tokens. The script automates this process by initiating a claim at a random interval close to when the wallet is full. If the wallet isn't yet filled, it calculates the time until completion and waits for the optimal moment—adjusted by your preferred random offset—to claim, thereby minimizing network load and reducing gas fees.
☕ If you find this script useful, please consider buying me a coffee as a token of appreciation. Thank you in advance for any support! ☕
🔍 HINT: Although you cannot register multiple wallets to a single Telegram account, this script enables you to manage multiple pre-existing HereWallet accounts with just one Telegram login by handling each Wallet in a separate virtual browser session. Alternatively, you can manage each Wallet with its own Telegram login if preferred.
💡 PRO-TIP: For a straightforward, easily visualized, unattended claim process, novice users may find SCREEN a helpful tool. Alternatively, more confident Linux users will benefit from the additional features provided by the PM2 process manager.
For detailed instructions on setting up your environment using Windows Subsystem for Linux 2 (WSL2), please take a look at our Windows Setup section.
Copy and paste the Quick Start command block into your terminal (or follow the Manual Steps below if you prefer).
sudo apt install -y git || true && git clone https://github.com/thebrumby/HotWalletBot.git && cd HotWalletBot && chmod +x install.sh && ./install.sh-
Starting Your First Session:
- If you are not in the HotWalletBot directory, navigate there first with
cd HotWalletBot. - Start your first independent session with
screen -S first_session. - Execute the script with
python3 claim.pyand follow the Usage Notes to set up the session. - Detach from the screen session and keep it running in the background by pressing
CTRL+A+D. - To resume the session and check progress or for errors, use
screen -r first_session. - To resume a previously set-up session use the command
python3 claim.py Wallet1. Remember, 'Wallet1' is the default session name. If you've used a different name, replace 'Wallet1' with your actual session name.
- If you are not in the HotWalletBot directory, navigate there first with
-
Starting a Second Account Session:
- From the command line (outside the first screen session), ensure you are in the HotWalletBot directory with
cd HotWalletBotand start a second session withscreen -S second_sessionand executepython3 claim.py. - Detach from this second screen session by pressing
CTRL+A+D. - To resume the session and check progress or for errors, use
screen -r second_session. - To resume a previously set-up session use the command
python3 claim.py Wallet2. Remember, 'Wallet2' is the default session name. If you've used a different name, replace 'Wallet2' with your actual session name.
- From the command line (outside the first screen session), ensure you are in the HotWalletBot directory with
💻 TIP: Each session while in wait status uses around 30mb of memory and virtually no CPU load. During the Claim or Login phases, however, each session requires approximately 450 MB of memory and utilizes a larger portion of your CPU resources. The concurrent claims setting (default value 1) limits the number of active claims to prevent hardware overload. Assess your hardware's capacity to determine how many simultaneous sessions it can handle, and adjust the maximum number accordingly by following the Usage Notes. Even with a maximum of one allowed claim session, claiming on multiple wallets is easily possible; additional claims just queue until a claim session slot becomes available.
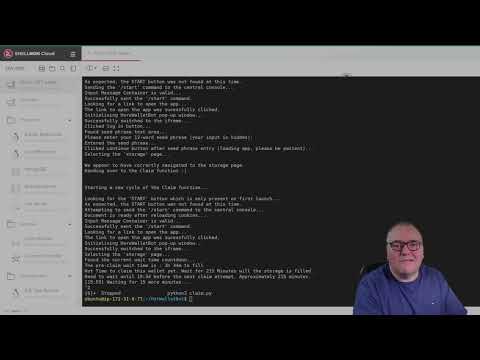
| YouTube Walkthrough | PM2 Output |
|---|---|
 See a walkthrough of all the steps, from server setup to installing the script, on YouTube. |
 |
-
Installation:
- Install PM2 manually, or use the install script packaged in the HotWalletBot directory. Navigate to the HotWalletBot directory if not already there:
sudo chmod +x install_pm2.sh && sudo ./install_pm2.sh
- Install PM2 manually, or use the install script packaged in the HotWalletBot directory. Navigate to the HotWalletBot directory if not already there:
-
Setup Before Using PM2:
- Open the script using
python3 claim.pyand complete the setup for each wallet. Follow the process to log into Telegram and enter your seed phrase. After setup, you will be prompted whether to exit before moving on to the claim function. Choose 'n' to exit the script and resume the session with PM2, or 'a' to automatically add the session name as a PM2 session.
- Open the script using
-
Configure PM2 to start automatically on boot/reboot:
- Linux/Ubuntu:
- For dedicated Linux/Ubuntu machines, initialize PM2 with systemd to ensure it starts on boot:
If the active user lacks administrative privileges, PM2 will provide a command to execute with sudo to complete the systemd activation.
pm2 startup systemd
- For dedicated Linux/Ubuntu machines, initialize PM2 with systemd to ensure it starts on boot:
- Windows:
- For setups that require persistent reboots, please refer to the Windows Installation Guide provided below.
- Linux/Ubuntu:
-
Adding Sessions to PM2:
-
If you choose to manually add then PM2 session, rather than have 'claim.py' add it, you can use the command below. This example starts a session named
firstWalletwhich loads a previously savedclaim.pysession namedWallet1:pm2 start claim.py --name firstWallet -- Wallet1
Note: Replace
Wallet1with the actual Session name given during setup if different.
-
-
Manage PM2 Sessions:
- Save configuration to persist through reboots:
pm2 save
- View all PM2 managed processes:
pm2 list
- View logs for a specific session (e.g.,
firstWallet):pm2 log firstWallet
- To remove a managed wallet:
pm2 delete firstWallet
- To stop PM2 from starting on boot:
pm2 unstartup systemd
- Save configuration to persist through reboots:
See a walkthrough of how to automate claims using PM, on YouTube.
Windows Subsystem for Linux (WSL2) allows you to run a GNU/Linux environment directly on Windows, unmodified, without the overhead of a traditional virtual machine or dualboot setup. This makes it an excellent choice for running this script in a Linux-like environment on Windows machines, as the quick start commands and drivers detailed in the Ubuntu installation section can be utilized directly.
-
Open the Microsoft Store:
- Search and install "Ubuntu 22.04 LTS" from the Microsoft Store.
-
Enable Windows Subsystem for Linux (WSL):
- Open PowerShell as an administrator and run:
dism.exe /online /enable-feature /featurename:Microsoft-Windows-Subsystem-Linux /all /norestart
- Restart your computer to apply changes.
- Open PowerShell as an administrator and run:
-
Set WSL2 as Your Default Version:
- After restarting, open PowerShell as an administrator and execute:
wsl --set-default-version 2
- If prompted, update the WSL2 kernel using the provided link.
- After restarting, open PowerShell as an administrator and execute:
-
Start Ubuntu 22.04:
- Open the Ubuntu app from the Start menu. Initial setup may take a few minutes.
-
Create a User Account and Password:
- Set up your default Ubuntu user with sudo privileges upon first launch.
- Update Your System:
- In the Ubuntu terminal, run:
sudo apt update && sudo apt upgrade
- In the Ubuntu terminal, run:
- Refer back to the Quick Start section for further instructions.
- Open the Run dialog (
Win + R), typeshell:startup, and move thewindows_pm2_restart.batfile into the Startup folder.

See a walkthrough of how to setup Ubuntu within Windows using WSL with our YouTube.
After executing the script with python3 claim.py, you will be prompted to update settings and configure the session:
-
Update Settings:
- If you choose "yes" when prompted, you will review and possibly update the following settings:
forceClaim: Choose to force a claim the first time the script runs, regardless of whether the wallet is full.debugIsOn: Activate debugging to save screenshots locally; default is off.hideSensitiveInput: Ensures sensitive information like phone numbers and seed phrases remain hidden; default is ON.screenshotQRCode: Prefer to log in via QR code; the alternative is manual login via phone number and OTP.maxSessions: Set the maximum number of concurrent claim sessions; additional wallets will wait for an available slot.verboseLevel: Adjust the verbosity of console messages; options range from 1 (minimal) to 3 (all messages).forceNewSession: Forces a new login, useful if the existing session encounters errors.lowestClaimOffsetandhighestClaimOffset: Define the range for randomized claim timing relative to when the pot is filled.- Examples of Claim Timing:
-30, -15: Early claims 30 to 15 minutes before the pot is full.30, 60: Late claims 30 minutes to 1 hour after the pot is full.-15, 15: Random claims within a 15-minute window around the pot being filled.
- Examples of Claim Timing:
- If you choose "yes" when prompted, you will review and possibly update the following settings:
-
Session Name Configuration:
- Sessions are auto-named numerically or can be customized. Reusing a name attempts to resume that session.
-
Login Options:
- If the script detects you have a saved Telegram session, you can choose 'y' when prompted to continue with it and proceed directly to step 7.
- If you prefer to log into a new account, selecting 'n' proceeds to a new Telegram login. The default method is to log in by scanning a QR Code screenshot and moving to step 6.
- Should this method be unsuccessful, or if another method is preferred, follow the OTP login procedure outlined in steps 4 and 5.
-
Country Name and Phone Number for Telegram:
- Enter your Country Name as displayed on Telegram's login page or accept the default, which is auto-detected based on your IP.
-
One-Time Password (OTP):
- Enter the OTP sent to your registered Telegram account.
-
Two-Factor Authentication (2FA):
- If 2FA is enabled on your Telegram account, enter your 2FA password following the QR code scan or OTP entry.
-
Seed Phrase Input for HereWalletBot Login:
- Carefully input your 12-word seed phrase, ensuring correct spacing without any punctuation or numbers.
-
Exit & Resume Options:
- Opt to exit and save the session for later resumption, possibly using PM2, or continue with claims directly in the CLI script.
Remember to check and adjust your settings upon startup to optimize the script's performance to your server's capabilities.
After following these steps, if all inputs are correctly entered, and assuming no flooding block is in place, you'll successfully logged into both Telegram and HereWallet.
-
Install Python, Zbar & PIP:
sudo apt update
sudo apt install -y python3 python3-pip
sudo apt-get install -y libzbar0
python3 --version
-
Download & Install the Chrome
.debpackage:sudo apt install -y wget wget -O /tmp/chrome.deb https://mirror.cs.uchicago.edu/google-chrome/pool/main/g/google-chrome-stable/google-chrome-stable_114.0.5735.198-1_amd64.deb sudo apt install -y /tmp/chrome.deb rm /tmp/chrome.deb
-
Download & Install Chromedriver:
sudo apt install -y unzip
wget https://chromedriver.storage.googleapis.com/114.0.5735.90/chromedriver_linux64.zip
unzip chromedriver_linux64.zip
rm chromedriver_linux64.zip
sudo mv chromedriver /usr/local/bin/
sudo chmod +x /usr/local/bin/chromedriver
chromedriver --version
-
Clone this repository:
sudo apt install -y git
git clone https://github.com/thebrumby/HotWalletBot.git
-
Switch to the repository directory:
cd HotWalletBot -
Install the dependencies:
pip install selenium Pillow pyzbar qrcode-terminal
💡 Communication: The only external communication is with the Telegram Web App, which occurs over HTTPS, providing a secure channel.
./HotWalletBot/selenium folder and in v.1.3.6 there is also a duplicate of the session in ./HotWalletBot/backups - if this information was compromised, it would allow a suitably experienced individual to access your account.
💡 Debugging: Enabling debug mode captures the whole process as screenshots, excluding the seed phrase entry step. These images are stored locally to assist you in the event of errors and are not otherwise transmitted or uploaded in any way.
💡 Private Devices: Only use this script on private, secure machines or Virtual Private Servers that only you can access.
💡 Awareness and Discretion: Understand the security trade-offs of using this automation tool or any other third-party tools. Your vigilance is crucial in safeguarding your information.
Use of HotWalletClaimer is at your own risk. While we are confident that the script neither transmits nor stores your sensitive data, it is essential to acknowledge that devices can become compromised through viruses or other malicious software. The developers of HotWalletClaimer exclude any liability for potential security breaches or financial losses. It is your responsibility to safeguard your digital security. Always prioritize protecting your accounts and sensitive information.


