| MCU Pin | MCU Function | Nucleo Pin | Mic Board Pin |
|---|---|---|---|
| 3.3V | 3V | ||
| GND | GND | ||
| PB3 | SAI1_SCK_B | D3 | BCLK |
| PB5 | SAI1_SD_B | D4 | DOUT |
| PA4 | SAI1_FS_B | A2 | LRCL |
| - | - | - | SEL |
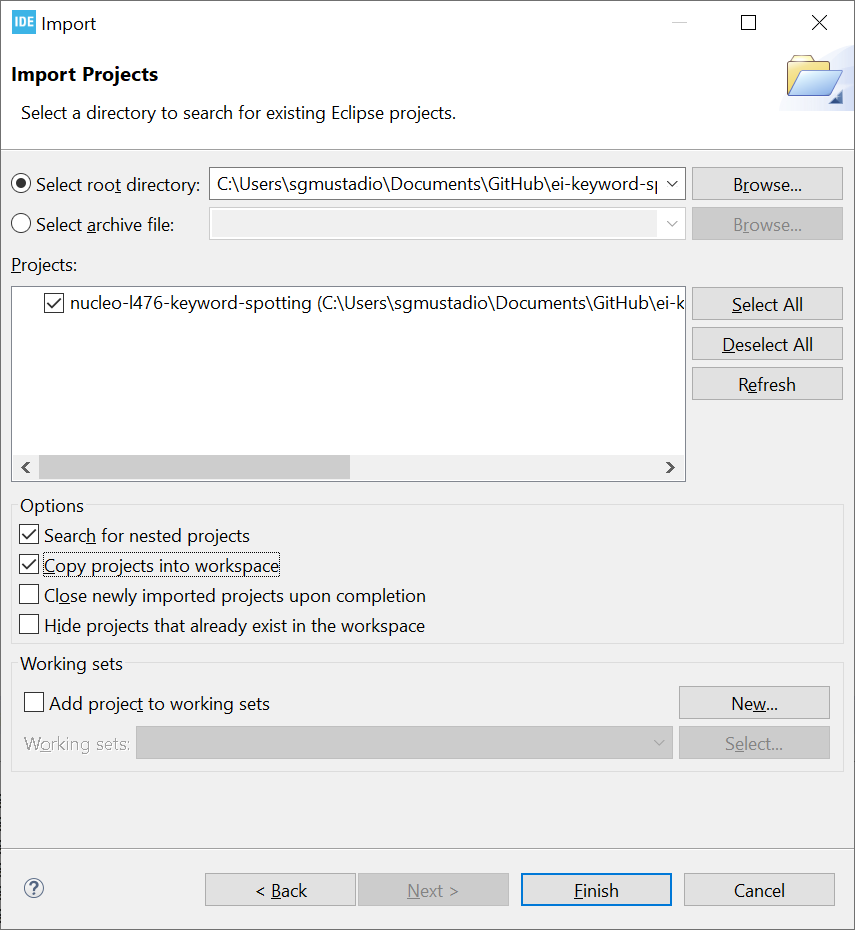
Select File > Import... Select Existing Projects into Workspace and click Next. Select your demo project folder (e.g. nucleo-l476-keyword-spotting) from the downloaded repository. Enable Copy projects into workspace. Click Finish.
In the Project Explorer, delete the model-parameters and tflite-model directories in the ei-keyword-spotting diretory of your project, as these contain a previously trained model on the "yes" and "no" keywords.
Select File > Import and General > File System. For the From directory section, select the model-parameters directory is selected from your downloaded Edge Impulse library. Select the model-parameters folder in the left pane to include the header files in the import. Select <project_name>/ei-keyword-spotting as the Into folder. Select Create top-level folder. Click Finish.
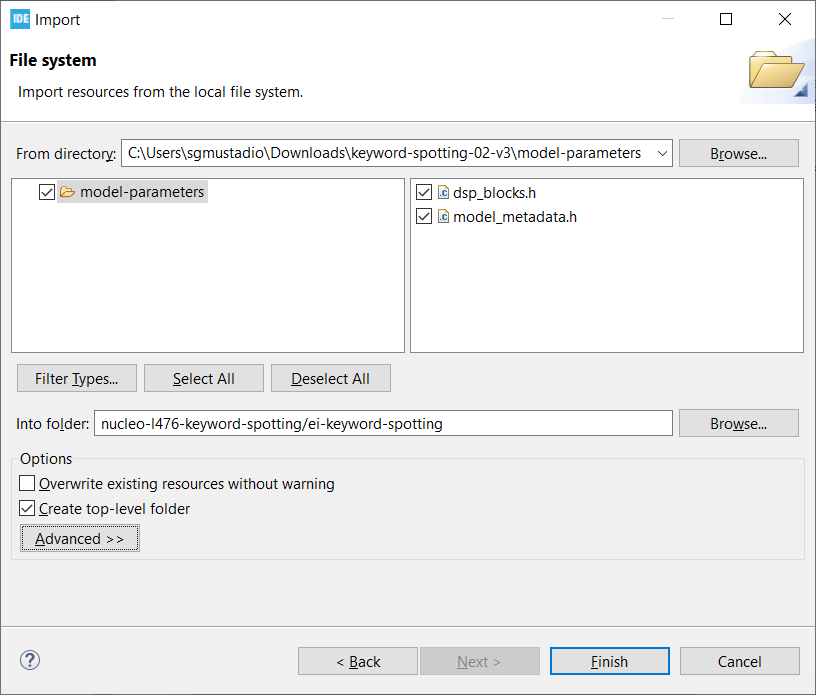
Repeat this process for the tflite-model directory in the downloaded Edge Impulse library.
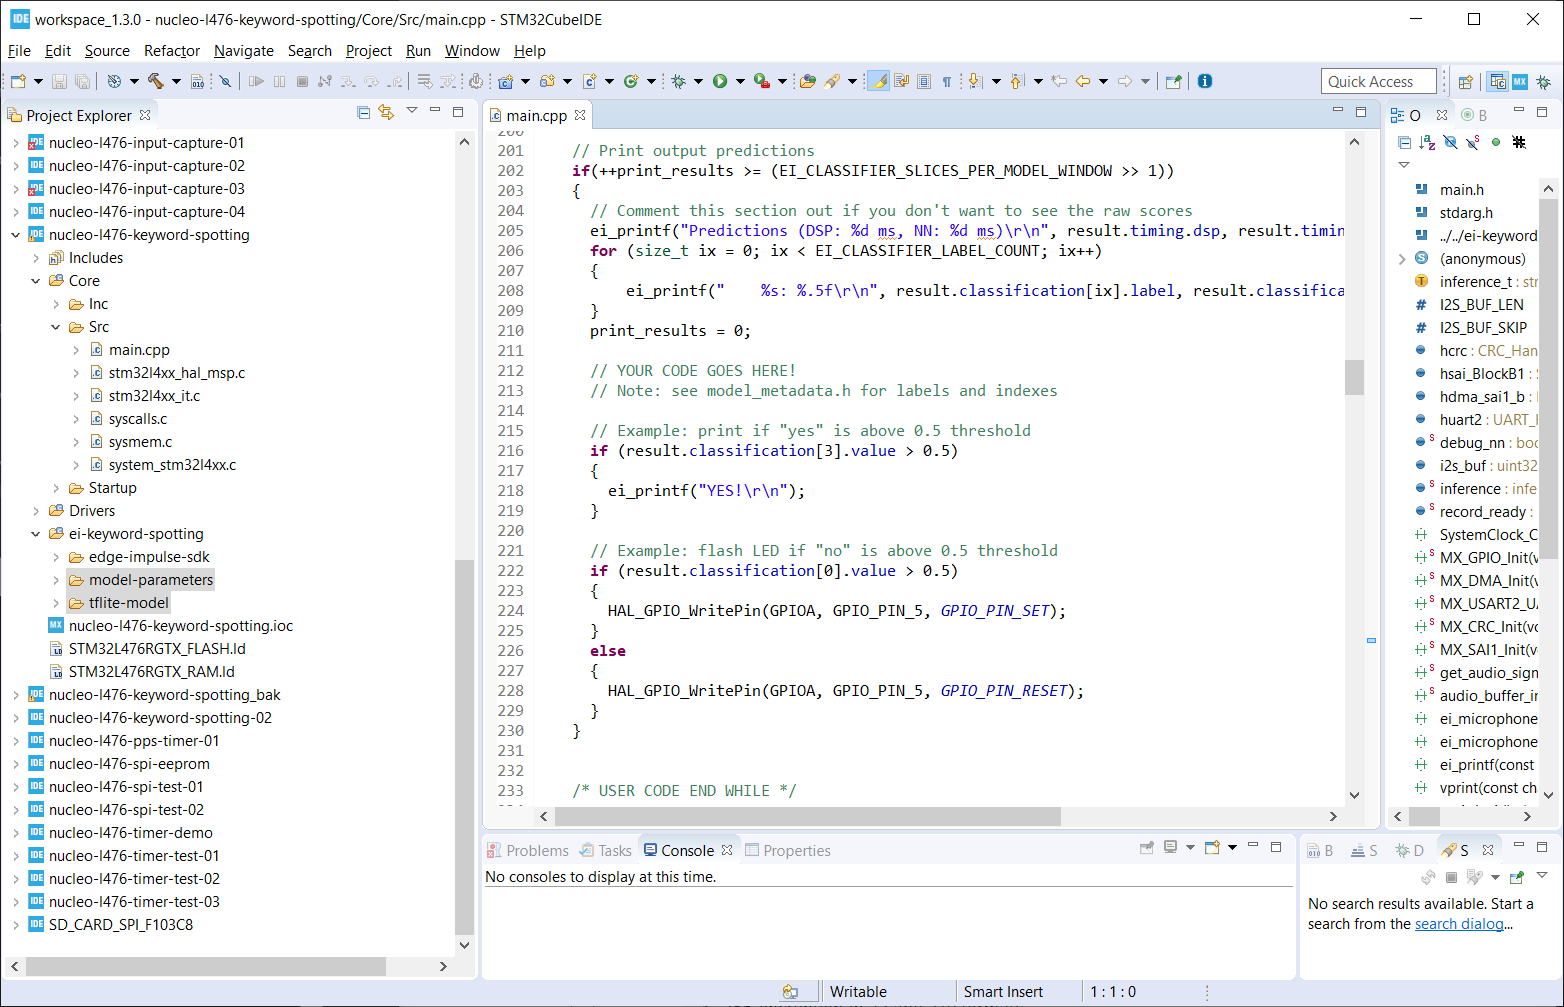
At this point, you should have replaced the model-parameters and tflite-model directories in your demo project. Open <project_name>/Core/Src/main.cpp to edit the program's main() function. Feel free to look through the code to see how STM32 sets up its peripherals and how the Edge Impulse library is initialized and used. Find the // YOUR CODE GOES HERE! section to do something with the inference results.
Select Project > Build Configurations > Set Active > Release. Then, select Project > Build Project. Wait while the project builds.
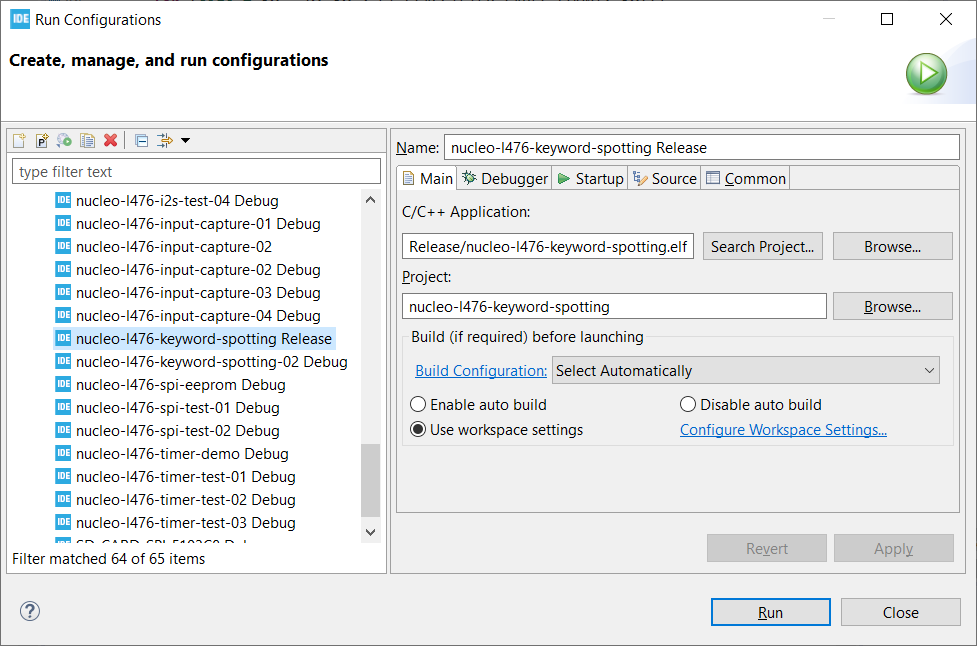
Select Run > Run Configurations. Select STM32 Cortex-M C/C++ Application type in the left pane and click the New Configuration button (top left) to create a new configuration profile. It should be named "<project_name> Release" and use the Release/<project_name>.elf file for the application. If not, click Search Project... and select the Release/<project_name>.elf file for your project. Leave everything else as default. Click Run.
If asked to update the Nucleo's ST-LINK firmware, click Yes. Click Open in update mode and click Upgrade. On "Upgrade successful," close the pop-up window. Click Run > Run.
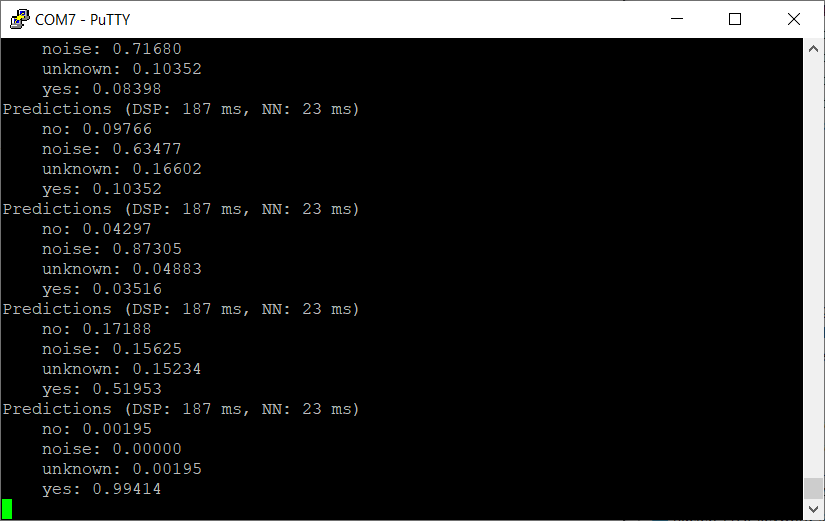
Use a serial terminal program (such as PuTTY) to view the output of your keyword spotting system.
If you see ERROR: Audio buffer overrun, it means your code is taking too long to process things after inference. A few recommendations to speed things up:
- Comment out the "raw scores" printing section
- Make UART printing interrupt-based instead of blocking
- Do less stuff in your code section (e.g. don't print anything to the serial terminal)
- Use less keywords (e.g. identify 1 keyword instead of 2 or 3).
See individual source code files for their respective licenses. STM32 code, Edge Impulse libraries, and TensorFlow Lite are all licensed differently.
This tutorial is licensed under Creative Commons, Attribution 4.0 International (CC BY 4.0)

