Bootable Gentoo images for the Novena SBC (Linux 4.7.2, Xfce, regular & full-libre variants)
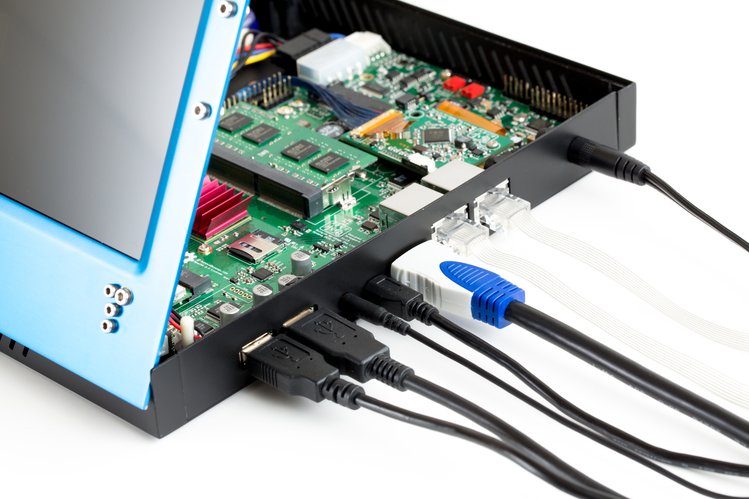
This project contains two bootable, microSD card Gentoo images for the FOSS-friendly Novena single-board computer from Sutajio Ko-usagi.
Both images contain a complete (OpenRC-based) Gentoo system (including a full Portage tree) - so you can run emerge operations immediately - and both have a reasonably populated userland (Xfce v4.12, Firefox v49.0, Claws Mail v3.14.0, Thunderbird v45.3.0, VLC v2.2.4, abiword v3.0.1 etc.) so that you can get productive without having to compile anything first (unless you wish to do so, of course ^-^).
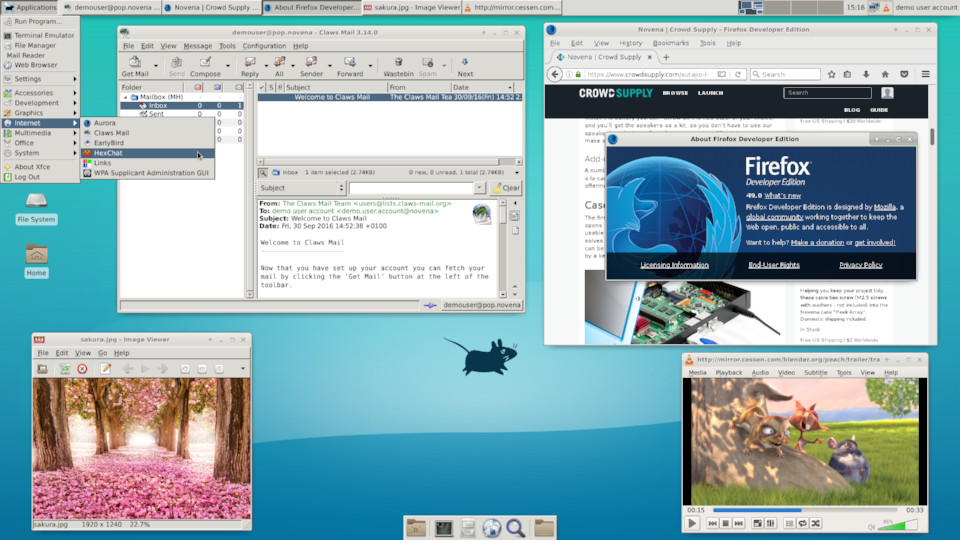
Additionally, both images contain the full set of Novena-specific apps (novena-eeprom-gui etc.), ported across from xobs' Debian packages for your convenience (including the custom armada X.org video driver). Here's a screenshot:
The images however differ from each other in that:
-
The libre image contains a deblobbed 4.7.2 kernel (sys-kernel/novena_hardened-sources), derived from Gentoo's hardened-sources and xobs' Novena patchset. As the name suggests, everything on this image (kernel and userspace) is completely libre (in the sense of complying with Gentoo's @FREE licence metaset), which fits nicely with the Novena's philosophy.
Of course, because of this restriction, sys-kernel/linux-firmware has not been installed, meaning that the Novena's built-in Bluetooth (which requires a runtime firmware upload) is inoperative. However, since the Novena hardware has been selected to be FOSS-friendly, pretty much everything else (including WiFi) does work.
-
The standard image contains a non-deblobbed 4.7.2 kernel (sys-kernel/novena-sources), derived from gentoo-sources and xobs' Novena patchset. In addition, sys-kernel/linux-firmware has been installed (so the Novena's Bluetooth works under this image). Other than the kernel and firmware, all other packages on this image are identical to the libre variant, and comply with Gentoo's @FREE licence metaset.
Note, the kernel configs used are derived simply by running
make novena_defconfig; but, for reference, may be viewed here and here, respectively.
The images may be downloaded from the links below (or via wget, per the instructions which follow).
| Variant | Version | Image | Digital Signature |
|---|---|---|---|
| Libre | v1.0.1 | novgenfree.img.xz | novgenfree.img.xz.asc |
| Standard | v1.0.1 | novgen.img.xz | novgen.img.xz.asc |
The older images are still available, together with a short changelog, here.
Please read the instructions below before proceeding. Also please note that all images are provided 'as is' and without warranty.
NB: running either of these images will not affect any existing Debian system you may have installed to your Novena's hard drive (if fitted) (unless you explicitly perform mount, fdisk or similar operations, of course).
It is sensible to install Gentoo to a separate microSD card from that used by your default Debian system; that way, when you are finished using Gentoo, you can simply power off, swap back to your old card, reboot, and your original system will be just as it was.
NB: please use a separate card even if your root filesystem is on SATA, since (by default) the Novena system always boots using the kernel (and device tree blob) from its internal microSD card, and you shouldn't overwrite this.
To try this out, you will need:
-
A microSD card of at least 8GB capacity (the images are both ~800MiB compressed, 6GiB uncompressed, so they should fit on any card marked as >= 8GB). Depending on the slots available on your PC, you may also need an adaptor to allow the microSD card to be plugged in (to write your chosen image to it initially).
I have found most SanDisk cards work fine; if you are having trouble you might want to check this post by bunnie. Also, in case of problems, a good sanity check is to try writing the standard Novena Debian image to your card, to see whether your Novena will boot with that (for example, I have found that some high-capacity Samsung cards are totally unusable for booting).
-
A Novena SBC (obviously!). The images should work with any of the Novena variants ("just the board", desktop, laptop or "heirloom", but please note that I have only been able to test with the first two of these configurations so far).
"Heirloom" users should emerge the package dev-embedded/novena-heirloom once booted, and then restart, to ensure fan control works.
-
A PC to decompress the image and write it to the microSD card. This is most easily done on a Linux machine of some sort, but tools are also available for Windows (see here and here, for example). In the instructions below I'm going to assume you're using Linux.
It is possible use your Novena for this task, if you have an external card reader attached, or if you have your root on SATA (and take care to unmount your existing /boot directory before removing the original microSD card).
Choose either the libre or standard variant, then follow the appropriate instructions below (libre or standard).
On your Linux box, issue:
# wget -c https://github.com/sakaki-/gentoo-on-novena/releases/download/v1.0.1/novgenfree.img.xz
# wget -c https://github.com/sakaki-/gentoo-on-novena/releases/download/v1.0.1/novgenfree.img.xz.asc
to fetch the compressed disk image file (~770MiB) and its signature.
Next, if you like, verify the image using gpg (this step is optional):
# gpg --keyserver pool.sks-keyservers.net --recv-key DDE76CEA
# gpg --verify novgenfree.img.xz.asc novgenfree.img.xz
Assuming that reports 'Good signature', you can proceed. (Warnings that the key is "not certified with a trusted signature" are normal and may be ignored.)
Next, insert (into your Linux box) the microSD card on which you want to install the image, and determine its device path (this will be something like /dev/sdb, /dev/sdc etc., or perhaps something like /dev/mmcblk1; the actual path will depend on your system - you can use the lsblk tool to help you). Unmount any existing partitions of the card that may have automounted (using umount). Then issue:
Warning - this will destroy all existing data on the target drive, so please double-check that you have the path correct! As mentioned, it is wise to use a spare microSD card as your target, keeping your existing Debian microSD card in a safe place; that way, you can easily reboot back into your existing Debian system, simply by swapping back to your old card.
# xzcat novgenfree.img.xz > /dev/sdX && syncSubstitute the actual microSD card device path, for example /dev/sdc, for /dev/sdX in the above command. Make sure to reference the device, not a partition within it (so e.g., /dev/sdc and not /dev/sdc1; /dev/sdd and not /dev/sdd1 etc.)
If, on your system, the microSD card showed up with a path of form /dev/mmcblk1 instead, then use this as the target, in place of /dev/sdX. For this naming format, the trailing digit is part of the drive name (partitions are labelled as /dev/mmcblk1p1, /dev/mmcblk1p2 etc.). So, for example, you might need to use
xzcat novgenfree.img.xz > /dev/mmcblk1 && sync.
The above xzcat to the microSD card will take some time, due to the decompression (it takes between 5 and 15 minutes on my machine, depending on the microSD card used). It should exit cleanly when done - if you get a message saying 'No space left on device', then your card key is too small for the image, and you should try again with a larger capacity one.
Now continue reading at "Booting!" below.
On your Linux box, issue:
# wget -c https://github.com/sakaki-/gentoo-on-novena/releases/download/v1.0.1/novgen.img.xz
# wget -c https://github.com/sakaki-/gentoo-on-novena/releases/download/v1.0.1/novgen.img.xz.asc
to fetch the compressed disk image file (~797MiB) and its signature.
Next, if you like, verify the image using gpg (this step is optional):
# gpg --keyserver pool.sks-keyservers.net --recv-key DDE76CEA
# gpg --verify novgen.img.xz.asc novgen.img.xz
Assuming that reports 'Good signature', you can proceed. (Warnings that the key is "not certified with a trusted signature" are normal and may be ignored.)
Next, insert (into your Linux box) the microSD card on which you want to install the image, and determine its device path (this will be something like /dev/sdb, /dev/sdc etc., or perhaps something like /dev/mmcblk1; the actual path will depend on your system - you can use the lsblk tool to help you). Unmount any existing partitions of the card that may have automounted (using umount). Then issue:
Warning - this will destroy all existing data on the target drive, so please double-check that you have the path correct! As mentioned, it is wise to use a spare microSD card as your target, keeping your existing Debian microSD card in a safe place; that way, you can easily reboot back into your existing Debian system, simply by swapping back to your old card.
# xzcat novgen.img.xz > /dev/sdX && syncSubstitute the actual microSD card device path, for example /dev/sdc, for /dev/sdX in the above command. Make sure to reference the device, not a partition within it (so e.g., /dev/sdc and not /dev/sdc1; /dev/sdd and not /dev/sdd1 etc.)
If, on your system, the microSD card showed up with a path of form /dev/mmcblk1 instead, then use this as the target, in place of /dev/sdX. For this naming format, the trailing digit is part of the drive name (partitions are labelled as /dev/mmcblk1p1, /dev/mmcblk1p2 etc.). So, for example, you might need to use
xzcat novgen.img.xz > /dev/mmcblk1 && sync.
The above xzcat to the microSD card will take some time, due to the decompression (it takes between 5 and 15 minutes on my machine, depending on the microSD card used). It should exit cleanly when done - if you get a message saying 'No space left on device', then your card key is too small for the image, and you should try again with a larger capacity one.
Now continue reading at "Booting!", immediately below.
With your Novena still running its normal Debian system, run the novena-eeprom-gui tool, and make sure that the "Root filesystem location" radio button is set to "Internal MMC". If it is, you need do nothing, but, if it is currently set to "SATA disk" instead, then click on "Internal MMC" now, and then select the menu item File -> Save to EEPROM.

Then, power down your Novena. Remove the current (Debian) microSD card from the board, taking care not to damage the little metal hinge as you do so, and store it somewhere safe.
Next, insert the (Gentoo) microSD card you just wrote the image to into the slot on your Novena, and carefully close the metal hinge. Apply power.
If all is well, within 30 seconds or so your Novena should boot to a SLiM graphical login prompt (either on your LCD panel or connected HDMI monitor, depending on your system). Enter demouser as the user name and press Enter:

then type changeme when prompted for the password, and press Enter again. You should then be presented with a standard Xfce desktop:

The initial root password is kosagi.
The supplied image contains a fully-configured Gentoo system (not simply a minimal install or stage 3), with a complete Portage tree already downloaded, so you can immediately perform emerge operations etc. Be aware that, as shipped, it uses UK locale settings and timezone; however, these are easily changed if desired. See the Gentoo Handbook for details.
The full set of packages (from /var/lib/portage/world) in the image may be viewed here (libre variant) and here (standard variant) (note that the version numbers shown in this list are Gentoo ebuilds, but they generally map 1-to-1 onto upstream package versions).
The full package lists for the image (including @system and dependencies) may be viewed here (libre variant) and here (standard variant).
The system on the image has been built via a minimal install system and stage 3 from Gentoo (armv7a_hardfp), but all binaries (libraries and executables) have been rebuilt to target the novena's i.MX6 SoC specifically (the /etc/portage/make.conf file used on the image may be viewed here). The CHOST on the image is armv7a-hardfloat-linux-gnueabi. All packages have been brought up to date against the Gentoo tree as of 28 September 2016.
Note: although the CFLAGS used for the image build includes
-march=armv7-a -mcpu=cortex-a9 -mfpu=neon -mfloat-abi=hard, the neon FPU will not generally be exploited fully, as-ffast-mathhas not been set, and neon is not 100% IEEE 754 compliant. See here for a brief discussion. You can of course re-build selective components with more aggressive flags yourself, should you choose.
Once logged in as "demouser", it is sensible to change the password (from "changeme") and root's password (from "kosagi"). Open a terminal window and do this now:
demouser@novena ~ $ passwd
Changing password for demouser.
(current) UNIX password: <type changeme and press Enter>
New password: <type your desired password, and press Enter>
Retype new password: <type the desired password again, and press Enter>
passwd: password updated successfully
demouser@novena ~ $ su -
Password: <type kosagi and press Enter, to become root>
novena ~ # passwd
New password: <type your desired password for root, and press Enter>
Retype new password: <type the desired root password again, and press Enter>
passwd: password updated successfully
novena ~ # exit
logout
demouser@novena ~ $
If you want to create your own account, you can do so easily. Open a terminal, su to root, then issue (adapting with your own details, obviously!):
novena ~ # useradd --create-home --groups "adm,disk,lp,wheel,audio,cdrom,video,cdrw,usb,users,plugdev,portage" --shell /bin/bash --comment "Sakaki" sakaki
novena ~ # passwd sakaki
New password: <type your desired password for the new user, and press Enter>
Retype new password: <type the desired password again, and press Enter>
passwd: password updated successfully
You can then log out of demouser, and log into your new account, using the username and password just set up. Once logged in, you can delete the demouser account if you like. Open a terminal, su to root, then:
novena ~ # userdel --remove demouser
userdel: demouser mail spool (/var/spool/mail/demouser) not found
The mail spool warning may safely be ignored.
Have fun! ^-^
-
The images are subscribed to the following overlays:
- sakaki-tools: this provides the tools showem (source), and genup (source).
- novena: this provides various Gentoo-packaged versions of xobs' standard Debian packages, for example dev-embedded/novena-eeprom-gui. These are pulled in by dev-embedded/novena-meta, which is USE-flag controlled; please see the overlay's GitHub page for more details.
-
Because the Novena's real-time clock (RTC) can sometimes be unreliable, I have used the "swclock" OpenRC boot service on the images - this simply sets the clock on boot to the recorded last shutdown time. An NTP client, chronyd, is also configured, and this will set the correct time as soon as a valid network connection is established.
Note that this may cause a large jump in the time, which in turn will make the screensaver lock come on. Not a major problem, but something to be aware of, as it can be quite odd to boot up, log in, and have your screen almost immediately lock!
-
The images are configured with NetworkManager, so network connectivity should be straightforward. Both the ethernet interfaces are initially configured as DHCP clients, but obviously you can modify this as needed. Use the NetworkManager applet (top right of your screen) if you want to connect to a WiFi network (and do not use WPA supplicant, although that is supplied on the images too). If running the standard (non-libre) image, you can also use NetworkManager to setup Bluetooth devices.
-
Because of licensing issues (bindist compliance), Mozilla Firefox and Thunderbird have been distributed in their 'developer' editions - named 'Aurora' and 'EarlyBird'. Bear in mind that these apps will take quite a long time (20 to 30 seconds) to start on first use, as they set up their local storage in ~/.mozilla/<...>.
-
Firefox works, but can feel a rather sluggish at times on the Novena. To improve it, turn on fetch pipelining and the improved back-end cache via about:config; see these instructions for example, and also here.
-
I have also pre-installed the lighter-weight Links browser and Claws Mail on the images, in case you would like to use those in preference to Firefox and Thunderbird.
-
By default, the VLC media player will attempt to use accelerated video playback when the "armada" X.org video driver is loaded (which, on both images, it will be). This works well, playing videos at native frame rates, but uses an overlay, so that once video playback is started, you won't be able to move the playback window around (although you can use the playback controls, of course).
-
As with the current Debian image, the armada driver does not have 2D acceleration enabled (in either image). A lot of work is currently underway around the etnaviv project in kernel and userspace though, so I would expect accelerated 2D to be available shortly, without relying on libgal. Incidentally, I haven't included the etnaviv Mesa fork with the image, but I may add it to the "novena" overlay at a later date.
-
If you are using an HDMI monitor with audio capability, you can send the Novena's sound output there, by using the "Applications -> Multimedia -> Pulse Audio Volume Control" application. Go to "Configuration", and make sure that DW-DHMI is enabled (set to "Analog Stereo Output"). Then, go to output devices, and mute imx-audio-es8328 output, and unmute DW-HDMI output. Sound should now be playable though your monitor.
If using VLC, you can use its Audio -> Audio Device menu to explicitly route the sound.
-
If using the libre image, note that although the Grsecurity patchset is in place, almost none of its options are turned on. You can of course change this yourself with
make menuconfig(see below section on kernel compilation). -
I haven't properly tested suspend to RAM yet. Hibernation (suspend-to-disk) will not work given the small size of the swap on the images.
-
There is currently no (publicly released) installer to write the Gentoo system to the Novena's HDD (should you have one installed, and wish to do so). However, I plan to release one as part of the "novena" overlay in the near term.
-
Finally, if you have a microSD card larger than the minimum 8GB, after writing the image you can easily extend the size of the third partition (using fdisk and resize2fs), so you have more space to work in. See these instructions, for example.
If you'd like to compile a kernel on your new system, you can do so easily.
NB: if you are running Gentoo on a microSD card, please be sure to expand your root partition (as described above) before attempting to build a kernel: it requires more free space than is present on the shipped image.
Suppose you wish to build the most modern version available using the libre Gentoo-patched sources. Then, running as root, you would issue:
novena ~ # eix-sync -w
   (to ensure package metadata up-to-date)
novena ~ # emerge --ask --verbose sys-kernel/novena_hardened-sources
   (confirm when prompted; this will take some time to complete, depending on your network connection)
novena ~ # eselect kernel list
   (this will show a numbered list of available kernels)
novena ~ # eselect kernel set 1
   (replace '1' in the above command with the number of the desired kernel from the list)
novena ~ # cd /usr/src/linux
Next, grab the configuration from the current kernel:
novena linux # zcat /proc/config.gz > .configAlternatively, you can run
make novena_defconfig.
If you like, modify the kernel configuration to suit your own requirements:
novena linux # make menuconfigNow build and install the kernel, device tree blob and modules:
novena linux # make -j4 zImage modules dtbs
novena linux # make modules_install
Next, assuming your /boot is mounted, do:
novena linux # cd /boot
novena boot # mv zImage{,.bak}
novena boot # mv novena.dtb{,.bak}
novena boot # cp /usr/src/linux/arch/arm/boot/zImage .
novena boot # cp /usr/src/linux/arch/arm/boot/dts/imx6q-novena.dtb novena.dtb
novena boot # sync
All done! After you reboot, you'll be using your new kernel.
Of course, you can easily adapt the above process, if you wish to use sys-kernel/novena-sources etc.
It is also possible to cross-compile a kernel on your (Gentoo) PC, which is much faster than doing it directly on the Novena, by using crossdev (or to use distcc and crossdev together).
You can update your system at any time. As there are quite a few steps involved to do this correctly on Gentoo, I have provided a convenience script, genup to do this as part of the image.
NB: if you are running Gentoo on a microSD card, please be sure to expand your root partition (as described above) before attempting this: the update of certain packages (such as www-client/firefox) requires more free space than is present on the shipped image.
So, to update your system, simply issue:
novena ~ # genup
   (this will take some time to complete)
This is loosely equivalent to apt-get update && apt-get upgrade on Debian. See the manpage for full details of the process followed, and the options available for the command.
Note that because Gentoo is a source-based distribution, and the novena is not a particularly fast machine, updating may take a number of hours, if many packages have changed. However, genup will automatically take advantage of distributed cross-compiling, using distcc, if you have that set up.
When the update has completed, if prompted to do so by genup, then issue:
novena ~ # dispatch-confto deal with any config file clashes that may have been introduced by the upgrade process.
Note that the kernel build process for Gentoo is separate (see the previous section for details).
For more information about Gentoo's package management, see my notes here.
You may also find it useful to keep an eye on the 'Software' forum at kosagi.com, as I occasionally post information about this project there.
If you have any problems, questions or comments regarding this project, feel free to drop me a line! ([email protected])