| A product that will help you increase user engagement by leveraging the use of notifications. It's simple to generate, add and use the notifications without writing complicated code for you website. First step is to customize your notifications by adjusting parameters related to the notification (background color,etc). Second step is to get the auto-generated script. Last step is to the script to your website. You can decide when to show the notification to the user and design your entire timeline associated with it. |
In order to manage the project and deadlines associated with the project, the first step I take is to set up the GitHub scrum board associated with the project. Link of the board can be found here: Board link.
The main purpose of setting up a scrum board is to monitor the progress of the project. The task associated with the board can be attached to issues, such that when the issue closes, it would automatically change it from pending to completed state.
The first approach I take even before drawing the architectural diagram, is to make sure that the requirements related to the project is understood properly. Once the requirements are understood well, it becomes easy to visualize things. The next step I take is to create the architectural diagram associated with it.
High level architecture diagram does not include any low level details. It mainly deals with the structure of the application. It revolves around dividing the applicaiton into different layers ( presentation, business and data layer). The main advantage of creating layers for the project is that incase, the project structure is to be changed in future to another structure like microservice architecture, it becomes easy for transition it to a module based architecture to microservice based architecture. Below is the high-level architecture implemented for this project:
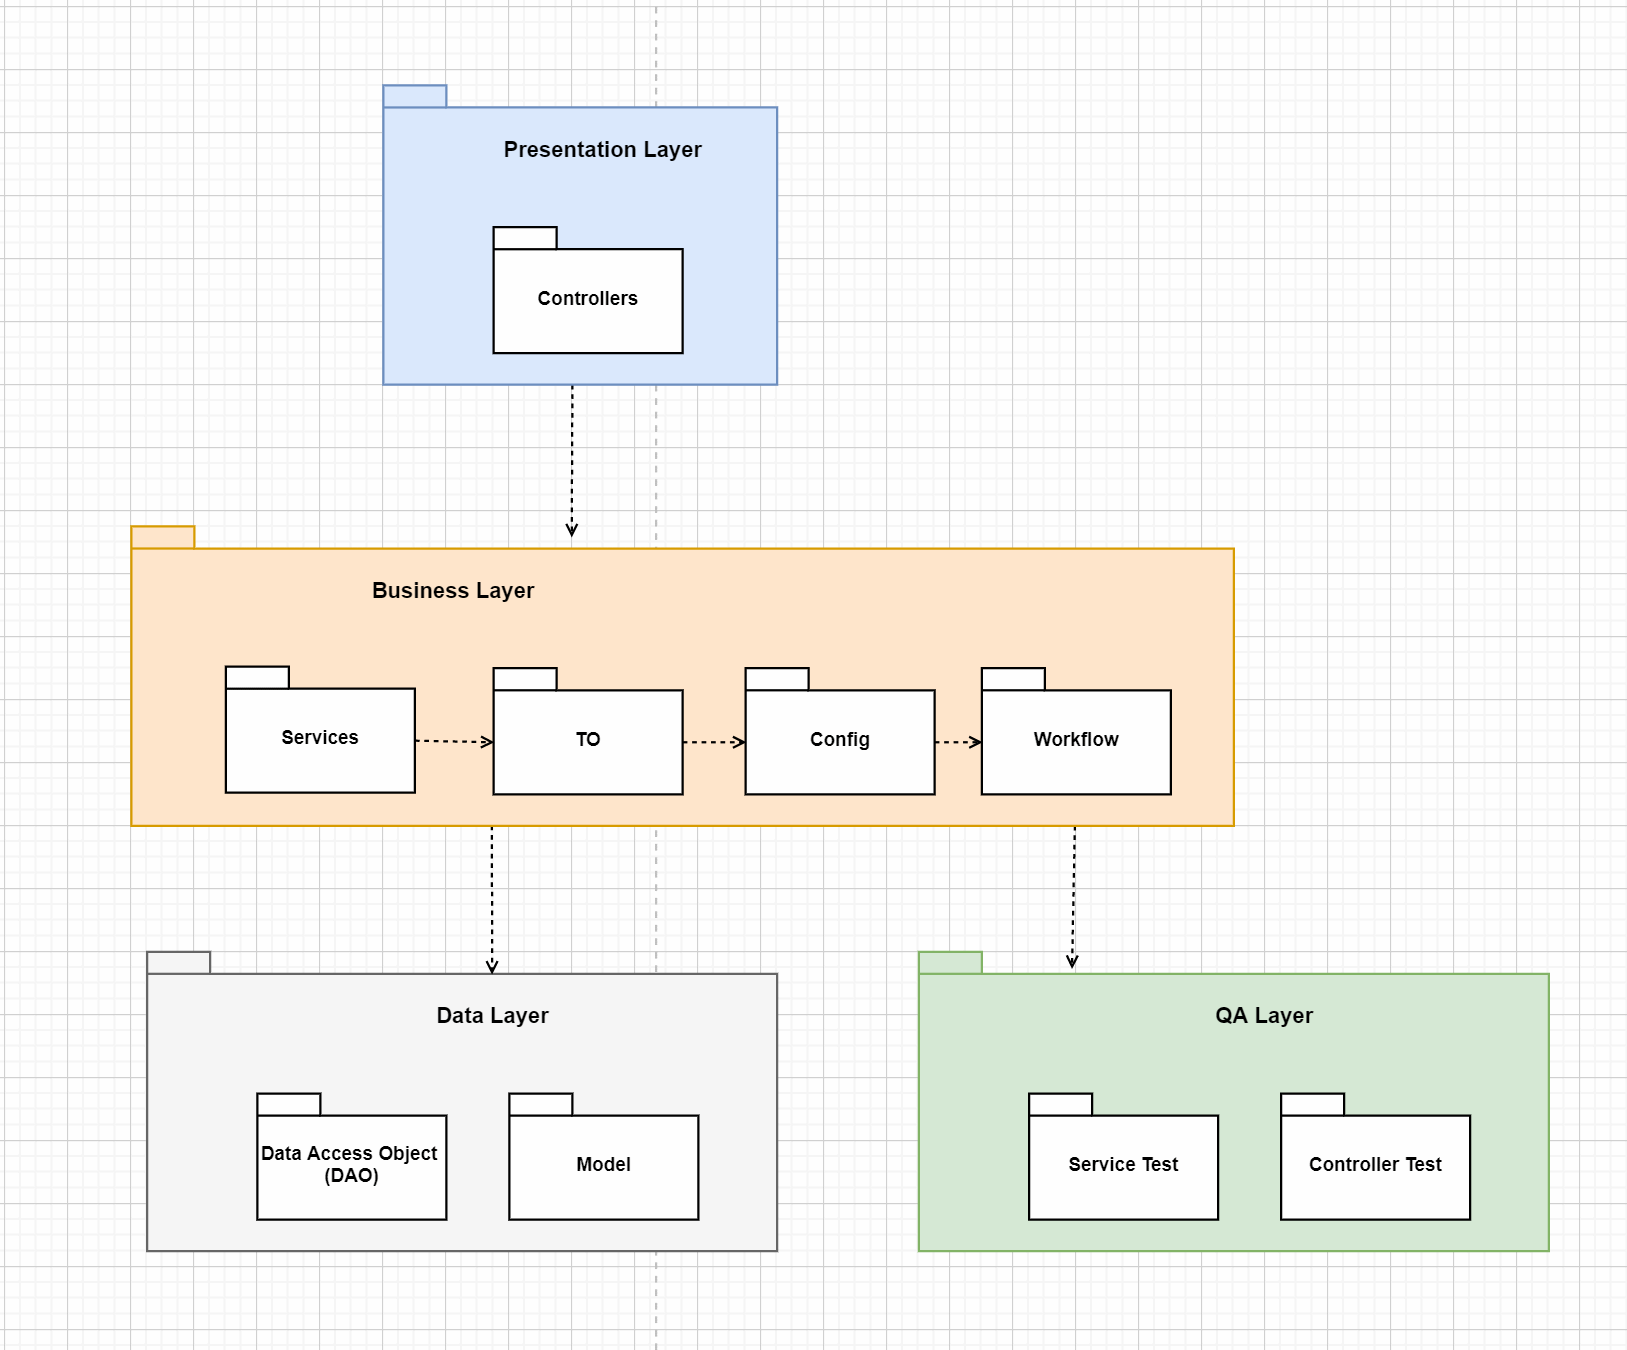
Within the above diagram, we can see that the entire project is divided into different modules and sub-modules. Each module representing a part of layer ( presentation, business or data layer). Together these layers form the main crux of the project. Presentation layer defines the APIs which include controllers. Business layer defines the main logic of the application. Data layer defines the way how the data interacts with the business layer and finally we have our QA/test layer, where all the test are written for test driven development approach.
Once there was a brief understanding of how the project would be divided, the next step was to implement the low-level architecture for the project. This is where the flow of application is seen in the form of classes and objects. This is where the the use of design patters, SOLID principles is defined. Consider the following low-level architecture diagram created for this project:
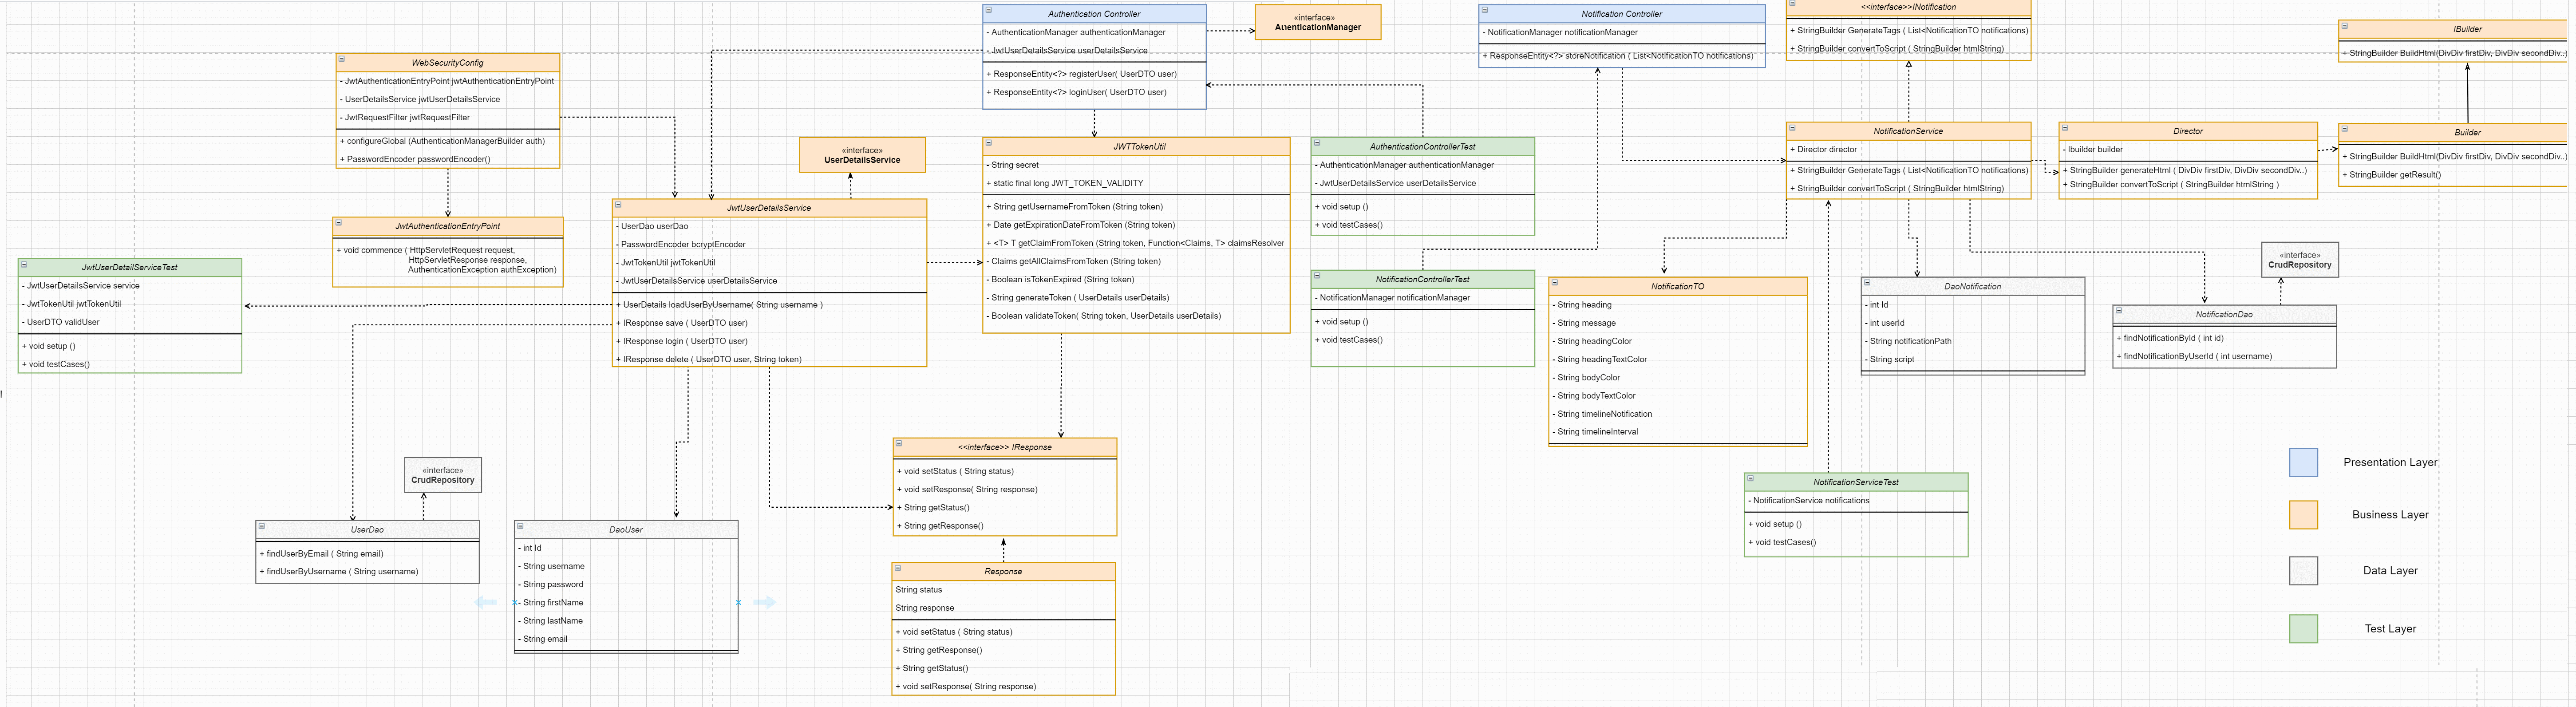
Feel free to zoom the above diagram, this is where the main magic happens. The entire architecture diagram is color coded using the color scheme from high level diagram, it was mainly used to differentiate classes in terms of layers.
Two main design patterns were used to implement the project.
- The first is the used of builder pattern to generate html tags and scripts. The director in the builder pattern defines the steps needed to create the script and tags.
- Second design pattern used was factory pattern to deal with the creation of objects for JWT and authenticaion.
- In order to implement the project, test driven development was used, with the main emphasis on code quality and code writing test cases for both backend and frontend services. A separate test module was created where unit and integration test cases were written. These unit test cases run each time when a change of code happens (pull request and code push).
Inorder to implement this project the following technology have been used:
- Frontend: Angular
- Backend: Java Spring Boot
- CI/CD: Github Actions
- Database: MySQL
Once the technological stack was decided, it was time to implement the project in an Agile manner. Using the best principles and practices, the first prototype was created. The frontend of the website where the user has the flexibility to create the notifications and generate the script associated with it. This script could be added to the website and notifications would appear as per the set timeline. Consider the following image:
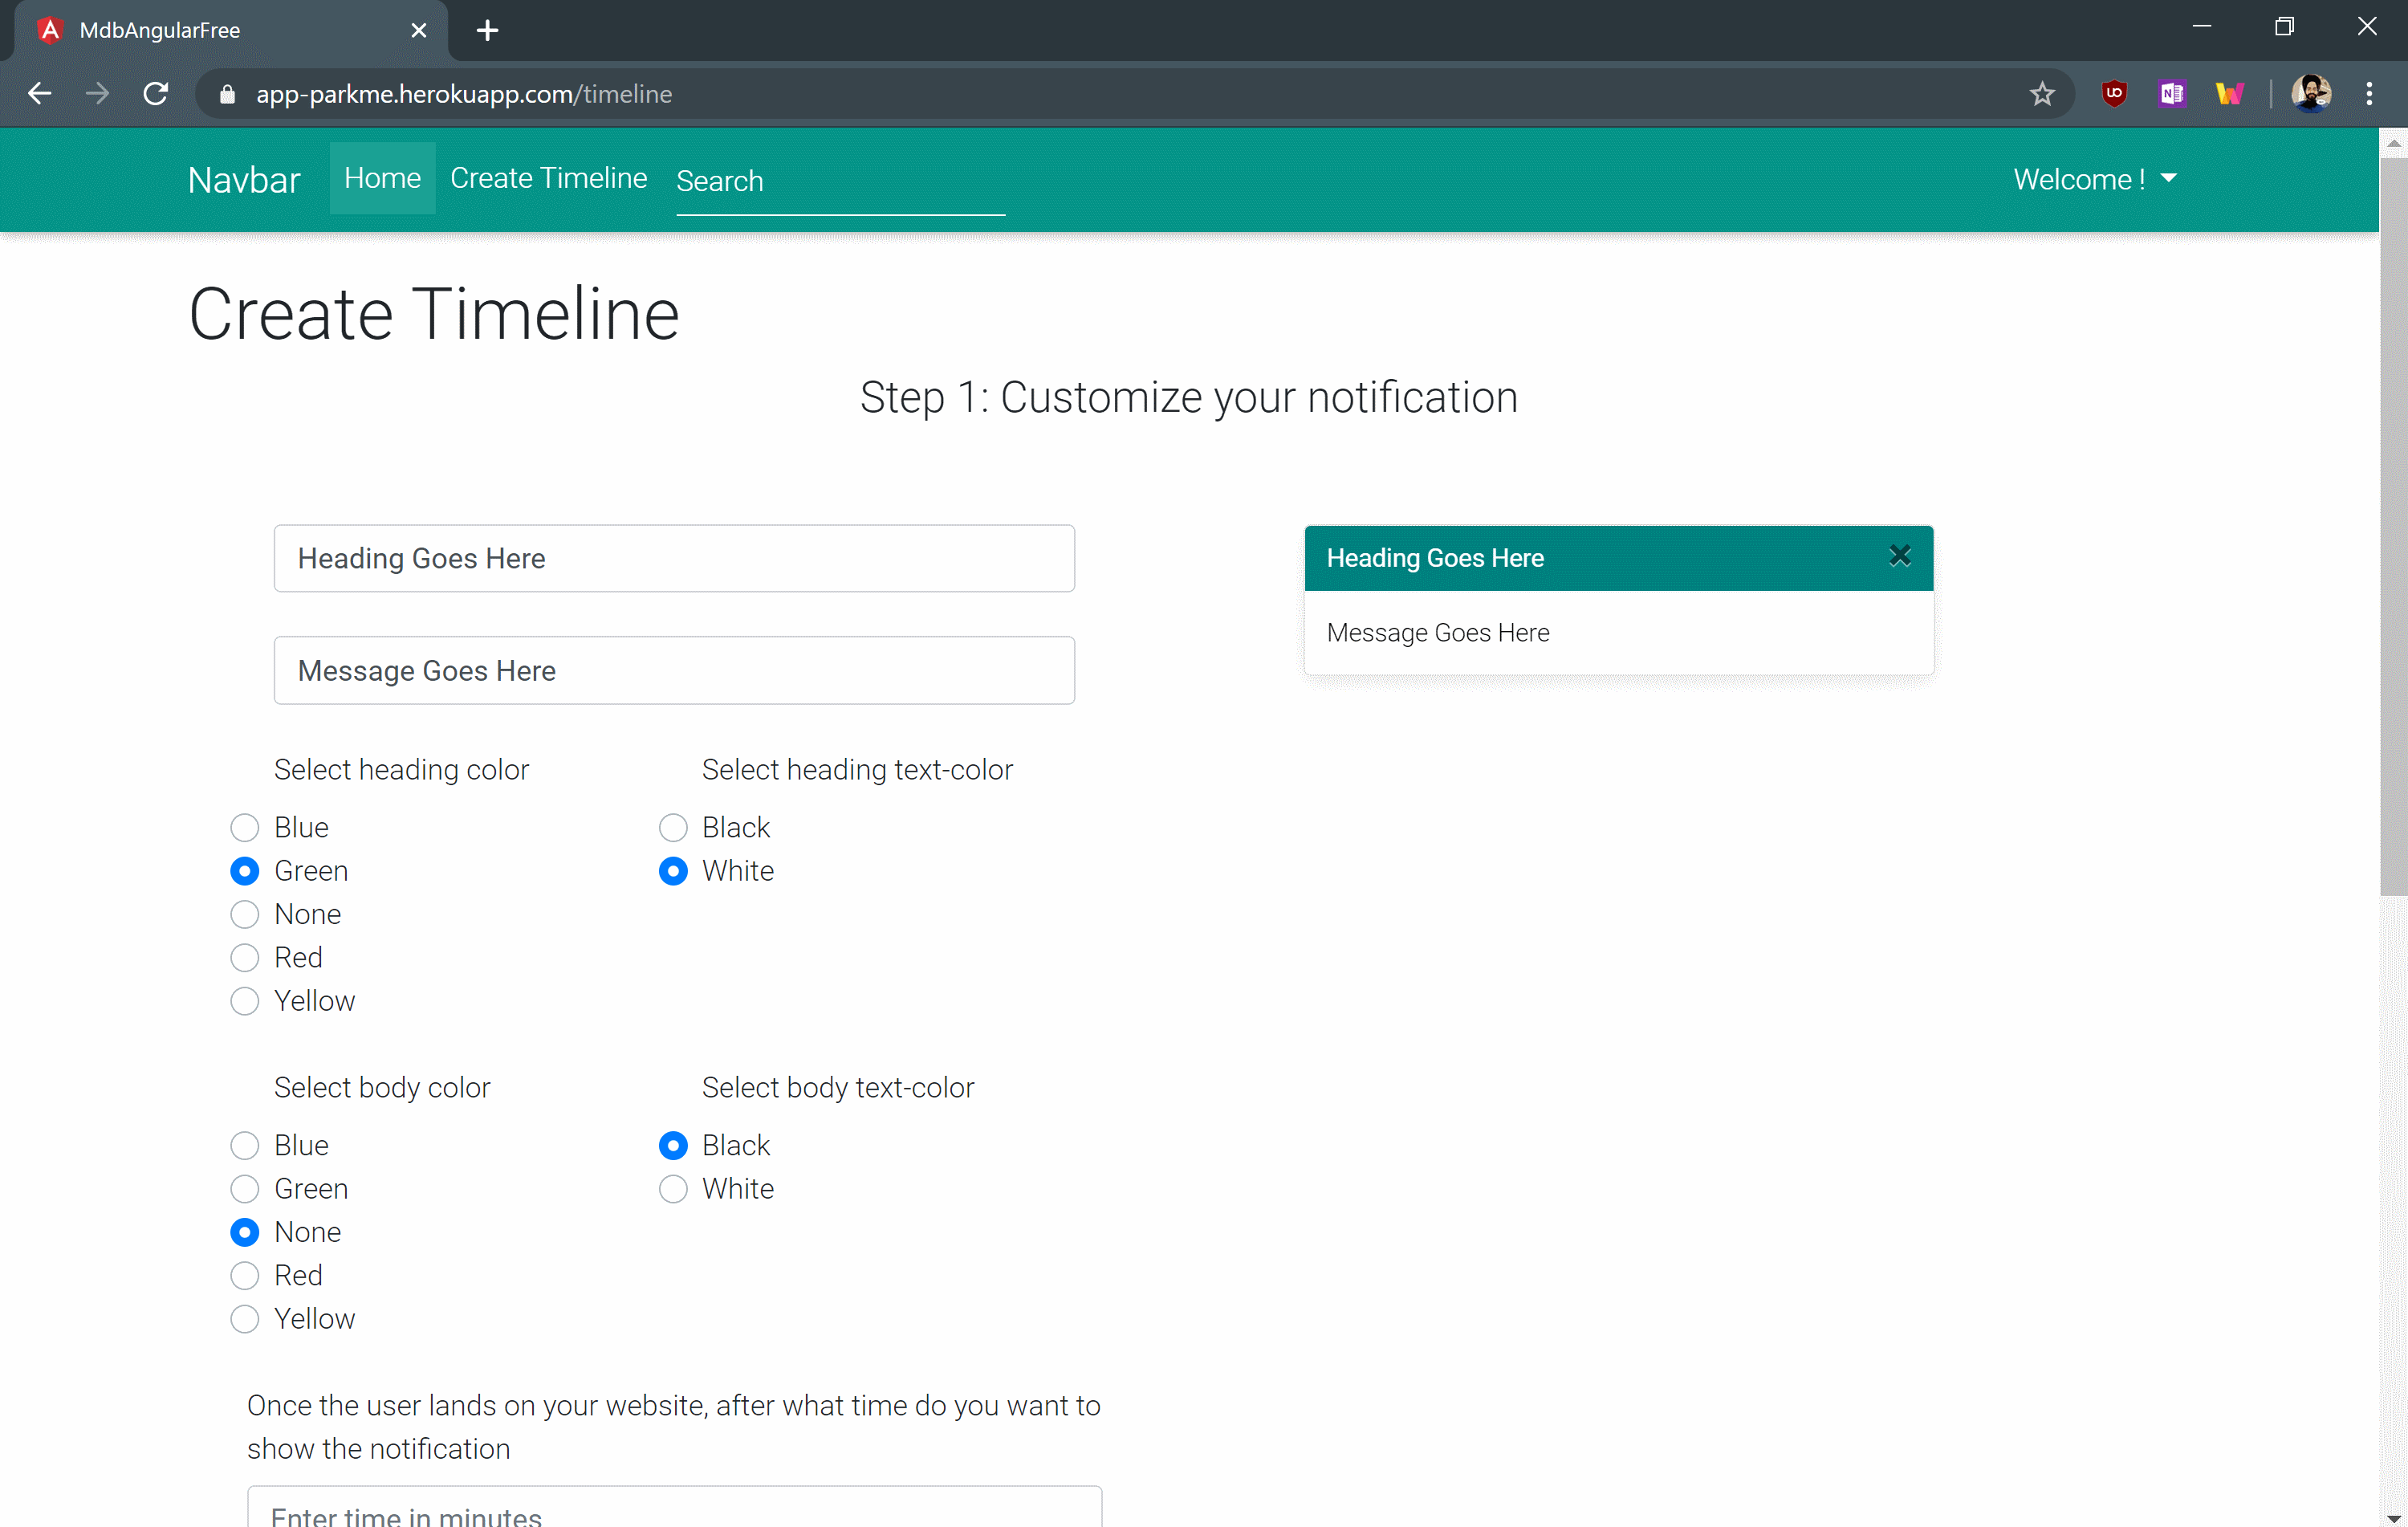
As seen above, the user has the complete flexibility to customized their own notification, with the choice of colors, text colors and customization, the user can easily decide how the notificaion should appear to the user.
The script that was created was added to an the website where the user wanted to use and once the script was added, the notification started to appear as shown in the following screenshot:
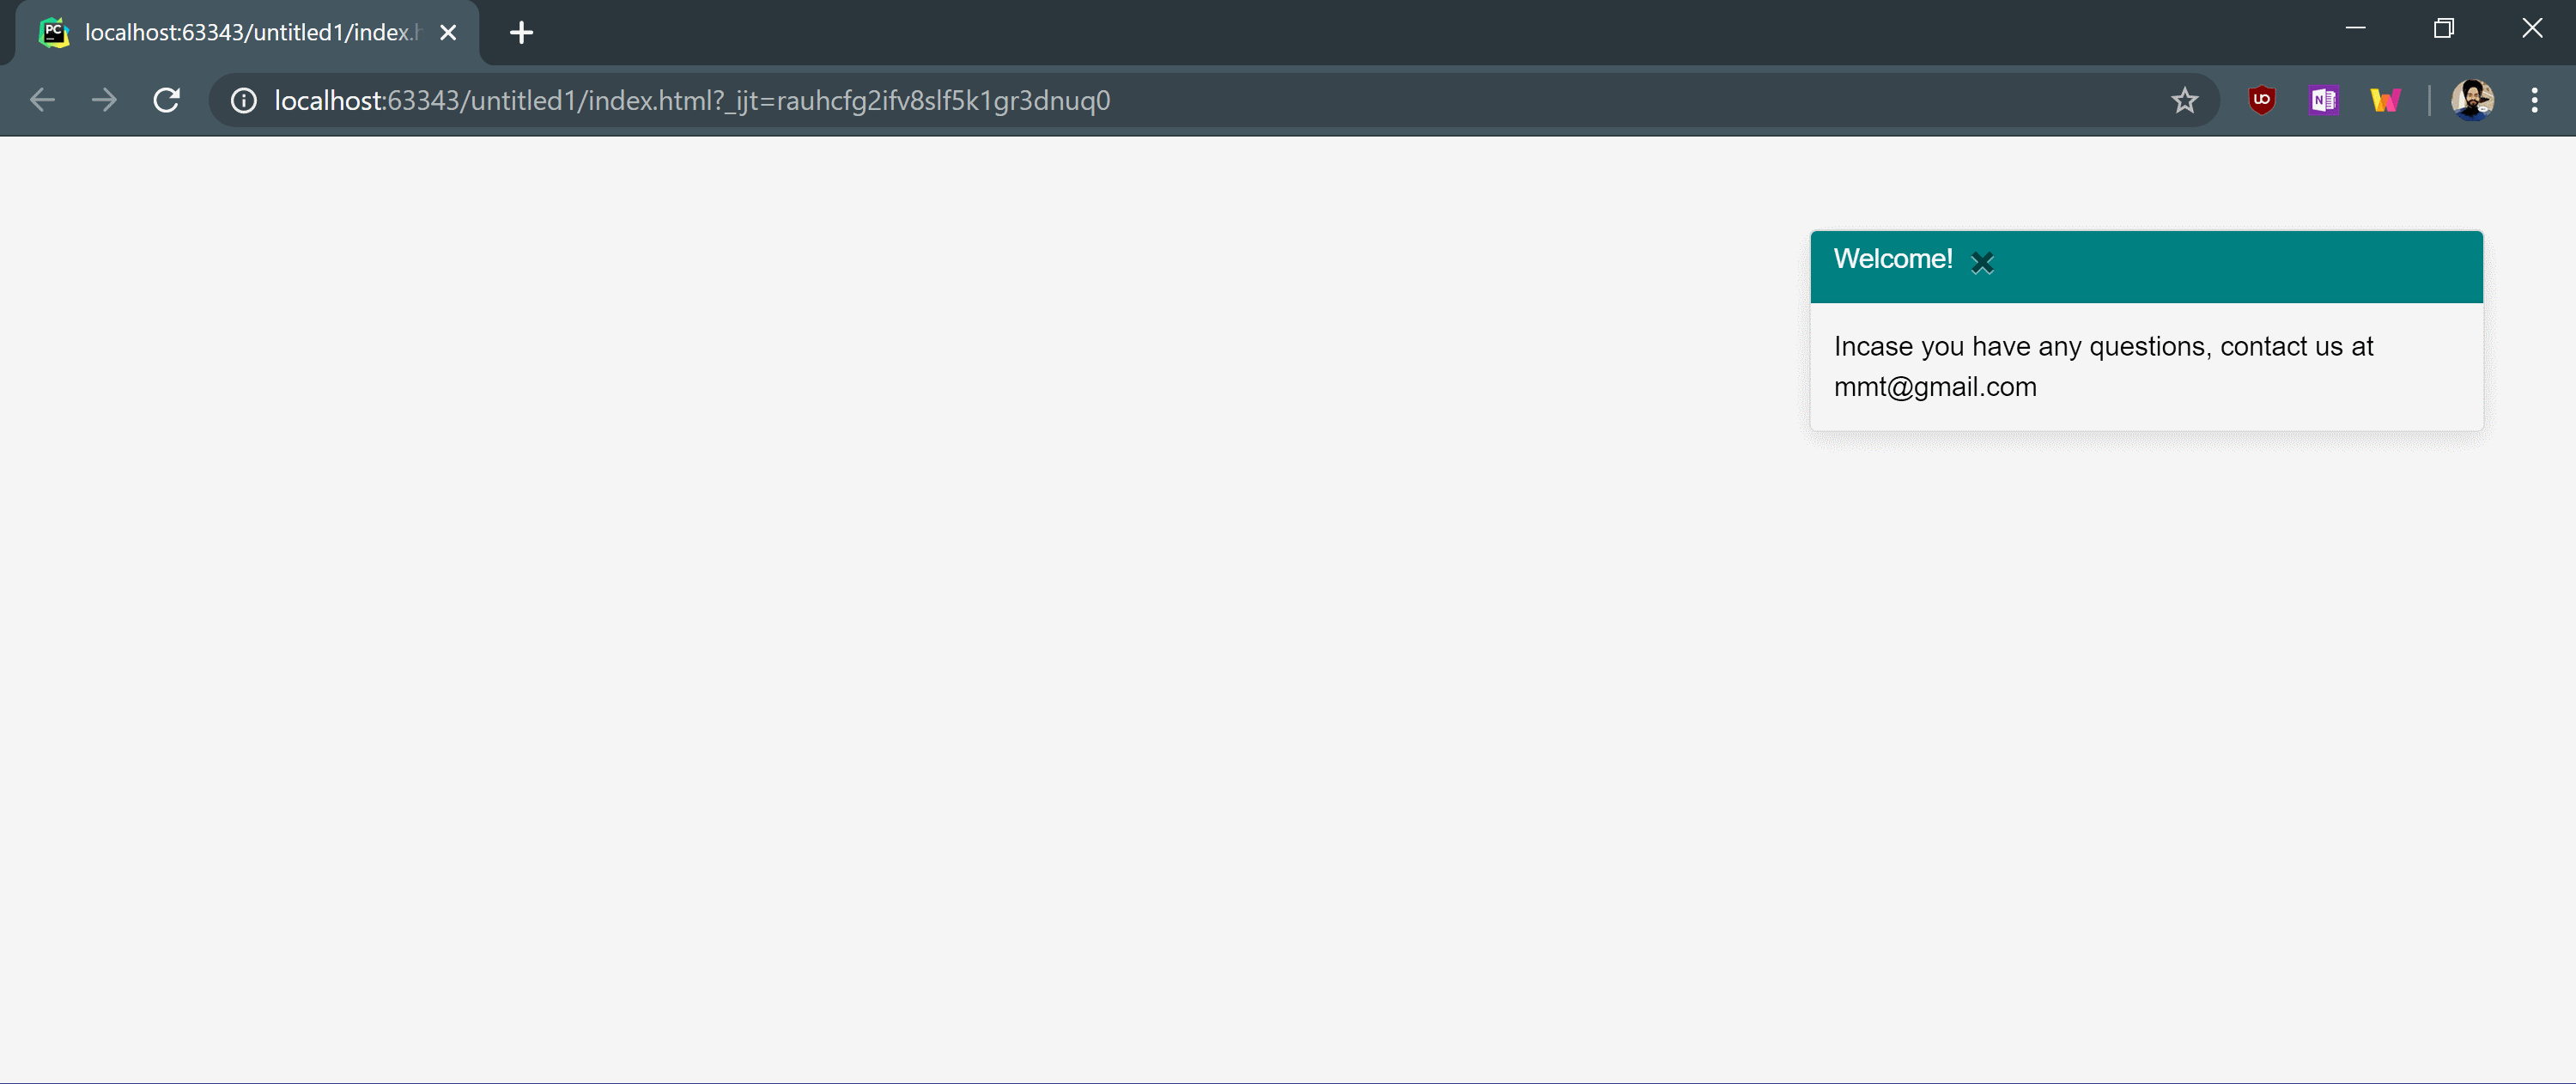
From the above screenshot, we can see that the notification appeared as per the target we had.
Once the prototype was running correctly, the next step was to integrate CI/CD with the project such that the test cases runs every time a pull request is raised. This process was integrated using Github Actions, using Yaml files. The files for CI/CD can be found in the workflow folder.
![github-actions[bot] avatar](https://avatars.githubusercontent.com/in/15368?v=4 "github-actions[bot]")


