Coder Social home page Coder Social logo

microsoft / vscode-iot-workbench Goto Github PK

View Code? Open in Web Editor NEW
168.0 15.0 74.0 73.5 MB

Azure IoT Device Workbench for Visual Studio Code

JavaScript 36.96% HTML 2.38% Dockerfile 3.54% CMake 0.60% Shell 1.25% C++ 0.38% C 0.74% TypeScript 52.28% CSS 1.87%

vscode-iot-workbench's Introduction

Azure IoT Device Workbench for Visual Studio Code

Gitter Build Status

Azure IoT Device Workbench extension is now part of Azure IoT Tools extension pack. We highly recommend installing Azure IoT Tools extension pack, which makes it easy to discover and interact with Azure IoT Hub that power your IoT Edge and device applications. This extension pack can help you:

  • Develop and connect your Azure IoT Applications to Azure. With this extension, you can interact with an Azure IoT Hub, manage connected devices, and enable distributed tracing for your Azure IoT applications.
  • Develop and debug Certifies Azure IoT Devices (including MXChip IoT DevKit, ESP32, Raspberry Pi) to Azure. This extension pack makes it easy to code, build, deploy and debug your IoT applications with popular IoT development boards.
  • Develop and deploy artificial intelligence and your custom logic to Azure IoT Edge. This extension pack makes it easy to code, build, deploy, and debug your IoT Edge applications.

Overview

The Azure IoT Device Workbench is a Visual Studio Code extension that provides an integrated environment to code, build, deploy, and debug your IoT device project with multiple Azure services supported.

If you would like to develop device using IoT Plug and Play preview refresh and the Digital Twin Definition Language (DTDL), you could refer to the DTDL extension to get intellisense completion and syntax validation of DTDL.

Get Started

Develop on generic device

Currently the following device platforms and languages are supported in Azure IoT Device Workbench.

Embedded Linux public preview

For Embedded Linux devices, the Device Workbench uses container to simplify the cross-compiling tool chain setup and configuration, which means all cross-compiling work happens in the container.

Languages supported: C/C++

Devices supported: Cortex-A series devices (e.g. Raspberry Pi, NXP i.MX6) that are running embedded Linux such as Debian, Ubuntu or Yocto Linux.

Follow the setup guide to setup the prerequisite including Docker runtime.

Here are a set of tutorials to help you get started:

Arduino

Currently, Device Workbench supports MXChip IoT DevKit and ESP32 DevKits using Arduino. For generic Arduino device, we recommend you use Arduino extension in VS Code.

Languages supported: Arduino C/C++

Devices supported: MXChip IoT DevKit, ESP32.

The Device Workbench relies on Arduino IDE as a dependency to develop on the above devices. If you have installed Device Workbench prior to Arduino IDE, you may need to restart VS Code to make it find the Arduino IDE installation path correctly.

MXChip IoT DevKit

Follow the setup guide to setup the environment including the Arduino extension.

Here are a set of tutorials to help you get started:

ESP32

Follow the setup guide to setup ESP32 device including the Arduino extension.

Here are a set of tutorials to help you get started:

Please take the survey to let us know extra device platforms and languages you want to see support in Device Workbench.

Develop device using IoT Plug and Play

This section is deprecated for Azure IoT Device Workbench 0.16.0 or above.

If you are using Azure IoT Device Workbench extention before 0.16.0, this extension provides an integrated environment to author IoT Plug and Play public preview device capability models (DCM) and interfaces, publish to model repositories, and generate skeleton C code to implement the device application.

Learn how to get started with IoT Plug and Play public preview and use the Device Workbench extension to build an IoT Plug and Play device:

Commands

Generic device development

Command Description
Azure IoT Device Workbench: Create Project... Create new IoT Device Workbench projects.
Azure IoT Device Workbench: Open Examples... Load existing examples of IoT Device Workbench project.
Azure IoT Device Workbench: Provision Azure Services... Provision Azure services for current project.
Azure IoT Device Workbench: Deploy to Azure... Deploy the code of the Azure services.
Azure IoT Device Workbench: Compile Device Code Compile device code.
Azure IoT Device Workbench: Upload Device Code Compile and upload device code.
Azure IoT Device Workbench: Configure Device Settings... Manage the settings on the device.
Azure IoT Device Workbench: Set Workbench Path Set the default path for Azure IoT Device Workbench.
Azure IoT Device Workbench: Help Get help for Azure IoT Device Workbench.

IoT Plug and Play

These commands are deprecated for Azure IoT Device Workbench 0.16.0 or above.

Command Description
IoT Plug and Play: Create Capability Model... Create new IoT Plug and Play device capability model file.
IoT Plug and Play: Create Interface... Create new IoT Plug and Play interface file.
IoT Plug and Play: Generate Device Code Stub... Generate skeleton device code and project based on given device capability model file.
IoT Plug and Play: Open Model Repository... Open Public or Company Model Repository view to manage device model files.
IoT Plug and Play: Submit files to Model Repository... Submit files to model repository.
IoT Plug and Play: Sign out Model Repository Sign out the Company Model Repository.

Documentation

Privacy Statement

The Microsft Enterprise and Developer Privacy Statement describes the privacy statement of this software.

Contributing

There are a couple of ways you can contribute to this repo:

  • Ideas, feature requests and bugs: We are open to all ideas and we want to get rid of bugs! Use the Issues section to either report a new issue, provide your ideas or contribute to existing threads.

  • Documentation: Found a typo or strangely worded sentences? Submit a PR!

  • Code: Contribute bug fixes, features or design changes:

    • Clone the repository locally and open in VS Code.
    • Install TSLint for Visual Studio Code.
    • Open the terminal (press Ctrl + `) and run npm install.
    • To build, press F1 and type in Tasks: Run Build Task.
    • Debug: press F5 to start debugging the extension.
    • Run gts check and gts fix to follow TypeScript style guide.
  • Example: Contribute examples for the supported devices.

    • Create a git repo to host the code of your example project.

    • Write a tutorial to describe how to run the example.

    • Submit a new issue and provide the following information:

      Item Description
      Name Name of the example to be displayed in example gallery.
      Description A short statement to describe the example.
      Location URL of the GitHub repo.
      Image URL of the example image (size: 640*370) shown in the gallery, if not provided, the default image will be used.
      Tutorial URL of tutorial that describes how to run the example.
      Difficulty Difficulty of the example, easy, medium or difficult.

Code of Conduct

This project has adopted the Microsoft Open Source Code of Conduct. For more information please see the Code of Conduct FAQ or contact [email protected] with any additional questions or comments.

Contact Us

If you would like to help to build the best IoT experience with Azure IoT Device Workbench, you can reach us directly at Gitter.

Telemetry

VS Code collects usage data and sends it to Microsoft to help improve our products and services. Read our privacy statement to learn more. If you don’t wish to send usage data to Microsoft, you can set the telemetry.enableTelemetry setting to false. Learn more in our FAQ.

vscode-iot-workbench's People

Contributors

arthma avatar blackchoey avatar bw-song avatar chagong avatar dependabot[bot] avatar dilin-ms avatar dominicbetts avatar dooriya avatar eriolchan avatar flipbug avatar formulahendry avatar git-remove avatar gorgoras avatar hellyzh avatar hongyanh avatar ihere1 avatar ivanjobs avatar jackstromberg avatar jerryyangkai avatar jimbobbennett avatar ksivamuthu avatar lirenhe avatar liydu avatar microsoftopensource avatar msftgits avatar peterblazejewicz avatar renehezser avatar sneezry avatar yjin81 avatar zunhu avatar

Stargazers

 avatar  avatar  avatar  avatar  avatar  avatar  avatar  avatar  avatar  avatar  avatar  avatar  avatar  avatar  avatar  avatar  avatar  avatar  avatar  avatar  avatar  avatar  avatar  avatar  avatar  avatar  avatar  avatar  avatar  avatar  avatar  avatar  avatar  avatar  avatar  avatar  avatar  avatar  avatar  avatar  avatar  avatar  avatar  avatar  avatar  avatar  avatar  avatar  avatar  avatar  avatar  avatar  avatar  avatar  avatar  avatar  avatar  avatar  avatar  avatar  avatar  avatar  avatar  avatar  avatar  avatar  avatar  avatar  avatar  avatar  avatar  avatar  avatar  avatar  avatar  avatar  avatar  avatar  avatar  avatar  avatar  avatar  avatar  avatar  avatar  avatar  avatar  avatar  avatar  avatar  avatar  avatar  avatar  avatar  avatar  avatar  avatar  avatar  avatar  avatar

Watchers

 avatar  avatar  avatar  avatar  avatar  avatar  avatar  avatar  avatar  avatar  avatar  avatar  avatar  avatar  avatar

vscode-iot-workbench's Issues

"Esc" key doesn't work correctly

Steps:

  1. Launch VSCode
  2. Press F1, select "IoT Workbench project: Azure Provision" -> ">> 1. IoT Hub - 2. IoT Hub Device - 3. Azure Function" -> "Create a new IoT Hub" -> select subscription -> create resource group
  3. When the "Resource Group Name" textbox displays, press Esc key to cancel this operation

Expected:

  1. The "azure provision" should be cancelled, without any exception

Actual:
There is an error - "Cannot read property 'length' of null", please refer to the following screenshot

The Esc doesn't work correctly, the function seems to equal to press Enter key

image

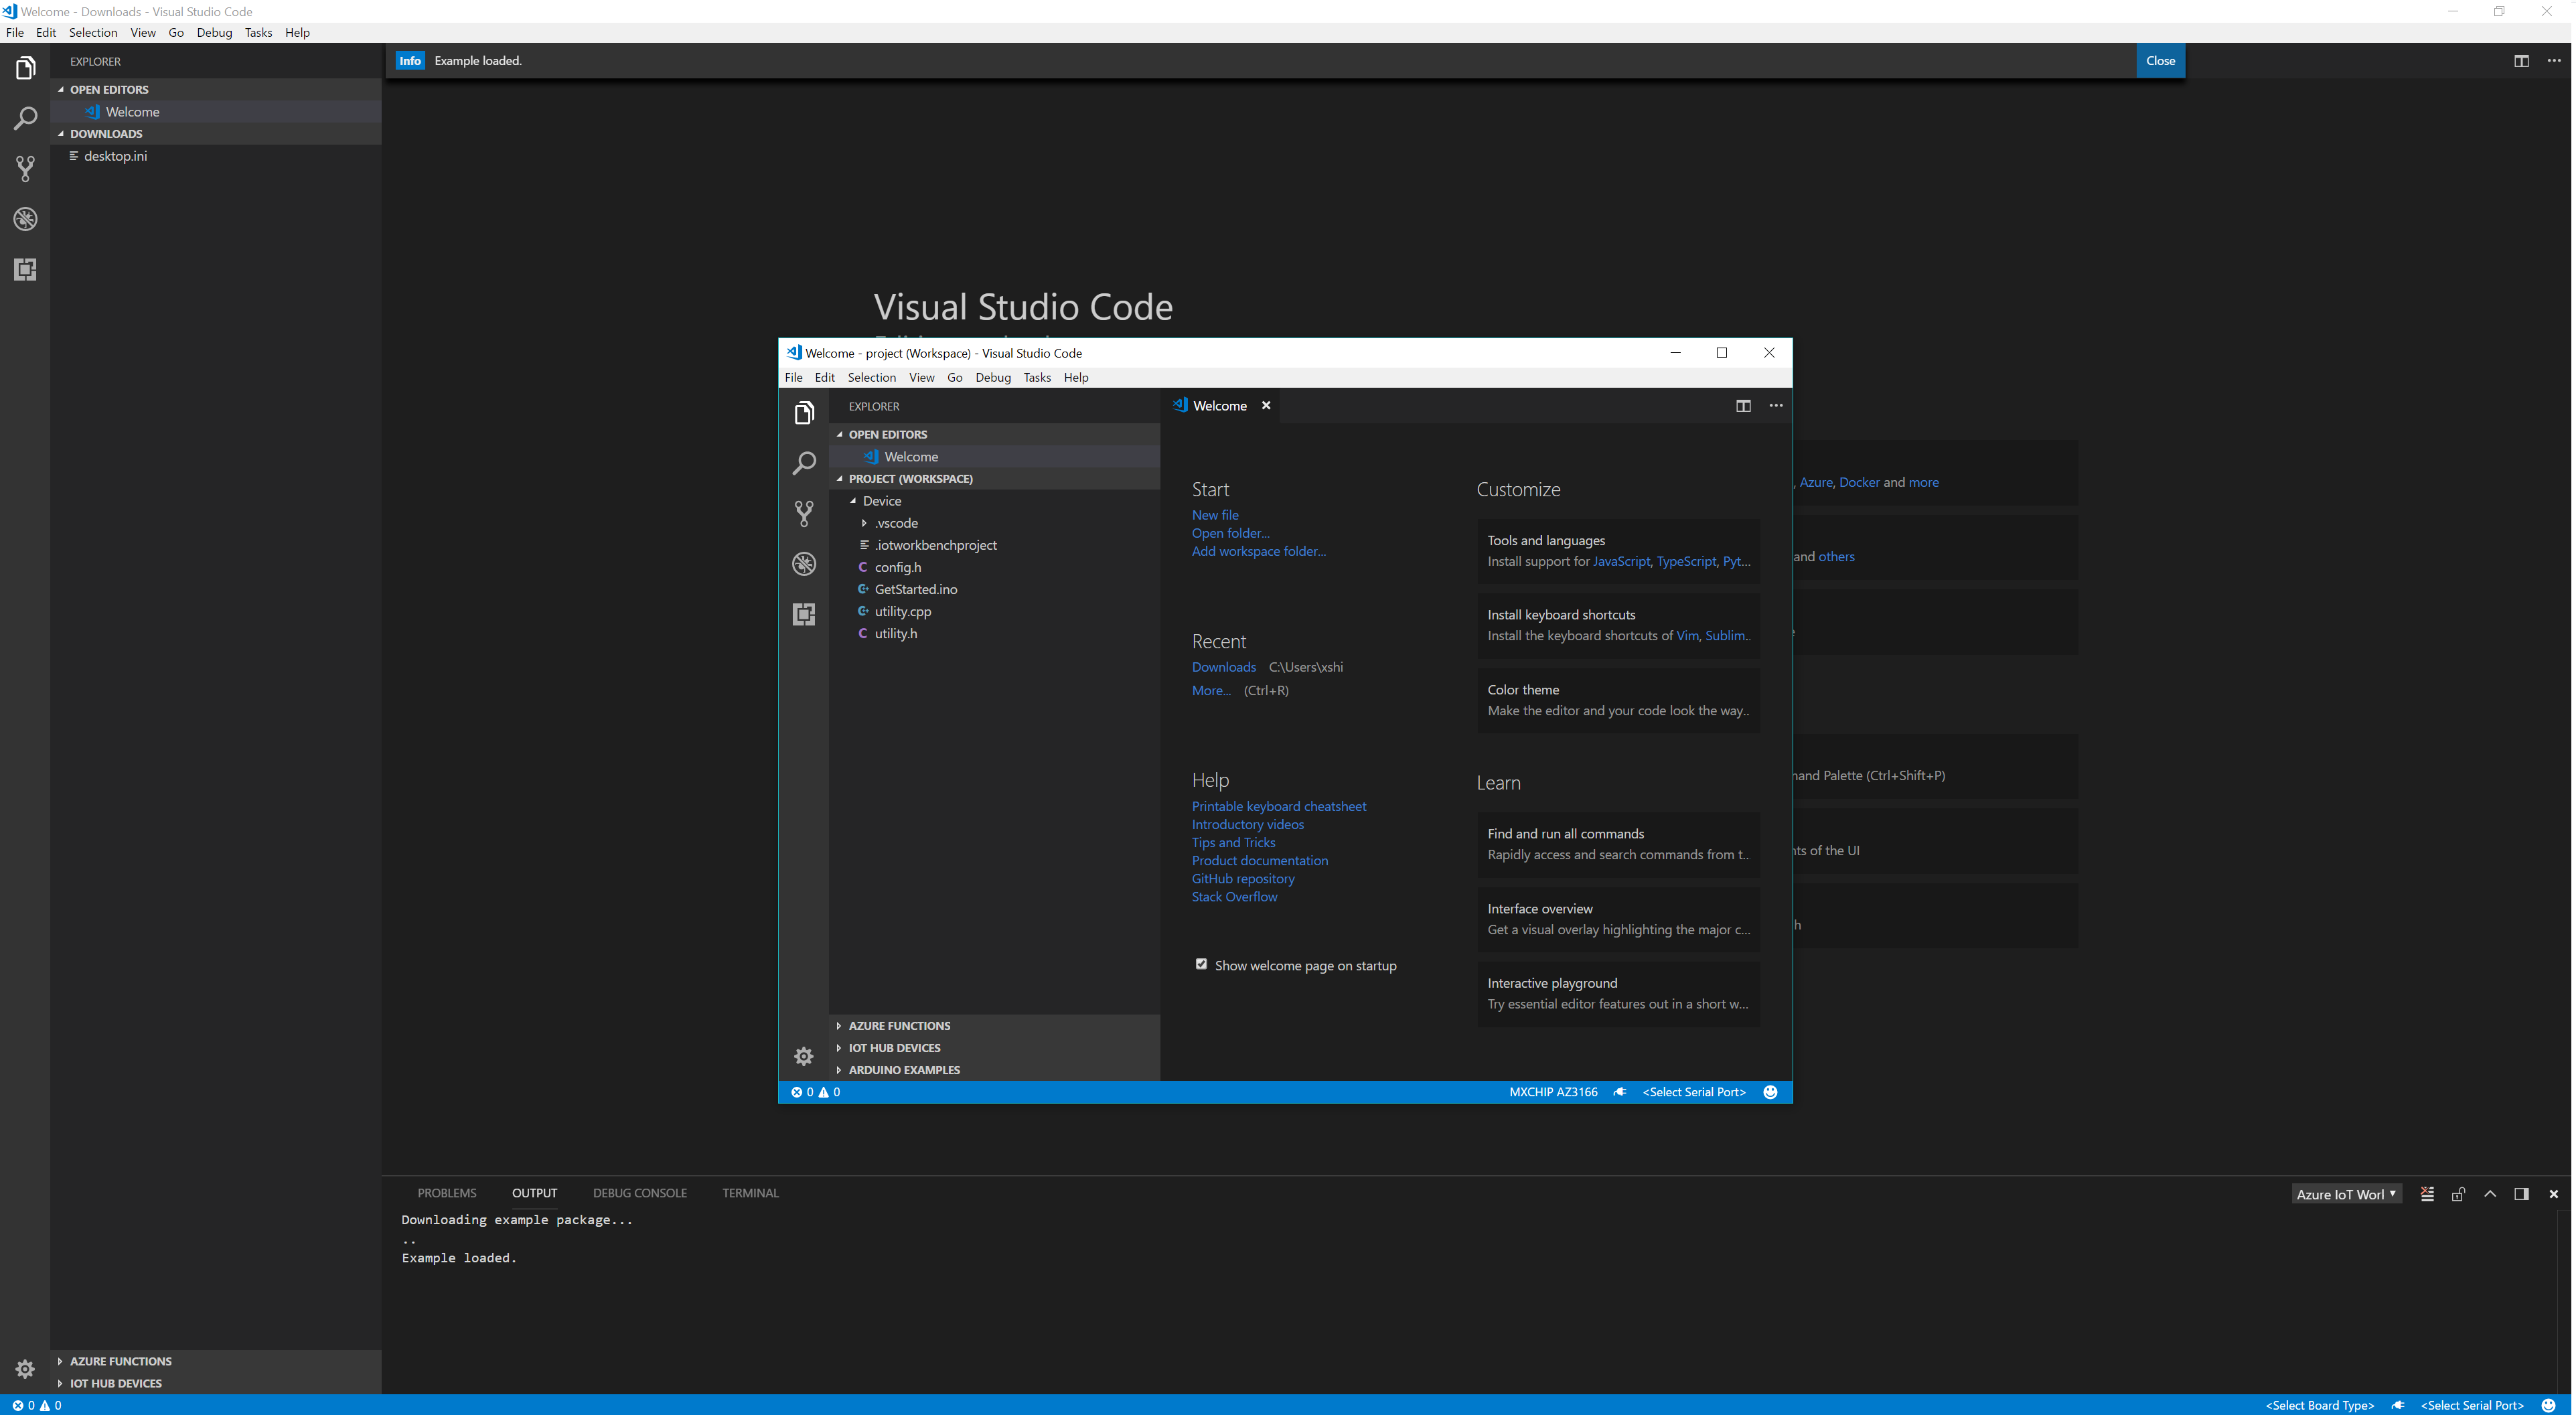
If workspace is not empty and try to create a new project, the message should be keep consistent

Steps:

  1. Launch ShakeShake example
  2. Run "IoT Workbench: New", verify the message
  3. Launch GetStarted example
  4. Run "IoT Workbench: New", verify the message

Expected:

  1. The message should be equal

Actual:

  1. For step 2, the message is "There are multiple workspaces in the project. Initialize new project in workbench directory?"

image

  1. For step 4, the message is "An empty folder is required to initialize the project. Initialize new project in workbench directory?"

image

If no workspace open, the error message should be keep consistent

Steps:

  1. Launch VSCode, without any workspace open
  2. Press F1, select "IoT Device Env Project" -> select "Develop for Azure" or "Develop for Device" -> select any sub option

Expected:

  1. If there is no workspace open, there should be an error displays to tell user what happened, and for all options, the error message should be keep consistent

Actual:

  1. For "Azure Deploy" command, there is a warning - "The project does not contain any Azure components to be deployed, Azure Deploy skipped."
  2. For "Create Function" command, there is an error - "No workspace open."
  3. For other options, there is an error - "Unable to find the root path, please open an IoT Development project"

image

If sketch file is empty, the file named ".ino" is created

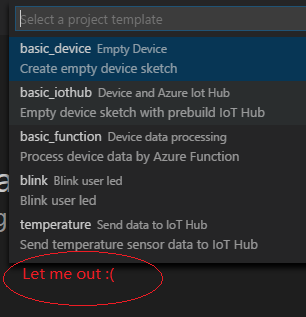
"IoT Dev Env Project" -> "Project Setup" -> "Initialize Project", then select any item from the dropdown list, such as "basic_device", then the clear the default sketch file name (device.ino), press enter button, it should be give user a warning message, such as the sketch file cannot empty, but actually, the file ".ino" is created without any exception.

Select workbench folder for example and click cancel, an error displays

Steps:

  1. "IoT Workbench: Examples" -> Select a board -> Select an example, such as shakeshake -> Select workbench folder, select "Browse..."
  2. For the folder select dialog, click Cancel

Except:

  1. The behavior should be cancelled, without exception

Actual:

  1. An error displays - Unable to write into user settings. Please open the user settings to correct errors/warnings in it and try again.

03

If az logout, user is blocked at "select subscription" step or "select resource group" step

If az logout, the example (such as shakeshake) cannot work correctly. Please refer to the following scenarios

Scenario 1. az logout + no IoT hub
follow the following steps:
"IoT Dev Env Project" -> "Develop for Azure" -> "Azure Provision" -> ">>1. IoT Hub - 2. IoT Hub Device - 3. Azure Function" -> "create a new IoT Hub" -> "select a subscription to create your IoT hub in …"-> "Select a resource group to create your IoT Hub in…"
Issues: The dropdown list is loading all the time which greater than 5 minutes, and nothing happened.

Scenario 2. az logout + IoT hub
follow the following steps:
"IoT Dev Env Project" -> "Develop for Azure" -> "Azure Provision" -> ">>1. IoT Hub - 2. IoT Hub Device - 3. Azure Function" -> "Select an existing IoT Hub" -> "Select Subscription"
Issues: The dropdown list is loading all the time which greater than 5 minutes, and nothing happened. And in the Output, it displays [object Object]

It seems we have no method to continue this example even if re-run the above the commands or re-launch this example

Add a device selection step

When create a new project (from template), the first step is select a device, currently it's 'IoT DevKit (AZ3166)'

IoT Workbench release 0.1.0 candidates

Feature:

  • #137 Add a device selection step
  • #134 Change ShakeShake example to IoT Hub triggered
  • #122 Create icon for the extension of Iot workbench
  • #140 Change the commands structure

Bug:

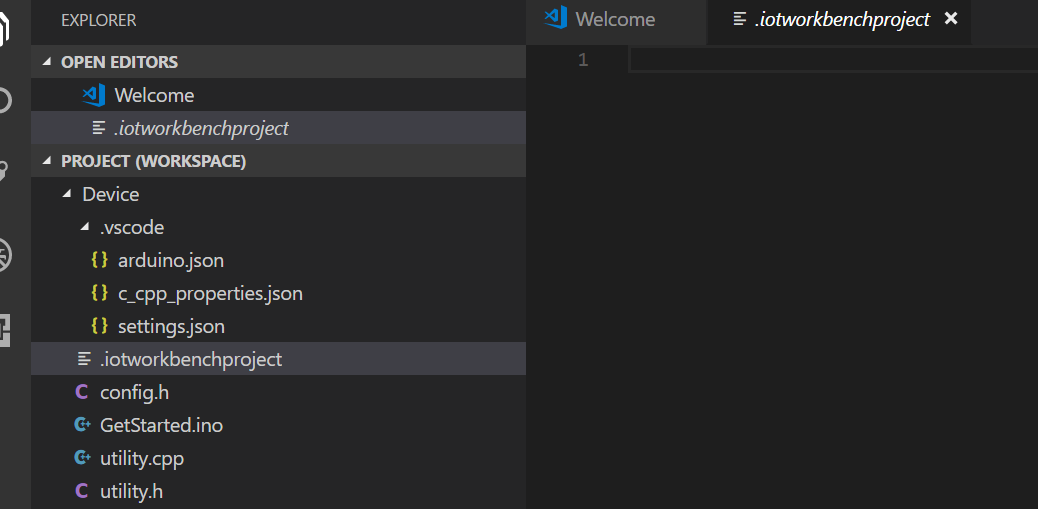
  • #133 .iotworkbenchproject file without any content
  • #131 No readme in Getstarted project
  • #126 "Esc" key doesn't work correctly [Toolkit issue]
  • #125 Better UI to show error message
  • #124 An error displays if set sketch file name to absolute path
  • #117 "Device Upload" failed as the sketch file contains white space
  • #114 If no workspace open, the error message should be keep consistent
  • #106 If az logout, user is blocked at "select subscription" step or "select resource group" step
  • #80 Need more comments in the MQTT code snippet
  • #26 Handle promise reject better
  • #142 Not create duplicate sample under same folder

An error displays if set sketch file name to absolute path

Steps:

  1. Launch VS Code
  2. Press F1, select "IoT Workbench Project" -> "Project Setup" -> "Initialize Project" -> "basic_device"
  3. Enter the sketch file name with absolute file path, such as " C:\Users\v-fional\Documents\test\Device\device.ino"
  4. Press Enter

Expected:
If absolute path is not allowed, it should be give user some message

Actual:

  1. There is an error - "Create Arduino sketch file failed: Maximum call stack size exceed", please refer to the following screenshot.

Not sure what the expected result is, so file this issue to tracking it.

image

Use workplace instead of folder

vscode.workplace.rootFolder will be deprecated, use vscode.workplace.workplaceFolders instead.

Also, we should create a workplace rather than a project folder for project init. This change is also required for Arduino Extension.

If az logout, all devices are listed on the "IOT HUB DEVICES" tab

If az logout, then create a new project, verify the "AZURE FUNCTIONS" and "IOT HUB DEVICES" tab of the left panel.

for "AZURE FUNCTIONS" tab, it displays "Sign in to Azure...", this is expected
for "IOT HUB DEVICES", all devices are listed. Due to az logout, it should not be display

The error message popup when not sign in

If not sign in Azure, run provision task will popup fail message notification bar as below
image

and then popup the sign in notification bar, can finish sign by clicking this notification.
The experience here is not good, consider to remove this provision error message if it's caused by not signed in

Variable-sized is not good

In the MqttSend code snippet

int length = 256;
char payLoad[length];

Not preferred, compiler may raise compilation error

"Device Upload" failed as the sketch file contains white space

Steps:

  1. "IoT Dev Env Project" -> "Project Setup" -> "Initialize Project", then select any option, such as "basic_device", enter the sketch file name, which contains space, such as "test test.ino"
  2. "IoT Dev Env Project" -> "Develop for Device" -> "Device Upload", try to upload this ino file

Expected:

  1. The upload operation should be succeed

Actual:

  1. It is failed as the file name is invalid
    And compare with Arduino IDE, if create a ino file which contains space, the space will change to "_"

image

All generated code should follow the same naming convention

  1. Follows camelcase syntax for naming the class, interface, method and variable
  2. Class / Interface name: should start with uppercase letter
  3. Method / function name should start with lowercase letter
  4. Variable name should start with lowercase letter
  5. Constants name should be in uppercase letter

Need more comments in the MQTT code snippet

int length = 256;
char payLoad[length];

//TODO: Generate message data

EVENT_INSTANCE* message = DevKitMQTTClient_Event_Generate(payLoad, MESSAGE);
DevKitMQTTClient_Event_AddProp(message, propertyName, propertyValue);
DevKitMQTTClient_SendEventInstance(message);
  1. How to do Generate message data ? the payload buffer
  2. propertyName and propertyValue
  3. How about put this code snippet into a function and let user call it in loop() ? just like the wifi and temperature.

Recommend Projects

  • React photo React

    A declarative, efficient, and flexible JavaScript library for building user interfaces.

  • Vue.js photo Vue.js

    🖖 Vue.js is a progressive, incrementally-adoptable JavaScript framework for building UI on the web.

  • Typescript photo Typescript

    TypeScript is a superset of JavaScript that compiles to clean JavaScript output.

  • TensorFlow photo TensorFlow

    An Open Source Machine Learning Framework for Everyone

  • Django photo Django

    The Web framework for perfectionists with deadlines.

  • D3 photo D3

    Bring data to life with SVG, Canvas and HTML. 📊📈🎉

Recommend Topics

  • javascript

    JavaScript (JS) is a lightweight interpreted programming language with first-class functions.

  • web

    Some thing interesting about web. New door for the world.

  • server

    A server is a program made to process requests and deliver data to clients.

  • Machine learning

    Machine learning is a way of modeling and interpreting data that allows a piece of software to respond intelligently.

  • Game

    Some thing interesting about game, make everyone happy.

Recommend Org

  • Facebook photo Facebook

    We are working to build community through open source technology. NB: members must have two-factor auth.

  • Microsoft photo Microsoft

    Open source projects and samples from Microsoft.

  • Google photo Google

    Google ❤️ Open Source for everyone.

  • D3 photo D3

    Data-Driven Documents codes.