Name: Daniel Krasovski
Student Number: C18357323
Class Group: DT282
this project is a a solar system that the user can navigate through and see the planets and moons that are in the solar system. the planets ands moons are prcocedurally generated and the user can move around the solar system. i used a tutorial from Sebastian Lague to help me with the procedural generation of the planets and moons. following this tutorial from episode 1 until episode 7: https://www.youtube.com/watch?v=QN39W020LqU&list=PLFt_AvWsXl0cONs3T0By4puYy6GM22ko8
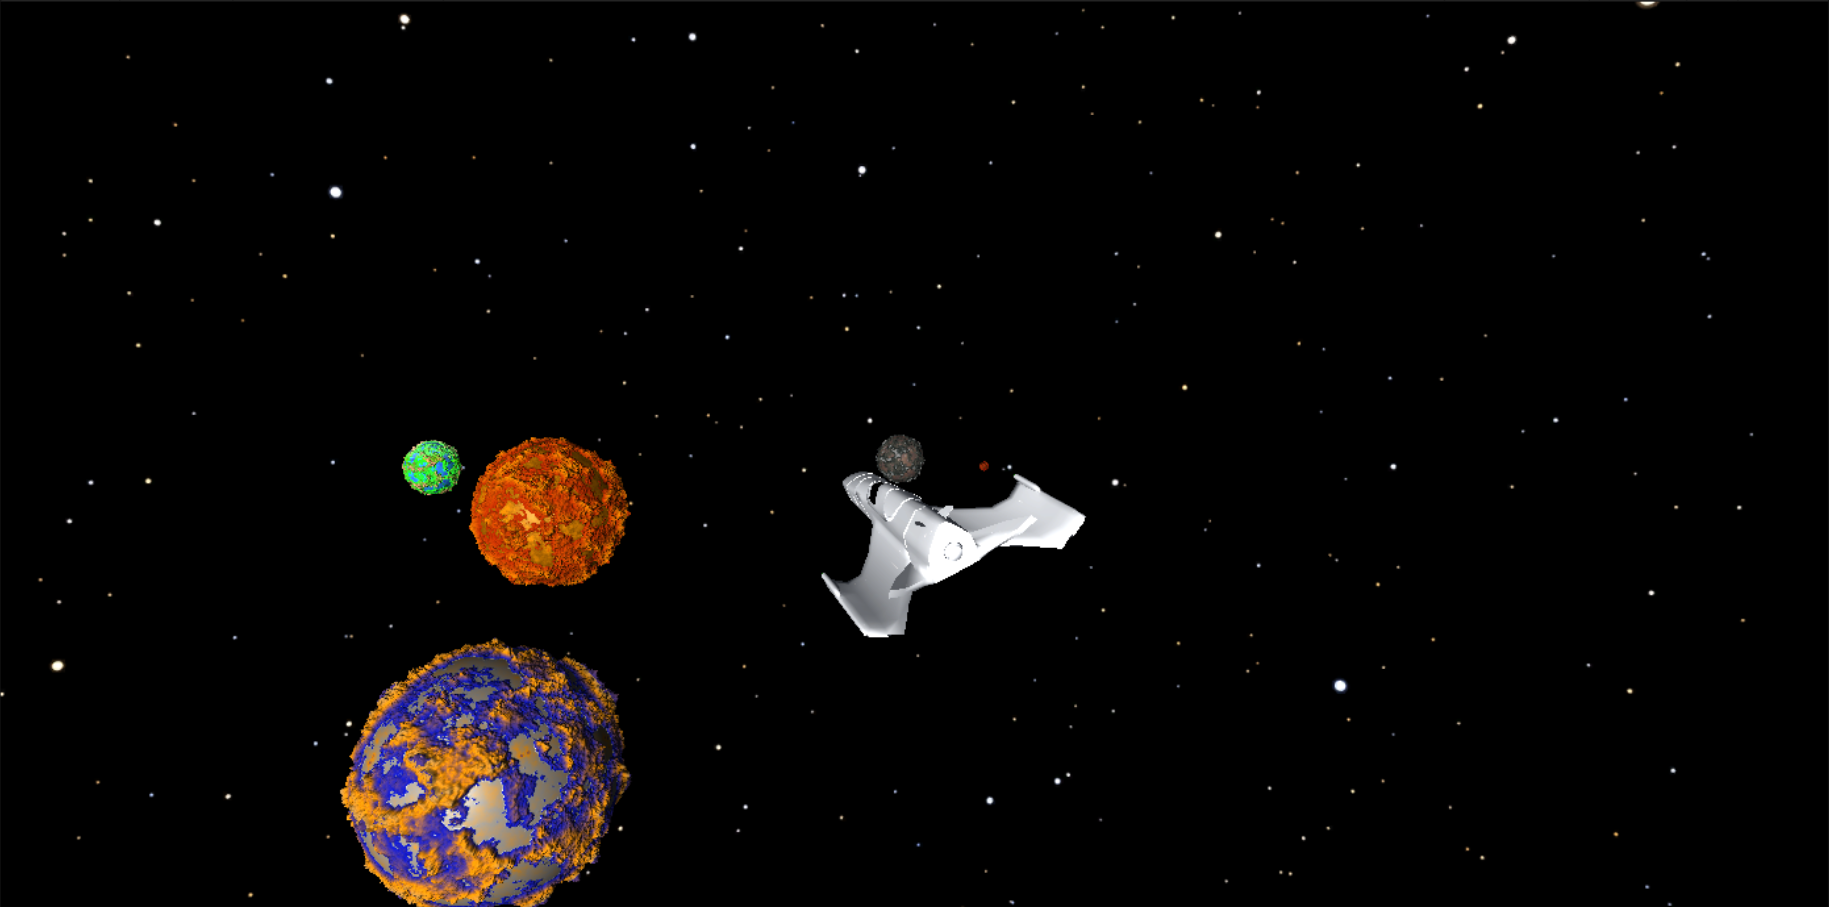
There is also a more cinematic experience of the solar system. where the user can select between different cinematic cameras to view the solar system and the planets. The planets rotate around the sun and the moons rotate around the planets. The planets also rotate around their own axis. The sizes of the planets are made to be in scale to their realistic size apart from the Sun and Jupiter because of their sizes.
The project uses the Universal Render Pipeline (URP) to render the planets using a shader graph and for the lighting. There are only 5 planets, 1 moon and the sun created.
to use the project, just load the sample scene in the unity editor. Depending if you want to play the cinematic version, or fly around using the spaceship. if you want to fly around, you have to enable the SpaceshipCamera Game object and disable the Camera and CameraSwap Game objects. To control the spaceship, use the WASD keys, W and S to move forward and backwards, A and D to go side ways, Spacebar to go up, and shift to go down. To change the cinematic camera, just press C to change the camera. The music is played at the start of the scene automatically. To create more planets, you have to make a new material(Graphics folder), shape and Colour settings(Settings Folder), you add the material to the colour settings and then attatch the planet.cs script to an empty game object.
To attach the skybox, you have to import the asset from https://assetstore.unity.com/packages/3d/environments/sci-fi/real-stars-skybox-lite-116333 (i used the StarSkyBox04)and then drag the skybox into the skybox slot in the unity editor for all the cameras. however it is also possible to just set background type to a black solid colour and you get the same effect.
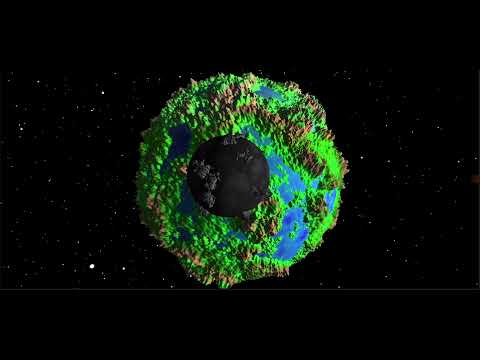
The planets, moon's and the sun's surfaces are procedurally generated. Using the Planet.cs, TerrainFace.cs and the simple and rigid noise filter scripts. The user is able to edit the planets surfaces by playing around with the silders in the Inspector. As seen in this screenshot: 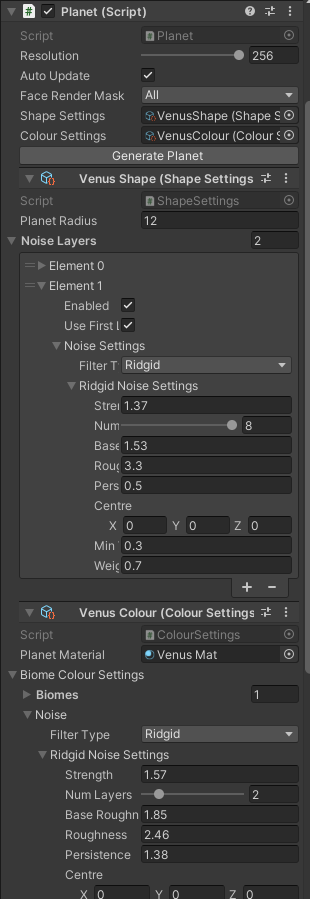
public void ConstructMesh()
    {
        Vector3[] vertices = new Vector3[resolution * resolution];
        int[] triangles = new int[(resolution - 1) * (resolution - 1) * 6];
        int triIndex = 0;
        Vector2[] uv = (mesh.uv.Length == vertices.Length) ? mesh.uv : new Vector2[vertices.Length]; //used for higher resolutions

        for (int y = 0; y < resolution; y++)
        {
            for (int x = 0; x < resolution; x++)
            {
                int i = x + y * resolution;
                Vector2 percent = new Vector2(x, y) / (resolution - 1);
                Vector3 pointOnUnitCube = localUp + (percent.x - 0.5f) * 2 * axisA + (percent.y - 0.5f) * 2 * axisB;
                Vector3 pointOnUnitSphere = pointOnUnitCube.normalized;
                float unscaledElevation = shapeGenerator.CalculateUnscaledElevation(pointOnUnitSphere);
                vertices[i] = pointOnUnitSphere * shapeGenerator.GetScaledElevation(unscaledElevation);
                uv[i].y = unscaledElevation;

                if (x != resolution - 1 && y != resolution - 1)
                {
                    triangles[triIndex] = i;
                    triangles[triIndex + 1] = i + resolution + 1;
                    triangles[triIndex + 2] = i + resolution;

                    triangles[triIndex + 3] = i;
                    triangles[triIndex + 4] = i + 1;
                    triangles[triIndex + 5] = i + resolution + 1;
                    triIndex += 6;
                }
            }
        }
        mesh.Clear();
        mesh.vertices = vertices;
        mesh.triangles = triangles;
        mesh.RecalculateNormals();
        mesh.uv = uv;
    }
2: Creating a settings editor for planet properties Editor/PlanetEditor.cs 3: Combining multiple layers of simplex noise to create terrain Noise.cs
    NoiseSettings.SimpleNoiseSettings settings;
    Noise noise = new Noise();
    //create a constructor for noiseSettings
    public SimpleNoiseFilter(NoiseSettings.SimpleNoiseSettings settings)
    {
        this.settings = settings;
    }
    public float Evaluate(Vector3 point)
    {
        float noiseValue = 0;
        float frequency = settings.baseRoughness;
        float amplitude = 1;

        for (int i = 0; i < settings.numLayers; i++)
        {
            float v = noise.Evaluate(point * frequency + settings.centre);
            noiseValue += (v + 1) * 0.5f * amplitude;
            frequency *= settings.roughness;
            amplitude *= settings.persistence;
        }
        noiseValue = noiseValue - settings.minValue;
        return noiseValue * settings.strength;
    }
4: Creating mountain ridges with a different noise filter RidgidNoiseFilter.cs 5: Combining different noise types for more varied terrain RidgidNoiseFilter.cs
for (int i = 0; i < settings.numLayers; i++)
        {
            float v = 1-Mathf.Abs(noise.Evaluate(point * frequency + settings.centre));
            v *= v;
            v *= weight;
            weight = Mathf.Clamp01(v * settings.weightMultiplier);

            noiseValue += v * amplitude;
            frequency *= settings.roughness;
            amplitude *= settings.persistence;
        }
        noiseValue = noiseValue - settings.minValue;
        return noiseValue * settings.strength;
    }
6: Using shadergraph to create a terrain shader ColorSettings.cs ColorGenerator.cs
public void UpdateColours()
    {
        Color[] colours = new Color[texture.width * texture.height];
        int colourIndex = 0;
        foreach(var biome in settings.biomeColourSettings.biomes)
        {
            for (int i = 0; i < textureResolution * 2; i++)
            {
                Color gradientColour;
                if(i <  textureResolution)
                {
                    gradientColour = settings.oceanColour.Evaluate(i / (textureResolution - 1f));
                }
                else
                {
                    gradientColour = biome.gradient.Evaluate((i - textureResolution)/ (textureResolution - 1f));
                }
                Color tintColour = biome.tint;
                colours[colourIndex] = gradientColour * (1-biome.tintPercent) + tintColour * biome.tintPercent;
                colourIndex++;
            }

        }

        texture.SetPixels(colours);
        texture.Apply();
        settings.planetMaterial.SetTexture("_texture", texture);
    }
7: Adding ocean depth
The planets rotation is done by the OtherRotate.cs script.
    public float rotationSpeed = 5f;
    public GameObject target;
    void Start()
    {
        //if target is the sun then set the rotationSpeed *= .2f;
        if (target.name == "Sun")
        {
            rotationSpeed *= .2f;
        }
    }

    void Update()
    {
        //rotate an object on the spot or around the sun
        transform.RotateAround(target.transform.position, Vector3.up, rotationSpeed * Time.deltaTime);
}The ships movement is done by the SpaceShipController.cs script. and the camera is done by the SpaceshipCamera.cs script. which i heavily modified from one of Sebastian Lague's scripts.
    void Movement ()
    {
        // Thruster input
        int thrustInputX = GetInputAxis (leftKey, rightKey);
        int thrustInputY = GetInputAxis (descendKey, ascendKey);
        int thrustInputZ = GetInputAxis (backwardKey, forwardKey);
        thrusterInput = new Vector3 (thrustInputX, thrustInputY, thrustInputZ);

        // Rotation input
        float pitchInput = GetInputAxis (PitchUp,PitchDown);
        float yawInput = GetInputAxis (leftKey, rightKey);
        float rollInput = GetInputAxis (rollCounterKey, rollClockwiseKey); //* rollSpeed * Time.deltaTime;

        //smooth Rotation
        targetRot = Quaternion.Euler (pitchInput, yawInput, rollInput) * targetRot;
        smoothedRot = Quaternion.Slerp (smoothedRot, targetRot, rotSmoothSpeed * Time.deltaTime);

        // Apply rotation
        transform.rotation = smoothedRot;

        // Apply thruster force
        if (thrusterInput.magnitude > 0)
        {
            GetComponent<Rigidbody>().AddRelativeForce(thrusterInput * thrustStrength);
        }
}For the Cinematic Camera, the user can press C to change the camera. The script is attached to the CameraSwap Game object. which switches between the different camera gameobjects in the project. the individual cameras have the PlanetCamera.cs script attacthed to them which is used to move the camera around the planets. The camera gets its target based on which camera is active at the time.
void Start()
{
target = SwapCameraScript.targets[0];
target_Offset = transform.position - target.position;
}
// Update is called once per frame
void LateUpdate()
{
//if switched, update the target target = SwapCameraScript.targets[0];
if (switched)
{
target = SwapCameraScript.targets[0];
target_Offset = transform.position - target.position;
switched = false;
}
// Look
var newRotation = Quaternion.LookRotation(target.transform.position - transform.position);
transform.rotation = Quaternion.Slerp(transform.rotation, newRotation, speed * Time.deltaTime);
// Move
Vector3 newPosition = target.transform.position - target.transform.forward * target_Offset.z - target.transform.up * target_Offset.y;
transform.position = Vector3.Slerp(transform.position, newPosition, Time.deltaTime * speed);
}
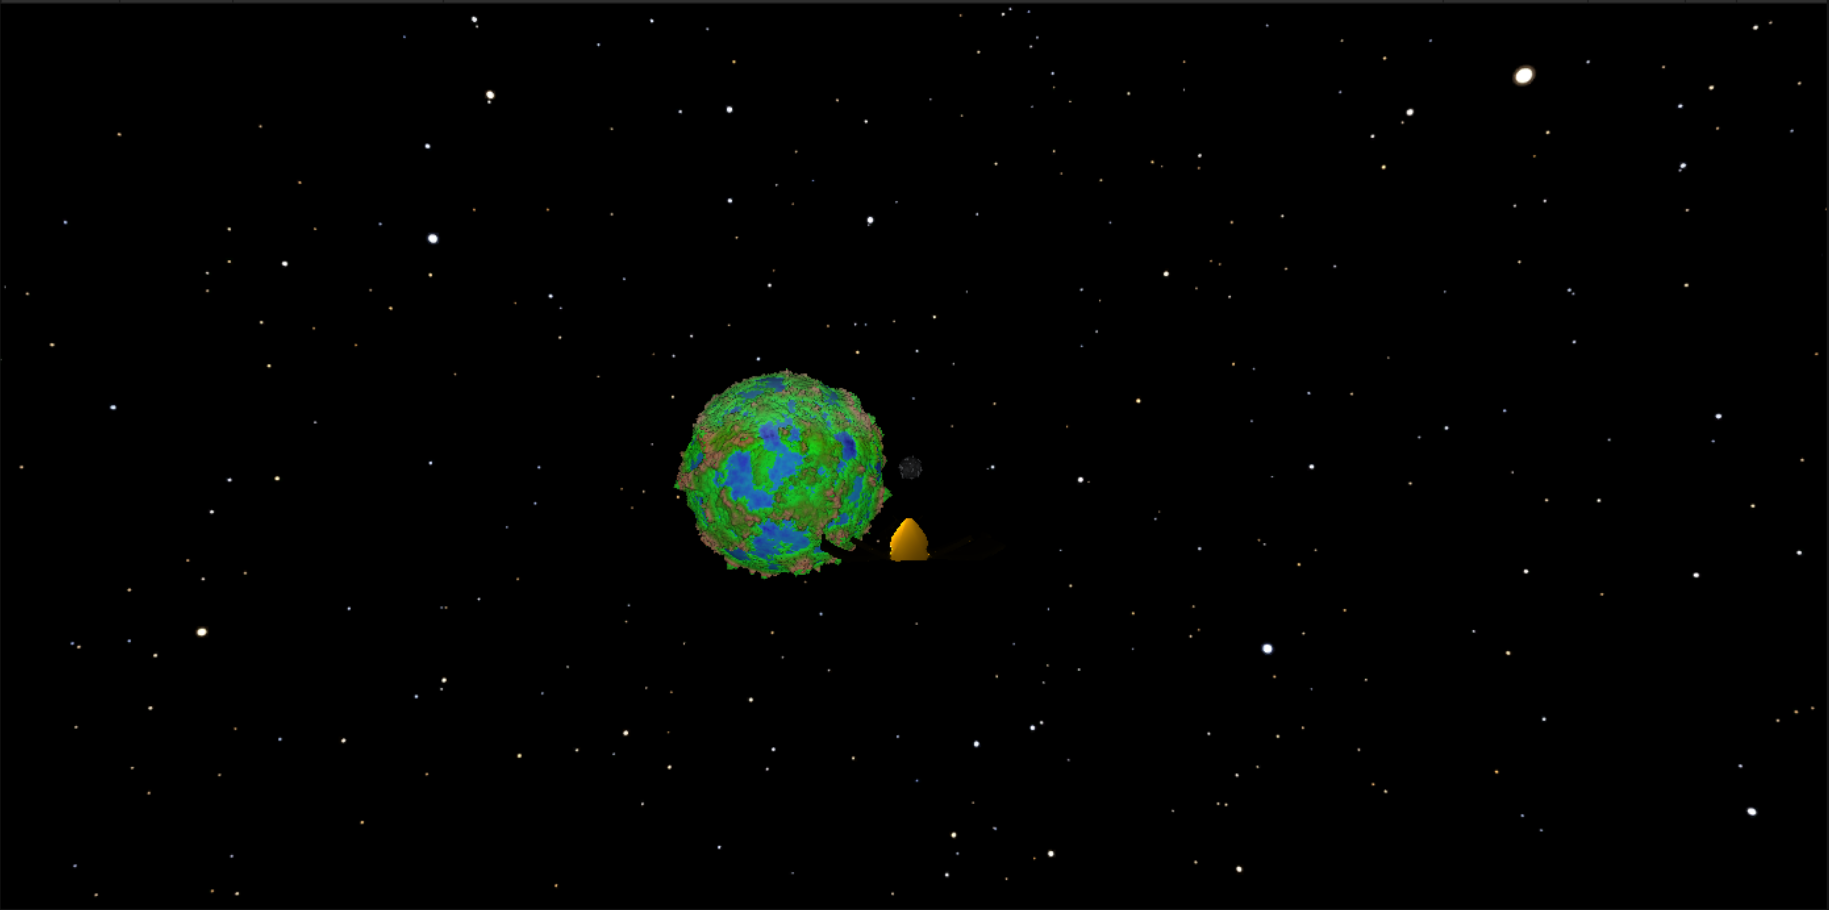
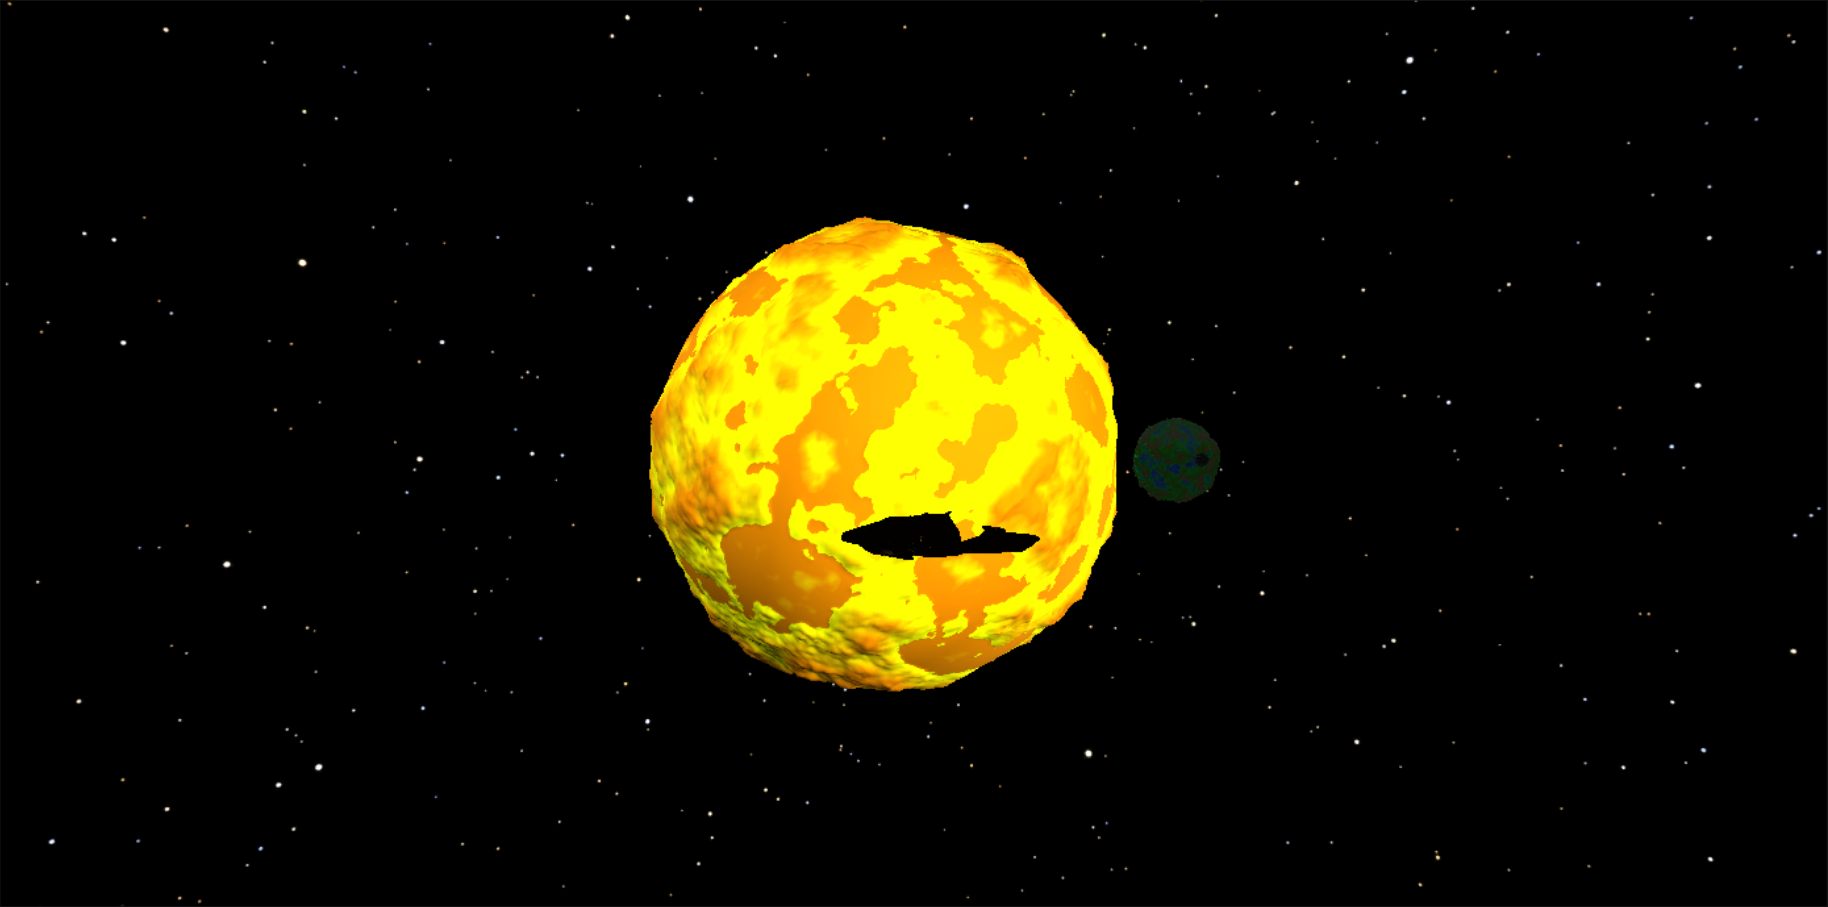
}Here is a screenshot of the cinematic camera of Earth, the Moon and Venus:
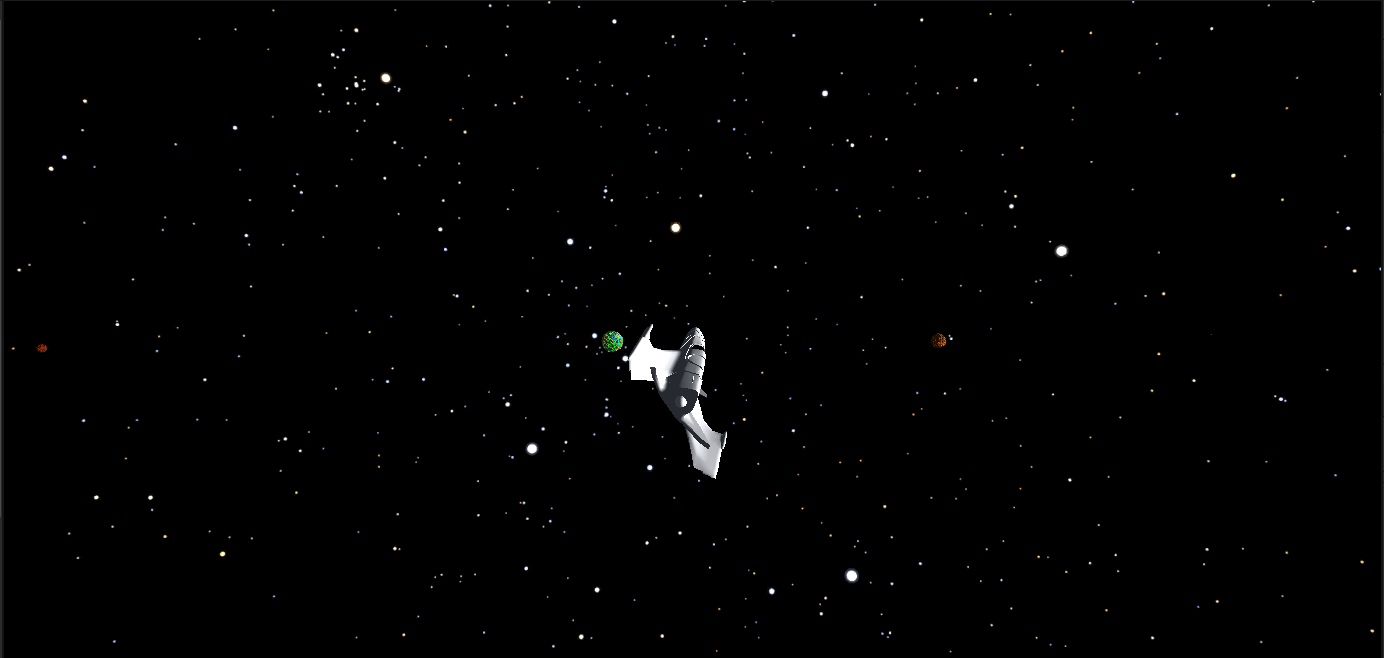
For the Spaceship Camera, depending on what direction the ship is facing, the camera will jump to the correct position and adjust which position it is facing. This is so the user always has a view of the ship and which direction it is heading in. Here is a small snipped of the code
if((target.transform.eulerAngles.y > 60 && target.transform.eulerAngles.y < 140) )
{
transform.position = Vector3.Lerp(transform.position, target.position-target_Offset,1.1f);
transform.position = new Vector3(transform.position.x - 30, transform.position.y + 3.36f, target.transform.position.z);
transform.eulerAngles = new Vector3(transform.eulerAngles.x, 90, transform.eulerAngles.z);
//Debug.Log("this is to the right");
}
else if((target.transform.eulerAngles.y > 140 && target.transform.eulerAngles.y < 230) )
{
transform.position = Vector3.Lerp(transform.position, target.position-target_Offset,1.1f);
transform.position = new Vector3(transform.position.x, transform.position.y + 3.36f, transform.position.z);
transform.eulerAngles = new Vector3(transform.eulerAngles.x, 180, transform.eulerAngles.z);
//Debug.Log("this is to the back");
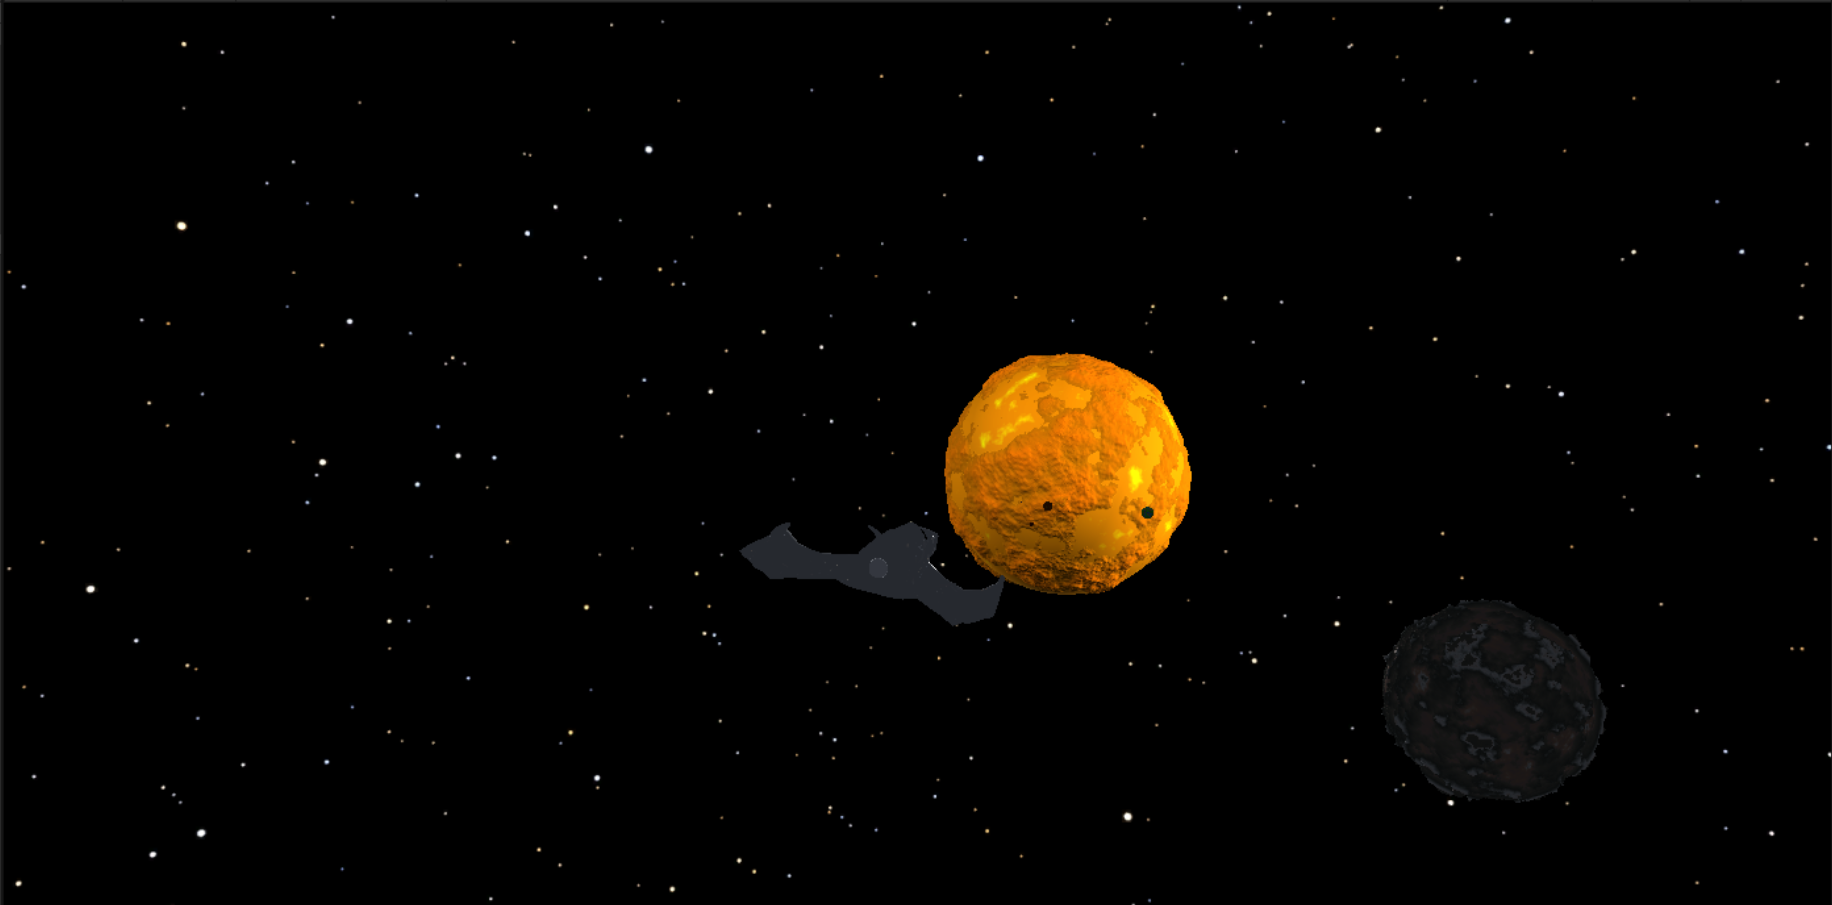
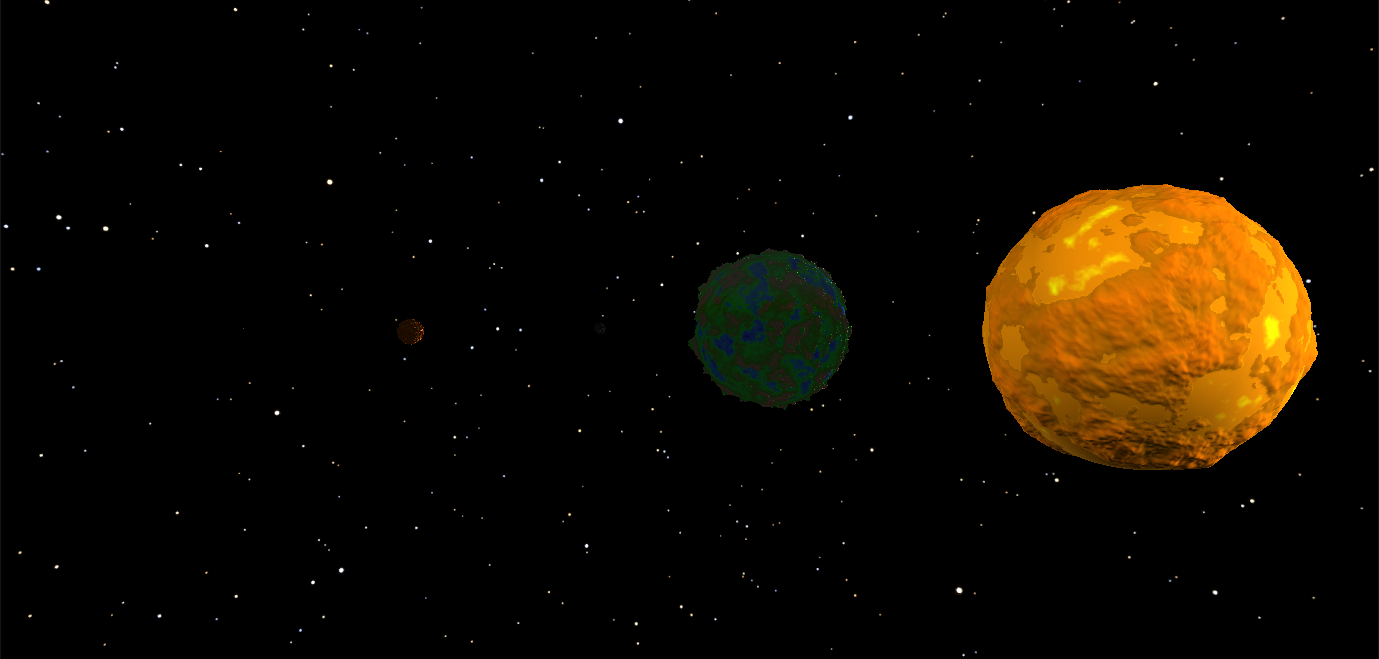
}Here is a screenshot of the spaceship and some of the planets:
List of classes/assets in the project and whether made yourself or modified or if its from a source, please give the reference
| Class/asset | Source |
|---|---|
| SpaceshipCamera.cs | Self written |
| SwapCameraScrip.cs | Self written |
| PlanetCamera.cs | Self written |
| OtherRotate.cs | Self written |
| RotatePlanet.cs | Self written |
| RotatePlanet.cs | Self written |
| Lighting | Self Done |
| All the Materials and Colour + Shape Settings | Self written |
| SpaceShipController.cs | Modified from Sebastian Lague |
| All other scripts | Modified/Adapted/Used From Sebastian Lague |
| Song: Galaxy | From MVSE |
Assets: Spaceship model: https://assetstore.unity.com/packages/3d/vehicles/air/space-cruiser-1-124172
Skybox: https://assetstore.unity.com/packages/3d/environments/sci-fi/real-stars-skybox-lite-116333
Tutorials: https://www.youtube.com/watch?v=QN39W020LqU&list=PLFt_AvWsXl0cONs3T0By4puYy6GM22ko8 by Sebastian Lague
What I am most proud of in the assignment is with how much i was able to get done, and how much I learned. My favourite part of the project is the cinematic camera on the Earth planet. Im also proud of how much i managed to get done and how motivated i was to not settle and always try to add more features to make the experience more complete
My idea is to create a solar system procedurally, all the planets have different terrains, maybe even allowing the user to change how it is generated using sliders. Depending on how I manage, I will attempt to also have it react to audio