This is a project for CDK development with Python for creating multi AWS account deployment.
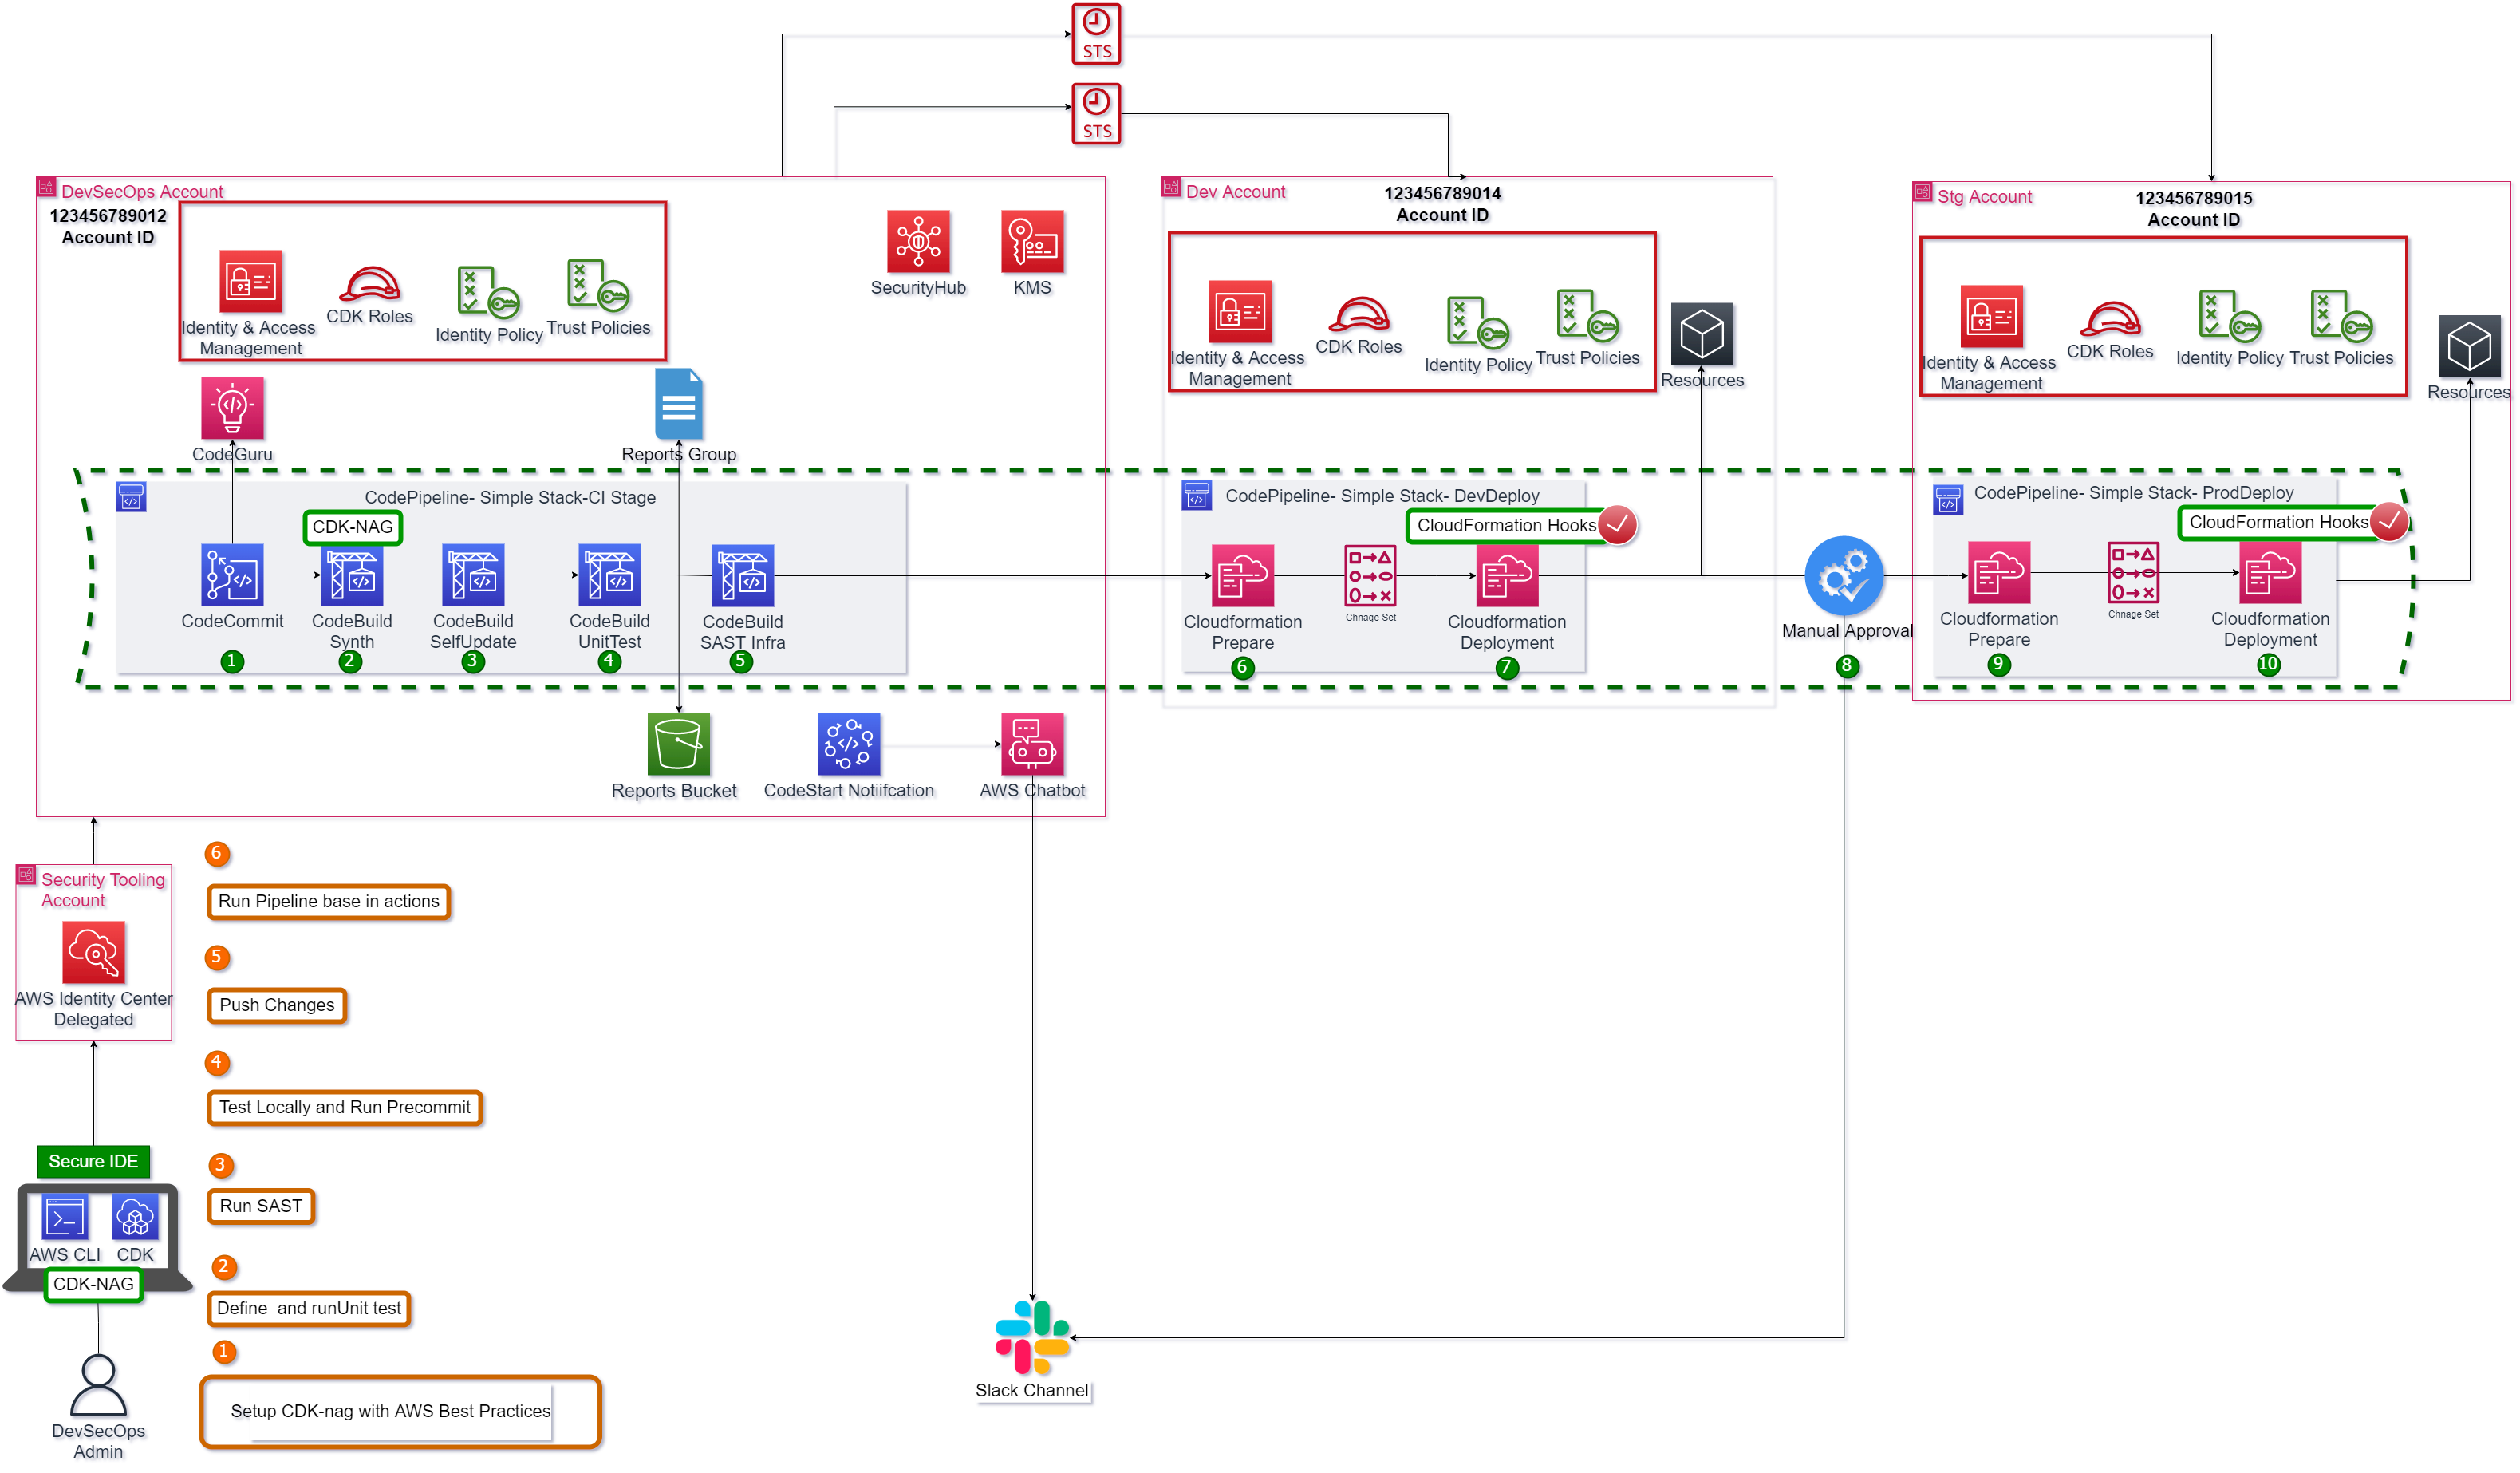
This pipeline is a default pipeline composed by next steps: 1.The changes are detected and activate de pipeline. For this demo the branch master is the default branch. 2.The CDK project is synthesized if is aligned with AWS Security Best practices. 3.The pipeline run self-update action. 4.The unit test runs, and its report is published in codebuild reports group. 5.The SAST runs, and its report is published in codebuild reports group. 6.The Cloudformation stack is prepared for developer environment. 7.The Cloudformation stack is deployed for developer environment after success result from Cloudformation hooks. 8.To move between environments a manual approval step is added, the notification is sent to slack channel. 9.The Cloudformation stack is prepared for staging environment. 10.The Cloudformation stack is deployed for staging environment after success result from Cloudformation hooks.
The cdk.json file tells the CDK Toolkit how to execute your app.
This project is set up like a standard Python project. The initialization
process also creates a virtualenv within this project, stored under the .venv
directory. To create the virtualenv it assumes that there is a python3
(or python for Windows) executable in your path with access to the venv
package. If for any reason the automatic creation of the virtualenv fails,
you can create the virtualenv manually.
To manually create a virtualenv on MacOS and Linux:
$ python3 -m venv .venv
After the init process completes and the virtualenv is created, you can use the following step to activate your virtualenv.
$ source .venv/bin/activate
If you are a Windows platform, you would activate the virtualenv like this:
% .venv\Scripts\activate.bat
Once the virtualenv is activated, you can install the required dependencies.
$ pip install -r requirements.txt
At this point you can now synthesize the CloudFormation template for this code.
$ cdk synth
To add additional dependencies, for example other CDK libraries, just add
them to your setup.py file and rerun the pip install -r requirements.txt
command.
The following diagram shows the code stacks and structure.

All project definitions are in project_configs/environment_options/environment_options_template.yaml
Please Visit avelez in Dev.to for more.
-
Create a new file with name
environment_options.yamland change the accounts ids. -
Deploy main stack
CdkPipelineMultienvironmentStack
cdk lslist all stacks in the appcdk synthemits the synthesized CloudFormation templatecdk deploydeploy this stack to your default AWS account/regioncdk diffcompare deployed stack with current statecdk docsopen CDK documentation
Enjoy!
