A complete solution for all your Payment needs, made with ❤️ by [Crazy Programmer].
Note that I have used test mode for this Live Demo, To accept real payments you can enable live mode in your razorpay dashboard, And change your test Key_Id and Key_Secret with live Key_Id and Key_Secret to start accepting real payments.
Accept payments with more than 10 payment methods including credit-card, debit-card, net-banking, UPI, wallets etc with less than 10 steps.
I have used angular as the front end and Firebase Cloud function as the backend for this project. Feel free to change them with your favourite language.
There are alot of ways in which we can integrate razorpay in our app such as :-
- Web Integration
- Android Integration
- iOS Integration
- React Native Integration
- Flutter Integration
- E-commerce Plugins
- Language-wise SDK Integration
I have used Web Integration for this project, You can use any of these integration as per your need, To follow along with the full documentation visit https://razorpay.com/docs/.
Steps required for getting started with web Integration:-
- Singup for razorpay and grab your Key_Id and Key_Secret from here https://razorpay.com.
- Integrate the checkout modal from razorpay in the front end to accept the payment details from user.
- Implement Order API in the backend.
- Capture Athorized payments.
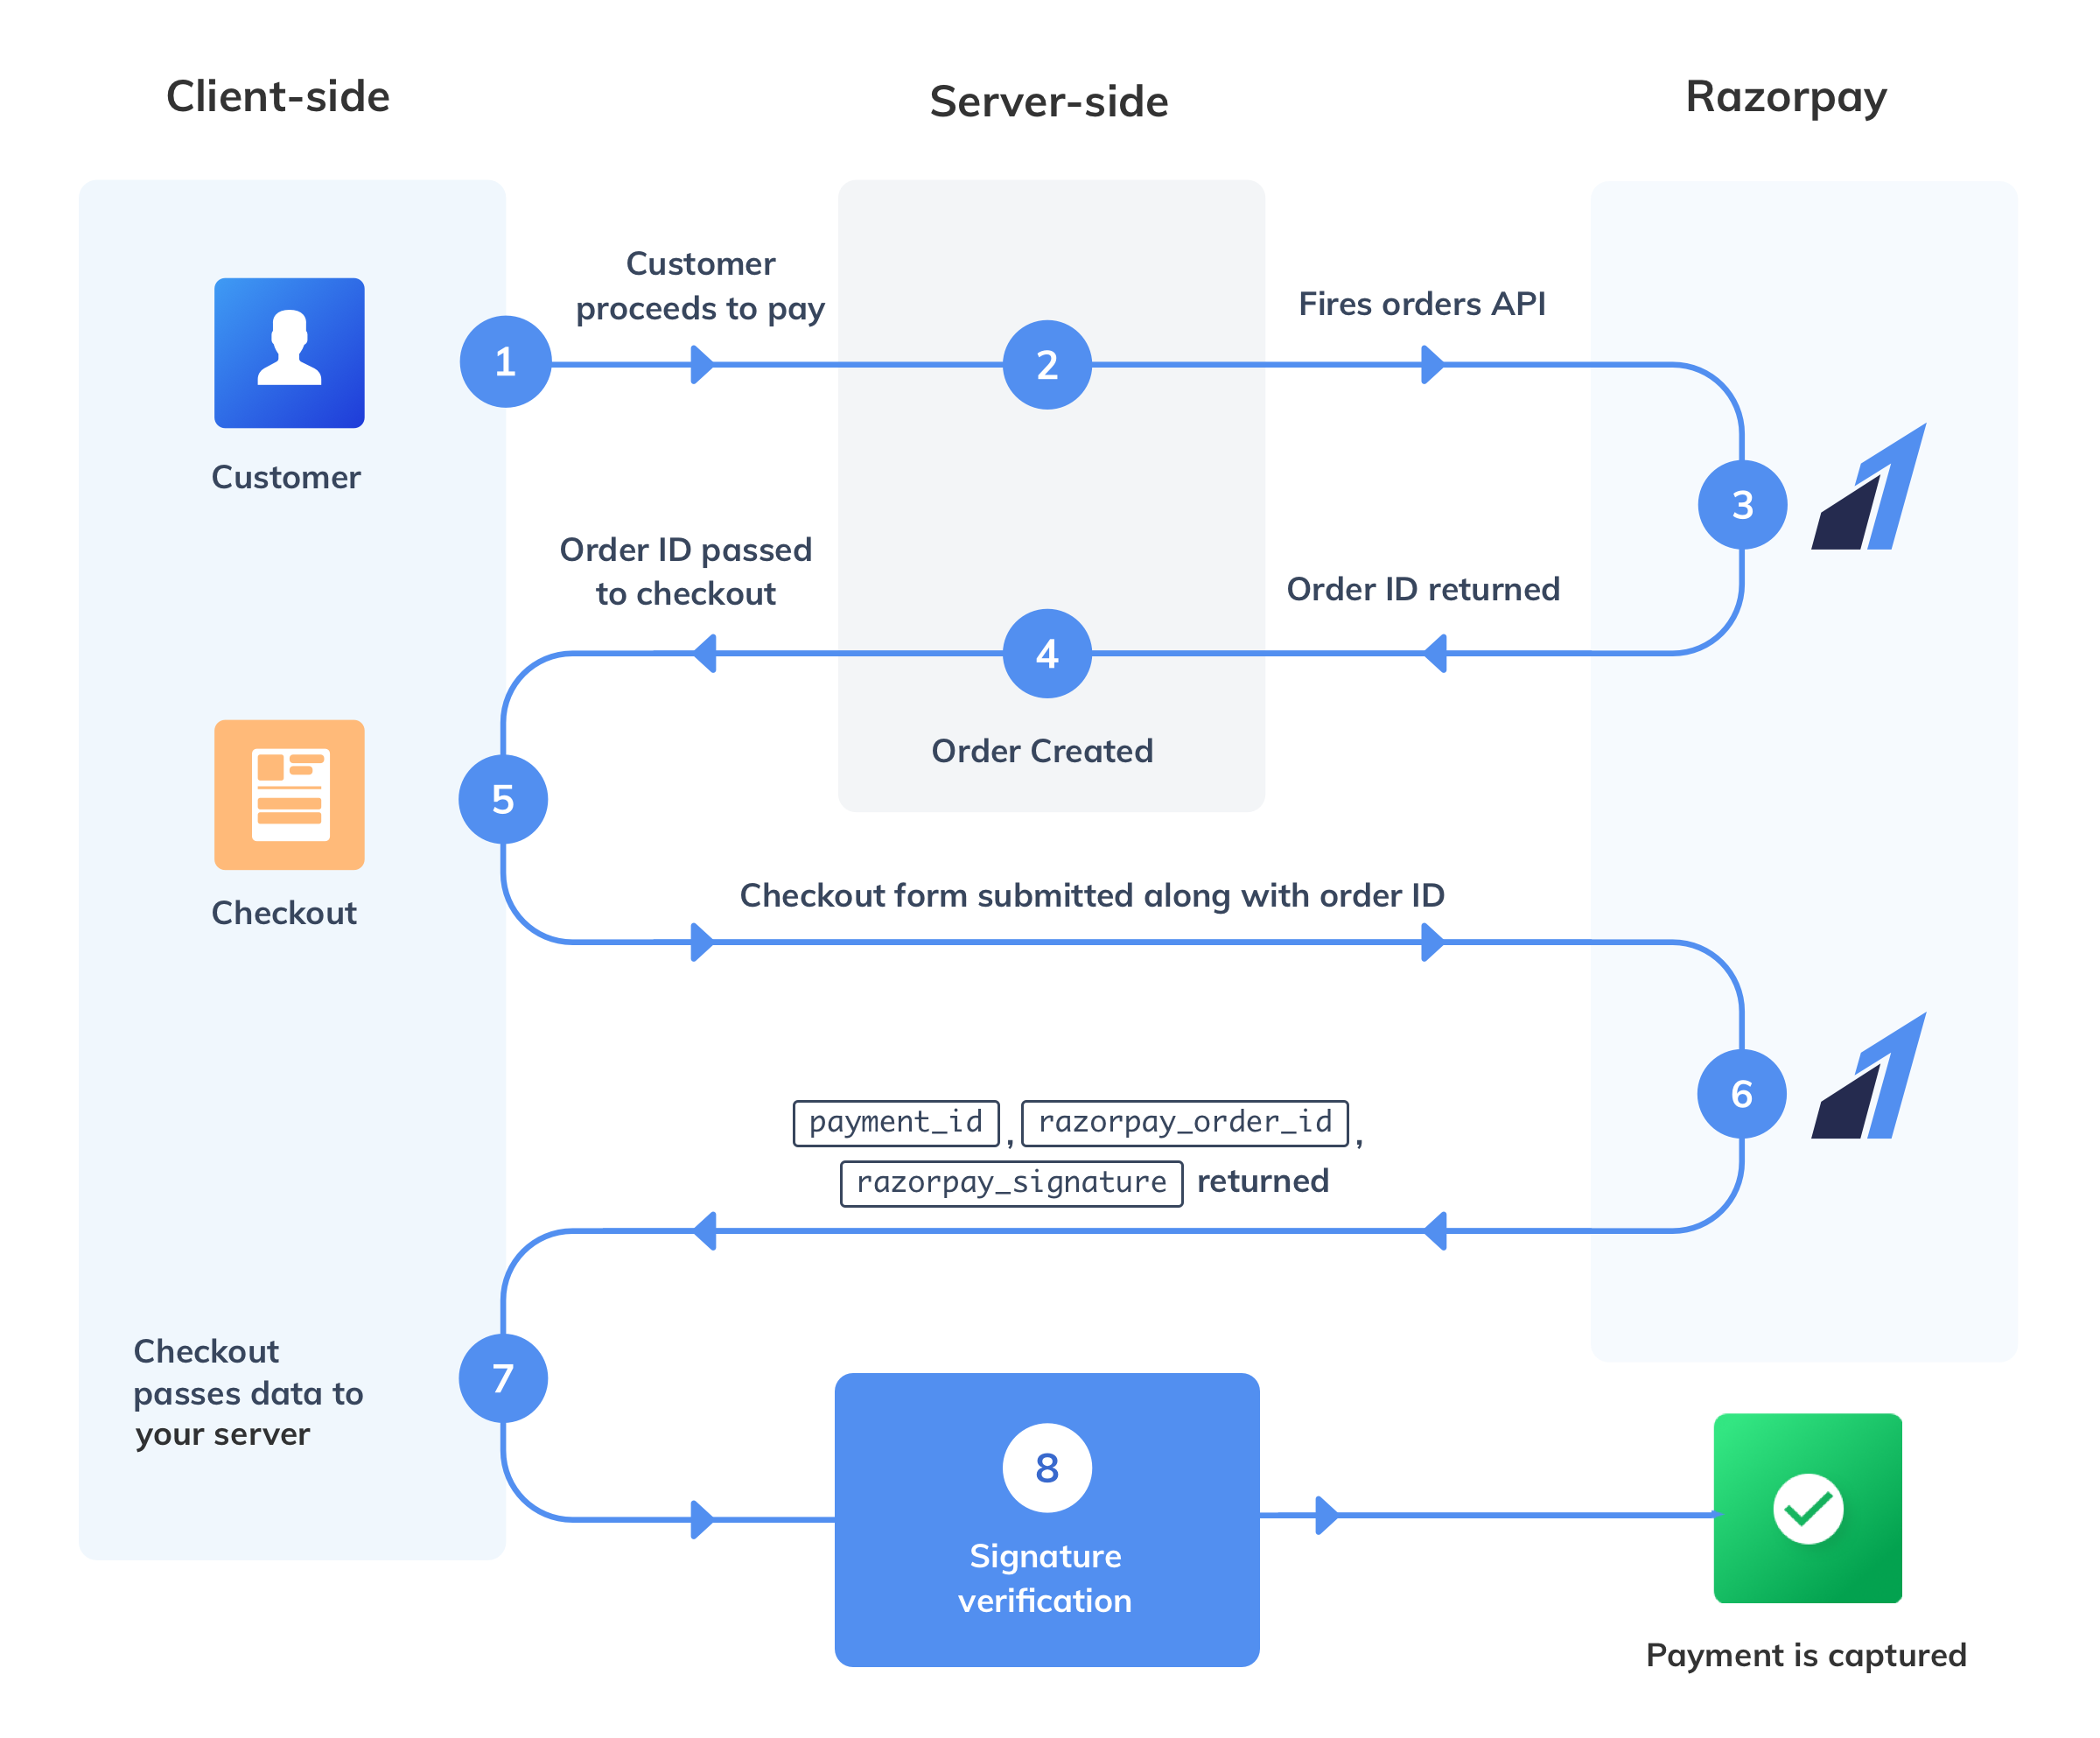
For a high level understanding of the payment flow, Refer This
Thats it :) you have integrated an e2e payment solution in your application.
-
We Need a firebase project for running our cloud functions which will be a backend for our project.You can signup for firebase and create your project here https://console.firebase.google.com.
-
In the project and in the functions directory, Run
npm install
- One last thing is to replace the key_id and key_secret of razorpay in the cloud functions. Grab your key_id and key_secret from https://razorpay.com [Signup for razorpay is required], Go to index.js file in the functions directory and replace the dummy details with actual key_id and key_secret.
- Install firebase cli tools on your system
npm install -g firebase-tools
- Login to your firebase account with the cli
firebase login
- Go to the functions directory and execute the following command
firebase deploy --only functions
while deploying select the project which you have created in firebase.
Once deployment is done, Go to functions in your firebase console. You Should see two functions created
- capturePayments
- createOrder
Copy the url of these functions, which may look simimlar to
- https://us-central1-${YOUR_PROJECT_NAME}.cloudfunctions.net/createOrder
- https://us-central1-${YOUR_PROJECT_NAME}.cloudfunctions.net/capturePayments
Now in Our local Project go to environment.ts file and replace cloudFunctions object's createOrder and capturePayment Url with your functions url i.e.
  cloudFunctions : {
    createOrder: 'YOUR_FUNCTION_URL_HERE',
    capturePayment: 'YOUR_FUNCTION_URL_HERE'
  }
Run
ng serve
And you are ready to go to the most visited url ever localhost:4200 ;)
Feel Free to Raise any Issues if encountered, Also I am available on Google Hangouts([email protected]) 7 days a week to answer all your queries, Happy Coding :)
