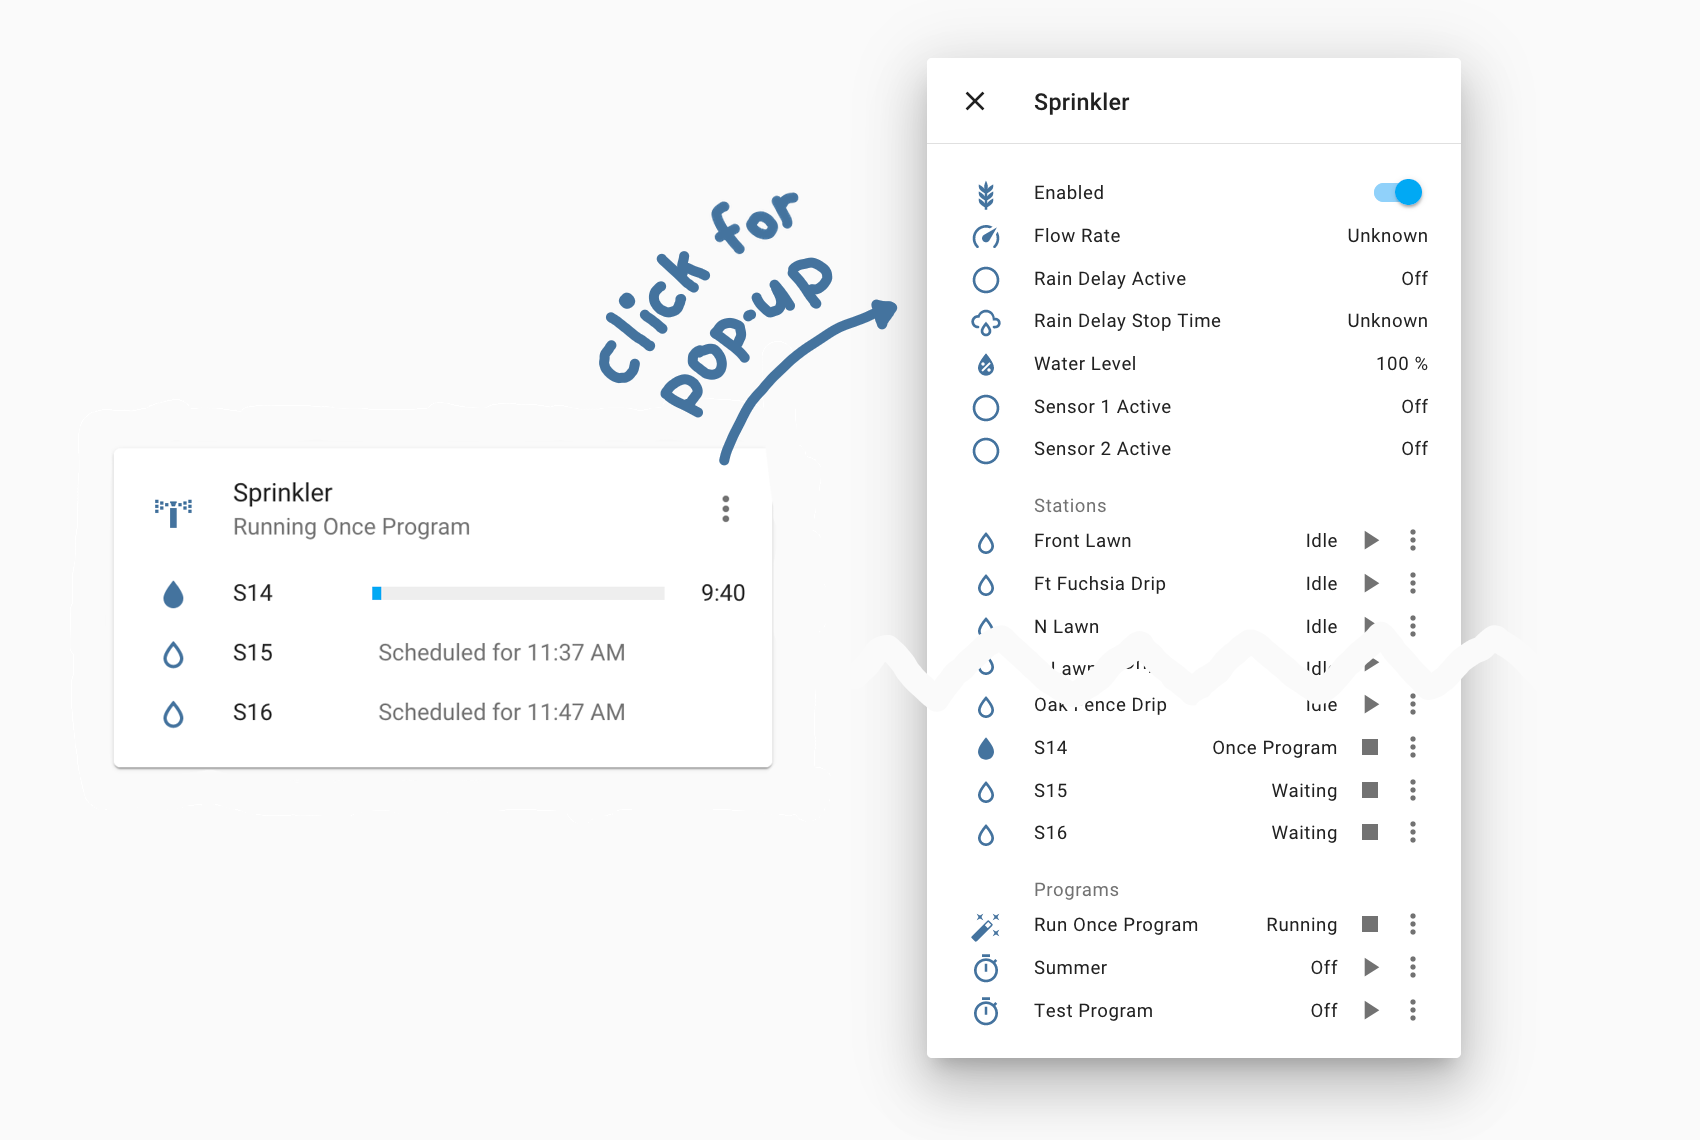
Collect OpenSprinkler status into a card for Home Assistant.
You will need the OpenSprinkler integration installed.
OpenSprinkler Card is available from HACS (search for "opensprinkler card"). If you don't have HACS installed, follow the manual installation instructions.
| Name | Type | Requirement | Description |
|---|---|---|---|
| type | string | Required | custom:opensprinkler-card |
| device | string | Required | Device id of the OpenSprinkler in Home Assistant |
| name | string | Optional | Card title (e.g. "Sprinkler") |
| icon | string | Optional | Card icon (e.g. "mdi:sprinkler-variant") |
| bars | dict | Optional | Configuration for the progress bars |
| extra_entities | array | Optional | Entities to always show in the card |
| input_number | string | Optional | Configuration for run-duration-choosing entity |
| hide_dots | bool | Optional | If true, hide the 3 dots appearing next to entities |
| hide_disabled | bool | Optional | If true, hide disabled stations and programs in the popup |
| icons | dict | Optional | Icon configuration. See the default config for an example. |
Finding device ids is tricky, so I recommend using the dropdown in the visual card editor to set device rather than YAML.
You can also set popup_line_height, timer_line_height, and card_line_height to control the spacing of entities.
This card locates your OpenSprinkler entities by using their entity ids. If you haven't changed these, you have nothing to worry about.
Otherwise, make sure:
- The ids of station status sensors end with
_status - The ids of program running binary sensors end with
_running - The id of the OpenSprinkler controller enabled switch ends with
_enabled - The ids of program & station enabled switches end with
_enabled
By default, the only way to control stations is to first click on the 3 dots in the top-right corner of the card. If you'd like to have a few stations controls always accessible from the dashboard, you can add them to the bottom of the card with the extra_entities option. You can also add programs or even any entity type (switches, lights, etc).
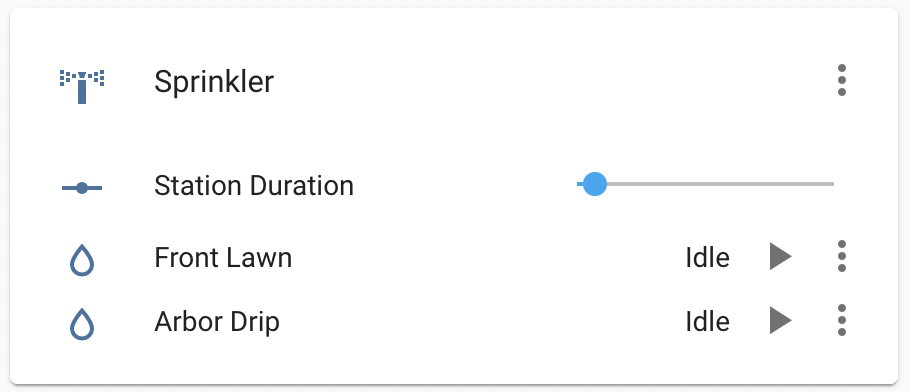
Stations also default to a runtime of 1 minute. To extend the length they run for, make an input_number entity then link it to the card via the input_number option. The slider or box input will appear in the popup, and if you are using the extra_entities option, in the card as well.
| Entity configuration | Home Assistant configuration.yaml |
|---|---|
type: custom:opensprinkler-card
device: 3e0a97a098f4609215aed92fe19bb7fb
extra_entities:
  - sensor.front_lawn_station_status
  - sensor.arbor_drip_station_status
input_number:
entity: input_number.slider |
input_number:
  slider:
    name: Station Duration
    initial: 5 # in minutes
    min: 1
    max: 30
    step: 1
# You can also use mode: box |
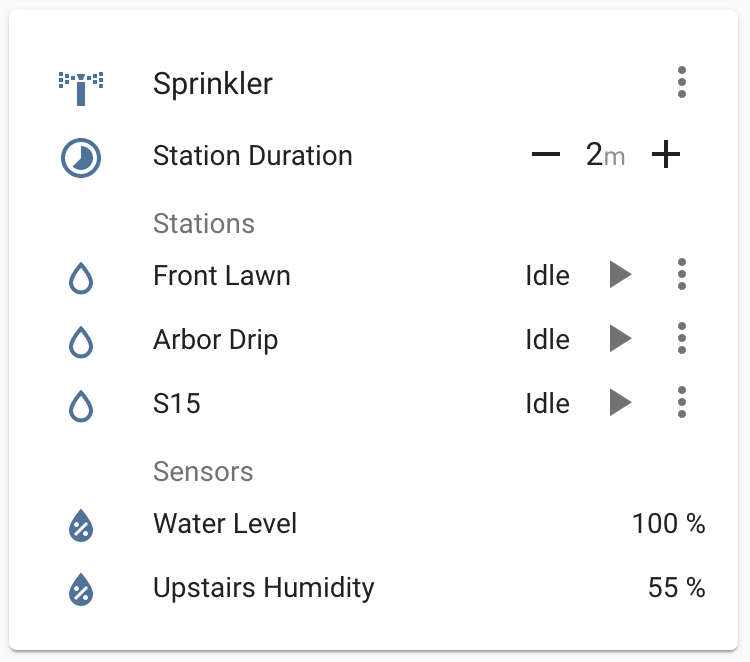
You can also use custom cards for the duration control, like numberbox-card. As well as headings inside the extra_entities! (anything without a . is a heading)
|
...
input_number:
  entity: input_number.slider1
  type: custom:numberbox-card
  unit: m
  icon: mdi:timelapse
extra_entities:
  - Stations
  - sensor.front_lawn_station_status
  - sensor.arbor_drip_station_status
  - sensor.s15_station_status
  - Sensors
  - sensor.opensprinkler_water_level
- sensor.upstairs_humidity |
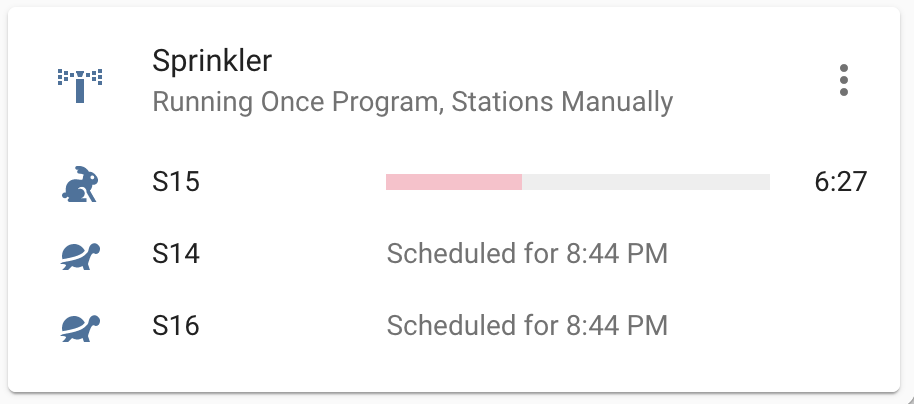
The OpenSprinkler card depends on the Timer Bar Card for rendering progress bars. You can use Timer Bar customization options inside the OpenSprinkler card by inserting your configurations under the bars option. You'll need to switch to the code (YAML) editor to use these options. Fields under the Customization section are supported. For an example:
type: custom:opensprinkler-card
device: 3e0a97a098f4609215aed92fe19bb7fb
name: Sprinkler
bars:
  bar_foreground: pink
  icon: mdi:tortoise
active_icon: mdi:rabbitBy default, the card is optimized for use with clickers, not fingers. There are a few options you may wish to change if you are a fingerer or touchscreen user:
- You can space entities further apart to make it more likeley you tap the correct one. For each of the following options, you can use
normal(40px spacing, the default in Home Assistant),medium(36px spacing), orsmall(32px). They are listed with their defaults:
popup_line_height: small # Spacing between entities (sensors, stations, programs) listed in the popup
timer_line_height: medium # Spacing between progress bars (running stations) in the card
card_line_height: small # Spacing between extra_entities (entities in the card)- You can hide the 3 vertical dots that appear to the right of station controls using
hide_dots, which should further remove some sources of accidents. You can still access entity details by clicking on the station icon (yup, that's not very obvious ... that's why I put the dots there)
You may find some details, such as loading icons, the run-once program entry, and the layout of the card in its default configuration to be tastefully designed. You may find other details like the duration input and extra_entities to appear like goblin heads grafted onto puppies. I only have so much time to play around with the design, and welcome any contribution, whether code or Figma link or pencil sketch, to make the card more accessible, consistent, prettier, or whatever you strive for.
- Download
opensprinkler-card.jsfrom the latest release and move this file to theconfig/wwwfolder. - Ensure you have advanced mode enabled (accessible via your username in the bottom left corner)
- Go to Configuration -> Lovelace Dashboards -> Resources.
- Add
/local/opensprinkler-card.jswith type JS module. - Refresh the page? Or restart Home Assistant? The card should eventually be there.

