Coder Social home page Coder Social logo

ivanhao / pvetools Goto Github PK

View Code? Open in Web Editor NEW
4.1K 44.0 501.0 795 KB

proxmox ve tools script(debian9+ can use it).Including email, samba, NFS set zfs max ram, nested virtualization ,docker , pci passthrough etc. for english user,please look the end of readme.

License: GNU General Public License v3.0

Shell 100.00%
samba zfs proxmox proxmox-ve

pvetools's Introduction

logo

pvetools

proxmox ve tools script(debian9+ can use it).Including email, samba, NFS set zfs max ram, nested virtualization ,docker , pci passthrough etc. for english user,please look the end of readme.

这是一个为proxmox ve写的工具脚本(理论上debian9+可以用)。包括配置邮件sambaNFSzfs嵌套虚拟化docker硬盘直通等功能。

安装

**用户:
方式一:命令行安装

需要用root账号来运行

在终端中按行分别执行以下内容:

强烈建议先删除企业源:rm /etc/apt/sources.list.d/pve-enterprise.list

export LC_ALL=en_US.UTF-8
apt update && apt -y install git && git clone https://github.com/ivanhao/pvetools.git
cd pvetools
./pvetools.sh

一键无脑安装:

echo "nameserver  8.8.8.8" >> /etc/resolv.conf && rm -rf pvetools && rm -rf /etc/apt/sources.list.d/pve-enterprise.list && export LC_ALL=en_US.UTF-8 && apt update && apt -y install git && git clone https://github.com/ivanhao/pvetools.git && echo "cd /root/pvetools && ./pvetools.sh" > pvetools/pvetools && chmod +x pvetools/pvetools* && ln -s /root/pvetools/pvetools /usr/local/bin/pvetools && pvetools
方式二:下载zip安装

download

  • 建议使用方式一来安装,不建议直接下载单sh脚本使用,因为那样更新的功能会无法使用!

  • 如果网络无法使用,或命令行使用有困难,可以使用方式二下载zip包拷入系统中使用。

卸载

  1. 删除下载的pvetools目录

运行

在shell中进入pvetools目录,输入 ./pvetools.sh

  • 如果提示没有权限,输入chmod +x ./*.sh

主界面

main

main1

根据需要选择对应的选项即可。

配置邮件说明:

只有以下界面需要用tab键选成红框的内容,其他的一律无脑回车即可。

mail

如果这个脚本帮到你了,麻烦点一下右上角的star小星星^_^

qq交流群: 878510703

qq

如果觉得好的请捐赠一下^_^

alipay

感谢捐赠人员!

捐赠列表:

杨惠(来源qq)

蓝蓝的天空(来源qq)

久别重逢(来源qq)

小呀嘛小Kiwi(来源qq)

*兴乐(来源支付宝)

孤独的根号三 (来源qq)

我心依旧丶(来源qq)

*俊磊(来源支付宝)

*家鑫(来源支付宝)

*小虎(来源支付宝)

*杭(来源支付宝)

*伟(来源支付宝)

*棘(来源支付宝)

zm (来源qq)

*阳 (来源支付宝)

**鑫 (来源支付宝)

**尧 (来源支付宝)

*潋 (来源支付宝)

**泽 (来源支付宝)

**涛 (来源支付宝)

*韬 (来源支付宝)

**旭 (来源支付宝)

**明 (来源支付宝)

**锐 (来源支付宝)

[版本说明]

v2.4.0

发布时间:2024.02.08

new feature:

  • 修复有些功能还原配置时出现问题,比如温度显示,去除订阅等

  • 修复配置apt国内源、安装配置VIM可导致原配置文件被覆盖

v2.3.9

发布时间:2023.10.19

new feature:

  • 增加pve8的支持

  • 优化英文语言的显示

v2.3.6

发布时间:2023.02.16

new feature:

  • 合并网友“for5million”提交的关于pci直通的修复。
v2.3.5

发布时间:2022.09.14

new feature:

  • 修复docker无法安装的问题,更换alpine的安装源。
v2.3.2

发布时间:2022.07.14

new feature:

  • 温度显示上方增加CPU频率显示。
  • add cpu frequency display.
v2.3.1

发布时间:2022.07.13

  • 调整省电模式powersave为conservative。
  • change cpufrequtils from 'powersave' to 'conservative'。
v2.3.0

发布时间:2022.05.30

new feature:

  • 修复pve7(debian 11)后security更新源地址格式变动的影响。

  • fix pve7 (debian 11) security source address.

  • 添加pve7以上版本配置硬件直通里的参数iommu=pt pcie_acs_override=downstream

  • add pve7 grub config iommu=pt pcie_acs_override=downstream

  • 删除默认.vimrc中重复的set termencoding=unix

  • delete .vimrc duplicate termencoding setting set termencoding=unix

  • 增加去除订阅提示的修复

  • add reinstall proxmox-widget-toolkit to fix remove subscription failure.

v2.2.9

发布时间:2022.05.29

new feature:

  • 增加常用工具下的自动扩展ROOT分区可用空间,比如有些用户使用dd等方式克隆系统盘,更换大硬盘还原镜像后可以一键扩展分区
  • add auto expand / partition size.
v2.2.8

发布时间:2021.10.26

new feature:

  • 优化pve7去订阅提示的判断和处理。
  • fix pve7 subscription note.
v2.2.7

发布时间:2021.10.14

new feature:

  • 在常用的工具下添加pve界面黑暗模式
  • add proxmox ve darkmode interface to manyTools.
v2.2.6

发布时间:2021.09.09

new feature:

  • 添加pve7的支持。
  • add proxmox ve 7.x support.
v2.2.5

发布时间:2020.12.16

new feature:

  • 优化pve升级后温度安装提示判断逻辑。
  • update sensors data install.
v2.2.4

发布时间:2020.12.14

new feature:

  • 修复温度显示界面高度自适应。
  • fix sensors display interface.
v2.2.3

发布时间:2020.12.09

new feature:

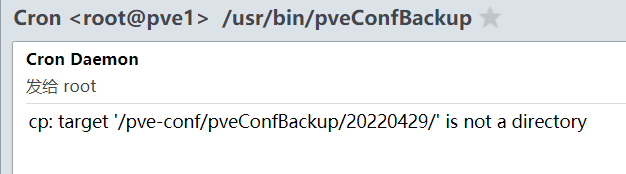
  • 增加对/etc/pve/qemu-server下的conf文件自动备份功能,可以选择备份路径和保留备份个数,建议备份到系统分区以外的虚拟机数据盘中,这样重装系统后方便直接恢复
v2.2.2

发布时间:2020.11.30

new feature:

  • 根据群友嗨 我是奶酪的建议,添加pve 更新源地址为非订阅更新源
v2.2.0

发布时间:2020.08.17

new feature:

  • 增加USB设备做为系统盘的优化,在'常用工具'下。
v2.1.9

发布时间:2020.07.15

new feature:

  • 增加N卡vbios的提示功能,在'常用工具'下。
v2.1.8

发布时间:2020.07.14

new feature:

  • 修复cpu省电,还原配置无法恢复频率的问题。
v2.1.7

发布时间:2020.05.19

new feature:

  • 优化cpu省电提示,处理卸载后再次运行不安装cpufrequtils的问题。
v2.1.5

发布时间:2020.03.28

new feature:

  • 解决docker重启不能自动启动的问题。
v2.1.4

发布时间:2020.02.21

new feature:

  • 常用工具中增加释放内存、speedtest、bbr\bbr+、v2ray功能
v2.1.3

发布时间:2019.12.24

new feature:

  • 优化samba回收站配置,在设置共享文件夹时自动提示是否开启;可以单独增加和取消某个共享文件夹的回收站;
  • 优化web界面温度显示功能
v2.1.2

发布时间:2019.12.18

new feature:

  • 增加samba回收站配置
v2.1.1

发布时间:2019.12.16

new feature:

  • 常用工具中增加dns配置
v2.1.0

发布时间:2019.12.09

new feature:

  • 增加在pve中直接安装omv( omvInPve)。
v2.0.9

发布时间:2019.12.04

new feature:

  • 增加samba共享文件夹权限自动配置,不再需要手工配置权限;同时删除共享文件夹会自动还原原来的用户组权限。 建议之前已使用的用户可以先删除旧的共享文件夹,手工恢复权限后,再用工具配置添加。
v2.0.8

发布时间:2019.11.28

new feature:

  • 增加chroot自定义安装路径的功能。
  • 增加chroot docker迁移的功能。 wiki
v2.0.7

发布时间:2019.11.25

new feature:

  • 增加安装NFS的功能。
v2.0.6

发布时间:2019.11.20

new feature:

  • 增加常用工具,此版本增加了局域网扫描
  • 修复dockerd启动bug
v2.0.5

发布时间:2019.11.14

new feature:

  • chroot优化,增加对alpine版本的判断,优化速度
  • 中文环境下包的下载全改到国内服务器
  • docker配置国内源
  • portainer改用docker pull的方式拉取镜像(之前使用tar包部署,github上下载包太慢)
  • 增加chroot后台管理功能,检测chroot的运行
  • 删除代码目录中的图片,改成简书图片链接
v2.0.4

发布时间:2019.11.06

new feature:

  • 增加docker的web界面(portainer)
  • 去除隐藏的命令输出,例如apt-get install的输出等。
  • chroot优化
v2.0.3

发布时间:2019.11.04

new feature:

  • 增加qm set映射物理硬盘的功能
v2.0.2

发布时间:2019.11.01

new feature:

  • 增加chroot功能,默认安装好Alpine
  • 增加docker功能,默认安装在Alpine中
  • bug修复
v2.0.1

发布时间:2019.10.24

new feature:

  • 增加显卡直通的支持
v2.0

发布时间:2019.10.01

new feature:

  • 界面修改为whiptail,交互性更好,不需要输入字母来选择
  • bug修复

installation method

1. command line
for english user:

Use root accout to run.

export LC_ALL=en_US.UTF-8
apt update && apt -y install git && git clone https://github.com/ivanhao/pvetools.git
cd pvetools
./pvetools.sh

If update error,you can remove enterprise source by : rm /etc/apt/sources.list.d/pve-enterprise.list and retry.

2. download

download

Interface

main

main1

Uninstall

  1. delete pvetools folder

Run

cd to pvetools folder,and type:./pvetools.sh

  • you should chmod +x pvetools.sh first.

email configration note:

you should choose Internet Site below, and keep others default.

mail

pvetools's People

Contributors

for5million avatar ivanhao avatar justwho avatar

Stargazers

 avatar  avatar  avatar  avatar  avatar  avatar  avatar  avatar  avatar  avatar  avatar  avatar  avatar  avatar  avatar  avatar  avatar  avatar  avatar  avatar  avatar  avatar  avatar  avatar  avatar  avatar  avatar  avatar  avatar  avatar  avatar  avatar  avatar  avatar  avatar  avatar  avatar  avatar  avatar  avatar  avatar  avatar  avatar  avatar  avatar  avatar  avatar  avatar  avatar  avatar  avatar  avatar  avatar  avatar  avatar  avatar  avatar  avatar  avatar  avatar  avatar  avatar  avatar  avatar  avatar  avatar  avatar  avatar  avatar  avatar  avatar  avatar  avatar  avatar  avatar  avatar  avatar  avatar  avatar  avatar  avatar  avatar  avatar  avatar  avatar  avatar  avatar  avatar  avatar  avatar  avatar  avatar  avatar  avatar  avatar  avatar  avatar  avatar  avatar  avatar

Watchers

 avatar  avatar  avatar  avatar  avatar  avatar  avatar  avatar  avatar  avatar  avatar  avatar  avatar  avatar  avatar  avatar  avatar  avatar  avatar  avatar  avatar  avatar  avatar  avatar  avatar  avatar  avatar  avatar  avatar  avatar  avatar  avatar  avatar  avatar  avatar  avatar  avatar  avatar  avatar  avatar  avatar  avatar  avatar  avatar

pvetools's Issues

在集群中配置温度显示,若有某台机器没使用pvetools配置过,页面会出错无限加载

Describe the bug
在集群中配置温度显示,若有某台机器没使用pvetools配置过,页面会出错无限加载

To Reproduce
1.在集群中某台机器安装并启用温度显示
2.从该节点的网页访问
3.切换到集群中其他节点的概要页面

Expected behavior
不显示温度

Screenshots
image

Uncaught SyntaxError: Unexpected end of JSON input
    at JSON.parse (<anonymous>)
    at g.renderer (pvemanagerlib.js?ver=6.3-3:34622)
    at g.updateField (pvemanagerlib.js?ver=6.3-3:11541)
    at Array.forEach (<anonymous>)
    at g.updateValues (pvemanagerlib.js?ver=6.3-3:11577)
    at F.fire (ext-all.js:22)
    at g.doFireEvent (ext-all.js:22)
    at g.a.doFireEvent (ext-all.js:22)
    at g.fireEventArgs (ext-all.js:22)
    at g.fireEvent (ext-all.js:22)

Desktop (please complete the following information):

  • OS: Windows 10 20H2
  • Chrome
  • 87.0.4280.88

一键开启PCIE直通功能在使用EFI模式启动的PVE上不可用 Can‘t enable iommu on pve booted from uefi

重现/Reproduce

  1. 安装一台使用EFI启动的pve实例

  2. 使用脚本开启PCIE直通

  3. 重启

  4. 直通并未开启

  5. Install pve using uefi

  6. use this script to enable iommu

  7. reboot

  8. iommu is not enabled

原因/Reason

当使用EFI启动时,intel_iommu=on 应当被写入到 /etc/kernel/cmdline 然后运行 proxmox-boot-tool refresh 以写入 loader/entries/proxmox-*.conf

When boot from uefi, option intel_iommu=on should be writen to /etc/kernel/cmdline and then run proxmox-boot-tool refresh to make sure the option is writen to loader/entries/proxmox-*.conf

修复方法/FIX

推荐直接不管启动类型,直接执行上述操作

I recommand just do the operation descirbed above with out consider the boot type.

PVE 去除订阅再次失效

Describe the bug
PVE 去除订阅在 PVE 7.0-10 中失效

To Reproduce
Steps to reproduce the behavior:

  1. 执行 pvetools.sh
  2. 选择去除订阅提示
  3. 直接提示已经去除,实际上没有去除

Expected behavior
去除订阅提示

Screenshots

Desktop (please complete the following information):

  • OS: Windows 10
  • Browser: Microsoft Edge
  • Version: 92.0.902.67

Additional context
原因:见上图,proxmoxlib.js 中现在有两行 data.status.toLowerCase() !== 'active',导致脚本 1323行 运行结果为 2,跳过了去除订阅部分

去除订阅提示在最新的 PVE 中失效

Describe the bug
去除订阅提示的功能在最新的 PVE 中失效

系统信息
PVE 版本:6.2-15
内核版本:Linux pve 5.4.65-1-pve

原因
/usr/share/javascript/proxmox-widget-toolkit/proxmoxlib.js 中的验证代码由

data.status !== 'Active'

更新成

res === null || res === undefined || !res || res.data.status.toLowerCase() !== 'active'

解决方法

可以将 pvetools.sh 中第 1320 行处的判断条件改为

grep ".data.status.toLowerCase() !== 'active'" /usr/share/javascript/proxmox-widget-toolkit/proxmoxlib.js |wc -l

然后将 sed 语句改为

sed -i.bak "s/.data.status.toLowerCase() !== 'active'/.data.status.toLowerCase() === 'active'/g"

或者全部替换为 false

7.2.4本脚本运行后失效不支持温度和频率显示了

如题,今天手贱升级了7.2.4,发现无论是跑脚本还是手工改那几个js,7.2.4上面不能显示温度和cpu频率了,7.2.3和以前版本可以,怀疑pve改了前端框架结构。主机上ssh直接sensors命令获取温度什么的都是没问题的,大佬能否研究下?

Docker安装报错

3ccdc8d70e251a24feab9d5c8bb1636

显示这个(一闪而过)然后直接跳转引导到安装docker web面板了;
到了安装Docker web面板的时候又提示Docker没安装上
image

看起来说的是镜像源里面没有XX包?但是我从对应的路径进去看是相应的包是存在的;
也尝试通过更换apt镜像但问题依旧
image

加强硬件直通的功能

很抱歉,不按格式来汇报,但应该看完我写的内容,应该还是能明白,只需要添加一点内容就可以完成了

开启PVE硬件直通就是修改grub启动参数,开启内核对应功能,但参数中还有两个可选参数

iommu=pt

关于"iommu=pt"参数的说明一:
iommu=pt并不会影响kvm/dpdk/spdk的性能,这三者本质上都是用户态驱动,iommu=pt只会影响内核驱动,能让内核驱动设备性能更高。
参考来源:IOMMU(二)-从配置说起 - 知乎 (zhihu.com)
关于"iommu=pt"参数的说明二:
You should also append the iommu=pt parameter. This will prevent Linux from touching devices which cannot be passed through.
你还应该附加 iommu=pt 参数。这将防止Linux将不能直通的设备直通。
参考来源:PCI passthrough via OVMF - ArchWiki (archlinux.org)

以及

pcie_acs_override=downstream

关于"pcie_acs_override=downstream"参数的说明:
用于将iommu groups拆分,方便直通一些板载的设备

举例说明:
iommu group 分离错误导致无法直通单个网口,在虚拟机中添加单个网口会将整个PCIe设备直通给虚拟机,或直通失败

实际操作:

先查看PCI设备,确定网卡所属的ID

lspci -k | grep Eth

shell运行后返回内容:

04:00.0 Ethernet controller: Intel Corporation Ethernet Controller 10-Gigabit X540-AT2 (rev 01)
        DeviceName:  Intel Ethernet X540 #1
        Subsystem: Super Micro Computer Inc Ethernet Controller 10-Gigabit X540-AT2
04:00.1 Ethernet controller: Intel Corporation Ethernet Controller 10-Gigabit X540-AT2 (rev 01)
        DeviceName:  Intel Ethernet X540 #2
        Subsystem: Super Micro Computer Inc Ethernet Controller 10-Gigabit X540-AT2
05:00.0 Ethernet controller: Intel Corporation Ethernet Controller 10-Gigabit X540-AT2 (rev 01)
        DeviceName:  Intel Ethernet X540 #3
        Subsystem: Super Micro Computer Inc Ethernet Controller 10-Gigabit X540-AT2
05:00.1 Ethernet controller: Intel Corporation Ethernet Controller 10-Gigabit X540-AT2 (rev 01)
        DeviceName:  Intel Ethernet X540 #4
        Subsystem: Super Micro Computer Inc Ethernet Controller 10-Gigabit X540-AT2
06:00.0 Ethernet controller: Intel Corporation Ethernet Controller 10-Gigabit X540-AT2 (rev 01)
        DeviceName:  Intel Ethernet X540 #5
        Subsystem: Super Micro Computer Inc Ethernet Controller 10-Gigabit X540-AT2
06:00.1 Ethernet controller: Intel Corporation Ethernet Controller 10-Gigabit X540-AT2 (rev 01)
        DeviceName:  Intel Ethernet X540 #6
        Subsystem: Super Micro Computer Inc Ethernet Controller 10-Gigabit X540-AT2

可以看到有6个ID,分别对应6个网口,而我的使用的硬件板载的三个X540-AT2网卡,每张网口有两个网口,正好是6个

查看iommu groups方法:

ls /sys/kernel/iommu_groups/*/devices

shell运行后返回内容:(仅展示网卡ID部分)

/sys/kernel/iommu_groups/1/devices:
0000:04:00.0  0000:04:00.1  0000:05:00.0  0000:05:00.1  0000:06:00.0  0000:06:00.1

iommu group 无法自动分离可以改/etc/default/grub里的内容为

intel处理器 修改后:
GRUB_CMDLINE_LINUX_DEFAULT="quiet intel_iommu=on iommu=pt pcie_acs_override=downstream"

添加参数后,iommu_groups全部分离了(仅展示网卡ID部分)

/sys/kernel/iommu_groups/13/devices:
0000:04:00.0

/sys/kernel/iommu_groups/14/devices:
0000:04:00.1

/sys/kernel/iommu_groups/15/devices:
0000:05:00.0

/sys/kernel/iommu_groups/16/devices:
0000:05:00.1

/sys/kernel/iommu_groups/17/devices:
0000:06:00.0

/sys/kernel/iommu_groups/18/devices:
0000:06:00.1

刚刚好每个网口都在一个单独的iommu_groups,这样就可以单独的直通某个网口,而不是整个网卡设备了,但注意的是在虚拟机添加PCI设备选项中不要勾选所有功能!!!

PVE7.0之前的版本是需要替换有PCIe ACS 补丁的Linux内核才能正常将iommu group拆分,但本次使用的PVE版本为7.0-11并没有打补丁就能正常拆分iommu group
参考:解决j3455直通iommu分组问题,PVE内核编
其中有现成编译好的内核,下载替换即可,仅限PVE使用,其他Debian系统请自己测试

在PVE7.2-3 && win 11 中开启嵌套虚拟化失败

我在使用:PVE7.2-3
win 11
cpu : i7-8700k
主板:技嘉gaming5 z370

给win 11 开启嵌套虚拟化后,
我的win11 无法启动 获得以下错误

swtpm_setup: Not overwriting existing state file.
audio: Could not init `spice' audio driver
audio: warning: Using timer based audio emulation
kvm: unable to find CPU model ''
stopping swtpm instance (pid 1561) due to QEMU startup error
TASK ERROR: start failed: QEMU exited with code 1

在我再次用脚本关闭单独虚拟化时我又得到了以下错误:

swtpm_setup: Not overwriting existing state file.
kvm: ,+vmx: Could not open ',+vmx': No such file or directory
stopping swtpm instance (pid 1396) due to QEMU startup error
TASK ERROR: start failed: QEMU exited with code 1

最后我手动删除了添加的指令才能启动虚拟机
我的主板没有vt-x选项 只有vt-d我推测它将两者合二为一了,我已经开启并正常运行了硬件直通

support pve 7.0+

Is your feature request related to a problem? Please describe.
this is great tool for pve, and now the system is upgrade to 7.0+ , it is not supported

Describe the solution you'd like
no ideas, just request Big Man to resolve this.

Describe alternatives you've considered
NA

Additional context
NA

白屏

装完之后从Chrome 正常访问,但是移动端和safari 打开web界面都是白屏

初次改频率成功,再次改动就无法生效

初次改用命令查询频率是改变了,但是恢复后再次更改后面反复试了几次都没生效。
我的CPU G5420固定频率不知道是否跟这个有关系,但是第一次改确实是频率降了
cat /proc/cpuinfo |grep MHz|uniq

CPU温度显示修改为℃

Describe the bug
CPU温度显示为C

To Reproduce
Steps to reproduce the behavior:

  1. 查找代码中:sed 's/°C/C/g'
  2. 修改为:sed 's/°C/\&degC/g' #将°通过转义符"\&deg"显示即可

【功能增强】改善Web界面的数据显示,加上IPMI风扇信息

非常抱歉没有按格式汇报,但这并非bug,只是我个人折腾后发一下,看看大家是否也有这样类似的需求。

一、改进CPU温度&频率 在Web端的显示效果

参考:Proxmox VE 顯示 CPU 當下的溫度 | BUBU 知識庫 & 秉迅資訊.Studio (freedomstu.com)

温度数据是通过lm-sensors获取,pvetools脚本会创建/usr/bin/s.sh 把获取的数据json化,然后再由PVE 的Node.js进行处理。

但Node.js也能用正则表达式来处理lm-sensors的数据。这也是我在看完上面那篇参考后才知道,所以就提及一下

使用的PVE版本:7.3-4

如果没使用过脚本进行配置显示频率温度的,先看这个部分,如果有用脚本配过,可以直接跳到第4步

第1步:安装 lm-sensors

apt install -y lm-sensors

第2步:加载相关的传感器模块

sensors-etect --auto

第3步:查看当前传感器的信息

sensors

正常情况下会有温度信息显示
image

第4步:创建显示频率的脚本,这里是直接用了pvetools里的脚本内容,非原创,感谢!

nano /usr/bin/GetCpuFrequency.sh

将以下内容复制进去

#!/usr/bin/bash
echo '{'$(lscpu|grep MHz|sed 's/CPU\ /CPU-/g'|sed 's/\ MHz/-MHz/g'|sed 's/\ //g'|sed 's/^/"/g'|sed 's/$/"\,/g'|sed 's/\:/\"\:\"/g'|awk 'BEGIN{ORS=""}{print $0}'|sed 's/\,$//g')'}'

其实我尝试过使用脚本的方式,直接把命令写到Nodes.pm之中,结果就是 Web界面会一直卡在加载中

第5步:编辑 /usr/share/perl5/PVE/API2/Nodes.pm

 nano /usr/share/perl5/PVE/API2/Nodes.pm 

在 第404行 后面添加内容,如果查找麻烦可以先把文件下载到本地用VSCode等文本编辑软件查找 PVE::pvecfg::version_text();

	$res->{pveversion} = PVE::pvecfg::package() . "/" .
	    PVE::pvecfg::version_text();

	$res->{thermalstate} = `sensors`; # 添加这一行
        $res->{cpufrequency} = `/usr/bin/GetCpuFrequency.sh`; # 添加这一行

	my $dinfo = df('/', 1);     # output is bytes

	$res->{rootfs} = {
	    total => $dinfo->{blocks},
	    avail => $dinfo->{bavail},
	    used => $dinfo->{used},
	    free => $dinfo->{blocks} - $dinfo->{used},
	};

第6步:编辑/usr/share/pve-manager/js/pvemanagerlib.js

nano /usr/share/pve-manager/js/pvemanagerlib.js

在 第38526行 修改内容,可以通过查找alias: 'widget.pveNodeStatus' 快速定位。【记得清理注释内容,会报错】

修改这个内容是为了让状态框架能宽一点,显示更多的信息

Ext.define('PVE.node.StatusView', {
    extend: 'PVE.panel.StatusView',
    alias: 'widget.pveNodeStatus',

    height: 320, # 将这个预设的 300 改为 320
    bodyPadding: '20 15 20 15',

    layout: {
	type: 'table',
	columns: 2,
	tableAttrs: {
	    style: {
		width: '100%'
	    }
	}

在 第38637行 修改内容 可以通过查找textField: 'pveversion' 快速定位。【记得清理注释内容,会报错】

  {
	    itemId: 'version',
	    colspan: 2,
	    printBar: false,
	    title: gettext('PVE Manager Version'),
	    textField: 'pveversion',
	    value: ''
  }, # 这里需要补充一个 , 号不然会出问题
# 增加以下内容
    {
		itemId: 'frequency',
		colspan: 2,
		printBar: false,
		title: gettext('CPU 频率'),
		textField: 'cpufrequency',
		renderer:function(value){
			var d = JSON.parse(value);
			f0 = d['CPU-MHz'];
			f1 = d['CPU-min-MHz'];
			f2 = d['CPU-max-MHz'];
			return  `实时(Cur): ${f0} MHz | 最小(min): ${f1} MHz | 最大(max): ${f2} MHz `;
		}
 	},
	{
		itemId: 'thermal',
		colspan: 2,
		printBar: false,
		title: gettext('CPU 温度'),
		textField: 'thermalstate',
		renderer:function(value){
			const p0 = value.match(/Package id 0.*?\+([\d\.]+)Â/)[1];
			const c0 = value.match(/Core 0.*?\+([\d\.]+)Â/)[1];
			const c1 = value.match(/Core 1.*?\+([\d\.]+)Â/)[1];
			const c2 = value.match(/Core 2.*?\+([\d\.]+)Â/)[1];
			const c3 = value.match(/Core 3.*?\+([\d\.]+)Â/)[1];
			return `Package: ${p0} ℃ | Core 0: ${c0} ℃ | Core 1: ${c1} ℃ | Core 2: ${c2} ℃ | Core 3: ${c3} ℃`
		}
	}

第7步:重启 pveproxy 服务

systemctl restart pveproxy

实际效果一览:

如果没生效,记得先清除网页缓存,或者使用Edge的InPrivate模式。

image
将宽度设置320可以把存储库状态给挡住,并且不像之前那样会有一大块的留白。

二、通过IPMI获取风扇转速 并 添加到Web界面上

首先需要主板支持IPMI才能实现这一功能,如果没有,那可以直接跳过。

第1步:安装 ipmitool

apt install -y ipmitool

验证一下能否获取风扇信息

ipmitool sdr type Fan

image

第2步:创建脚本,参考了前面的脚本,实现了输出json格式的数据

nano /usr/bin/GetFanSpeed.sh

粘贴以下内容到脚本中,记得要去修改为自己的BMC信息!!!【注意!此操作存在一定的安全风险,请熟知!!!】

#!/usr/bin/bash
echo '{'$(ipmitool -H <BMC IP地址> -U <BMC 用户名> -P <BMC 用户密码> sdr type Fan | grep RPM | awk -F"|" '{gsub(/ /,"",$1); gsub(/ /,"",$5); gsub(/RPM/,"",$5); print "\""$1"\":\""$5"\","}' | tr -d '\n' | sed '$ s/.$//')'}'

这里必须说一下,为什么需要使用参数去指定BMC信息。
因发现面板 www-date 账号权限不够,不能通过本地来访问IPMI,所以必须要指定BMC信息的才能实现正常的访问

原本在Shell里以root账户执行以下命令是没问题的

echo '{'$(ipmitool sdr type Fan | grep RPM | awk -F"|" '{gsub(/ /,"",$1); gsub(/ /,"",$5); gsub(/RPM/,"",$5); print "\""$1"\":\""$5"\","}' | tr -d '\n' | sed '$ s/.$//')'}'

可以获得正确的信息反馈
image
但实际的界面是无内容显示
image

虽然这样做解决了问题,但存在一定的安全隐患,毕竟明文记录了 IPMI 的管理员信息!【超微的IPMI非管理员账户获取不了风扇信息】

接着我考虑去使用加密shell,避免密码泄露。

参考:Shell脚本加密与解密 - 腾讯云开发者社区-腾讯云 (tencent.com)

直接说结论吧。 结果就是

使用gzexe 能加密成功并且脚本可以正常运行,但这样会导致PVE的web页面刷新变得非常慢!
而且gzexe的加密很弱,几步操作就能解密【本质就是压缩】

使用shc 加密后的文件无法运行

后面想到,如果有人都拿到PVE的root权限了,那这个IPMI密码似乎也阻挡不了什么,毕竟在root账号下,ipmitool直接就能免密码进行操作了。

虽然尚不清楚PVE的Web页面中是否会有bug能让攻击者获取到这个脚本的内容,但我也没打算把PVE的Web页面开放到公网上去。毕竟是最底层的系统,想要远程访问还是有很多安全办法的。

接着的操作就很简单了,基本上就是照搬上面。

第3步:编辑 /usr/share/perl5/PVE/API2/Nodes.pm

在 第404行 后面添加内容,如果查找麻烦可以先把文件下载到本地用VSCode等文本编辑软件查找 PVE::pvecfg::version_text(); 【记得清理注释内容,会报错】

	$res->{pveversion} = PVE::pvecfg::package() . "/" .
	    PVE::pvecfg::version_text();

	$res->{thermalstate} = `sensors`; # 获取CPU温度信息
        $res->{cpufrequency} = `/usr/bin/GetCpuFrequency.sh`; # 获取CPU频率信息
        $res->{getfanspeed} = `/usr/bin/GetFanSpeed.sh`; # 新添加一行,获取风扇信息

	my $dinfo = df('/', 1);     # output is bytes

	$res->{rootfs} = {
	    total => $dinfo->{blocks},
	    avail => $dinfo->{bavail},
	    used => $dinfo->{used},
	    free => $dinfo->{blocks} - $dinfo->{used},
	};

第4步:编辑 /usr/share/pve-manager/js/pvemanagerlib.js
在 第38637行 修改内容 可以通过查找textField: 'pveversion' 快速定位。【记得清理注释内容,会报错!】

  {
	    itemId: 'version',
	    colspan: 2,
	    printBar: false,
	    title: gettext('PVE Manager Version'),
	    textField: 'pveversion',
	    value: ''
  }, 
    {
		itemId: 'frequency',
		colspan: 2,
		printBar: false,
		title: gettext('CPU 频率'),
		textField: 'cpufrequency',
		renderer:function(value){
			var d = JSON.parse(value);
			f0 = d['CPU-MHz'];
			f1 = d['CPU-min-MHz'];
			f2 = d['CPU-max-MHz'];
			return  `实时(Cur): ${f0} MHz | 最小(min): ${f1} MHz | 最大(max): ${f2} MHz `;
		}
 	},
	{
		itemId: 'thermal',
		colspan: 2,
		printBar: false,
		title: gettext('CPU 温度'),
		textField: 'thermalstate',
		renderer:function(value){
			const p0 = value.match(/Package id 0.*?\+([\d\.]+)Â/)[1];
			const c0 = value.match(/Core 0.*?\+([\d\.]+)Â/)[1];
			const c1 = value.match(/Core 1.*?\+([\d\.]+)Â/)[1];
			const c2 = value.match(/Core 2.*?\+([\d\.]+)Â/)[1];
			const c3 = value.match(/Core 3.*?\+([\d\.]+)Â/)[1];
			return `Package: ${p0} ℃ | Core 0: ${c0} ℃ | Core 1: ${c1} ℃ | Core 2: ${c2} ℃ | Core 3: ${c3} ℃`
		}
	},# 这里需要补充一个 , 号不然会出问题
# 增加以下内容
	{
		itemId: 'speed',
		colspan: 2,
		printBar: false,
		title: gettext('FAN 转速'),
		textField: 'getfanspeed',
		renderer:function(value){
			var d = JSON.parse(value);
			f0 = d['FAN1'];
			f1 = d['FAN2'];
			f2 = d['FAN3'];
			return  `FAN1: ${f0} RPM | FAN2: ${f1} RPM | FAN3: ${f2} RPM `;
		}
 	}

第5步:重启 pveproxy 服务

systemctl restart pveproxy

实际效果一览:

如果没生效,记得先清除网页缓存,或者使用Edge的InPrivate模式。

image

当然如果你不想有留白的区域,想关掉一些信息显示,可以将/usr/share/pve-manager/js/pvemanagerlib.js里的这些内容删掉
image
image

最终效果

image

处理器信息我手动改了,因为是ES版,没法正确识别。

更新到PVE最新的7.2-11后,使用pvetools无法开启硬件直通

我安装了官方下载 的PVE后显示版本7.2-3,更新到最新后(7.2-11)使用pve开启直通还是显示no eommu detected。
于是我重新安装了pve,使用pvetools成功开启硬件直通,当我再更新到最新后,硬件直通又变成了no eommu detected。
设备:N5105软路由

关于管理页面温度显示

请问下pve节点概要页面中显示的传感器数据都对应的是什么 比如最后的packageid是cpu封装温度
core是核心温度 前面的几个temp和in各指的是什么

PVE 7.0去除订阅导致web gui崩溃

  1. 使用最新v2.7版本,去除订阅会导致web gui崩溃,需要reinstall pve widget
  2. 查看脚本代码,发现去除订阅部分的代码有疑问,如图,是否需要修改为> .false
    pve

添加阿里源后apt-get update提示404

Describe the bug
使用工具一键替换功能,替换阿里源或者清华镜像都出现如图错误

Screenshots
image

Desktop (please complete the following information):

  • Version PVE-7.1

开启“去除订阅提示功能”后,pve频繁死机故障

用了“去除订阅提示功能”pve每隔两天都会死机,具体症状:
1.pve可以ping通,无法ssh,pve web页面进不去。
2.大部分虚拟机正常运行,部分虚拟机会异常关机。
3.强制重启pve后正常,读取日志,没有发现错误报告.
4.此故障一直反复出现,最长4天出现一次,最短2天出现一次,期间换过内存条,换过散热均未解决,总故障时常超过2个月,。
后来和朋友机器对比,找差异点,发现在关掉pvetools的“去除订阅提示功能”这个功能后,pve已经正常运行超过10天,再也没有出过bug。

配置显示传感器温度 符号显示问题

Describe the bug
见截图,英文显示成了“it\'s”。这是转义转了个寂寞嘛

To Reproduce

  1. .\pveproxy.sh
  2. 随便选个语言
  3. j 配置pve的web界面显示传感器温度,回车
  4. 回车

Screenshots
20220218104755

Other Information

  • OS: PVE 7.1-7
  • SSH Client: Windows Terminal 1.11.3471.1 / OpenSSH_for_Windows_8.1p1, LibreSSL 3.0.2

硬盘休眠会导致USB挂载的硬盘掉盘

如题USB的硬盘掉线后无法重新挂载只能重新插拔或者重启,能否添加硬件忽略选项,配置单独的硬盘休眠。
另外用了工具中的BBR加速模块,PVE直接无法启动重装了一次无法确定是否个例,有其他用户反馈么。

开启硬盘休眠,停止pvestatd服务后,会每隔10分钟收到一封邮件提示

开启硬盘休眠,停止pvestatd服务后,会每隔10分钟收到一封邮件提示:
rm: cannot remove '/var/log/.gz': No such file or directory
rm: cannot remove '/var/cache/apt/archives/
.deb': No such file or directory
rm: cannot remove '/var/cache/apt/archives/partial/.deb': No such file or directory
rm: cannot remove '/var/log/
.1': No such file or directory
rm: cannot remove '/var/log/.2': No such file or directory
rm: cannot remove '/var/log/
.3': No such file or directory
rm: cannot remove '/var/log/.4': No such file or directory
rm: cannot remove '/var/log/
.5': No such file or directory
rm: cannot remove '/var/log/*.6': No such file or directory
/var/log
/var/log/apt
/var/log/ceph
/var/log/chrony
/var/log/corosync
/var/log/glusterfs
/var/log/journal
/var/log/journal/54016a6cb3cf42c7914c113c9a43403d
/var/log/lxc
/var/log/private
/var/log/pve
/var/log/pve/tasks
/var/log/pve/tasks/0
/var/log/pve/tasks/1
/var/log/pve/tasks/2
/var/log/pve/tasks/3
/var/log/pve/tasks/4
/var/log/pve/tasks/5
/var/log/pve/tasks/6
/var/log/pve/tasks/7
/var/log/pve/tasks/8
/var/log/pve/tasks/9
/var/log/pve/tasks/A
/var/log/pve/tasks/B
/var/log/pve/tasks/C
/var/log/pve/tasks/D
/var/log/pve/tasks/E
/var/log/pve/tasks/F
/var/log/pveproxy
/var/log/runit
/var/log/runit/ssh
/var/log/samba
/var/log/samba/cores
/var/log/samba/cores/nmbd
/var/log/samba/cores/smbd
/var/log/vzdump

关掉硬盘休眠和开启pvestatd服务后仍旧会受到邮件

关于lm-sensors 显示信息

现在只有一些 温度信息,可以加入 风扇转速信息吗?或者告知下如何修改 config 来达到目的呢

配置界面的温度模块标题错误

Describe the bug
line 1573:

x=$(whiptail --title " PveTools   Version : 2.1.6 " --menu "配置samba:" 25 60 15 \
    "a" "安装配置温度显示" \
    "b" "删除配置" \

To Reproduce
配置温度模块时标题仍提示配置samba

vimrc configure file error

Here is a wrong config in default vimrc file.

Line 15 on the default vimrc file might be wrong, and it's duplicate with line 20:

15: set termencoding=unix
20: set termencoding=utf-8

remove line 15 and keep line 20 remain will solve the problem.

修改界面以显示温度这部分遇到一个问题

ISO的pve-manager版本是6.3-2,我安装好后,运行pvetools修改了界面,
然后使用apt update和apt upgrade升级了pve-manager到了6.3-3,
发现此时界面里没有温度显示了。
运行pvetools,此时工具会提示说已经安装过了,无法修改界面了。

考虑到想重新弄过,就选择删除配置,还原以前的文件,再修改,
结果问题就来了,可能是版本不同,原文件都无法使用了,造成pveproxy无法启动,
reboot后,整个pve都无法正常启动,按pvetools源码排查后,发现就是pve-manager需要的js文件出现问题了

先恢复了旧版本,pve正常后,升级新版本,再用pvetools修改,此时就没有问题出现了。

所以我想麻烦能不能加入一个强制安装选项,直接修改界面,不检查是否有备份文件存在。
谢谢!

显示CPU频率

能否在PVE web管理界面再加入CPU频率显示, 谢谢!

Recommend Projects

  • React photo React

    A declarative, efficient, and flexible JavaScript library for building user interfaces.

  • Vue.js photo Vue.js

    🖖 Vue.js is a progressive, incrementally-adoptable JavaScript framework for building UI on the web.

  • Typescript photo Typescript

    TypeScript is a superset of JavaScript that compiles to clean JavaScript output.

  • TensorFlow photo TensorFlow

    An Open Source Machine Learning Framework for Everyone

  • Django photo Django

    The Web framework for perfectionists with deadlines.

  • D3 photo D3

    Bring data to life with SVG, Canvas and HTML. 📊📈🎉

Recommend Topics

  • javascript

    JavaScript (JS) is a lightweight interpreted programming language with first-class functions.

  • web

    Some thing interesting about web. New door for the world.

  • server

    A server is a program made to process requests and deliver data to clients.

  • Machine learning

    Machine learning is a way of modeling and interpreting data that allows a piece of software to respond intelligently.

  • Game

    Some thing interesting about game, make everyone happy.

Recommend Org

  • Facebook photo Facebook

    We are working to build community through open source technology. NB: members must have two-factor auth.

  • Microsoft photo Microsoft

    Open source projects and samples from Microsoft.

  • Google photo Google

    Google ❤️ Open Source for everyone.

  • D3 photo D3

    Data-Driven Documents codes.