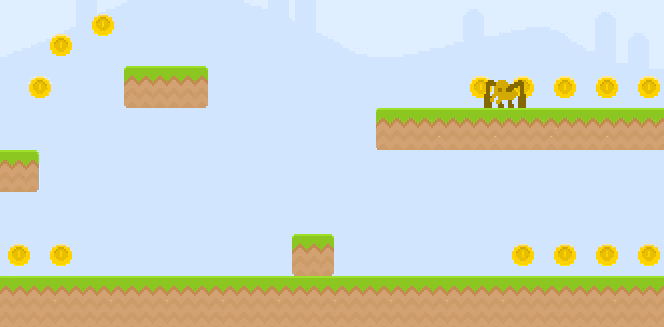
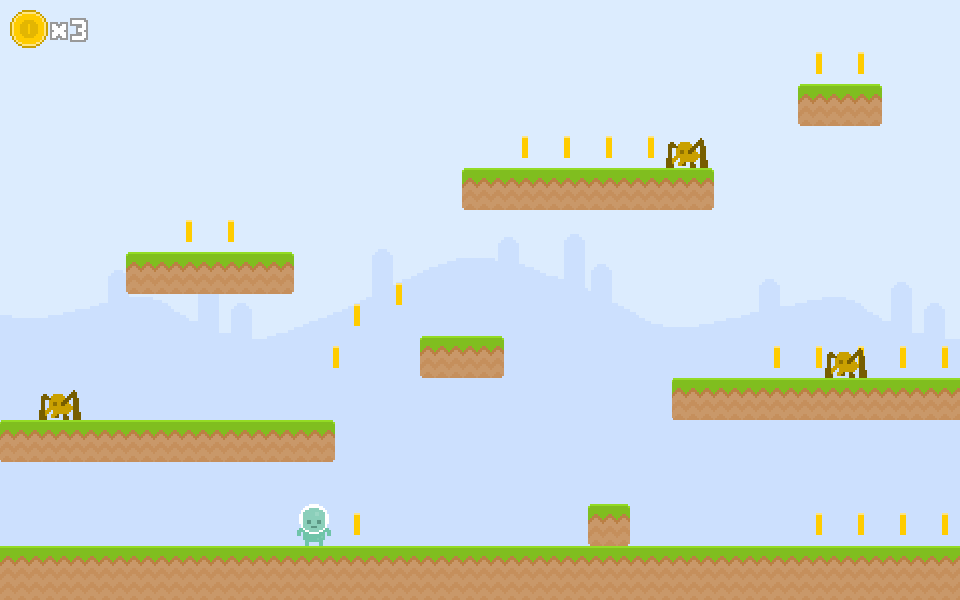
We are going to create a classic one-screen platformer game! It will feature a main character, who can run and jump to platforms. There will also be enemies that this character will have to avoid –or kill! The goal of the game is to fetch the key and open the door that leads to the next level.
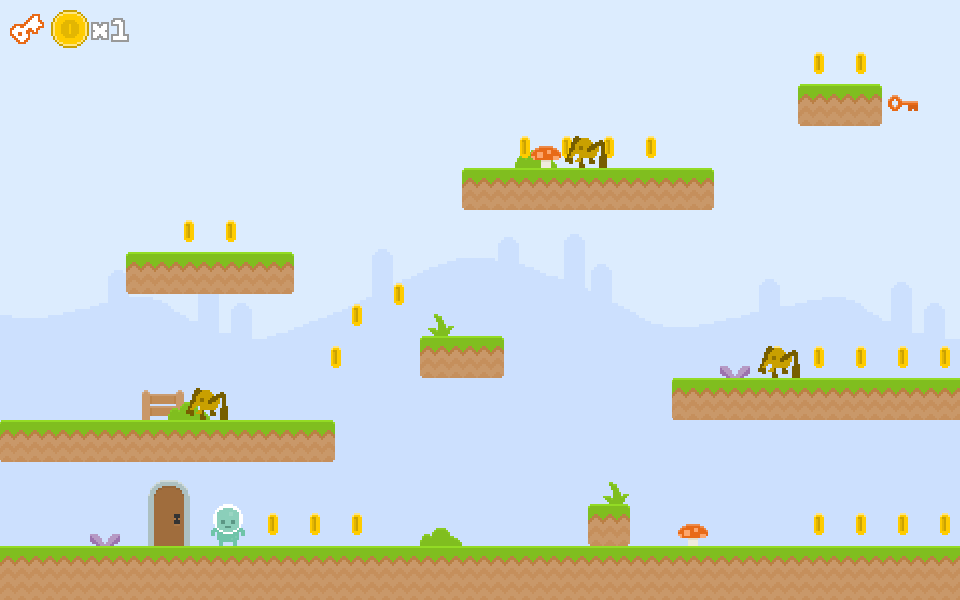
You can play the game here.
We will be implementing the following game development concepts:
- Loading assets.
- Handling game states.
- Rendering images on the screen.
- Implementing sprites.
- Reading the player's input via keyboard.
- Using a physics engine to move sprites and handle collisions.
- Writing text with a bitmap font.
- Playing sound effects and background music.
- Start here
- Initialise Phaser
- The game loop
- Creating platforms
- The main character sprite
- Keyboard controls
- Moving sprites with physics
- Gravity
- Jumps
- Pickable coins
- Walking enemies
- Death
- Scoreboard
- Animations for the main character
- Win condition
- Switching levels
- Moving forward…
- Create a directory/folder for the game in your computer.
- Download the initial project skeleton and unzip its contents in the directory you just created. Make sure that the resulting structure looks like this:
game
├── audio
├── data
├── images
├── index.html
└── js- Launch a local web server with:
live-serverand check that you can get to the index.html file in the browser. For instance, if you have launched your web server in the port 3000, you should be able to see the contents of index.html by accessing http://0.0.0.0:3000.
HTML5 games need a element to draw graphics. Phaser can create one automatically when we initialise the game. We need to supply the ID of the element that will wrap the canvas –in our case, it will be a
var game = new Phaser.Game(960, 600, Phaser.AUTO, 'game', {init: init, preload: preload, create: create, update: update});You might be wondering what is this Phaser.AUTO parameter we are passing. It's to specify whether we want a 2D canvas or a WebGL canvas. By setting it to AUTO, it will try to use a WebGL canvas –for most games it's most performant– and, when it isn't available, will fallback to use a regular 2D canvas.
Refresh your browser so you can see the changes. You should be able to see a black canvas with the dimensions we specified in the initialisation.
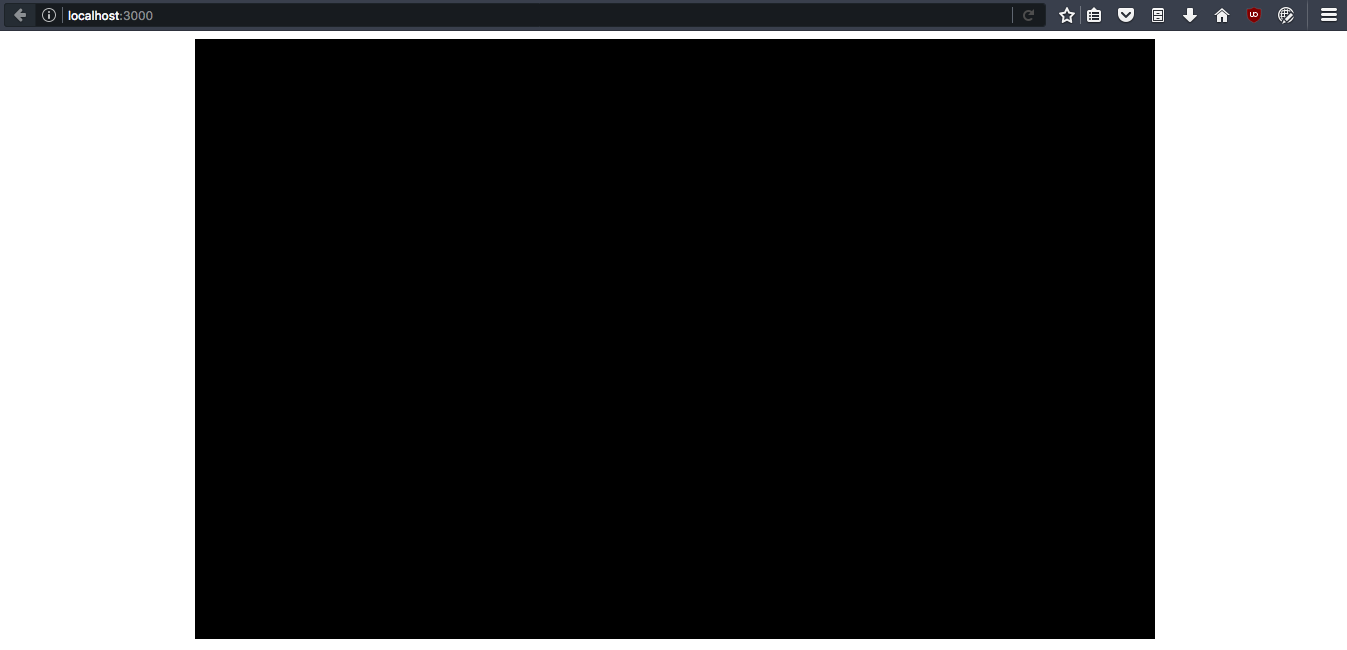
Before you go ahead, make sure:
- You can access the contents of index.html in your browser (by launching a local server).
- You see a black canvas element on the screen. All done? Then let's continue! The glory of game development awaits us!
The game loop is the core of every game. It's what allows us to update the game logic and render the graphics every frame –hopefully 60 times per second!

In Phaser, the game loop is handled automatically via game states. A game state represents one "screen" in our game: the loading screen, the main menu, a level, etc. Each state is divided into phases or steps, the most important are:
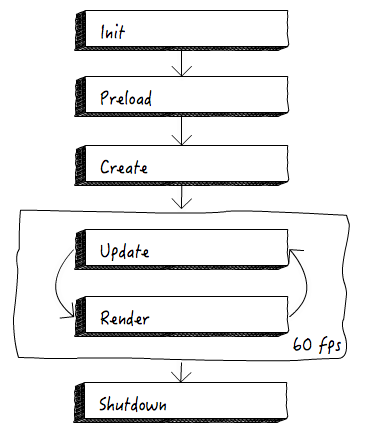
As you can see, update and render form the game loop. These phases are called automatically each frame, so we don't need to worry to implement a game loop and keep track of the timing.
A game state in Phaser is just an Object with some methods that we can override. We will be overriding some of these in order to load an image and render it on the screen.
- To load an image, we will make use of the preload phase of our game state. In this phase we will load all the assets that we require (images, sound effects, etc.).
To use a phase in a game state we need to add a method with a matching name. In our case, we will be filling in the preload function:
function preload(){
  game.load.image('background', 'images/background.png');
}
Things to note:
- When we load an asset, we assign it an (arbitrary) key. We will use this key later to reference that asset.
- To render an image we need to create an instance of
Phaser.Image, which is one of the many game entities in Phaser. We can do this using thegame.addfactory, which will automatically add the image to the game world so it gets drawn on the screen automatically every frame.
Add the following method to the create function:
// create game entities and set up world here
function create(){
  game.add.image(0, 0, 'background');
}
We are providing the X and Y coordinates –(0, 0) is the top left corner– and the key to the asset we just loaded.
If you check out the game, you should see a pretty background drawn in the screen:

- The background image is rendered in the screen. Rendering an image in the game loop is the first step in crafting games. Get ready for the next step!
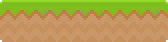
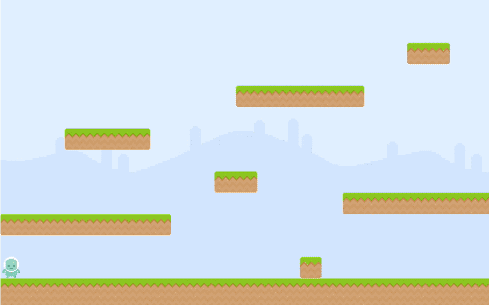
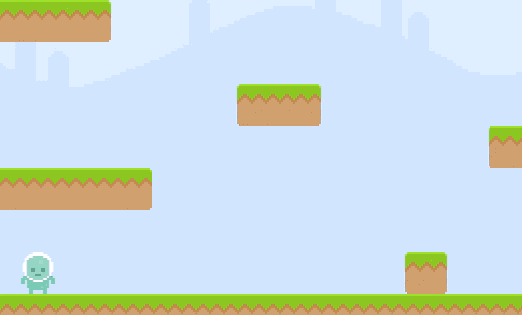
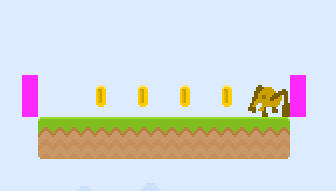
A platformer game needs… platforms, right? There are multiple techniques to handling platforms and the physics related to them. In this workshop, we will consider the platforms as sprites, like other characters in the game.
There are more efficient and flexible ways to do this, but for a one-screen platformer, this one is performant enough and, more importantly, the most simple way.
This is how some of the platforms look like (a 4✕1 and a 1✕1):
As with images, there is a factory method to create sprites (in this case, instances of Phaser.Sprite) and add them automatically to the game world.
But where to place the platforms? We could hardcode the whole thing, but in the long run it's better to have the level data in a separate file that we can load. We have some level data as JSON files in the data/ folder.
Ideally, these files would be generated with a level editor tool, but you can add more levels to the game after the workshop by creating your own JSON files!
If you open one of these JSON files, you can see how platform data is specified:
{
    "platforms": [
        {"image": "ground", "x": 0, "y": 546},
        {"image": "grass:4x1", "x": 420, "y": 420}
    ],
    // ....
}Phaser considers JSON files as another type of asset with can load within the game. Let's load the level data in the preload method:
function preload(){
  // game.load.image('background', 'images/background.png');
  game.load.json('level:1', 'data/level01.json');
  // ...
}
Now modify create:
function create(){
  // game.add.image(0, 0, 'background');
  loadLevel(this.game.cache.getJSON('level:1'));
}


function loadLevel(data) {
};
You can check this works if you add a console.log(data) in function loadLevel(data) –and don't forget to remove it afterwards.
- Before creating the sprites, we need to load the images that the platforms will use. As usual, we do this in the
preloadmethod:
function preload() {
    // game.load.json('level:1', 'data/level01.json');
    //spawn platform sprites
    game.load.image('ground', 'images/ground.png');
    game.load.image('grass:8x1', 'images/grass_8x1.png');
    game.load.image('grass:6x1', 'images/grass_6x1.png');
    // ? - load the image for grass:4x1
    // ? - load the image for grass:2x1
    // ? - load the image for grass:1x1
};- Now let's spawn the platforms. The level JSON file contains a
platformproperty with an Array of the info necessary to spawn the platforms: their position, and the image. So we just need to iterate over this Array and add new sprites to the game world:
function loadLevel(data) {
    // spawn all platforms
    data.platforms.forEach(spawnPlatform, this);
};

function spawnPlatform(platform) {
    game.add.sprite(platform.x, platform.y, platform.image);
};
If you are thinking why we are splitting this into different methods, it's because loadLevel will become very crowded in the following steps.
Refresh your browser and you should see our platform sprites!
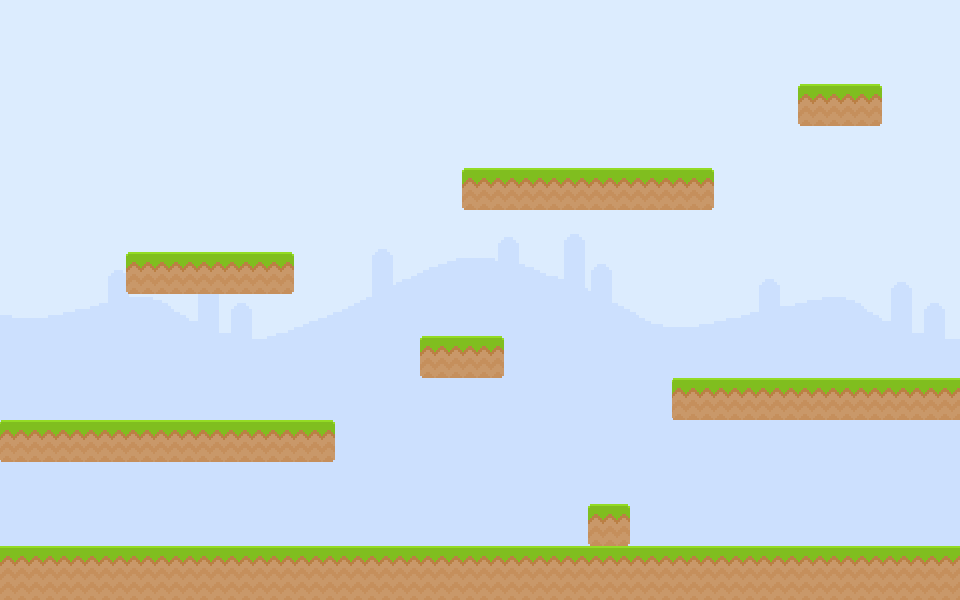
- You can see platforms rendered over the background
- Make sure you are using
game.add.spriteto create the platforms and notgame.add.image!
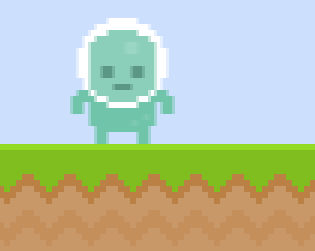
The hero or main character will be another sprite in our game. However, this sprite is more complex than the platforms, since it needs more business logics: moving around, jumping, etc.
Wouldn't be nice to have a class for these sprites with jump, move, etc. methods?
- In
preload:
function preload() {
    // ...
    game.load.image('grass:1x1', 'images/grass_1x1.png');

    // load the hero image
    game.load.image('hero', 'images/hero_stopped.png');
};- As with platforms, the hero position is stored in the JSON level file. We will create a new function, spawnCharacters, to spawn the hero and, later on, the enemies.
function loadLevel (data) {
// game.add.image(0, 0, 'background');
// spawn hero and enemies
spawnCharacters({hero: data.hero});
};
function spawnCharacters (data) {
// spawn hero
hero = game.add.sprite(data.hero.x, data.hero.y, 'hero');
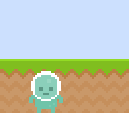
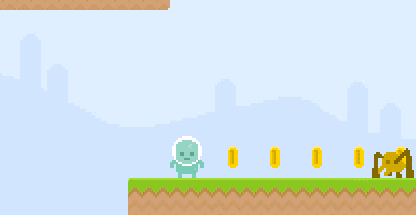
};- Check how it looks like. You should see the hero… not in a very good position:
Why is this? Is the level data wrong? What happens is that, usually, we'd like sprites to be handled by their center. This helps in operations like rotations, flipping, etc. and it's also more intuitive. Let's fix this.
In Phaser, the point where we handle sprites and images is called anchor. It's a vector, and it accepts values in the 0 (left) to 1 (right) range. So the central point would be (0.5, 0.5).
function spawnCharacters (data) {
    // spawn hero
    // hero = game.add.sprite(data.hero.x, data.hero.y, 'hero');
    hero.anchor.set(0.5, 0.5);
};
Refresh the browser again and you should see the hero positioned just over the ground:
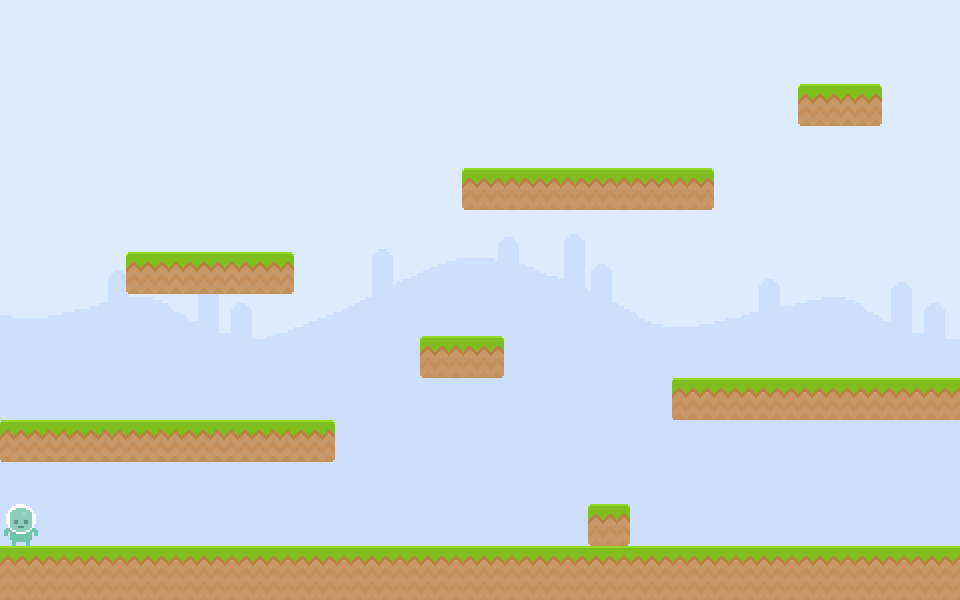
- There is a hero sprite over the ground, on the bottom left part of the level.
The player will be able to control the main character with the keyboard. For now, we will make the character move left and right when the player presses the arrow keys.
Phaser let us detect a key status (and listen to events like the key being released, etc.) via instances of Phaser.Key, each instance being associated to a specific key. Since we don't need to listen to the whole keyboard, we can settle for one instance for the left arrow key, and another one for the right arrow key.
We can easily create Phaser.Key instances with the game.input.keyboard.addKeys method, which allow us to create multiple keys at once. We will create them in the create phase, since we don't need any of the assets loaded in preload.
function create(){
  //This sets the left and right keys as inputs for this game
    leftKey = game.input.keyboard.addKey(Phaser.Keyboard.LEFT);
    // ? - create input for the rightKey
}
You can perfectly create the keys in the create phase. But sometimes reserving create to spawn game entities that need the assets in preload can help to make the code more readable.
This is when having a custom class comes handy! Let's add a move method which will receive the direction as a parameter: -1 will mean left, and 1 will mean right:
function move(direction){
    hero.body.velocity.x = direction * 200;
}
Remember how update and render were special phases of a state that were called automatically? Well, we will need to use update for this one: we want to check the status of the left and right arrow keys and, if they are pressed, move the character.
function spawnCharacters (data) {
    // hero = game.add.sprite(data.hero.x, data.hero.y, 'hero');
    hero.anchor.set(0.5, 0.5);
    //Make the main character use the physics engine for movement
    game.physics.enable(hero);
};
function update(){
handleInput();
}function handleInput(){
if (leftKey.isDown) { // move hero left
move(-1);
}
else if (rightKey.isDown) { // move hero right
// ? - pass a parameter to the move function to move hero right
}
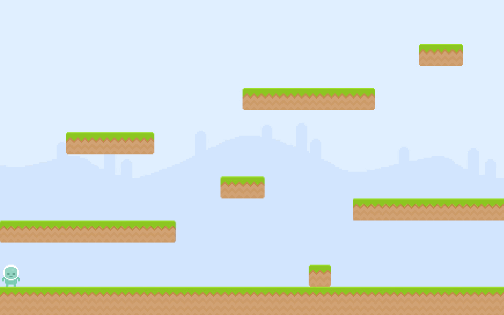
}Load the game in the browser and make sure you can move the character left and right. Woohoo!
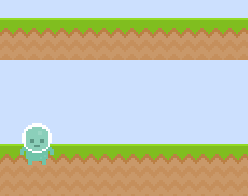
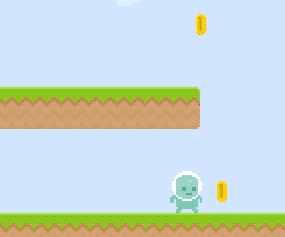
If your sight is sharp you may have noticed the following glitch when moving the character:
Do you see it? The hero sprite sometimes appear blurry, specially when compared to the background and platforms.
This is due to an anti-aliasing technique performed when drawing an image in not round coordinates (for instance, 100.27 instead of 100). For most games it is OK because it allows for smoother movements, but since this game uses pixel art, it doesn't look nice when it's blurred, even slightly.
Fortunately for us, there is a way in Phaser to force the rendering system to round the position values when drawing images.
We can do this in the init function, since it gets executed before any other phase:
function init(){
    //Make hero sprite more focused when moving around
    game.renderer.renderSession.roundPixels = true;
}- The character moves left and right with the arrow keys.
- The character stays sharp after having moved. You can check this more easily if you zoom in your browser (Ctrl + for Win/Linux, or ⌘ + for Mac OS).
It's always a good idea to tie movement to time. Previously we just set the character to move a fixed amount per frame, but we are ignoring how many frames per second our game is executing!
We could handle movements manually by querying for the delta time (the time that has elapsed between this frame an the previous one), but Phaser offer us a more convenient way: the use of a Physics engine.
Physics engines are usually expensive in terms of computation, but Phaser has implemented a very fast and small engine named Arcade Physics. It is very limited in features, but it's enough to handle a platformer game like ours –and we will not get a performance hit!
We will use the physics engine to move sprite, but also –later on– to handle gravity, collision tests, etc.
The important thing to take into account is that each sprite will have a physical body, and if this body is moved, rotated, etc. by the physics engine, Phaser will automatically update their rendering properties (like x or y), so we don't need to keep track of it.
Now we just need to make the move method affect the body of the sprite instead of directly modifying its position. What we need is to modify the sprite's velocity so it can move left or right. Edit the move function so it looks like this:
function move(direction){
    // hero.body.velocity.x = direction * 200;
    if (hero.body.velocity.x < 0) {
        hero.scale.x = -1;
    }
    else if (hero.body.velocity.x > 0) {
        // ? - Change the hero scale when the velocity is more than 0
    }
}
Try this out in the browser! Can you move left and right? Yes? Well done! But now we have a different problem… we need to be able to stop the character!
We didn't need to do this before because we were modifying the position, but now we are modifying the velocity –and obviously objects with a non-zero velocity, move. We can stop the character by setting its speed to zero, and we can do that just by passing 0 as the direction when no key is being pressed:
function handleInput() {
    if (leftKey.isDown) { // move hero left
        // ...
    }
    else if (rightKey.isDown) { // move hero right
        // ...
    }
    else { // stop
        move(0);
    }
};This is a taste of what a physics engine can do for us with very little code from our part. Let's prevent the main character to move outside the bounds of the screen. In Phaser this can be done by setting a flag in the body. Edit the function:
function spawnCharacters(data){
    //Make the main character use the physics engine for movement
    game.physics.enable(hero);

    //Prevent the main character to get out of the screen
    hero.body.collideWorldBounds = true;
}- You can still move the main character left and right with the arrow keys.
- The character stops if no key is being pressed.
- The character cannot move out of the screen.
Using a physics engine makes jumping and handling gravity easy. Now we will handle gravity in the world, making the character step on platforms. And as a side effect, we will make the character not to go trough walls too!
We can set a global gravity that affects all the entities in the world. In a platformer game, We want the characters (like the hero and some enemies) to be affected by it. Other sprites (like pickable coins, or platforms themselves) should be immobile and not be affected by gravity).
One thing that we will start doing from now on is to group multiple sprites of the same kind into a sprite list: in Phaser they are instances of Phaser.Group. Once there, we can –among other things– perform collision tests between groups or between a single sprite and a whole group.
- Edit loadLevel() to enable the gravity:
function loadLevel(data){
    //Enable gravity
    game.physics.arcade.gravity.y = 1200;
}
We are doing this here and not in PlayState.init to have more flexibility… in this way, in the future we could set the gravity value in the JSON file and allow each level to have their own gravity… Some platformers have levels in the Moon!
- Check the result in the browser… you will see that the main character falls down. The other sprites (the platforms) aren't affected because they don't have a physic body –yet.
- We don't want the main character to go through platforms –it's not a ghost! First we need to store the platforms into a group. Let's create it before spawning any sprite:
function loadLevel(data) {
    // create all the groups/layers that we need
    platforms = game.add.group();
    //Make sure this line of code is after!
    data.platforms.forEach(spawnPlatform, this);
};- Now change spawnPlatform so the sprite gets added to the group and we enable physics on it, to check for collisions:
function spawnPlatform(platform) {
    game.add.sprite(platform.x, platform.y, platform.image);
    var sprite = platforms.create(platform.x, platform.y, platform.image);
    // ? - Enable the game physics for the sprite
};
Phaser.Group.create is a factory method for sprites. The new sprite will be added as a child of the group.
- Finally, perform collision checks between the main character and the platforms. Using collide will make the physics engine to avoid bodies going through other bodies:
function update(){
    handleCollisions();
    handleInput();
};
function handleCollisions(){
game.physics.arcade.collide(hero, platforms);
};- If you try it out, you will see how the platforms fall! And there is one remaining platform that stays on the top of the character –because we prevented the character to move outside of the screen, remember?
- Let's disable gravity for platforms. There is a flag for that in the body:
function spawnPlatform(platform) {
    // game.physics.enable(sprite);
    sprite.body.allowGravity = false;
};- Refresh the game in the browser and you will be able to see how the platforms stay in their place… except the ground. This is happening because the main character is falling and pushing against the ground –like a pool ball against other balls.
- In order to fix this, we need to tell the physics engine that the platforms can't be moved when colliding. We do this by setting another flag:
function spawnPlatform(platform) {
    // sprite.body.allowGravity = false;
    sprite.body.immovable = true;
};
Everything should be working as expected now! As a bonus, see how the character can't go through the small wall/platform on the ground:
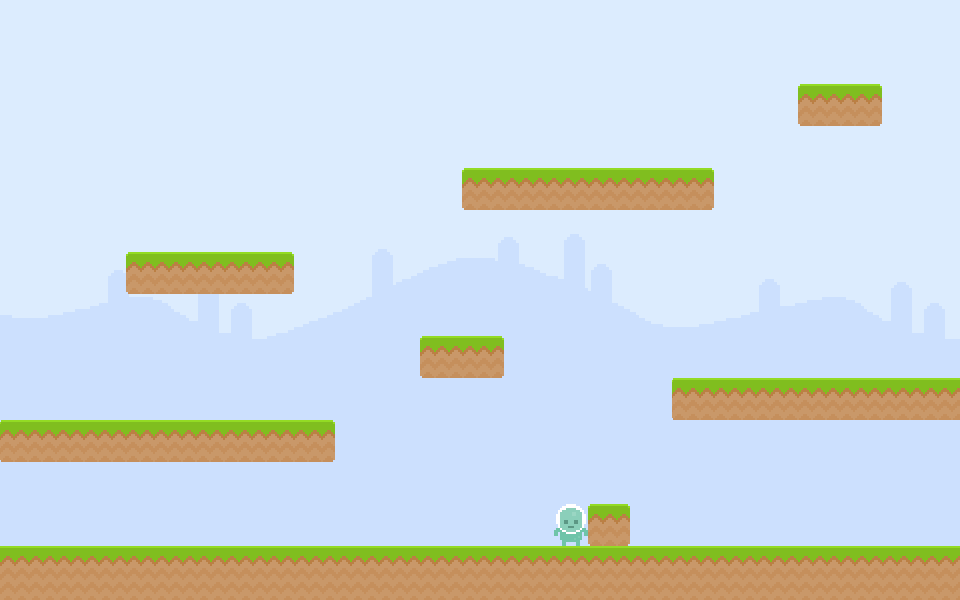
- Platforms stay at their place.
- The main character does not fall through the ground.
- The main character can't go through the small wall on the ground. Now on to doing some jumps!
Once we have gravity in place, making the main character to jump is almost trivial! If you remember physics class in school, a parabolic movement needs downward gravity applied to a body (we already did that in the previous step) and then some speed applied at the initial moment upwards so the body goes up and down in a parabola.
We will make the main character to jump when the player presses the up arrow key. We will also play a sound effect when this happens, since audio is crucial –even more than graphics– to provide feedback to the user!
- Create an instance of
Phaser.Keytied to the up arrow key. We will do that by modifying the addKeys call we already had in place in create:
function create() {
    // ...
    leftKey = game.input.keyboard.addKey(Phaser.Keyboard.LEFT);
    rightKey = game.input.keyboard.addKey(Phaser.Keyboard.RIGHT);
    // ? - Set the game input for the up key
};
Instead checking for whether the key is pressed or not, we will listen for the "on key down" event and jump when it happens. In Phaser, events are called signals (they are instances of Phaser.Signal), and it's very easy to subscribe and unsubscribe from them.
function create() {
    // ...
    upKey = game.input.keyboard.addKey(Phaser.Keyboard.UP); //add this line
    upKey.onDown.add(function(){
        // ? - Invoke the function 'jump'
    };
})
Like many other functions in JavaScript, the extra argument after the callback is what will become the this context when the callback is executed.
- Let's implement the jump function:
function jump(){
    hero.body.velocity.y = -600;
}-
Try it in the browser and check that the character can jump. You will find a bug, though: the character can jump mid-air! Although double jumps are not rare in platformer games, infinite jumps sure are. We will force the character to not jump mid-air.
-
We can check if a body is touching another body. Since platforms have physic bodies, we can know whether the main character is touching another body at the bottom or not. Modify the jump method so it looks like this:
function jump(){
    var canJump = hero.body.touching.down;
    //Ensures hero is on the ground or on a platform
    if (canJump) {
        hero.body.velocity.y = -600;
    }
    // ? - return the variable canJump
}
Note that we are also returning whether the character managed to jump or not… we will use this soon!
Sounds are also a game entity, but they obviously don't get rendered on the screen. But the process to handle them is similar to images. Let's start by loading the audio asset in preload:
function preload() {
    //game.load.image('grass:1x1', 'images/grass_1x1.png');

    //Play a sound effect when jumping
    game.load.audio('sfx:jump', 'audio/jump.wav');
};
Now let's create the audio entity, which will be an instance of Phaser.Sound. We can create these and add them to the game world with the game.add factory, as usual:
function create() {
    // game.add.image(0, 0, 'background');

    sfxJump = game.add.audio('sfx:jump');
};
Last, we need to play the sound effect when a jump has been made. Remember how we had the Hero.jump method to return true or false depending on whether the jump was possible? We will make use of this now! Modify the listener for the arrow key so it looks like this:
function jump(){
    var canJump = hero.body.touching.down;
    //Ensures hero is on the ground or on a platform
    if (canJump) {
        hero.body.velocity.y = -600;
        // ? - Call the method play from sfxJump
    }
    return canJump;
}
Try it out in the browser. With a bit of skill, you should be able to jump to reach all the platforms in the level.
- The character can jump!
- The character can not jump mid-air.
- A sound effect is played when jumping.
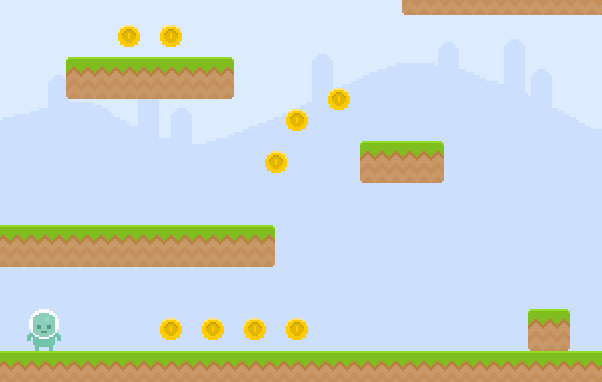
We have the core game mechanic –jumping– in place, so it's time to make the game more attractive and fun. We will add some coins for the main character to pick up. These coins will also be animated, so we will learn how to animate sprites.
In Phaser, animations are keyframe-based. This means that the sprite will change the image it's displaying periodically, and thus we will see it animated. If you have worked with CSS before, does this sound familiar?
This is our coin's spritesheet, and Phaser makes really easy to work with them and use them for animations.
Yup, CSS borrowed the name for the image technique from game development!
To collect the coins we will detect when the main character has touched any of them. The Arcade physics engine will assist us to do so, but we will another method, overlap, instead of collide. Why? collide actually resolves collisions, by separating the bodies so objects don't go through other objects: this allows for behaviours such as bouncing, pushing, blocking, etc. However we don't want the coins to block the character, so we will merely perform a hit test and see if the character's body is overlapping a coin's body.
- Spritesheets are a special type of asset, so we need to load them with game.load.spritesheet –and not with game.load.image. Note that we need to specify the dimensions of each individual frame (22✕22 pixels in this case):
function preload() {
    // ...
    game.load.spritesheet('coin', 'images/coin_animated.png', 22, 22);
};- Coins data is stored in the level JSON file, so we will spawn them when we load the level. We also need a group to store all the coins, so we can detect later whether the player has touched them.
function loadLevel(data) {
    platforms = game.add.group();
    // ? - Add a group to the game and set it to the value of 'coins'

    // ...

    spawnCharacters({hero: data.hero, spiders: data.spiders});
    // spawn important objects
    data.coins.forEach(spawnCoin, this);

    // ...
};- Onto our new spawnCoin method! Coins will have no behavior (besides a looping animation), so we don't need a custom class for it and can settle for regular Phaser.Sprite instances.
function spawnCoin(coin) {
    var sprite = coins.create(coin.x, coin.y, 'coin');
    sprite.anchor.set(0.5, 0.5);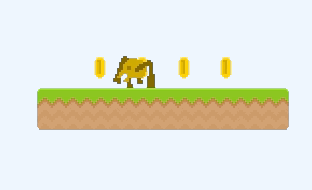
};- This is a good point to see if it's working in the browser. You should be able to see some –still static!– coins spawned through all the level.
- Each sprite can have multiple animations, but here we only need one (the coin rotating). When adding a new animation, we specify which frame indices it will use. Optionally, we can set the animation speed (measured in frames per second) and whether the animation should loop or not. We will add and play the animation in the spawnCoin method:
function spawnCoin(coin) {
    // ...
    sprite.animations.add('rotate', [0, 1, 2, 1], 6, true); // 6fps, looped
    sprite.animations.play('rotate');
};- Reload the browser and you should see the coins animated like this:

- Let's check for collisions between the character and the coins. Since we will use the physics engine for this, we need to give the coins a physic body (and don't forget to disable gravity or the coins will fall!).
function spawnCoin(coin) {
    // ...
    this.game.physics.enable(sprite);
    sprite.body.allowGravity = false;
};- Now onto the detection itself! As we have said before, we will use overlap and not collide because we just want to query for overlaps, and not the coins to block the character.
function handleCollisions() {
    //...
    game.physics.arcade.overlap(hero, coins, onHeroVsCoin, null, this);
};
If you are wondering what that null is for… We can add a filter function to exclude some of the sprites for this check. Since we want to check all coins, we can just pass null to indicate "no filter, please".
- Let's implement now onHeroVSCoin, which is the callback that will be executed every time the main character touches a coin. What we will be doing is to get rid off the coin –this can be done by calling the Phaser.Sprite.kill method.
function onHeroVsCoin(hero, coin){
    coin.kill();
};- Picking coin should feel rewarding and playing a sound effect will help to achieve this. Let's load it in preload:
function preload() {
    // ...
    // ? - Load the audio from audio/coin.wav and set its name as 'sfx:coin'
};- Now we just have to create a Phaser.Sound instance…
function create(){
    // ...
    // ? - Add the audio 'sfx:coin' and set as value of 'sfxCoin'
    sfxCoin = game.add.audio('sfx:coin');
}- And play the sound effect in the overlap callback!
function onHeroVsCoin(hero, coin) {
    sfxCoin.play();
    // ...
};
Now you should be able to move the main character and collect all the coins in the level.
- Coins are displayed in the level with an animation.
- The main character can pick up coins, and they disappear when it happens.
- There's a sound effect playing when picking up a coin.
Right now the only challenge the player needs to overcome in our game is to execute jumps properly. It's not very fun –specially since there are no pits the character can fall into–, so let's add a hazard in the form of enemies.
Meet the mighty spiders!
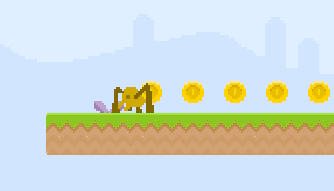
This enemy has a simple behaviour: move horizontally until it finds a "border" (a wall, the bounds of the screen, or the end of the platform) and then turn into the opposite direction.
As you could see in the GIF, spiders are animated. This is its spritesheet:
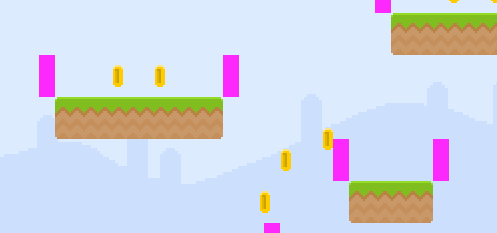
We will use a trick so the spiders don't fall off platforms: invisible walls. These walls will be sprites, with a physic body, but will not be seen. The main character will also be oblivious to them. But the spiders… the spiders will collide against these walls and turn around!
Here is how these walls would look like, if they were being displayed: note that there's one at the edge of each platform.
- First we need to load the spritesheet in preload:
function preload() {
    // ...
    game.load.spritesheet('spider', 'images/spider.png', 42, 32);
};- The level JSON file contains the points where the spiders should be created, so we will spawn them in loadLevel, as we have done with the rest of the sprites. Add there a new group to store the spiders, right below where the coins group is being created. We are also passing the spiders data to the spawnCharacters method.
function loadLevel(data) {
    // ...
    // ? - add a group and set as value of 'spiders'
    spawnCharacters({hero: data.hero, spiders: data.spiders});
}- Now spawn the spiders at spawnCharacters:
function spawnCharacters(data){
    // ...
    data.spiders.forEach(function (spider){
        var sprite = game.add.sprite(spider.x, spider.y, 'spider');
        spiders.add(sprite);
        sprite.anchor.set(0.5);
        // animation
        sprite.animations.add('crawl', [0, 1, 2], 8, true);
        sprite.animations.add('die', [0, 4, 0, 4, 0, 4, 3, 3, 3, 3, 3, 3], 12);
        sprite.animations.play('crawl');
        game.physics.enable(sprite);
        sprite.body.collideWorldBounds = true;
        // ? - Set the sprite.body.velocity.x to value 100
    })
}
Try it out and you will see a small disaster…
This is happening because the spiders are being affected by gravity and restricted to stay within the screen bounds, but we are not resolving collisions against the world (i.e. the platforms!).
- The first step is to enable collision resolution between the spiders and the platforms, like we did with the main character:
function handleCollisions() {
    // game.physics.arcade.collide(hero, platforms);
    // game.physics.arcade.overlap(hero, coins, onHeroVsCoin,
        null, this);
    // ? - Set the collision between spiders and platforms
    // ...
};- Let's add those invisible walls so the poor spiders don't fall off. Let's load the image first –it will not be displayed, but it's used so the sprite knows how big the wall is:
function preload() {
    // game.load.spritesheet('spider', 'images/spider.png', 42, 32);
    // Add invisible "walls" so the spiders don't fall off platforms
    game.load.image('invisible-wall', 'images/invisible_wall.png');
    // ...
};- We also need a group to store these walls, so we can do collision detection later. Create this group after the one that holds the spiders:
function loadLevel(data) {
    // platforms = game.add.group();
    // spiders = game.add.group();
    enemyWalls = game.add.group();
    // ...
};- Now let's create two walls per spawned platform: one at the left side, another one at the right side:
function spawnPlatform(platform) {
    // ...
    spawnEnemyWall(platform.x, platform.y, 'left');
    spawnEnemyWall(platform.x + sprite.width, platform.y, 'right');
};
function spawnEnemyWall(x, y, side){
var sprite = enemyWalls.create(x, y, 'invisible-wall');
sprite.anchor.set(side === 'left' ? 1 : 0, 1);
game.physics.enable(sprite);
sprite.body.immovable = true;
sprite.body.allowGravity = false;
}- We need to resolve collisions against these walls so the spiders can't go through them, right after checking for collisions against platforms…
function handleCollisions() {
    // game.physics.arcade.collide(spiders, platforms);
    // ? - Add collisions between spiders and enemyWalls
    // ...
};- If you reload the browser you can see how some pink walls stop the spiders from falling!
- We obviously don't want to show those walls to the player, so let's hide them right after creating the group. We can hide game entities by setting their visible property to false:
function loadLevel(data) {
    // ...
    enemyWalls = game.add.group();
    // ? - Set the visibility of the enemyWalls to false
    // ...
};- We know that there is a flag in a sprite's body, touching, that we can query to see whether the sprite is touching another one. These is what we need to detect that we have colliding against a wall or a platform.
However, we will also need to check for the blocked flag, since it will tell us collisions against the world bounds.
Add an update method to Spider. This method will be called automatically by Phaser every frame. Remember that we must add new methods to custom sprites after having cloned their parent's prototype:
function moveSpider(){
    spiders.forEach(function (spider){
        if (spider.body.touching.right || spider.body.blocked.right) {
            spider.body.velocity.x = -100; // turn left
        }
        else if (spider.body.touching.left || spider.body.blocked.left) {
            // ? - Change spiders velocity to turn right
        }
    })
}
Done! Spiders should be turning around when they reach the end of the platform, a wall, or the border of the screen:
- There are three cute spiders walking around happily without falling down or going through platforms.
- Spiders turn when they reach an obstacle or the end of the platform, so they stay in motion continuously.
- The main character cannot influence the spiders movement in any way.
We have enemies, but right now there's no interaction between them and the main character. Let's allow them to kill each other!
- The spiders will kill the main character simply by touching them.
- The main character will only be able to kill an enemy by jumping (or falling) over them. As with picking up coins, we will need to merely have a hit test (with overlap) and not resolving collisions (i.e. separating bodies, etc.).
- Killing or being killed is an important event, and we should provide a lot of feedback to the user. We will be playing a sound effect when this happens, so let's load the audio asset and create its corresponding sound entity:
function create() {
    // ...
    // ? - Add the audio 'sfx:stomp' and set to value of sfxStomp
};
function preload() {
// ...
// ? - Load the audio 'sfx:stomp' from 'audio/stomp.wav'
};- To do the killing, we need to detect when a spider is touching the main character. We can do this by calling overlap:
function handleCollisions() {
    // ...
    game.physics.arcade.overlap(hero, spiders, onHeroVsEnemy, null, this);
};- We need to implement the onHeroVsEnemy function. For now, we'll just make the spider to kill the hero. When that happens, we will play a sound effect and restart the level (by restarting the game state).
function onHeroVsEnemy(hero, enemy) { sfxStomp.play(); game.state.restart(); }; 4. Try it in the browser and make sure that the level restarts whenever the main character touches an enemy.
- Let's allow the main character to kill the spiders. To detect whether it's falling or not, we can check the vertical velocity of the body. If it's positive, it means the character is falling and, thus, able to kill! Let's modify the onHeroVsEnemy callback to detect if the contact has been produced during a fall:
function onHeroVsEnemy(hero, enemy){
    if (hero.body.velocity.y > 0) { // kill enemies when hero is falling
        hero.body.velocity.y = -200;
        die(enemy);
        sfxStomp.play();
    }
    else { // game over -> restart the game
        sfxStomp.play();
        game.state.restart();
    }
}- Try it and you should be able to kill the spiders. But it looks a bit odd, isn't it? Let's add a small bounce to the main character, like in classic platformers:
function onHeroVsEnemy(hero, enemy){
    if (hero.body.velocity.y > 0) { // kill enemies when hero is falling
        hero.body.velocity.y = -200;
    }
}- Try it again. Much better, isn't it?
Bouncing on enemies
- Let's make killing enemies even more satisfying by adding an animation for when the spider has been hit. We will use the last two frames of the spritesheet for this.
function spawnCharacters(data){

    data.spiders.forEach(function (spider){
        // ...
        sprite.animations.add('die', [0, 4, 0, 4, 0, 4, 3, 3, 3, 3, 3, 3], 12);
    // ...
    })
}- Once thing we are going to need to do is to delay the actual killing, for when a sprite doesn't exist it's not visible and doesn't get updated. Let's add a new method for the spider to agonize:
function spawnSpider(){
    spider = spiders.create(spider.x, spider.y, 'spider');
    spider.anchor.set(0.5);
    spider.animations.add('crawl', [0, 1, 2], 8, true);
    spider.animations.add('die', [0, 4, 0, 4, 0, 4, 3, 3, 3, 3, 3, 3], 1);
    spider.animations.play('crawl');

    // physic properties
    game.physics.enable(spider);
    spider.body.collideWorldBounds = true;
    spider.body.velocity.x = Spider.speed;
}
Note how we are disabling the body to remove the sprite from physics operation. This is important so the spider stops and isn't taken into account for collisions.
- Now modify the onHeroVsEnemy function
function onHeroVsEnemy(hero, enemy) {
    // ...
    if (hero.body.velocity.y > 0) {
        // make sure you remove enemy.kill() !!!
        die(enemy);
    }
    // ...
};- It should be working now!
In this step we are going to add a scoreboard that displays how many coins the main character has collected:
In order to do that, we need to be able to write text in the screen. In games, this can be done in different ways:
- By using a regular TTF font, like Times New Roman (for HTML5 games this could be a Web Font)
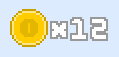
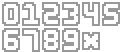
- By using a bitmap font, which is actually a spritesheet, and render the characters one by one like they were images. For the scoreboard we will use a bitmap font, which are called in Phaser retro fonts. The font will consist only of digits, a blank space and an x character. Here's the spritesheet:
It's important to know that in order to render a text with a bitmap font, we need both an instance of Phaser.RetroFont and an instance of Phaser.Image. Why? The retro font holds the image data in memory (i.e. the pixel values of a rendered text), but then we need a Phaser entity that can make use of that image data, such as Phaser.Image (or even Phaser.Sprite)!
- We need to create a global variable coinPickupCount that will keep track of the coints
var coinPickupCount = 0;

function onHeroVsCoin(hero, coin){
    coinPickupCount++;
}- Load the image asset in preload:
function preload() {
    // ...
    // ? - load the image 'images/coin_icon.png' and set as 'icon:coin'
    // ...
};- We will separate the creation of UI elements into a separate method. Inside it, we will create a new group to store all the UI icons, text, etc.
function create() {
    coinIcon = game.make.image(40, 0, 'icon:coin');

    hud = game.add.group();
    hud.add(coinIcon);
    hud.position.set(10, 10);
};
Note how all entities inside this.hud will get rendered relatively to it. This means that, since the hud is in position (10, 10), if we draw an image at –for instance– (5, 5), it will get rendered at position (15, 15) of the screen.
- Check that the coin icon is rendered at the top left of the screen:
- Finally we get to the most interesting part! As usual, we need to load the asset that will make up the font. Note that, even though conceptually it is a spritesheet, in Phaser it needs to be loaded it with load.image:
function preload() {
    // game.load.image('icon:coin', 'images/coin_icon.png');
    // ? - load the image 'images/numbers.png' and set as 'font:numbers'
    // ...
};
Now we need to instantiate Phaser.RetroFont, that will be able to compute how a text looks like with the bitmap font spritesheet.
function create() {
    // ...
    // ? - Declare a variable 'NUMBERS_STR' and set its value as string '0123456789X '
    coinFont = game.add.retroFont('font:numbers', 20, 26, NUMBERS_STR, 6);
    // ...
};
Since Phaser has no idea of the contents of the spritesheet, we need to tell it when creating the retro font: the width and height of each character and which characters are being included (the orden is important!)
With the retro font created, we need to make use of it from a game entity. We will use a Phaser.Image for this:
function create() {
    // let coinIcon = ...
    var coinScoreImg = game.make.image(100 + coinIcon.width, coinIcon.height / 2, coinFont);
    coinScoreImg.anchor.set(1, 0.5);

    // ...
    hud.add(coinScoreImg);
};
Last, we just need to tell the retro font which text string to render.
function onHeroVsCoin(hero, coin){
    // ...
    coinFont.text = `x${this.coinPickupCount}`;
};
Try it in the browser and see how the text changes with every coin collected!
Right now we have a few animated sprites in the game: the coins and the enemy spiders. But none for the main character! We are going to implement them now.
This is the character's spritesheet and the animations in it:
- Stopped: frame #0
- Running: frames #1 - #2
- Jumping (upwards): frame #3
- Falling: frame #4 There's also a dying/hit animation in the spritesheet, but we will implement it in a later stage.
As you can see, this can be a bit complex, so the approach that we will follow to handle animations for the main character is to check every frame which animation should be active and, if it's different, we'll play another one.
- Previously we had hero_stopped.png assigned to the hero key, loaded as an image. We need to get rid of that, so delete this line in the preload:
function preload () {
    // delete this line below
    game.load.image('hero', 'images/hero_stopped.png');
};- Now we need to load the new spritesheet into the hero key:
function preload() {
    // ...
    game.load.spritesheet('hero', 'images/hero.png', 36, 42);
    // ...
};- Add the new animations in the Hero constructor:
function spawnCharacters(data){
    // add hero sprite to game
    hero = game.add.sprite(data.hero.x, data.hero.y, 'hero');
    hero.anchor.set(0.5, 0.5);

    hero.animations.add('stop', [0]);
    hero.animations.add('run', [1, 2], 8, true); // 8fps looped
    hero.animations.add('jump', [3]);
    hero.animations.add('fall', [4]);
}- Calculate which animation should be playing
This is the new function that will return the name of the animation that should be playing:
function getAnimationName(){
    var name = 'stop';
    // jumping
    if (hero.body.velocity.y < 0) {
        name = 'jump';
    }
    // falling
    else if (hero.body.velocity.y >= 0 && !hero.body.touching.down) {
        name = 'fall';
    }
    else if (hero.body.velocity.x !== 0 && hero.body.touching.down) {
        name = 'run';
    }
    return name;
}
Note how in the falling state we are both checking that the vertical velocity is positive (it goes downwards) and that the main character is not touching a platform. Why? Because when the character is on the ground it still has a vertical velocity caused by the gravity. The character doesn't fall because there is a body blocking them, not because their vertical velocity is zero.
- We will create an update method for Hero in which we will check which animation should be playing and switch to a new one if necessary. Remember that update methods in Phaser.Sprite instances get called automatically each frame!
function update() {
    var animationName = getAnimationName();
    if (hero.animations.name !== animationName) {
        hero.animations.play(animationName);
    }
}- Try it now in the browser! Run, jump around… You should be able to see all the animations in place. And a little glitch: the character does not face the right direction when moving left.
- It may sound weird, but usually in game development flipping (or mirroring) an image is achieved by applying a negative scale to the image. So applying a scale of -100% horizontally will flip the image of the character to face to the left.
Add this to the move function, since we know the direction in that moment:
function move(direction){
    hero.body.velocity.x = direction * 200;
    if (hero.body.velocity.x < 0) {
        hero.scale.x = -1;
    }
    else if (hero.body.velocity.x > 0) {
        hero.scale.x = 1;
    }
}
In Phaser scales are normalized, so 0.5 means 50%, 1 means 100% and so on.
The final result is the main character facing the right direction when moving.

- The main character shows different animations or images for the following actions: not moving, running, jumping and falling.
- The main character faces the correct direction when moving either left or right.
Currently the player can lose in the game –and they will have to start over again–, but there is no way for them to win.
We are going to add two elements to the level: a door and a key. The goal of the game would be to fetch the key and then go back to the door and open it to advance to the next level. We will also add an icon next to the coin scoreboard to display whether the key has been picked up yet or not.
In the JSON file there is already the data of where the door and the key should be placed.
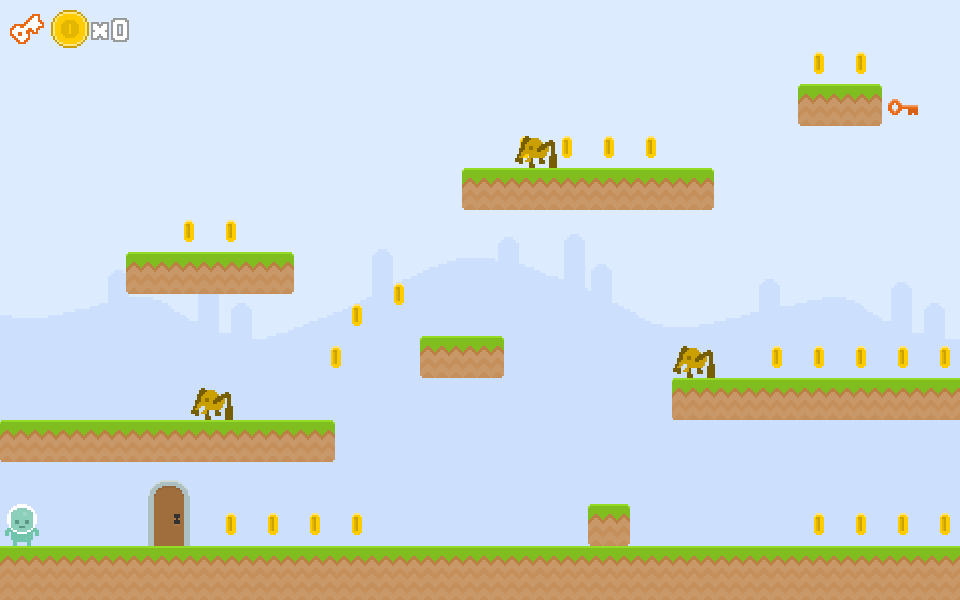
Here's how the whole thing will look like:
- The door is a spritesheet (showing it closed and open):
function preload() {
    // ...
    game.load.spritesheet('door', 'images/door.png', 42, 66);
};- The door needs to appear below all the other sprites. We will be adding later some other elements that act as decoration (bushes, fences, flowers…) and need to appear at the back as well. For this, we will create a new group to store these kind of objects:
function loadLevel(data) {
    bgDecoration = game.add.group();
    // ...
};
Since this group is created before any other, the objects it contains will appear below the rest.
- We will split the creation of the door and the key in separate functions. The door will be created with a new function spawnDoor:
function spawnDoor(x, y){
    door = bgDecoration.create(x, y, 'door');
    door.anchor.setTo(0.5, 1);
    game.physics.enable(door);
    door.body.allowGravity = false;
}
Note that we have enabled physics in it. This is because we are going to detect if there is a collision between the door and the main character and see if the key has been already picked to trigger the win condition.
- Now we just need to call the function from loadLevel:
function _loadLevel(data) {
    // ...
    // after spawning the coins in this line:
    // data.coins.forEach(spawnCoin, this);
    spawnDoor(data.door.x, data.door.y);
    // ...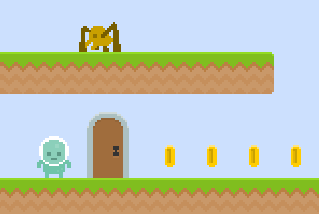
};- Load the game in the browser and see how the door has been created:
- The key is very similar to the door, but it just has a single image, not a spritesheet:
function preload() {
    // ...
    game.load.image('key', 'images/key.png');
};- As with the door, we will have a separate new function to spawn the key:
function spawnKey(x, y){
    key = bgDecoration.create(x, y, 'key');
    key.anchor.set(0.5, 0.5);
    game.physics.enable(key);
    key.body.allowGravity = false;
}
Since the key should also appear behind enemies and other sprites, we are adding it to the same group as the door.
- And we call the spawnKey function just after having created the door:
function loadLevel(data) {
    // ...
    // add it below the call to spawnDoor
    // spawnDoor(data.door.x, data.door.y);
    spawnKey(data.key.x, data.key.y);
    // ...
};- Now you should be able to see the key at the top right region of the screen!

- The win condition is touching the door once the character has picked up the key. We are going to store whether the key has been picked up or not in a flag, as a global variable hasKey
var hasKey = false;
The hasKey flag will be set to true once the key has been collected.
- To make sure the player understands that picking up the key is an important action, we are going to play a sound effect when this happens. So let's load its asset and create a Phaser.Sound instance for it. We are doing the same for the "open door" sound effect here as well.
function preload() {
    // ...
    game.load.audio('sfx:key', 'audio/key.wav');
    game.load.audio('sfx:door', 'audio/door.wav');
};
function create(){
sfxKey = game.add.audio('sfx:key');
sfxDoor = game.add.audio('sfx:door');
}- We are going to collect the key in the same way that we collect the coins: call overlap in the Arcade physics engine and then kill the key so it doesn't appear anymore. We will also play the sound effect, and set hasKey to true:
function handleCollisions() {
    // ...
    game.physics.arcade.overlap(hero, key, onHeroVsKey, null, this)
};
function onHeroVsKey(hero, key){
sfxKey.play();
key.kill();
hasKey = true;
}-
Play the game, fetch the key and notice how it disappears and the sound effect is playing.
-
We now have the first part of the win condition: fetching the key. Let's implement the final one: opening the door with it.
function handleCollisions() {
    // ...
    game.physics.arcade.overlap(hero, door, onHeroVsDoor,
        // ignore if there is no key or the player is on air
        function (hero, door) {
            return hasKey && hero.body.touching.down;
        });
};
This time, we have made use of the filter function we can pass to overlap. This is because we don't want the overlap test to pass if the player hasn't fetched the key yet or if the main character is jumping –it would be weird to open a key while jumping, right?
- The collision function looks like this:
function onHeroVsDoor(hero, door){
    sfxDoor.play();
    game.state.restart();
}
For now, we are just playing a sound effect and restarting the level. Later on, we will implement level switching so the player can advance through all of them!
- Try it! Play the level, fetch the key and then go back to the door. The level should restart and you should hear the door opening.
Last, we will add an icon next to the scoreboard to display if the key has been picked up. We will use a spritesheet for it:
function preload() {
    // ...
    game.load.spritesheet('icon:key', 'images/key_icon.png', 34, 30);
}
We will make an image in the create function:
function create() {
    keyIcon = game.make.image(0, 19, 'icon:key');
    keyIcon.anchor.set(0, 0.5);
    // ...
    hud.add(keyIcon);
};
Don't forget to move the scoreboard to the right to make room for the key icon! Change the spawning point of the coin icon:
function create() {
    // ...
    // remove the previous let coinIcon = ... line and use this one instead
    coinIcon = game.make.image(40, 0, 'icon:coin');
    // ...
};
If you load the game you will be able to see the icon!
Now we need to change the frame of the spritesheet depending on whether the key has been picked up or not. With sprites, we have used animations before to handle spritesheets, but since this is not an animation and we don't need to control the timing, we can just use the frame property to select the frame index we want:
function update() {
    // ...
    //Add the key icon
    keyIcon.frame = hasKey ? 1 : 0;
};
Play the level again, pick up the key and… ta-da!
- A door and a key appear in the level.
- If the main character picks up the key, it disappears and a sound effect is played.
- The level restarts when the main character gets to the door, having picked up the key.
- The level does not restart when the main character gets to the door when the key has not been collected.
- There is an icon at the top left part of the screen that indicates if the key has been picked up.


