This repository contains a Game Boy / Game Boy Color emulator, written in Chisel, that can be run on an FPGA. Read the full writeup here.
Currently, only the Pynq-Z2 is supported, although the core of the emulator should be able to be used on any FPGA with sufficient resources.
A precompiled bitstream is available under Releases.
Currently this project uses Vivado 2020.2. The free edition is sufficient. Make sure to install with support for Zynq-7000 SoCs.
Install the Pynq-Z2 Vivado board files.
Additionally, you should set up a shared IP cache to speed up synthesis of Xilinx IP:
- Create the
~/vivado_ip_cachedirectory (could be located somewhere else). - Create the file
~/.Xilinx/Vivado/Vivado_init.tcl - In that file, add
set_param project.defaultIPCacheSetting /home/eli/vivado_ip_cache/(substituting the absolute path to the IP cache directory).
You'll need to install JDK 8 or later, and Scala Build Tool (sbt). Additionally, install FuseSoC.
From the top-level directory:
fusesoc --cores-root . run --build --target=pynq_z2 elipsitz:gameboy:gameboy
This will generate a .bit and .hwh file, which need to be accessible to the PS Python code.
Install Pynq Linux on the Pynq-Z2, and install the pip packages listed in python/requirements.txt.
Transfer the gameboy_ps Python module (located in the python directory) to the Pynq-Z2.
Place the gameboy.bit and gameboy.hwh files from the build process in the gameboy_ps/resources directory.
Connect an HDMI cable from the "HDMI OUT" port on the Pynq-Z2 to a monitor or TV.
Attach an Xbox-compatible controller to the USB port of the Pynq-Z2.
As root, run python3 -m gameboy_ps <path to ROM directory>, passing the path to the directory containing ROM files.
The program will load the bitstream to the PL. It takes a few seconds to load all of the Pynq libraries, but the main menu should soon show up on the display.
Warning: the audio output can be quite loud. Start at the lowest setting on the monitor/TV and increase it as needed.
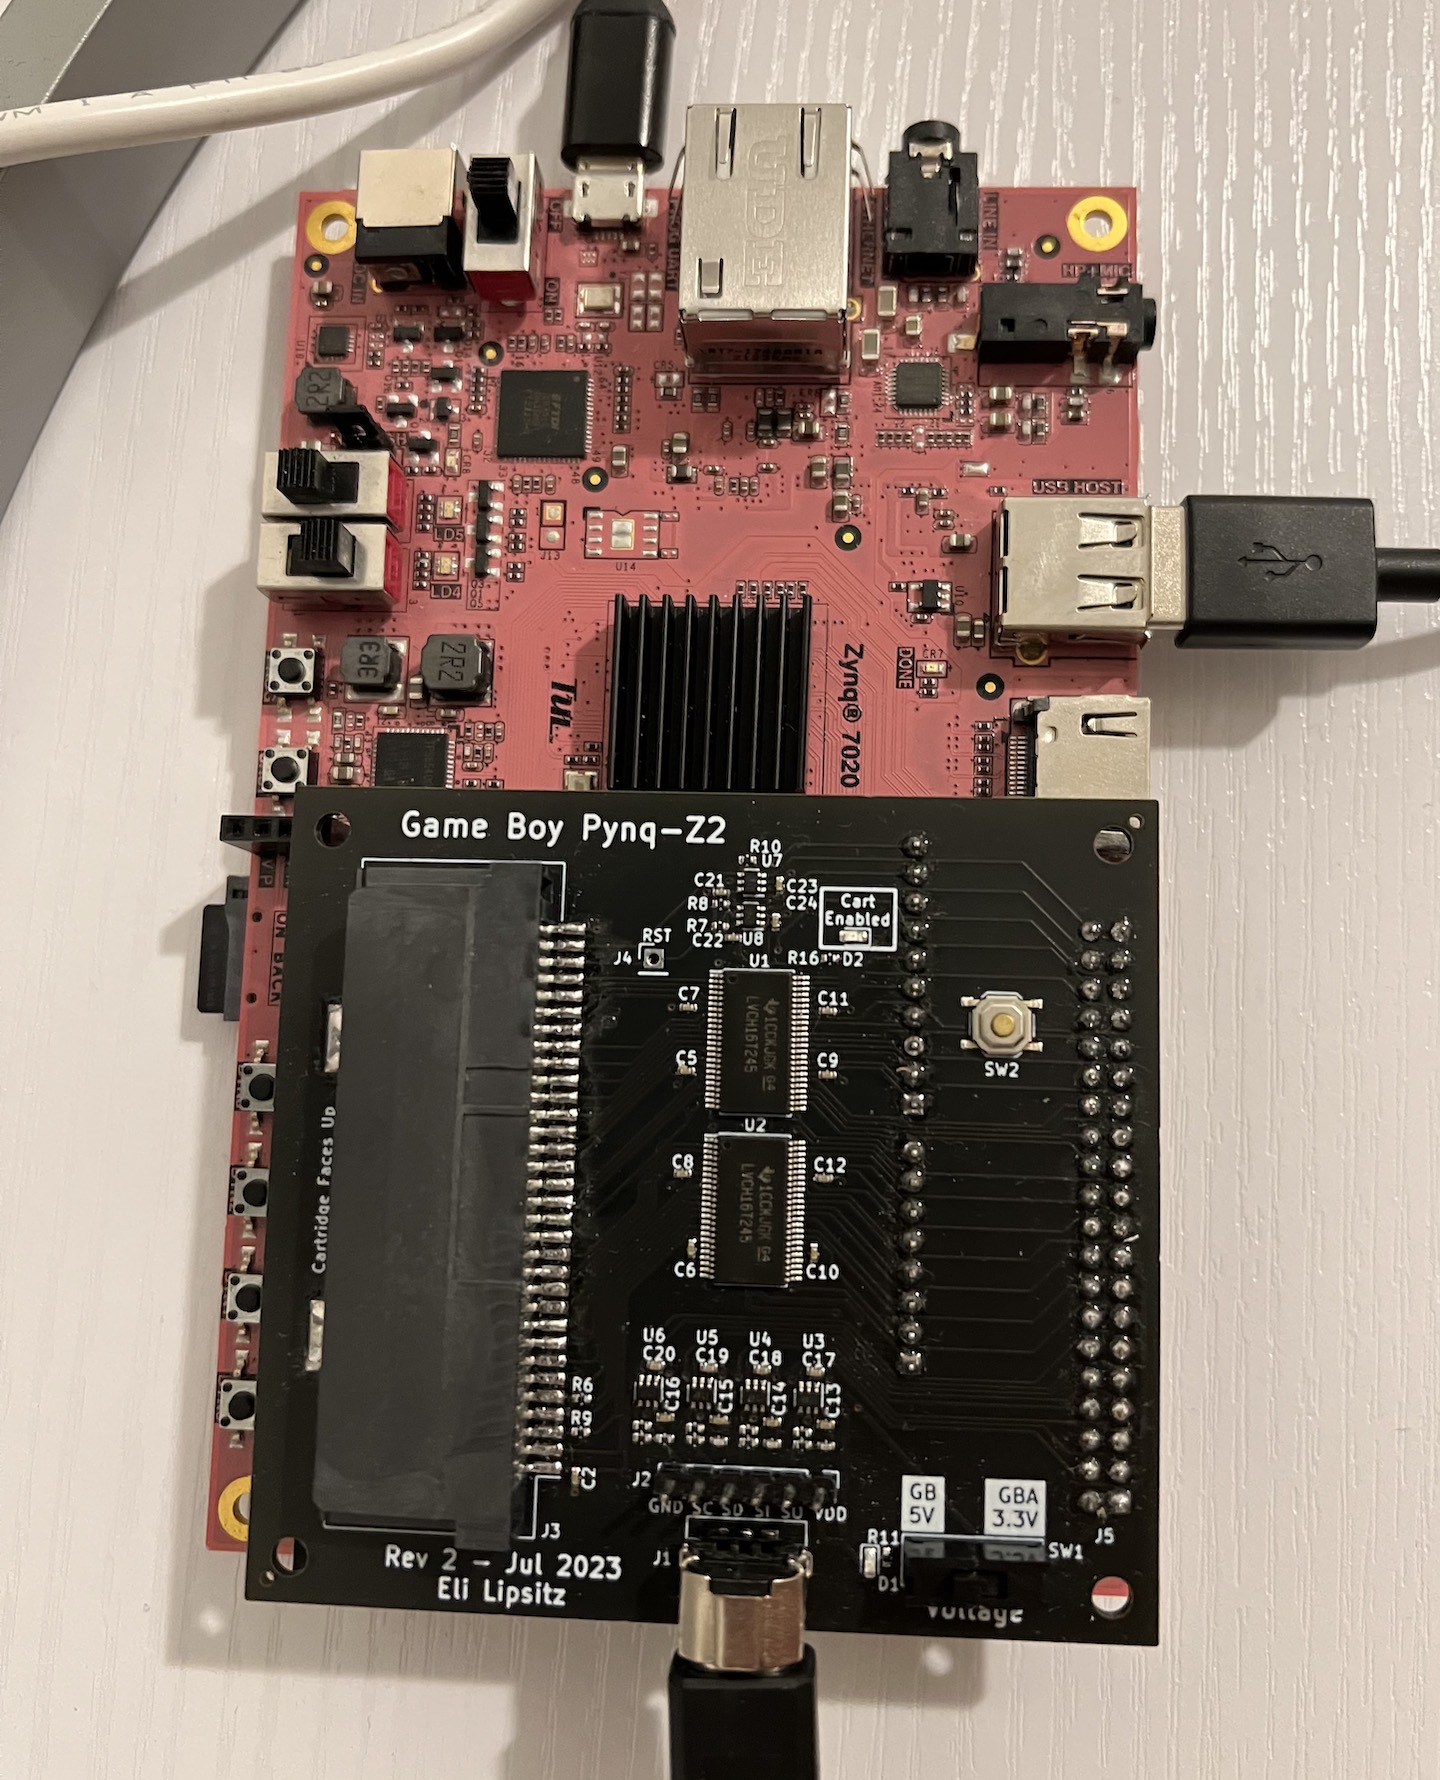
To play physical cartridges, you'll need to assemble the adapter board. KiCad board files can be found in the pcb/pynq_adapter_rev2 directory. The schematic is pre-populated with LCSC part numbers for easy assembly at JLCPCB.
You'll need to add a few components yourself. These are all easy to solder:
- A 2x20 0.1mm female pin header (e.g. this one). These are used for Raspberry Pi HATs, so they're pretty easy to find.
- A SPDT slide switch such as the EG1218, or just a 1x3 strip of 0.1mm male pin header and a jumper.
- A GBA SP slot (such as this one). These can be found quite cheaply on eBay or Aliexpress as well. They're all pretty much the same.
- If desired, a GBA link port (e.g. this one). These can also be found easily from other sources.
The other parts are relatively small, so I don't recommend hand soldering the board. However, if you want to assemble the whole thing yourself, in addition to assorted resistors and capacitors, you'll also need:
- 6x 74LVC1T45DCK 1-bit level shifters.
- 2x 74LVCH16T245DGGR 16-bit level shifters. The non 'H' version should work as well, but the 'H' (bus hold) version is preferable.
This needs the xpad and joydev drivers. Pynq Linux isn't built with them. If you're running Pynq Linux with kernel 5.15.19-xilinx-v2022.1, prebuilt kernel modules can be found in the extra directory in the repository. Otherwise, to build loadable kernel modules from scratch:
On the Pynq-Z2, go to /lib/modules/5.15.19-xilinx-v2022.1/build.
Download the right version of xpad.c
to drivers/input/joystick/xpad.c.
And do the same with joydev.c, to drivers/input/joydev.c.
The build commands in /lib/modules need to run with sudo due to permissions issues.
Do sudo make menuconfig and set:
Device Drivers --> Input device support --> Joystick interfacetoM(for 'module')Device Drivers --> Input device support --> Joysticks/gamepads --> X-box Gamepad supporttoM(for 'module')
Save and exit.
Then build the modules:
sudo make scripts
sudo make distclean
sudo make prepare
sudo make modules_prepare

sudo make -C . M=drivers/input/ joydev.ko
sudo make -C . M=drivers/input/joystick xpad.ko
Install the modules so that they'll be loaded automatically on boot.
Copy the .ko files to /usr/lib/modules/$(uname -r)/kernel/, and append
to /etc/modules:
joydev
xpad
Alternatively, use insmod <modules>.ko to load them once.
Make sure the xilinx user is in the group input:
sudo usermod -a -G input xilinx (and re-login)
Install the Python library with sudo pip3 install xbox360controller
Create the device nodes if needed: https://docs.kernel.org/input/joydev/joystick.html#device-nodes
cd /dev
rm js*
mkdir input
mknod input/js0 c 13 0
mknod input/js1 c 13 1
mknod input/js2 c 13 2
mknod input/js3 c 13 3
ln -s input/js0 js0
ln -s input/js1 js1
ln -s input/js2 js2
ln -s input/js3 js3