A Python-TKinter application with the capability to connect to running SITL instances, create its own, load WayPoint missions, inject instrumentation failures, and run multiple simulations in succession for in-depth, efficient fault testing of the ArduPilot software.
Forked from Jayson Boubin's FaultInjector, developed for AFIT in 2016 (original notes here), this version of FaultInjector adds much-needed functionality and modernizes the software for Python3.
With this UAV Fault Injection, it is easy to test many mission scenarios in varied environments, making it a robust UAV testing and verification tool.
To run FaultInjector, simply download all of the required programs and packages, you'll need to do some setup on your own machine.
First, change the path variable in the FaultInjector.py script to the location
of your missions folder. This ensures that Python will be able to find where you
put all your missions.
To load more custom missions, simply add the waypoint file to your mission folder.
Then, navigate to the folder that contains FaultInjector.py in a Command Prompt, and
type
python3 FaultInjector.py
FaultInjector requires Python3 or greater, and the following packages:
os, signal, psutil, dronekit, tkinter, time, __thread, sys, struct, curses, pymavlink, pymavlink.dialects.v10
To get these packages, it's easiest to use pip3 with Python3.
FaultInjector makes use of ArduPilot SITL. I have a custom version of ArduPilot that uses different locations as its default and would recommend cloning my fork if you're at CICATA.

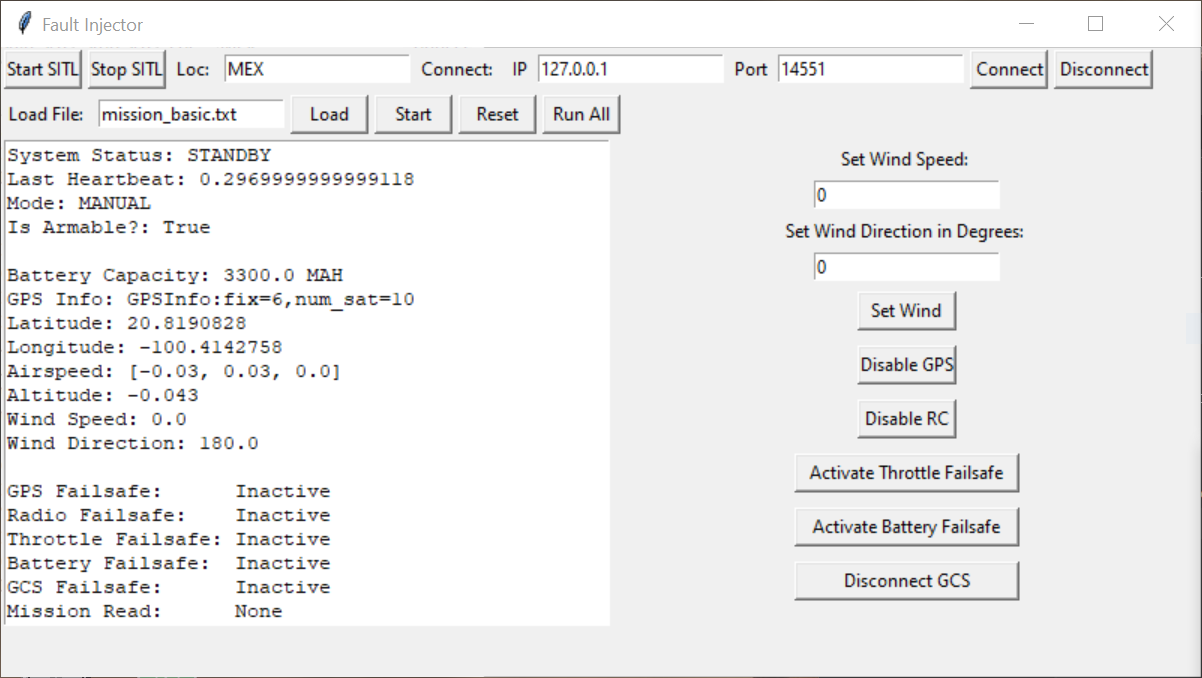
This version of FaultInjector includes the ability to start and stop Software-in-the-Loop Simulations (SITL).
To start a new instance of MavLink's SITL, simply press 'Start SITL' in the
upper left toolbar. This will run sim_vehicle.py with the default options in
the location specified by the text box. After a while, a MAVProxy window should
appear running the simulation with the default parameters.
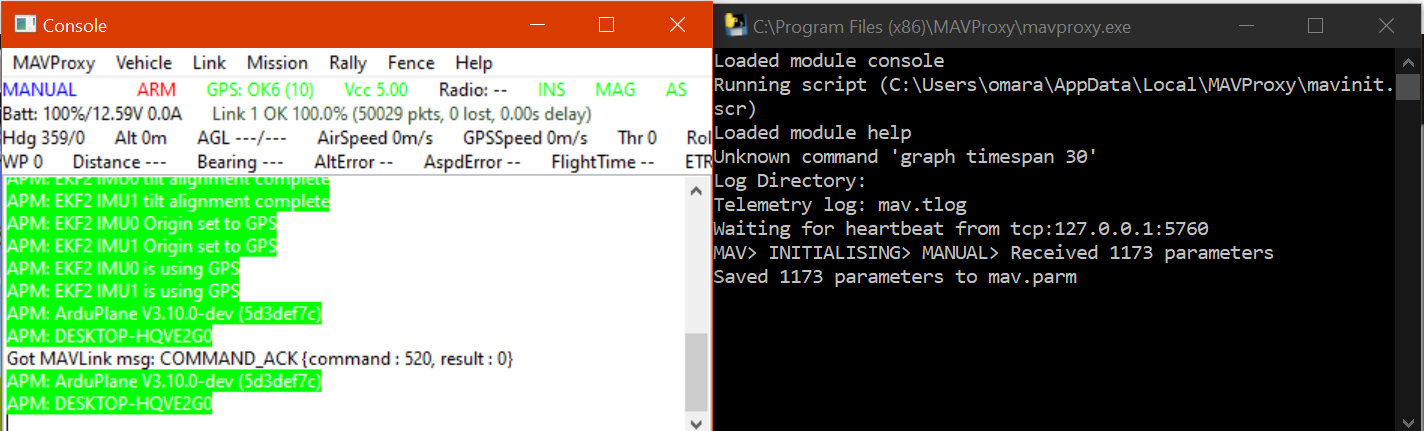 To connect to the simulation, simply press 'Connect' and you'll be good to go.
To add a named location to ArduPilot, simply navigate to
your_ardupilot_folder/Tools/autotest and modify the locations.txt file
in the specified manner. Restart FaultInjector to be able to enter that location
in the box.

This version of FaultInjector allows for custom missions to be loaded.
To load custom missions in FaultInjector, there are two options:
put your Mission File (saved as a text file) in the following format
into the missions folder.

FaultInjector will automatically recenter the mission around the home point of the drone itself using the mission-converter script I wrote for this program.
This script is currently only tested with a few types of entries; if there are issues, please let me know.
To load one mission, simply press the 'Load' button when FaultInjector is connected to a MAVLink instance. Once the waypoints have been converted, press 'Start'.
To run all the missions in the missions folder, press 'Run All'. This will sequentially start and stop SITL instances, load missions, and run them. The termination condition is reaching the final waypoint.
With the original FaultInjector code, you can:
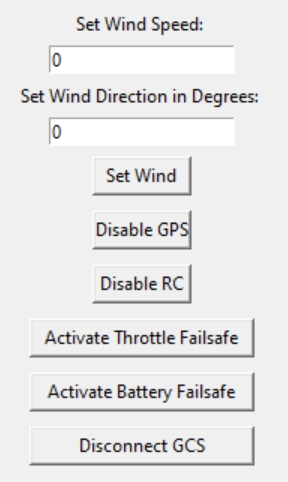
- Add wind and change its direction
- Simulate failures of GPS and RC
- Activate failsafes for throttle and battery
- Simulate a disconnected ground control system
This is useful for testing because it becomes much easier to determine the fault tolerance of your autopilot. By running multiple missions in succession with various failures, it is easy to test how well your autopilot will respond to con-ideal conditions. Previously, simulations were done in mostly ideal environments; by enhancing the functionality of the original FaultInjector, we have developed a robust SITL testing environment.
Adding connections works the same way it does with running the sim_vehicle.py script: you can connect via TCP or UDP using your favorite ground control software and flight simulation visualizations.
For more information, check out my in-depth guide over here.


