学习视频(B站):https://www.bilibili.com/video/BV1Mt4y1i7JW
系列文章:https://blog.csdn.net/tian330726/article/details/112910508
- Nacos 服务注册与发现
- Ribbon 负载均衡
- Sentinel 流量控制
- RockerMQ 消息的生产和消费
- Gateway 路由映射和限流
- Seata 分布式事务
创建父工程,作为项目的大环境,微服务的各个组件作为子项目,继承父项目。
首先确保 JDK、Maven、IDEA 安装正常.
Maven 推荐配置文件 maven的settings.xml文件
父项目根据 Spring Initializr 自动创建项目,并添加 spring-cloud-dependencies 和 spring-cloud-alibaba-dependencies 的依赖,注意踩坑点:pom 中的那几个依赖先放到springboot自带的 dependencies 中,然后再添加到 DependentDependencyManagement 中,否则会导致依赖下载不下来的问题。
具体pom.xml文件,参看代码: https://github.com/tyronczt/spring-cloud-alibaba-learning/blob/master/pom.xml
官网安装包下载地址:https://github.com/alibaba/nacos/releases/tag/1.2.1
免费下载地址:https://download.csdn.net/download/tian330726/14150203
此处使用 Windows 环境,解压zip文件,进入bin目录,双击 startup.cmd ,会弹出命令框启动nacos程序,如果弹出后立即消失,记得检查下 JAVA_HOME 是否配置!
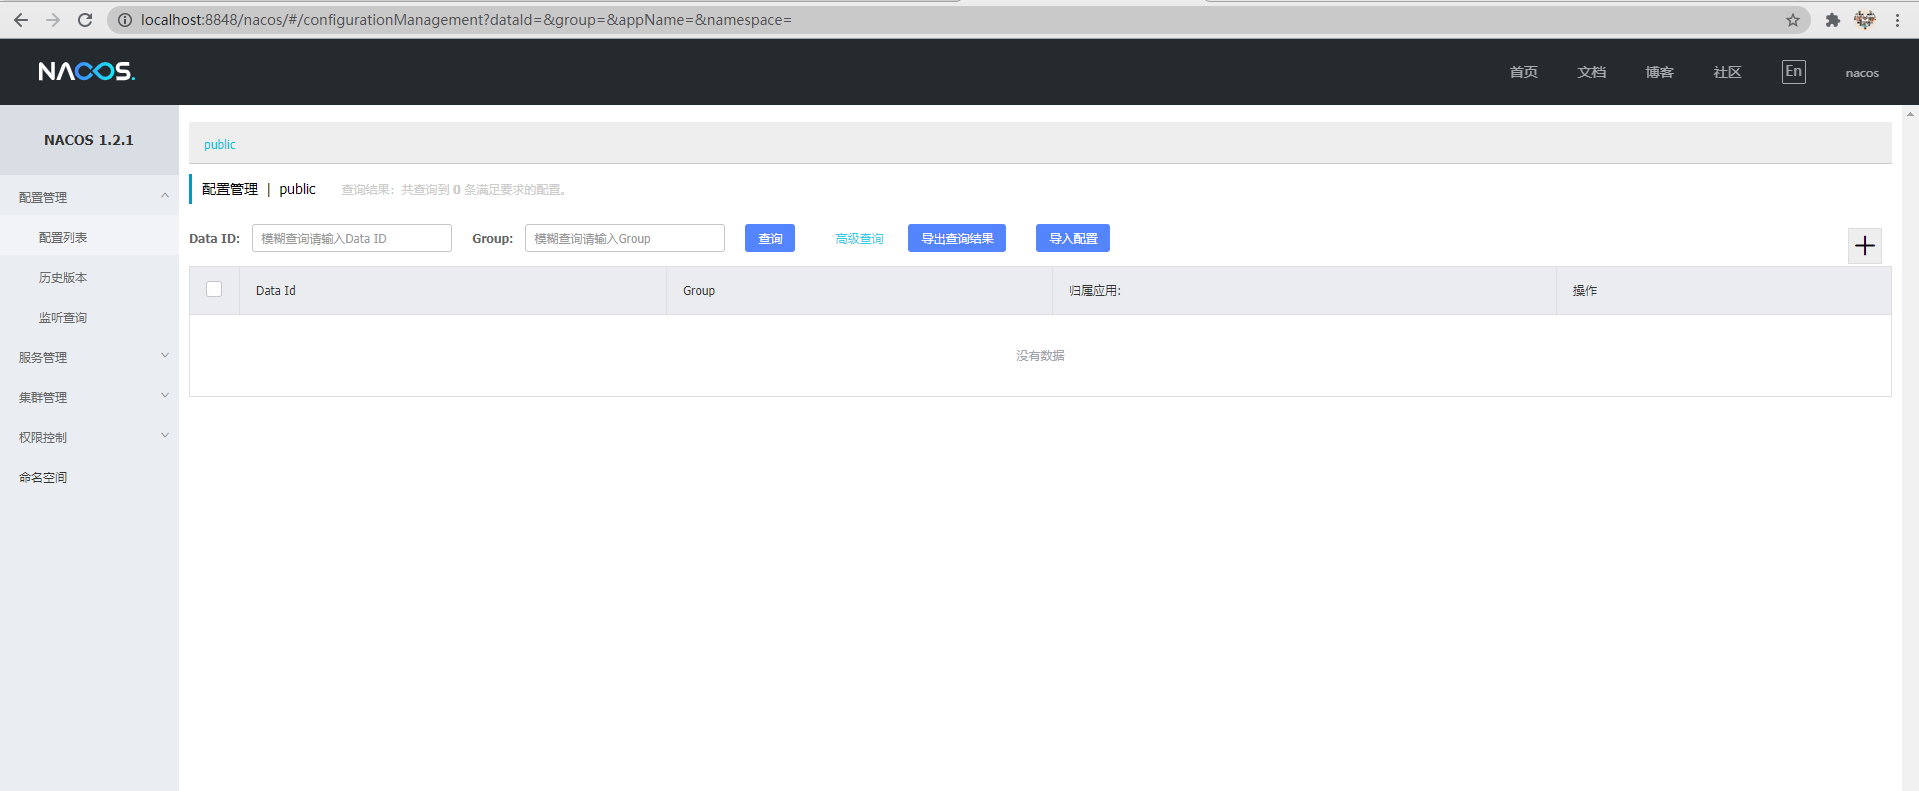
此时访问地址:http://localhost:8848/nacos
继承父项目,并加入nacos-discovery 的依赖
<parent>
    <groupId>com.tyron</groupId>
    <artifactId>springcloudalibabademo</artifactId>
    <version>0.0.1-SNAPSHOT</version>
</parent>

<dependency>
    <groupId>com.alibaba.cloud</groupId>
    <artifactId>spring-cloud-starter-alibaba-nacos-discovery</artifactId>
    <version>2.2.1.RELEASE</version>
</dependency>
配置application.yml
spring:
cloud:
nacos:
discovery:
server-addr: localhost:8848
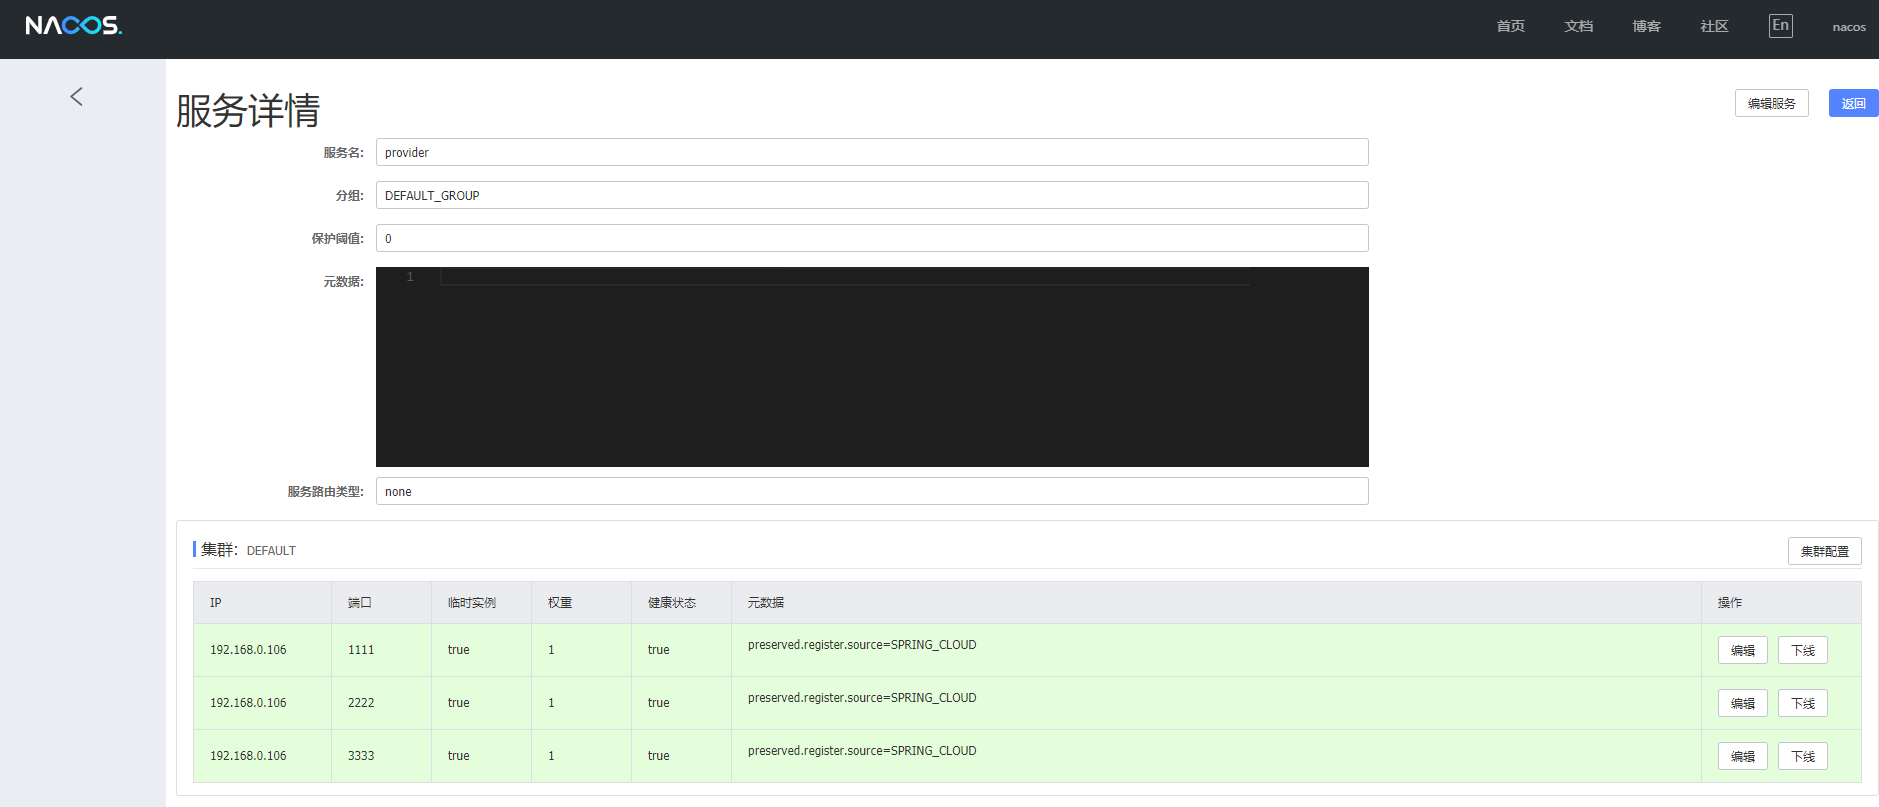
application:
name: provider
server:
port: 1111/2222/3333启动项目时,Edit Configurations,将 Allow parallel run 的选项勾上,最终:
pom.xml文件同 provider 项目类似
新建 ConsumerController,对服务注册情况进行查看
@RestController
public class ConsumerController {
@Autowired
private DiscoveryClient discoveryClient;
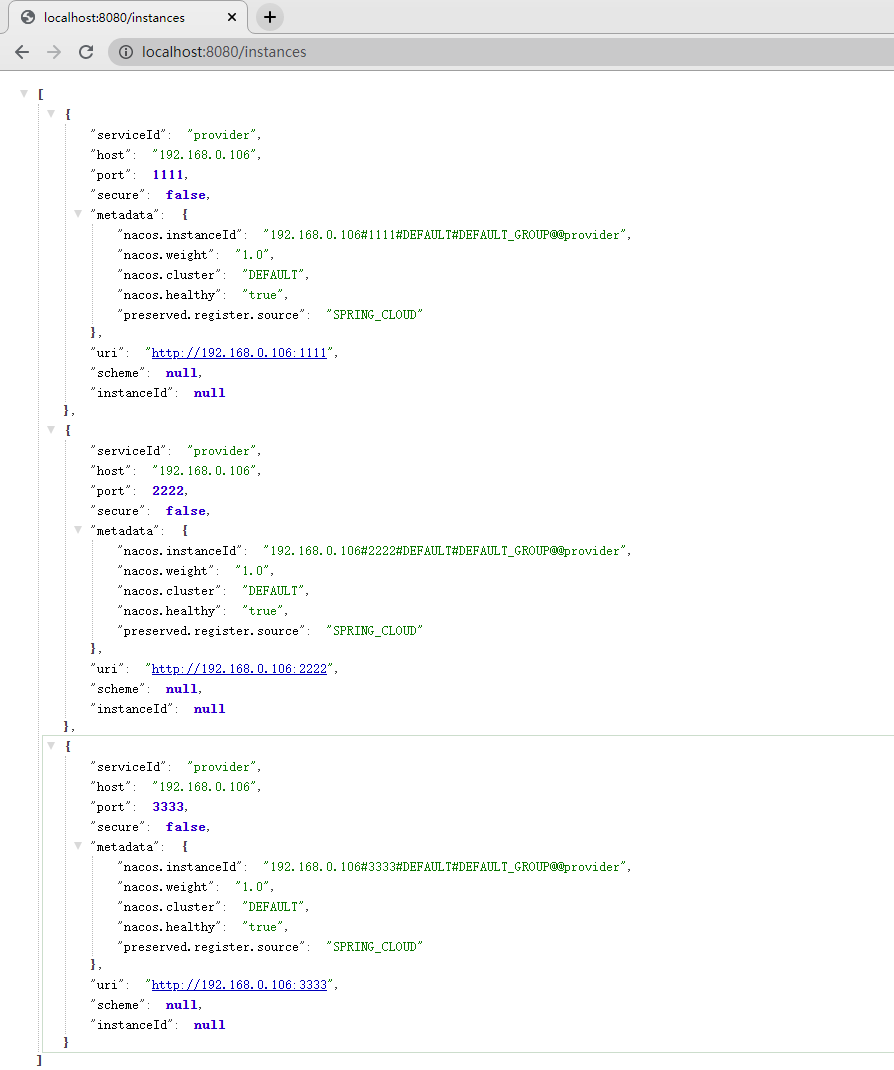
@GetMapping("/instances")
private List<ServiceInstance> instances(){
return this.discoveryClient.getInstances("provider");
}
}启动后浏览器查看
provider 提供服务
//SPEL
@Value("${server.port}")
private String port;

@GetMapping("/index")
public String index() {
	return port;
}
consumer 配置 RestTemplate
@Configuration
public class ConsumerConfig {

    @Bean
    public RestTemplate restTemplate(){
        return new RestTemplate();
    }
}
ConsumerController 随机调用 provider 服务
@Autowired
private RestTemplate restTemplate;

@GetMapping("/index")
public String index() {
    List<ServiceInstance> provider = discoveryClient.getInstances("provider");
    int index = ThreadLocalRandom.current().nextInt(provider.size());
    String url = provider.get(index).getUri() + "/index";
    return "consumer随机远程调用provier:" + this.restTemplate.getForObject(url, String.class);
}简介:
Spring Cloud Ribbon 是一个基于 HTTP 和 TCP 的客户端负载均衡工具,它基于 Netflix Ribbon 实现。通过 Spring Cloud 的封装,可以让我们轻松地将面向服务的 REST 模版请求自动转换成客户端负载均衡的服务调用。
由于在consumer的pom中已经引入 spring-cloud-starter-alibaba-nacos-discovery , 它已经引入ribbon:
<dependency>
    <groupId>org.springframework.cloud</groupId>
    <artifactId>spring-cloud-starter-netflix-ribbon</artifactId>
    <version>2.2.2.RELEASE</version>
    <scope>compile</scope>
</dependency>
所以只需要在 restTemplate 的 bean 中添加 @LoadBalanced 注解,即可以使用ribbon
@Configuration
public class ConsumerConfig {

    @Bean
    @LoadBalanced
    public RestTemplate restTemplate(){
        return new RestTemplate();
    }

}
ConsumerController 调用接口,默认采用 轮询 方式
@RestController
public class ConsumerController {

    @Autowired
    private RestTemplate restTemplate;

    @GetMapping("/index")
    public String index() {
        return "consumer远程调用provier:" + this.restTemplate.getForObject("http://provider/index", String.class);
    }
}
设置调用方式为 随机【只需在yml配置文件中添加已经定好的规则即可】:
provider:
  ribbon:
    NFLoadBalancerRuleClassName: com.netflix.loadbalancer.RandomRule
设置调用方式为 Nacos 权重
@Slf4j
public class NacosWeightedRule extends AbstractLoadBalancerRule {

    @Autowired
    private NacosDiscoveryProperties nacosDiscoveryProperties;

    @Override
    public void initWithNiwsConfig(IClientConfig iClientConfig) {
        //读取配置文件
    }

    @Override
    public Server choose(Object o) {
        ILoadBalancer loadBalancer = this.getLoadBalancer();
        BaseLoadBalancer baseLoadBalancer = (BaseLoadBalancer) loadBalancer;
        //获取要请求的微服务名称
        String name = baseLoadBalancer.getName();
        //获取服务发现的相关API
        NamingService namingService = nacosDiscoveryProperties.namingServiceInstance();
        try {
            Instance instance = namingService.selectOneHealthyInstance(name);
            log.info("选择的实例是port={},instance={}",instance.getPort(),instance);
            return new NacosServer(instance);
        } catch (NacosException e) {
            e.printStackTrace();
            return null;
        }
    }
}Sentinel 是面向分布式服务架构的流量控制组件,主要以流量为切入点,从流量控制、熔断降级、系统自适应保护等多个维度来帮助您保障微服务的稳定性。
如果在A的链路上某个或几个被调用的子服务不可用或延迟较高,则会导致调用A服务的请求被堵住。堵住的请求会消耗占用掉系统的线程、io等资源,当该类请求越来越多,占用的计算机资源越来越多的时候,会导致系统瓶颈出现,造成其他的请求同样不可用,最终导致业务系统崩溃,又称:雪崩效应。
解决方案
- 设置线程超时
- 设置限流
- 熔断器 Sentinel、Hystrix
- 降级:在高并发情况下,防止用户一直等待,使用服务降级方式(直接返回一个友好的提示给客户端,调用fallBack方法)
- 限流:服务限流就是对接口访问进行限制,常用服务限流算法令牌桶、漏桶,计数器也可以进行粗暴限流实现。
- 熔断:熔断机制目的为了保护服务,在高并发的情况下,如果请求达到一定极限(可以自己设置阔值)如果流量超出了设置阈值,让后直接拒绝访问,保护当前服务。
- provider 的 pom.xml 引入依赖
<dependency>
    <groupId>com.alibaba.cloud</groupId>
    <artifactId>spring-cloud-starter-alibaba-sentinel</artifactId>
    <version>2.2.1.RELEASE</version>
</dependency>

<dependency>
    <groupId>org.springframework.boot</groupId>
    <artifactId>spring-boot-starter-actuator</artifactId>
</dependency>- application.yml 配置
# 配置限流路径
management:
  endpoints:
    web:
      exposure:
        include: "*"
# sentinel的控制面板路径
spring:
  cloud:
    sentinel:
      transport:
dashboard: localhost:8080- 下载 Sentinel 控制台,解压,启动,下载地址:https://github.com/alibaba/Sentinel/releases
用户名/密码:sentinel/sentinel
当访问provider项目中index接口时 [http://localhost:3333/index],sentinel会将流量实时记录,每十秒刷新:


一般阈值类型选择QPS(Query Per Second每秒查询率)
选择单机阈值为1时,即表示每秒查询超过1时,即被流量限制,默认提示:Blocked by Sentinel (flow limiting)
流控模式为 **关联 **时,输入关联资源,如list,即效果为:当list超过阈值时,index限制访问
模拟访问list接口:
public static void main(String[] args) throws InterruptedException {
    RestTemplate restTemplate = new RestTemplate();
    for (int i = 0; i < 1000; i++) {
        restTemplate.getForEntity("http://localhost:3333/list",String.class);
        Thread.sleep(200);
    }
}
效果:

主要对service或dao层的接口进行限流保护。
pom.xml 添加依赖
<dependency>
    <groupId>com.alibaba.csp</groupId>
    <artifactId>sentinel-core</artifactId>
    <version>1.7.1</version>
</dependency>

<dependency>
    <groupId>com.alibaba.csp</groupId>
    <artifactId>sentinel-web-servlet</artifactId>
    <version>1.7.1</version>
</dependency>
修改配置文件application.yml
spring:
	cloud:
        sentinel:
          filter:
            enabled: false
添加配置类
@Configuration
public class FilterConfiguration {

    @Bean
    public FilterRegistrationBean registrationBean(){
        FilterRegistrationBean registrationBean = new FilterRegistrationBean();
        registrationBean.setFilter(new CommonFilter());
        registrationBean.addUrlPatterns("/*");
        registrationBean.addInitParameter(CommonFilter.WEB_CONTEXT_UNIFY,"false");
        registrationBean.setName("sentinelFilter");
        return registrationBean;
    }
}
Service层
@Service
public class ProviderService {

    @SentinelResource("provider")
    public String provider(){
        return "ProviderService";
    }
}
Controller层
@Autowired
private ProviderService providerService;

@GetMapping("/provider1")
public String provider1() {
	return providerService.provider();
}

@GetMapping("/provider2")
public String provider2() {
    return providerService.provider();
}
配置规则

