Great Scott!
The DeLorean's time circuits have been damaged! I bet Biff was in there messing around. In order to get you back to your own time, we'll need to build a new set of time circuits and rig them up to the DeLorean. I think that pocket computer you showed me earlier will do nicely. If you can build a program with an interface for the time circuits, I can give you the mathematical formulas that make time travel possible. All you have to do is enter them into that newfangled gadget of yours and you'll be on your way back to the future!
Time is a factor here. 😉 We've only got 24 hours until lightning is due to strike the clock tower to provide the DeLorean with the 1.21 gigawatts of power needed to activate the time circuits. You've got to get the program built and your pocket computer rigged to the DeLorean before then.
- Doc Brown
- Understand how a custom delegate can be used to pass data between objects.
- Be comfortable using the
preparemethod to intercept an in-progress storyboard segue and pass data to the receiving view controller. - Know how to use a timer to execute code after a specified interval.
- Be able to present an alert controller to show relevant messages to the user.
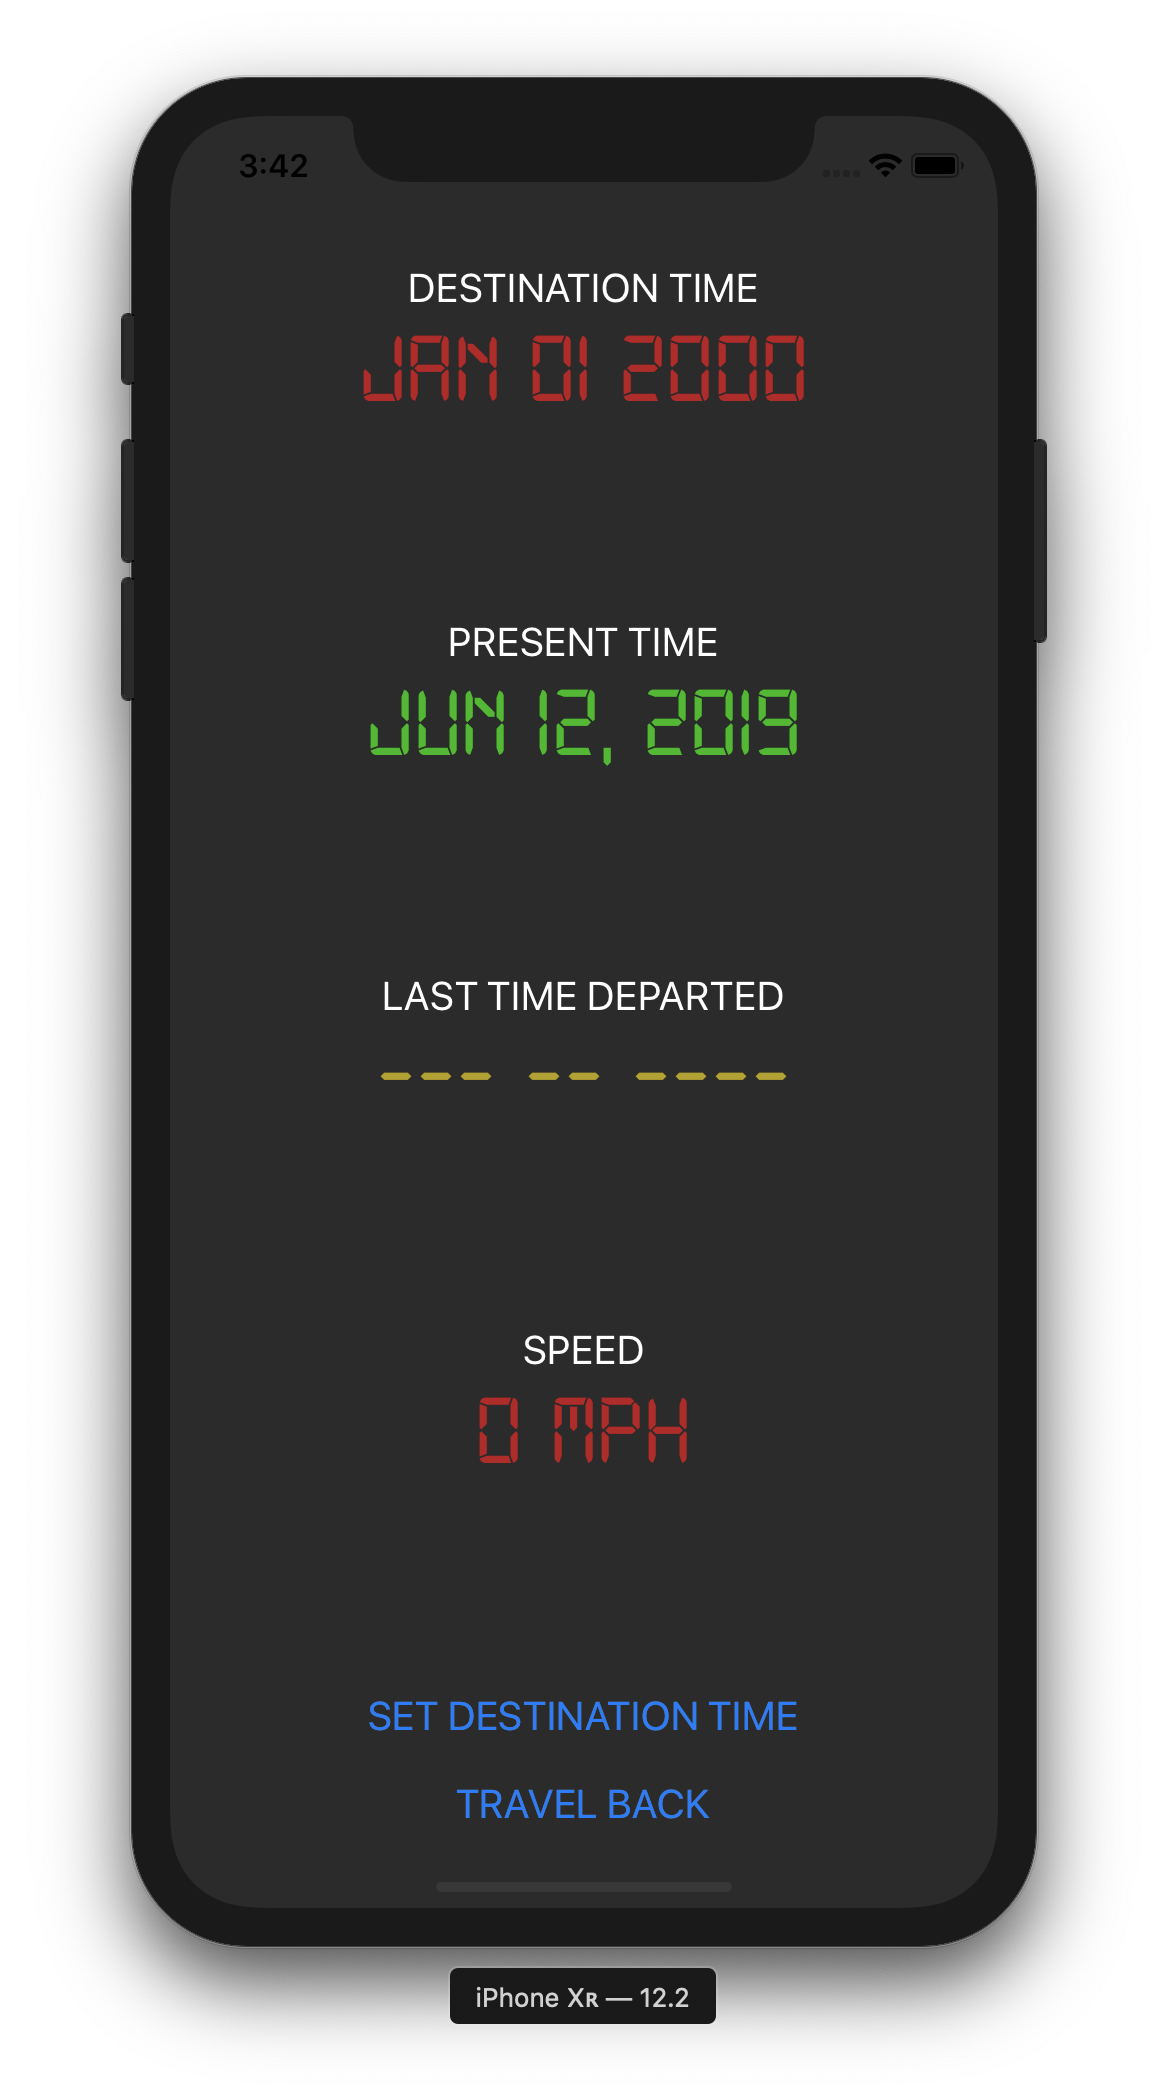
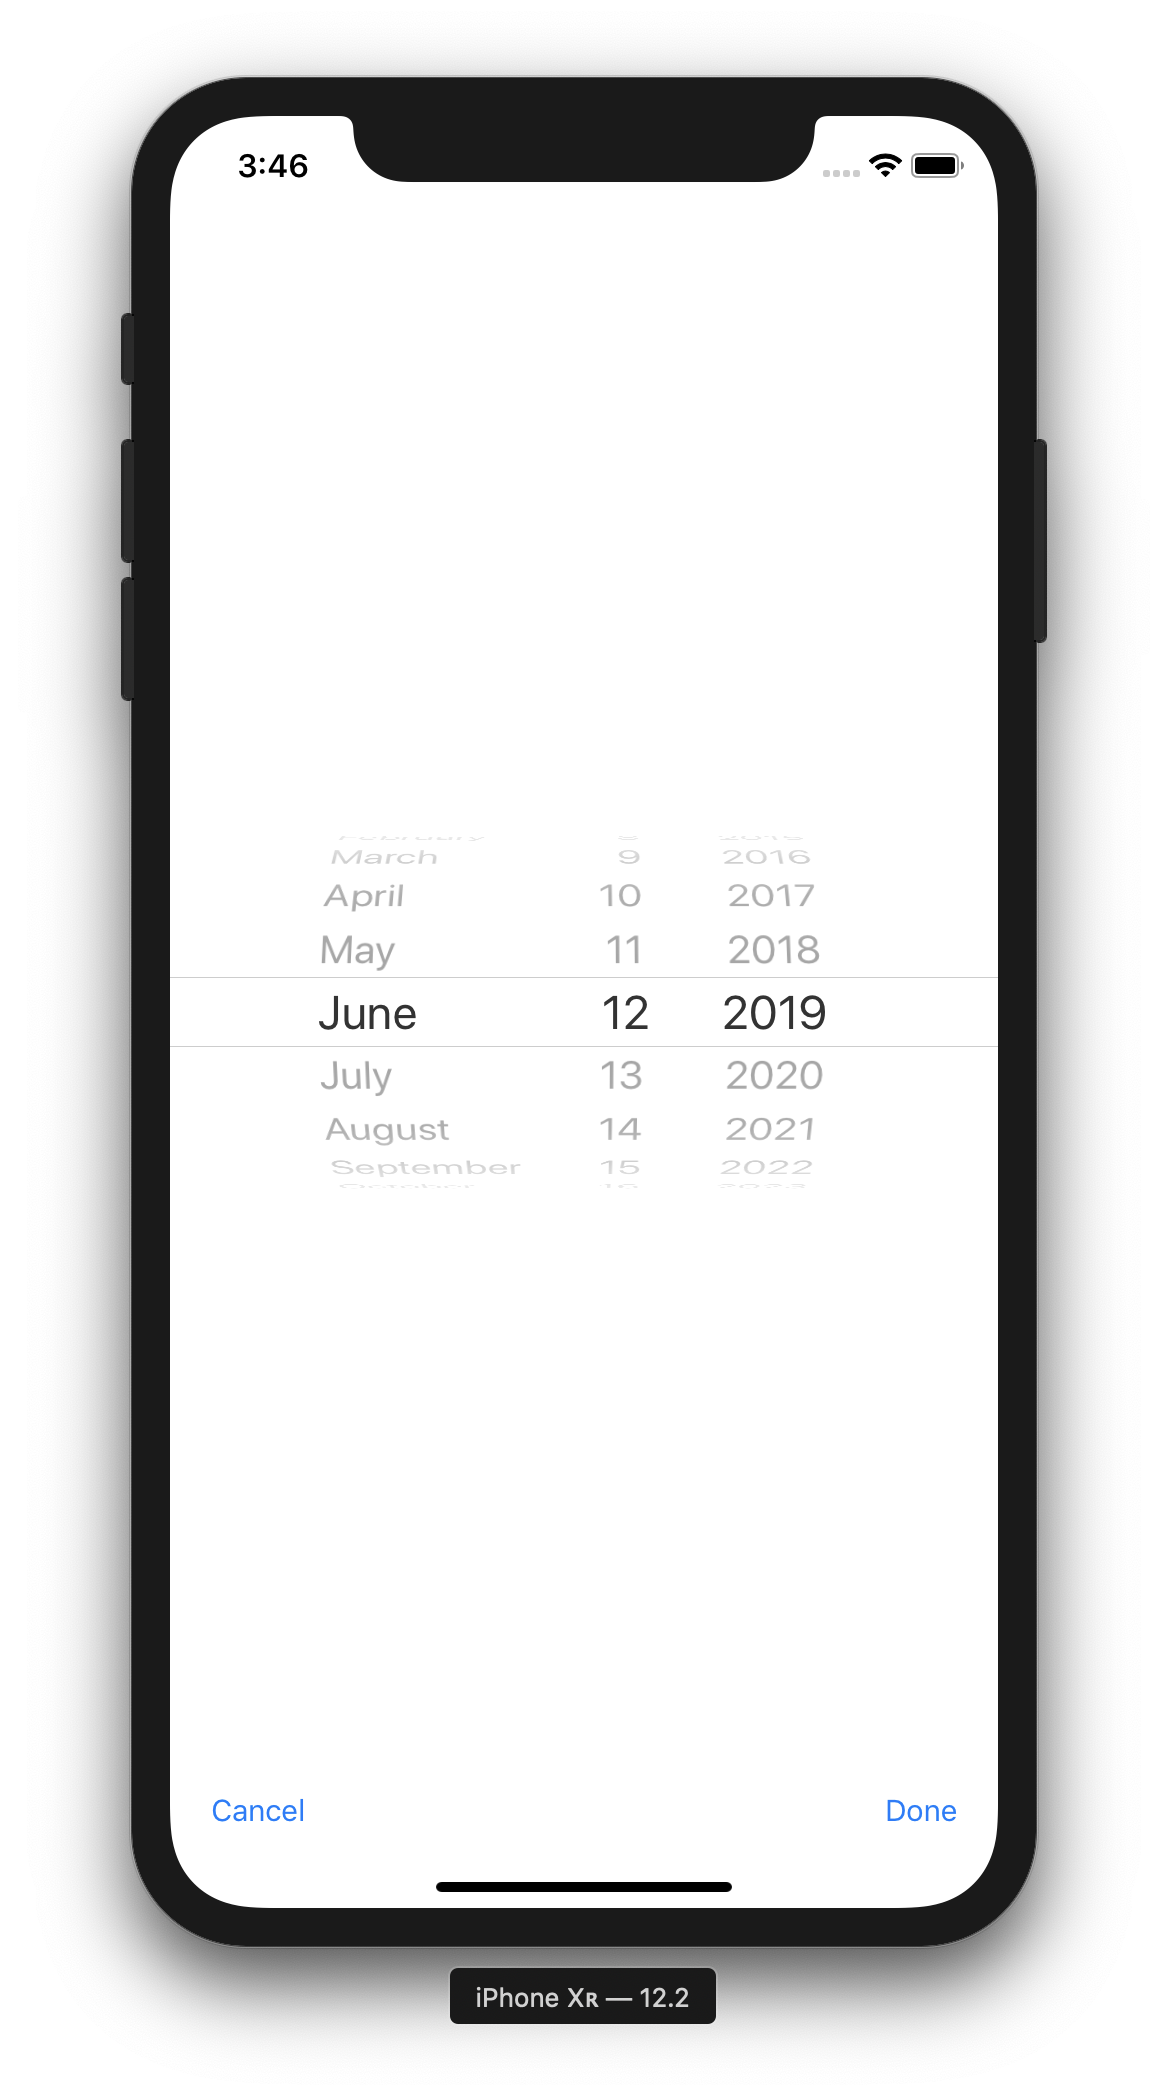
At the bottom of this README, there are some screenshots to illustrate how the finished app should look more or less.
- Create a project called
OutaTime. Use the single view template. - Create a class called
TimeCircuitsViewController, and another one calledDatePickerViewController.
- Drag two view controller objects into your storyboard canvas and set their custom classes to match the two classes you just created above.
- In the time circuits view, create a UI that matches the screenshot below (recommend you use a vertical stack view to make the subviews align nicely).
- Drag the
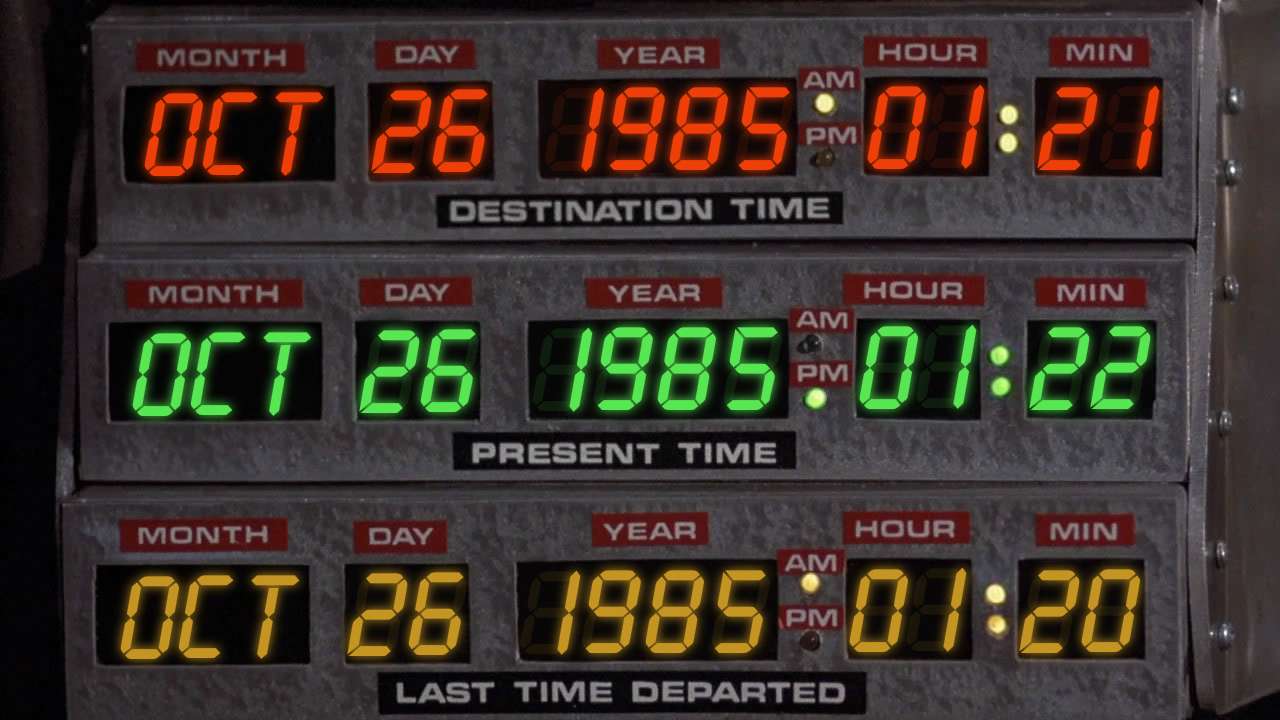
digital-7.ttffile from this repo into your project so you can use it. Once added, the font should be available from any font picker in the storyboard. - Feel free to experiment a bit with the UI's look. Take inspiration from the original time circuits used in the movie, but play around with colors and arrangments to make it your own.
- Drag the
- Add
IBOutlets to yourTimeCircuitsViewControllerfor relevant subviews from the storyboard. Also wire them up to the appropriate UI element. Think about which elements on screen you'll want to modify from your code. Those elements will each need an outlet in Swift. - Add 1
IBActionto theTimeCircuitsViewControllerfor when thetravel backbutton is tapped. Wire it up to thetouch up insideevent of the button in the storyboard. - Create an
IBOutletfor the date picker, andIBActions for the two buttons in theDatePickerViewController, and wire them to the appropriate elements in the view. - Connect the time circuits view to the date picker view with a segue. Have it originate from the
set destination timebutton, and choose a modal presentation. Set the identifier toModalDestinationDatePickerSegue.
- Create a computed property called
dateFormatterthat is of typeDateFormatterand initialize it with correct formatting rules (see how we did this in the guided project for help. Use this link to decide what formatting symbols to use). - Set the label that shows the present time on screen to the current date using the date formatter.
- Create a variable property to store the current speed and set it to 0.
- Set the speed label to show the current speed, with "MPH" appended to the end of the string.
- Set the label showing the last time departed to
"--- -- ----".
- Declare a protocol that will be used by this class' delegate. You might called it something like
DatePickerDelegate. Declare a single function requirement inside the protocol and call itdestinationDateWasChosenand have it take aDateas an argument. - Inside the
DatePickerViewControllerclass, declare it to have an optional variable calleddelegateand set the type toDatePickerDelegate.
- Create an extension of the class at the bottom of the file and make the class conform to the protocol from the date picker view controller (That means listing it after the VC's class name and at least stubbing out the required delegate functions).
- For the
cancelIBAction, simply dismiss the view by callingdismiss(animated: true, completion: nil). This will transition the view away and reveal the time circuits view underneath. - For the
doneIBAction, call the delegate method to inform the delegate of the new date chosen by the user. Also call that same dismiss method from above after the delegate method call. This will inform the delegate of the change, and then dismiss the view, revealing the time circuits underneath.
- Set the
DatePickerViewControllerobject's delegate as theTimeCircuitsViewControllerobject in thepreparemethod. - Set the
destinationTimeLabelwith the date received from the picker view controller using the date formatter object in thedestinationDateWasChosenmethod. - Call a method
startTimerin theIBActionthat is called when the travel back button is tapped. - In the
startTimermethod, initialize the timer object for a 0.1 sec time interval. Set it to fire a method that updates the speed label. - In the
resetTimermethod, stop the timer (there is a method you can call to do this, see our project from today) and then set it to nil. - In the
updateSpeedmethod:- Check if the current speed variable has reached 88. If we have NOT:
- Increment the current speed variable by 1.
- Update the speed label with the current speed.
- Once the speed has reached at least 88, stop the timer.
- Update the value of the
lastTimeDepartedLabelwith the value from thepresentTimeLabel. - Update the value of the
presentTimeLabelwith the value from thedestinationTimeLabel. - Reset the value of the current speed variable to 0.
- Show an alert view with a title "Time Travel Successful" and a message that says "You're new date is [insert present time here].".
- Update the value of the
- Check if the current speed variable has reached 88. If we have NOT:


