Sample Application using using the new features of Firebase - This is NOT using AngularFire
- email login and account creation
- simple data object database and retriveal in the database
- simple image object storage and retriveal in storage
- application uses Image-Picker Plugin to select images to upload
Install the plugin
cordova plugin add cordova-plugin-image-picker
Follow the instructions for installing ngCordova http://ngcordova.com/docs/install/
I am using the fetch polyfill in the application, needed it when testing in browser on Safari
When you are all set up, the hed section in index.html file should look similar to this
  <!-- ionic/angularjs js -->
  <script src="lib/ionic/js/ionic.bundle.js"></script>

  <script src="lib/ngCordova/dist/ng-cordova.js"></script>
  <!-- cordova script (this will be a 404 during development) -->
  <script src="cordova.js"></script>

  <script src="lib/whatwg-fetch/fetch.js"></script>

  <!-- your app's js -->
  <script src="js/app.js"></script>
  <script src="js/controllers.js"></script>
  <script src="js/services.js"></script>

<script src="https://www.gstatic.com/firebasejs/live/3.0/firebase.js"></script>We do it ONCE in the run block of the application
angular.module('starter', ['ionic', 'starter.controllers', 'starter.services', 'ngCordova'])

  .run(function ($ionicPlatform, FirebaseDB, $rootScope, $state) {

    FirebaseDB.initialize();

    // for authentication, managing the state if error..
    $rootScope.$on('$stateChangeError',
      function (event, toState, toParams, fromState, fromParams, error) {

        // if the error is "NO USER" the go to login state
        if (error === "NO USER") {
          event.preventDefault();
          $state.go('login', {});
        }
      });

})Please use your own keys...
I will discuss the specifics when covering authentication, but for the working with data I initialize the Firebase App and Firebase Storage and save them as properties of the factory to use later
  .factory('FirebaseDB', function ($q, $state, $timeout) {
    var instance, storageInstance, unsubscribe, currentUser = null
    var initialized = false

    return {
      initialize: function () {

        // Not initialized so... initialize Firebase
        var config = {
            //SET YOUR CONFIG BLOCK HERE
        };

        // initialize database and storage
        instance = firebase.initializeApp(config);
        storageInstance = firebase.storage();

        // listen for authentication event, dont start app until I
        // get either true or false
        unsubscribe = firebase.auth().onAuthStateChanged(function (user) {
          currentUser = user
          console.log("got user..", currentUser);
        })
      },
      /**
       * return database instance
       */
      database: function () {
        return instance.database()
      },
      /**
      * return storage instance
      */
      storage: function () {
        return storageInstance
      },
      isAuth: function () {
        return $q(function (resolve, reject) {
          return firebase.auth().currentUser ? resolve(true) : reject("NO USER")
        })
      },
      /**
       * return the currentUser object
       */
      currentUser: function () {
        debugger;
        return firebase.auth().currentUser
      },

      /**
       * @param  {any} _credentials
       */
      login: function (_credentials) {
        return firebase.auth().signInWithEmailAndPassword(_credentials.email, _credentials.password)
          .then(function (authData) {
            currentUser = authData
            return authData
          })
      },
      /**
       * @param  {any} _credentials
       */
      createUser: function (_credentials) {
        return firebase.auth().createUserWithEmailAndPassword(_credentials.email, _credentials.password).then(function (authData) {
          currentUser = authData
          return authData
        }).then(function (authData) {

          // add the user to a seperate list
          var ref = instance.database().ref('Trash-Talk/users');
          return ref.child(authData.uid).set({
            "provider": authData.providerData[0],
            "avatar": (authData.profileImageURL || "missing"),
            "displayName": authData.email
          })

        })
      }
    }
})How this works...
- Go to default route,
tab.chats, when app starts up - If I have user, then I am happy and I list the data
- If I dont have user then resolve fails and login state,
login, is transistioned to - In the login state, initialize the app and check for a user or not using the
FirebaseDBService calling theinitialize()function - If I have a user then list state,
tab.chats, is transistioned to, otherwise display login screen fromloginstate
coming soon...
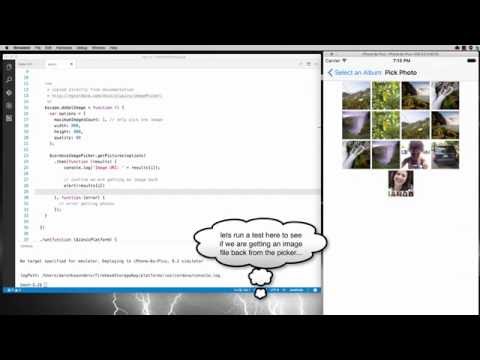
First we use the image picker plugin to get the data
function pickTheImage() {
  var options = {
    maximumImagesCount: 1,
    width: 320,
    quality: 80
  };

  return $cordovaImagePicker.getPictures(options)
    .then(function (results) {
      for (var i = 0; i < results.length; i++) {
        console.log('Image URI: ' + results[i]);
      }
      return results[0];

    }, function (error) {
      // error getting photos
    });
}
returns a promise when resolved, we have the path to the selected image which is what is passed into the following function processImage()
Saving the image is two steps, save the image in the storage, and keep a reference to the image in the database
function processImage(_image, _title) {

  // Read image to get the blob for saving...
  return fetch(_image).then(function (_data) {
    return _data.blob()
  }).then(function (_blob) {

  // (1) SAVE THE IMAGE
    uploadTask = FirebaseDB.storage().ref('images/' + _title + '.jpg').put(_blob)

    uploadTask.on('state_changed', function (snapshot) {
      // Observe state change events such as progress, pause, and resume
    }, function (error) {
      // Handle unsuccessful uploads
      return error
    }, function () {
      // Handle successful uploads on complete..
      var downloadURL = uploadTask.snapshot.downloadURL;

      // (2) SAVE A REFERENCE
      var ref = FirebaseDB.database().ref('Trash-Talk/images');
      ref.push({
        'imageURL': downloadURL,
        'owner': FirebaseDB.currentUser().uid,
        'when': new Date().getTime(),
      });

      return downloadURL
    });
  })
}coming soon...