Coder Social home page Coder Social logo

ankanbhunia / pidm Goto Github PK

View Code? Open in Web Editor NEW
472.0 22.0 59.0 92.37 MB

Person Image Synthesis via Denoising Diffusion Model (CVPR 2023)

Home Page: https://ankanbhunia.github.io/PIDM

License: MIT License

Jupyter Notebook 79.46% Python 20.54%
diffusion-models generative-models generativeai image-generation person-image-generation pose-guided-person-image-generation stable-diffusion cvpr2023

pidm's Introduction

Person Image Synthesis via Denoising Diffusion Model Open in Colab

ArXiv | Project | Demo | Youtube

News

  • 2023.02 A demo available through Google Colab:

    🚀 Demo on Colab

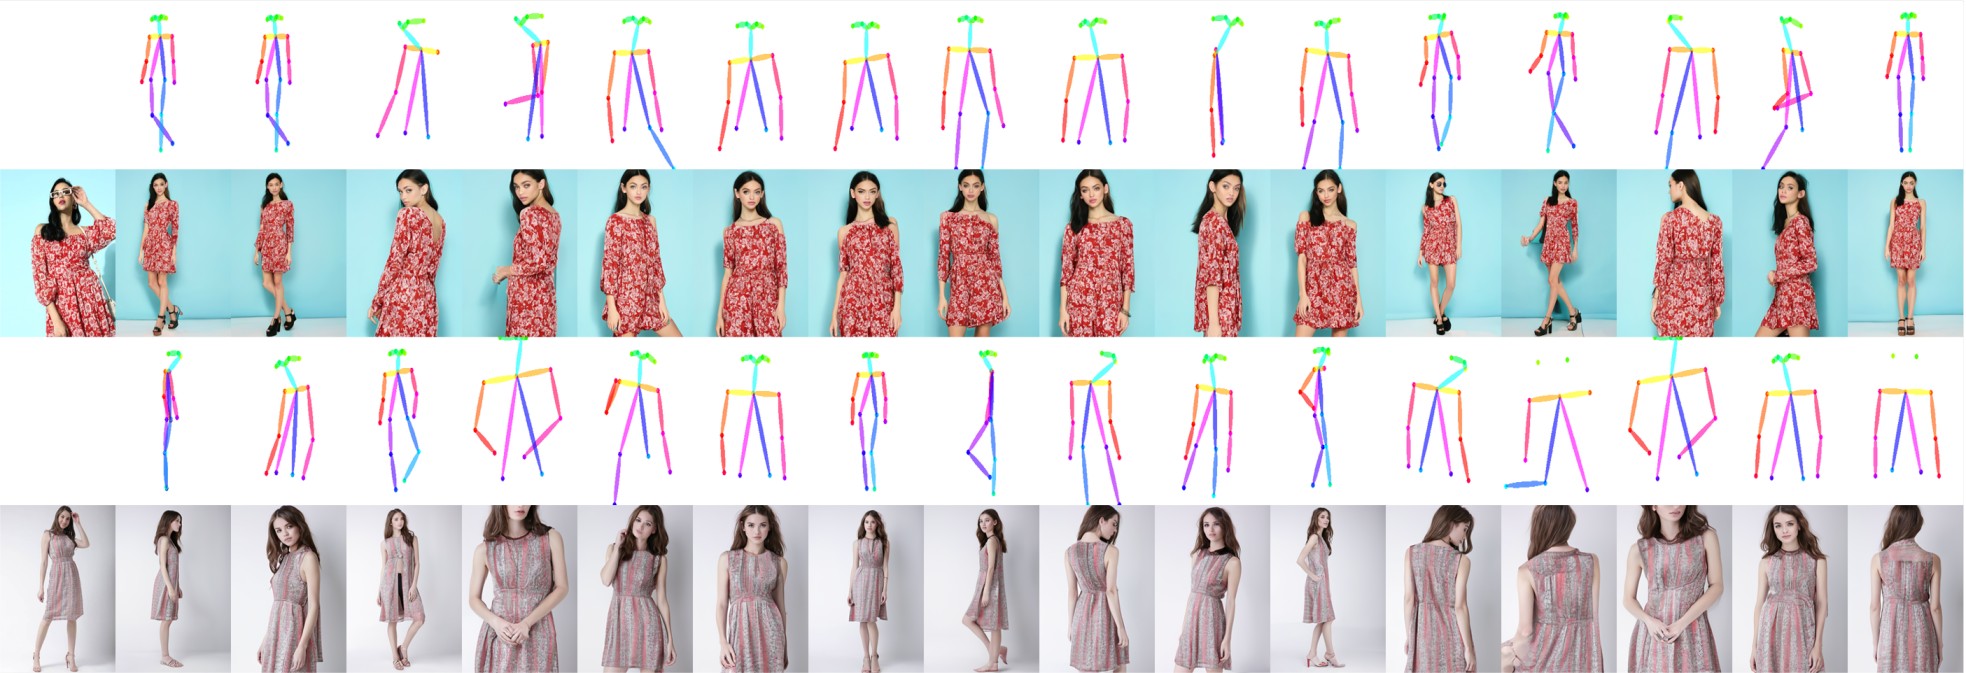
Generated Results

You can directly download our test results from Google Drive: (1) PIDM.zip (2) PIDM_vs_Others.zip

The PIDM_vs_Others.zip file compares our method with several state-of-the-art methods e.g. ADGAN [14], PISE [24], GFLA [20], DPTN [25], CASD [29], NTED [19]. Each row contains target_pose, source_image, ground_truth, ADGAN, PISE, GFLA, DPTN, CASD, NTED, and PIDM (ours) respectively.

Dataset

  • Download img_highres.zip of the DeepFashion Dataset from In-shop Clothes Retrieval Benchmark.

  • Unzip img_highres.zip. You will need to ask for password from the dataset maintainers. Then rename the obtained folder as img and put it under the ./dataset/deepfashion directory.

  • We split the train/test set following GFLA. Several images with significant occlusions are removed from the training set. Download the train/test pairs and the keypoints pose.zip extracted with Openpose by downloading the following files:

  • Download the train/test pairs from Google Drive including train_pairs.txt, test_pairs.txt, train.lst, test.lst. Put these files under the ./dataset/deepfashion directory.

  • Download the keypoints pose.rar extracted with Openpose from Google Driven. Unzip and put the obtained floder under the ./dataset/deepfashion directory.

  • Run the following code to save images to lmdb dataset.

    python data/prepare_data.py \
    --root ./dataset/deepfashion \
    --out ./dataset/deepfashion

Custom Dataset

The folder structure of any custom dataset should be as follows:

  • dataset/
    • <dataset_name>/
      • img/
      • pose/
      • train_pairs.txt
      • test_pairs.txt

You basically will have all your images inside img folder. You can use different subfolders to store your images or put all your images inside the img folder as well. The corresponding poses are stored inside pose folder (as txt file if you use openpose. In our project, we use 18-point keypoint estimation). train_pairs.txt and test_pairs.txt will have paths of all possible pairs seperated by comma <src_path1>,<tgt_path1>.

After that, run the following command to process the data:

python data/prepare_data.py \
--root ./dataset/<dataset_name> \
--out ./dataset/<dataset_name>
--sizes ((256,256),)

This will create an lmdb dataset ./dataset/<dataset_name>/256-256/

Conda Installation

# 1. Create a conda virtual environment.
conda create -n PIDM python=3.7
conda activate PIDM
conda install pytorch torchvision torchaudio pytorch-cuda=11.7 -c pytorch -c nvidia

# 2. Clone the Repo and Install dependencies
git clone https://github.com/ankanbhunia/PIDM
pip install -r requirements.txt

Method

Training

This code supports multi-GPU training. Full training takes 5 days with 8 A100 GPUs and a batch size 8 on the DeepFashion dataset. The model is trained for 300 epochs; however, it generates high-quality usable samples after 200 epochs. We also attempted training with V100 GPUs, and our code takes a similar amount of time for training.

python -m torch.distributed.launch --nproc_per_node=8 --master_port 48949 train.py \
--dataset_path "./dataset/deepfashion" --batch_size 8 --exp_name "pidm_deepfashion"

Inference

Download the pretrained model from here and place it in the checkpoints folder. For pose control use obj.predict_pose as in the following code snippets.

from predict import Predictor
obj = Predictor()

obj.predict_pose(image=<PATH_OF_SOURCE_IMAGE>, sample_algorithm='ddim', num_poses=4, nsteps=50)

For apperance control use obj.predict_appearance

from predict import Predictor
obj = Predictor()

src = <PATH_OF_SOURCE_IMAGE>
ref_img = <PATH_OF_REF_IMAGE>
ref_mask = <PATH_OF_REF_MASK>
ref_pose = <PATH_OF_REF_POSE>

obj.predict_appearance(image=src, ref_img = ref_img, ref_mask = ref_mask, ref_pose = ref_pose, sample_algorithm = 'ddim',  nsteps = 50)

The output will be saved as output.png filename.

Citation

If you use the results and code for your research, please cite our paper:

@article{bhunia2022pidm,
  title={Person Image Synthesis via Denoising Diffusion Model},
  author={Bhunia, Ankan Kumar and Khan, Salman and Cholakkal, Hisham and Anwer, Rao Muhammad and Laaksonen, Jorma and Shah, Mubarak and Khan, Fahad Shahbaz},
  journal={CVPR},
  year={2023}
}

Ankan Kumar Bhunia, Salman Khan, Hisham Cholakkal, Rao Anwer, Jorma Laaksonen, Mubarak Shah & Fahad Khan

pidm's People

Contributors

ankanbhunia avatar

Stargazers

 avatar  avatar  avatar  avatar  avatar  avatar  avatar  avatar  avatar  avatar  avatar  avatar  avatar  avatar  avatar  avatar  avatar  avatar  avatar  avatar  avatar  avatar  avatar  avatar  avatar  avatar  avatar  avatar  avatar  avatar  avatar  avatar  avatar  avatar  avatar  avatar  avatar  avatar  avatar  avatar  avatar  avatar  avatar  avatar  avatar  avatar  avatar  avatar  avatar  avatar  avatar  avatar  avatar  avatar  avatar  avatar  avatar  avatar  avatar  avatar  avatar  avatar  avatar  avatar  avatar  avatar  avatar  avatar  avatar  avatar  avatar  avatar  avatar  avatar  avatar  avatar  avatar  avatar  avatar  avatar  avatar  avatar  avatar  avatar  avatar  avatar  avatar  avatar  avatar  avatar  avatar  avatar  avatar  avatar  avatar  avatar  avatar  avatar  avatar  avatar

Watchers

 avatar  avatar  avatar  avatar  avatar  avatar  avatar  avatar  avatar  avatar  avatar  avatar  avatar  avatar  avatar  avatar  avatar  avatar  avatar  avatar  avatar  avatar

pidm's Issues

Some details about PIDM

Thank you for your nice work ! 

  1. Which dimension is used for concat between the Yt and Xp? (2 * B C H W -> B C H 2W or 2 * B C H W -> B 2C H W ?)

  2. how to generate the Epose by Xp in sampling? concat the Yt and Xp ? or other way

Looking forward to your reply. Again, Thanks for your awesome work! ;-)

custom dataset training

Can you explain how to train with custom dataset and provide a sample format how it would look like?

About the implementation on multi-scale condition.

Thanks for sharing this great work.

In the paper, you mentioned that "transfer rich multi-scale texture patterns from the source image distribution to the noise prediction"

How ever, in the code, I find that just the last layer feature of the encoder is used for cross attention. As the [-1] means:
pose_out = self.cros_attn2(x = xt_feats[-1], cond = pose_feats[-1]).mean([2,3])

Could you please briefly tell me where is the implementation of "multi-scale" feature for cross attention?

About GPUs

Hi! I appreciate your excellent work. I would like to know what GPU you use to train this model

How long does it take

Hi, Very interesting and nice results.
I am wondering how long does it take to train the model.

Error while doing inference on resized PNG image

I can successfully run inference with a 800x1280 PNG image generated by stable-diffusion-webui with the following python script:


from predict import Predictor
obj = Predictor()

img_path = "full.png"

obj.predict_pose(image=img_path, sample_algorithm='ddim', num_poses=1, nsteps=50)

However, the image generated seems to be not in the right aspect ratio.

From you example, I found that the sample image is 1080x1440. So I used gimp to crop a 540x720 and export PNG with default parameters. Then I changed the file name to the new PNG and run inference again. However, I am getting this error:

Traceback (most recent call last):
File "/tank/ai/PIDM/pose.py", line 9, in
obj.predict_pose(image=img_path, sample_algorithm='ddim', num_poses=1, nsteps=50)
File "/tank/ai/PIDM/predict.py", line 51, in predict_pose
src = self.transforms(src).unsqueeze(0).cuda()
File "/tank/ai/stable-diffusion-webui/venv/lib/python3.10/site-packages/torchvision/transforms/transforms.py", line 95, in call
img = t(img)
File "/tank/ai/stable-diffusion-webui/venv/lib/python3.10/site-packages/torch/nn/modules/module.py", line 1194, in call_impl
return forward_call(*input, **kwargs)
File "/tank/ai/stable-diffusion-webui/venv/lib/python3.10/site-packages/torchvision/transforms/transforms.py", line 270, in forward
return F.normalize(tensor, self.mean, self.std, self.inplace)
File "/tank/ai/stable-diffusion-webui/venv/lib/python3.10/site-packages/torchvision/transforms/functional.py", line 360, in normalize
return F_t.normalize(tensor, mean=mean, std=std, inplace=inplace)
File "/tank/ai/stable-diffusion-webui/venv/lib/python3.10/site-packages/torchvision/transforms/functional_tensor.py", line 940, in normalize
return tensor.sub
(mean).div_(std)
RuntimeError: The size of tensor a (4) must match the size of tensor b (3) at non-singleton dimension 0

What went wrong? Thanks a lot in advance.

The Question about Figure 3 in Paper?

  1. I want to cite it and compare, but I don't know the ID name of these images.
  2. Could you provide the result's size of Fig. 3? I feel like it's not a square,e.g., 256x256 or 512x512.

About cond_scale

Have you ever conducted a CFG-deactivating ablation experiment? I'm curious as to whether deactivating CFG will significantly affect the results.

How to start with the code

Many Thanks for sharing the code! I'm new to this and I'm not sure how can I start debugging the code. I want to first debug the code on my local machine which has very limited GPU before I run it on the sever (which has a 12 GB GPU). I'm using visual studio code. I would really appreciate if you can guide me in this and how can I run the code on a single GPU. Your input is highly appreciated.

Many thanks again.

Training code

Hello, excellent work!
when will the training code be published?

No module named 'predict'

Hi, Very interesting!
@ankanbhunia
But when I use the. pnb file, it always tells me [No module named 'predict'].
I want to know what I should do to successfully try our conference code.

SSIM, FID and PSNR

Hi authors, your work is impressive. Thanks for sharing the code base. However, I couldn't find the evaluation code for SSIM, PSNR, and FID. It would greatly help the community if you could share it. Looking forward to your kind response.

Question on pose-target data

Thank you for this interesting work and releasing the inference demo. I am currently also working on a pose conditional generation model so I was curious about your solution. I noticed that your pose targets contain 20 channels which surprised me with further inspection I saw that the first 3 channels are basically a visualization of the pose skeleton and the other 17 channels the usual gaussian key point maps.

I wonder what the rational of including the skeleton visualization is? Does it lead to any significant improvement feeding that into the model along side the keypoint maps?

Thank you

Using the pre-trained model for market-1501 dataset

Hope this message finds you well!

I wanted to try this model with the Market 1501 dataset, but I don't want to train the model from scratch.

I was reading that I can use the concept of transfer learning/fine-tune/retraining. Could you please help me with the steps I need to follow to be able to do that.

I'm just confused about which code I have to use to do the fine tuning as the model consist of multiple parts. Also, how I can prepare the new dataset in terms of keypoints and target poses.

I'm asking these questions since you have already experienced the model with this dataset as mentioned in the paper

Your help will be highly appreciated!

Quantitative Problem

real_path = './deepfashion/train_256x256_pngs/'

Thank you very much for open-sourcing your articles.
Could you please clarify what these three files represent and how they were obtained?

About Market-1501 Experiments

Thanks for your excellent work and generous sharing in the repo.

I want to make sure one thing about ReID experiments in the paper.

Are synthesized images generated from a model that trained from scratch on Market-1501 training set?
Since I observed that its resolution (128x64) is different from DeepFashion, I'm quite confused about this.

About the training images

Thanks for your great work!

I find the training dataset that you offer is 256x256,but the original image is 256x176,I want to know the way to turn 256x176 into 256x256.

Thanks again!

The possible contradiction for disentangled cfg between the paper and train code

Hello authors, your work is impressive. Thanks for sharing the code base.

I want to clarify about your disentangled cfg.
The paper mentions that you omitted the pose condition and the style condition with 0.1 probability.
However, this code(train.py) seems to omit only the style condition. Since, invocation of unet in GaussianDiffusion.training_losses()

model_output = model(x = torch.cat([x_t, target_pose],1), t = self._scale_timesteps(t), x_cond = img, prob = prob)

passes both target_pose as concatenated input and img(style) as condition along with prob.
Although the x_cond is masked with the probability given in the forward function of the unet BeatGANsAutoencModel.forward(), the argumentx is used without any modification.

Could you clarify how you train your model for disentangled cfg?

Excuse me if I overlooked something.
Best regards.

Training code

Hi, Very interesting and nice results.
When will the training code be published?

About the color difference between the generated image and ground truth

I trained this generative model with my own data, using the same MSEloss and vbloss as in the code you provided, and after 100 generations of training the network can correctly generate the content of the image, but the color of the image deviates a lot, and I'd like to ask if you've encountered a similar problem.

results and evaluation for 512x352 images

Hi authors, your work is impressive. Thanks for sharing the code base.

However, I find the file "utils/metrics.py" is the evaluation code only for 256x176 images. And the FID calculated by "utils/metrics.py" seems to be incorrect.

It would greatly help the community if you could share 512x352 generated image results and the evaluation code for 512x352 images. Looking forward to your kind response.

About the model structure

Incredible work! However, the code of the model structure is quite hard to read for me. Is there any chance to post a model structure figure or anything that helps us understand the model structure? Really appreciate it!

About implementation details

Hi @ankanbhunia

Thanks for your great work!

I'm trying to reproduce your results. Could you please share more implementation details?
For example, how big for the unet and TDB you used (detailed architecture)? How many epochs (and how long) did you spend on training?

Thanks in advance.

CUDA out of memory !

Hi authors,

Thanks for sharing the code base and awesome work in view synthesis for Fashion! I tried training/finetuning the model with Batch size = 2, which is essentially one pair of data with a custom dataset (Image 512 x 352 and pose obtained and formatted from Openpose). I am getting CUDA out of memory at the lowest possible settings. I use an Nvidia RTX GPU with 20Gb size x 8 (number of GPUs). Could you please suggest some tips or tricks that can reduce memory utilization?

Feature request: Run this in image to image style for generation.

Hi,

Current pipeline seems to start from complete noise, is it possible to have a sample code snippet where the generation starts from latents generated from another image like in stable diffusion img2img pipeline? I was hoping we can then stack PIDM on top of noisy images generated from other techniques like dress in order.

SSIM params

Hi,

Could you please tell me what's your params for ssim calculation?
I cannot get the same number with your shared generative images.

Cheers

More details about PIDM architecture

Great job!
Can you please give more details about the architecture of the model? like the general architecture of the Unet, the encoder HE and the texture diffusion block so I can re-produce the model.

Many thanks.

Generalization of anime characters

thanks for your wonderful work!
it is possible to replace real person images with anime characters, then generate anime characters to match the given pose ?
look forward to your reply!

About keypoints estimation

Thanks for your great work! Really appreciate it!
I wonder if you could release the code of keypoint extraction for us to upload some customized model pictures as target pictures.

can you teach me how the"frozen_out" work? thanks!

frozen_out = th.cat([model_output.detach(), model_var_values], dim=1)
terms["vb"] = self._vb_terms_bpd(
model=lambda *args, r=frozen_out: r,
x_start=x_start,
x_t=x_t,
t=t,
clip_denoised=False,
)["output"]

keypoints to .npy

Hello author, I got the key point of 18*2, using get_label_tensor function and using np.load to convert to npy file. When the last predict, the effect is poor and there is no image of the key points.

Training Code

Hi. Great article and results!
Are you planning to publish the training code as well?

Recommend Projects

  • React photo React

    A declarative, efficient, and flexible JavaScript library for building user interfaces.

  • Vue.js photo Vue.js

    🖖 Vue.js is a progressive, incrementally-adoptable JavaScript framework for building UI on the web.

  • Typescript photo Typescript

    TypeScript is a superset of JavaScript that compiles to clean JavaScript output.

  • TensorFlow photo TensorFlow

    An Open Source Machine Learning Framework for Everyone

  • Django photo Django

    The Web framework for perfectionists with deadlines.

  • D3 photo D3

    Bring data to life with SVG, Canvas and HTML. 📊📈🎉

Recommend Topics

  • javascript

    JavaScript (JS) is a lightweight interpreted programming language with first-class functions.

  • web

    Some thing interesting about web. New door for the world.

  • server

    A server is a program made to process requests and deliver data to clients.

  • Machine learning

    Machine learning is a way of modeling and interpreting data that allows a piece of software to respond intelligently.

  • Game

    Some thing interesting about game, make everyone happy.

Recommend Org

  • Facebook photo Facebook

    We are working to build community through open source technology. NB: members must have two-factor auth.

  • Microsoft photo Microsoft

    Open source projects and samples from Microsoft.

  • Google photo Google

    Google ❤️ Open Source for everyone.

  • D3 photo D3

    Data-Driven Documents codes.