 Do you like the Blobifier? Consider buying me a coffee
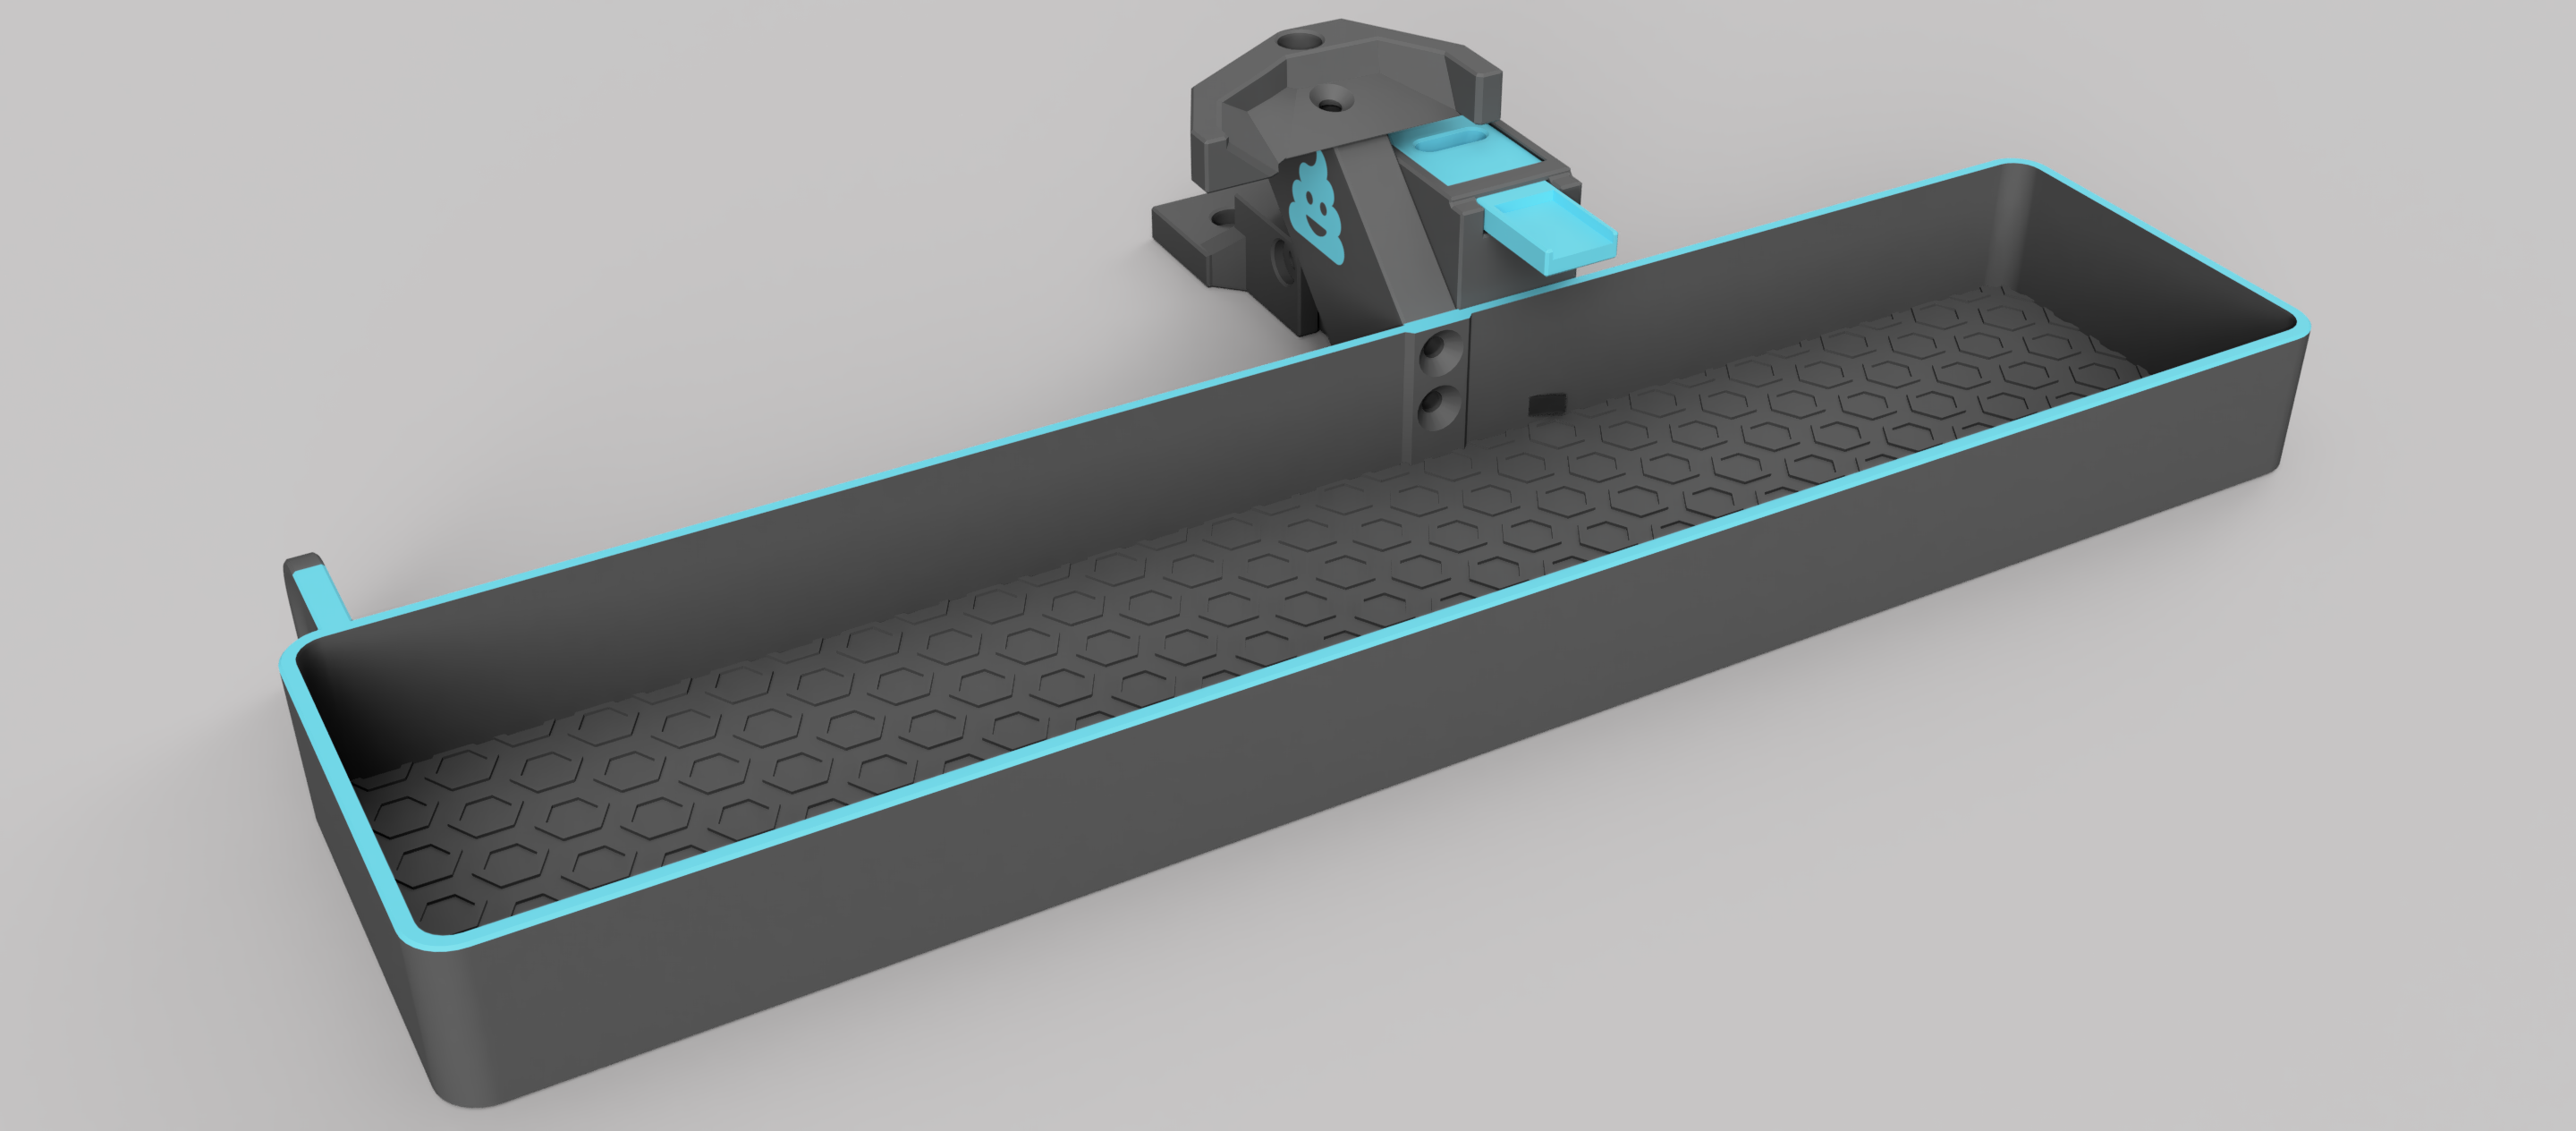
The Blobifier is a small device that eliminates the need for a purgeblock, making filament swaps more quick. It does this by extruding filament onto a tray creating a blob that will get ejected into a purge-bucket.
- Turn your filament purge waste into blobs for fewer waste and quicker purging.
- Store the blobs in a bucket that can hold 400 blobs! (for the V2 300mm version)
- Automatically pause the printer once the bucket is full.
- Detect when the bucket is installed or missing.
- NOTE: Empty the bucket if you remove it! The system will reset the blob counter.
- Shake the bucket for better dispersion of the blobs in the bucket.
- Clean your nozzle on a brass brush before resuming to print.
The Macro and Nozzle Scrubber are based on a version madde by by Hernsl (hernsl#8860 on Discord).
The device is designed around a Voron V2.4 300mm, but should work for 250mm and 350mm too. This version only supports the assembly on the rear-left of the bed. If you decide to change all this, please consider contributing to the project by creating a pull request with the needed changes.
- 3 x M3x8 shsc
- 1 x M3x25 shsc
- 3 x M3x8 fhcs
- 3 x M3 t-nut
- 1 x M2x6 shsc (For the servo pivot arm)
- 2 x M2x10 self tapping screws
- 5 x heat set inserts
- 1 x 10x15 aluminum strip
- max 1mm thick
- Make sure it's thick enough to dissipate the heat from the nozzle
- 1 x SG90 or MG90 servo (and the included screws)
- 1 x omron D2F-5L sized micro switch. Any knock-off will work.
- 1 x brass brush
- 1 x 4-pin jst connector set (male + female)
- other connectors and wire to connect it to the board
- Bucket_*.stl (whichever suits your printer (and printbed))
- *_Shaker.stl (whichever suits your toolhead)
- *_Shaker_Arm.stl (whichever suits your toolhead)
- The included *_Shaker_arm_poo.stl can be used for a multimaterial print.
- Insert 4 heatset inserts in the arm. Mind that one needs to be inserted at an angle.
- Screw the arm to the bucket with the poo being upright using 2 M3x8 fhcs screws.
- Screw the shaker to the arm with the opening facing the bucket using an M3x8 fhcs and M3x8 shsc screw.
- Brush.stl
- Cut off the handle from the brass brush and insert it into the printed part. If it doesn't fit smootly, file down the brush further until it does.
- Screw the brush down on the left bed extrusion with the brush against the rear of the bed using an M3x8 shcs and t-nut.
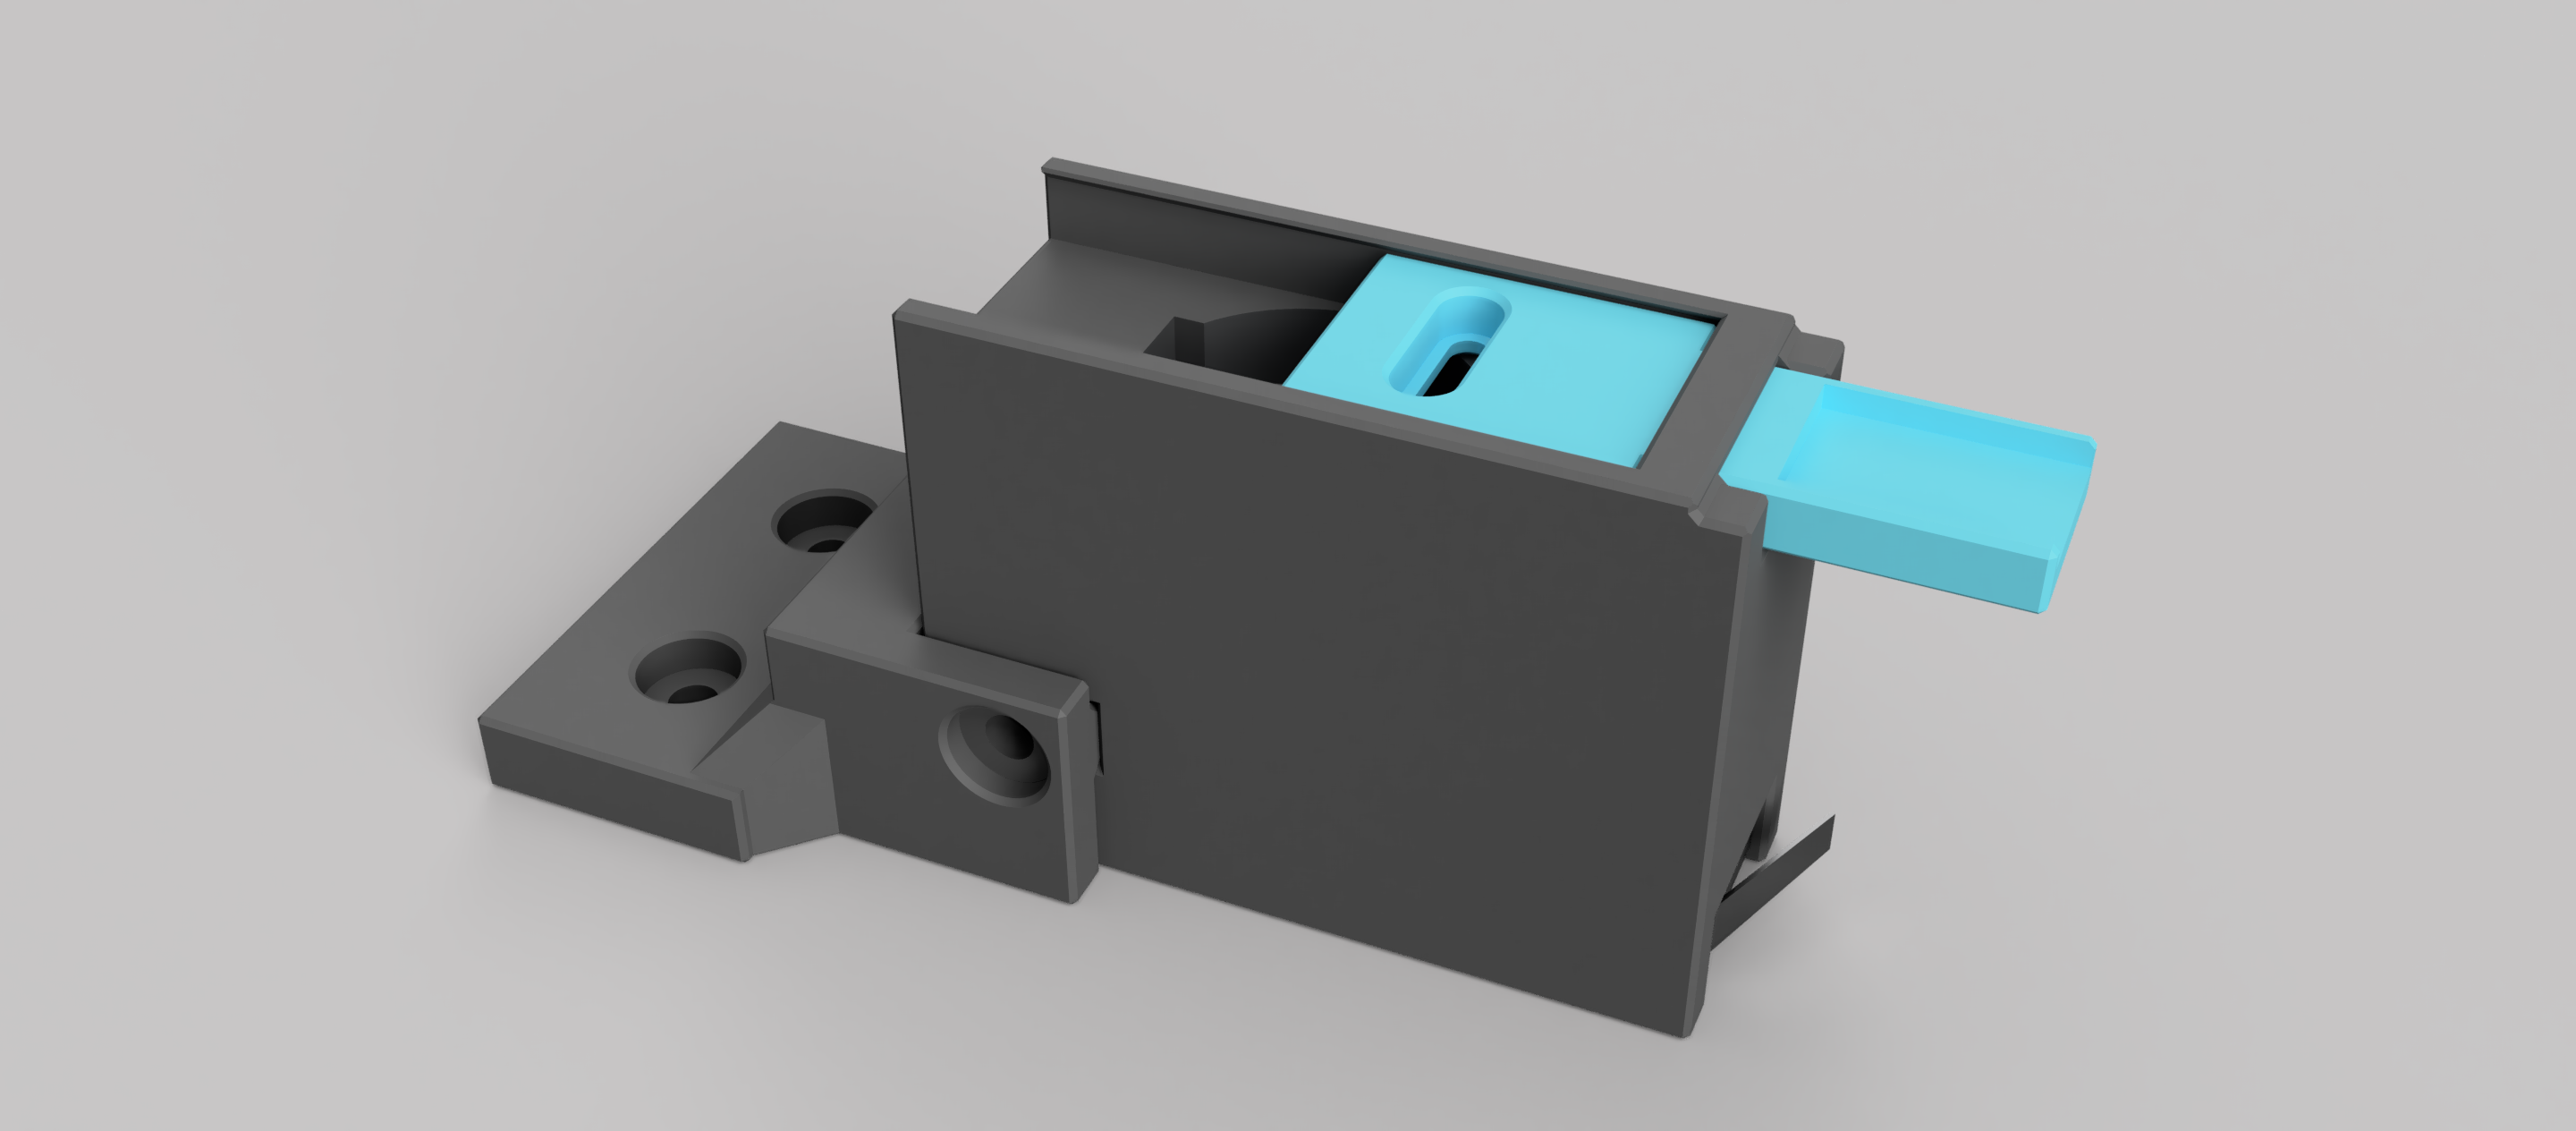
- Base.stl
- Tray.stl
- Servo_arm_*.stl (Check which arm fits properly on your servo)
- Mount_*.stl Check the mount for your printer. The V2.4 has two mounts because some beds are slightly wider(255, 305 or 355)
- Glue a piece of aluminum inside the tray. Make sure the piece of aluminum is thick enough to dissipate heat from the nozzle without melting the plastic.
- Sand down the tray untill the top and bottom are smooth. If the aluminum pertrudes the top a bit, sand that down with it.
- Remove 3 included support from the base.
- One in the slot for the tray
- Two at the bottom for the switch and jst connector
- Test fit the tray in the base. Slide it in from the back. It should stick out 15mm if fully inserted. If operation isn't smooth, go back to step 2.
- Remove the tray from the base
- Insert the servo from above making sure the wires face the cavity meant for them and are inserted first so they come out from the bottom. It could be a tight fit, but if your printer is properly tuned you shouldn't have any trouble. Make sure you inserted it fully, you can check from the bottom.
- Insert the microswitch in the bottom. Check if the lever is correctly oriented. Screw it down with 2 M2x10 self tapping screws. The screw holes might be hard to see, because there is an extra layer for printability.
- Insert the 4-pin female JST connector iside the slot. If the fit is very loose, use some glue.
- Solder the wires from the servo and the switch to this connector. The order is less important, just keep in mind that you'll have to connect the wire to the board in the same order.
- pin 1: VCC (Red, usually)
- pin 2:
- GND from the servo (Brown, usually)
- C from the switch (pins are marked C, NC and NO)
- pin 3: Signal wire from servo (Orange, usually)
- pin 4: NC from the switch
- Connect the base to your printer with a cable of your own making. You can drill a hole in the bottom plate of your printer to feed the wire through. Be careful not to hit any components in your electronics compartment and ALWAYS unplug your printer from the wall if you're working on the electronics! You'll have to pick empty pins on your board. Refer to your boards documentation on which pins to use.
- pin 1: 5V (any 5V on your board should work)
- pin 2: GND (any GND on your board should work)
- pin 3: An output capable pin. Most of them are.
- pin 4: A pin with an internal pullup resistor. Most of them have.
- Insert a heated insert into the base mount. Only one side is suitable for it.
- Slide the base in the mount and secure it with an M3x25 shsc.
- Screw the base into place with 2 x M3x8 shcs and T-nuts onto the left 2020 extrusion. The tray should just slide behind your bed. You can temporarily insert the tray to verify the position.
- Turn on your printer and include the config file found in the github. Then restart the klipper firmware.
- run
BLOBIFIER_SERVO POS=outin the console. You should hear your servo move. - Screw the servo arm onto the servo with the arm pointing towards the slot. Make sure you don't turn the servo while doing this. If you accidentally turn it, run
BLOBIFIER_SERVO POS=outagain and continue. - Insert the tray from the back until the hole in the servo arm becomes visible through the tray. Then screw it down with an M2x4 screw, then go back half a turn so the screw can rotate freely in the tray.
- Test the servo a couple of times with
BLOBIFIER_SERVO POS=inandBLOBIFIER_SERVO POS=out. The tray should be fully inside or outside the base. If not, try to determine why.- There may be too much resistance in the sliding mechanism.
- You might have screwed the m2 screw too tight.
- The values in the config might need adjustment (unlikely)
- Push the switch on the base. A message that the bucket is placed should be on the screen. Then let go of the switch. A message that the bucket was removed should be on the screen.
- Place the bucket and see if it still works. If not, the base might need slight adjustment towards the center.
Refer to the config files comments to configure the macro to your desires.
For maximum integration with Happy Hare, make use of the gcode pre-processing. Make sure to include PURGE_VOLUMES=!purge_volumes!
Add BLOBIFIER to the post_load sequence in mmu_macro_vars.cfg
variable_user_post_load_extension : "BLOBIFIER"
That's it. The Blobifier will now automatically be called for a purge everytime you swap materials. Oh... don't forget to disable that filthy wipe tower.
- Add BLOBIFIER_PARK for use in conjuntion with Happy Hare. Parking prevents oozing.
- Removed the retraction moves (apart from the initial one in BLOBIFIER_PARK)
- Add a dwell time to relieve pressure from the nozzle
- Purge volumes are now extracted from the new Happy Hare tool map!
- It is now advised to use the 'variables' of Happy Hare branch in conjunction with this mod.
- Add support for wider beds (5mm extra width) (#6)
- Persistent blob state! Values are saved across reboots
- Now fits the MG90 servo too!
- Tray height reduced to accomodate for the MG90 servo.
- Base servo cavity expanded for fitting an MG90.
- Added a channel alongside the servo for wiring the microswitch.
- Improved servo arm and removed different fits.
- Included supports in the base for easier printing.
- Modified the macro so it temporarily restores the feedrate to 100%.
- Adjusted the part cooling options. You can now either set it to a desired speed, or don't change it at all.
- Added some simple validation in the config to prevent bad values for the parameters.
- Designed from the ground up in Fusion 360.
- Changed the way the system mounts for easy adaptation.
- Hexagon pattern on the bucket floor! (For smoother distribution, and hexagons are bestagons).
- Change shaker shape to better fit the Stealthburner toolhead.
- Included supports in the mount and brim-ears for the bucket.
- Add chamfers to most edges.
- Add the poo icon for multicolored prints.
- Add a shaker arm to the bucket which the SB can slide into.
- Other toolheads may be added in future releases.
- Move the brush to the right.
- Increase bucket height to 23mm.
- Add ridges to the bucket floor to help spread the blobs.
- Add a micro switch to the base bottom to detect the bucket.
- Updated BOM to include hardware for the brush
- Increased the hight of the base by 0.2mm for more support to for the tray
- I... started making release notes with version 0.3


