


![]()


Steam Play compatibility tool to run games using native Linux engines
Compatibility tool will work on any modern 64-bit Linux distribution. All packaged games are compiled for Steam Runtime Sniper environment and any additional dependencies are provided in the download.
Using Luxtorpeda with Steam native runtime may or may not work, but is not supported.
The packages.json for the supported packages and getting the latest versions will get updated on each launch of luxtorpeda, without any input needed from the user. New releases of the luxtorpeda client will need to be downloaded manually, but a new release of the client is not required when a package is created or updated, unless that package depends on a new feature (which will be noted in the release notes).
-
Close Steam.
-
Download latest version at https://github.com/luxtorpeda-dev/luxtorpeda/releases
-
Move and unpack tarball to compatibilitytools.d directory (create one if it does not exist):
$ cd ~/.local/share/Steam/compatibilitytools.d/ || cd ~/.steam/root/compatibilitytools.d/
$ tar xJf luxtorpeda-<version-number>.tar.xz
-
Start Steam.
-
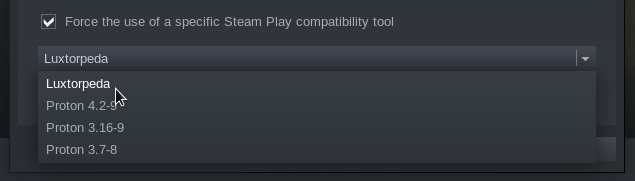
In game properties window select "Force the use of a specific Steam Play compatibility tool" and select "Luxtorpeda".
- Download ProtonUp-Qt from here: https://davidotek.github.io/protonup-qt/#download
- Run ProtonUp-Qt and select Steam
- Click
Add Version, select Luxtorpeda and pressInstall - Restart Steam
- In Steam game properties window select "Force the use of a specific Steam Play compatibility tool" and select "Luxtorpeda".

You will need Rust, Cargo, OpenSSL, Godot4 and export templates.
Official method:
- Rust and Cargo: You can install Rust and Cargo using rustup.
- Godot 4: Download and install Godot 4 and export templates from their official webpage.
- OpenSSL: Install OpenSSL from your distribution's package manager.
Terminal installation (for those who prefer the terminal):
-
Debian, Ubuntu, and variants: Open a terminal and run:
$ sudo apt install cargo libssl-dev godot
-
Fedora: Use the following command:
$ sudo dnf install openssl-devel rust cargo godot
-
Arch Linux: You know what to do:
$ sudo pacman -S openssl rust godot
-
You can either open Godot, go to settings and install the export templates from there.
-
If you prefer to use the terminal these commands should work:
$ mkdir -p ~/.local/share/godot/templates/4.2.1.stable/
$ wget https://github.com/godotengine/godot/releases/download/4.2.1-stable/Godot_v4.2.1-stable_export_templates.tpz
$ unzip -j Godot_v4.1-stable_export_templates.tpz -d ~/.local/share/godot/templates/4.2.1.stable/
-
Close Steam.
-
Clone the repository, then use makefile to trigger
cargo buildand install:$ git clone https://github.com/luxtorpeda-dev/luxtorpeda.git $ cd luxtorpeda $ make user-install GODOT=godot-path-here -
Start Steam.
-
In game properties window select "Force the use of a specific Steam Play compatibility tool" and select "Luxtorpeda (dev)".
A configuration json file named config.json will be located in the ~/.config/luxtorpeda/config.json if the application has been run at least once. The defaults can be seen at https://github.com/luxtorpeda-dev/luxtorpeda/blob/master/src/config.rs. It has the following parameters:
- host_url - This is used to determine where the packages.json file is located remotely, for use in automatic updates of this file.
- should_do_update - If this parameter is set to true, then the packages.json file will be updated automatically.
- disable_default_confirm - Disables default engine confirmation dialog. Defaults to false. This can be done globally in the config.json by setting
disable_default_confirmto true, or settingLUX_DISABLE_DEFAULT_CONFIRM=1 %command%in the launch options of a particular game. SettingLUX_DISABLE_DEFAULT_CONFIRM=0 %command%will enable the confirmation if the config variable is set to disabled for that particular game. - enable_steam_cloud - If this parameter is set to true, each engine & game with steam cloud support will enable it. This defaults to false. This can also be done by setting
LUX_STEAM_CLOUD=1 %command%in the launch options of a particular game. - hash_check_install - If this parameter is set to true, hash checking will be enabled for each file the engine needs to run, so that if a file has already been extracted/installed, it won't do it again until there is an update to one of the engine files. This is defaulted to false.
- close_client_on_launch - If this parameter is set to true, the client will close as soon as the game launches, instead of waiting for the engine to complete like normal behavior. This is defaulted to false.
- steam_app_id_install_wait_in_seconds - How long to wait for the install to complete when installing game dependencies. Defaults to 600.
- additional_remote_packages - An array of full URLs of additional JSON files to retrieve package information from. If this is provided, the data will be merged with the official package metadata, only being active for new games, and only looking at the games and engines keys.
Logs will be written to file if LUX_WRITE_LOGGING=1 is set. The log file will be located at ~/.local/state/luxtorpeda/luxtorpeda.log.
A ~/.config/luxtorpeda/user-packages.json file can be created, which will allow custom package information without having to change the normal packages.json file. This file should have the same format as packages.json, but can have either new games or overrides to existing games. See #65 for more information.
When a prompt appears from the client, it will accept input from controllers, keyboard or mouse. These prompts can include the engine chooser, progress indicator, error notices, and questions. The input works the following way:
- Keyboard and mouse are always supported, even if a controller is detected.
- Keyboard icons will appear in the buttons if no controllers are detected. Keyboard arrows can be used to navigate the choices.
- Controller Icons Library for Godot is used to detect and accept inputs from controllers.
- Controller icons will appear in the buttons if a controller is detected. If input is switched, such as going from using a controller to mouse or keyboard, the icons will change accordingly.
- Icons are only available for controllers in the testing list below, with it falling back to the Xbox controller icons if an unknown controller is detected.
- Input with that controller should still work but the icons may be incorrect. If additional controller support is wanted, feel free to open an issue.
- The following controllers have been tested:
- Xbox One Controller
- PS4 Controller (PS5 Controller should work and use PS4 icons)
- Switch Pro Controller (Will show icons)
- Steam Controller - The Steam Controller will act as a keyboard and mouse, like in desktop mode.
For using controllers in the engine itself, ensure that Steam Input is enabled, that a gamepad profile has been set, and that the Steam Input controller-specific option has been enabled, such as for Xbox or Playstation controllers.
- Thanks to help with testing from LiamD at GamingOnLinux, luxtorpeda works with the Steam Deck! See more information at https://www.gamingonlinux.com/2022/03/steam-deck-using-luxtorpeda-for-morrowind-warzone-2100-and-x-com/
- Gamepad support relies on the steam input settings. If steam input for the game is set as a gamepad, then will show controller icons and work as a controller. Otherwise, can use the touchscreen as a mouse.
- Setting a game to use luxtorpeda can be done in desktop or gaming mode, using the compatibility options.
Just click "Play" and Luxtorpeda will download and install the package for you. You need to select Luxtorpeda as a compatibility tool first, of course.
When you launch a game that supports multiple engines, a prompt will appear asking for the engine that should be downloaded and launched. Once the engine has been picked, a second prompt will ask if the engine should become the default. Launches after this if "Yes" is picked in this dialog will not ask for the engine again. A file can be deleted to restore the engine prompt for a particular game. The file will have the following format: ~/.config/luxtorpeda/<app_id>/default_engine_choice.txt
To go to the main website, go to https://luxtorpeda.org
To see a list of supported titles, go to https://luxtorpeda.org/packages
Want a specific game?
Check issues to see if we are working on it.
You can also make a package request by creating a new issue
You can also create a package yourself
You can use cargo as with any Rust project; make serves only as a convenient
frontend for packaging and triggering longer cargo commands.
For the UI, the Godot editor is required. It can be downloaded from https://godotengine.org/download
- Open desktop mode and download the luxtorpeda repo to a directory on the deck.
- Install flatpak org.freedesktop.Sdk/21.08 (should have glibc 2.33, as of current steam deck glibc version).
- Run the following:
flatpak run --command=bash -d --filesystem=home --share=network org.freedesktop.Sdk//21.08 - Install rustup:
curl --proto '=https' --tlsv1.2 -sSf https://sh.rustup.rs | sh - Go into the luxtorpeda directory and run
cargo build. Then copytarget/debug/libluxtorpeda.sointo the correct directory. The Godot project should be exportable using the engine on Steam and then copied into the correct directory.
- First make sure all pull requests have been merged that are wanted for the release. Then
git pullon the master branch. - Make sure cargo-release is installed locally
cargo install cargo-release(https://github.com/crate-ci/cargo-release) - Run
cargo release version majorto do a dry run of the version update. Can also use minor, patch, etc - Run again if dry run successful:
cargo release version major --execute. Make sure to commit & push to git if needed. - Run
cargo releaseto do a dry run of the release. - Run
cargo release --executeif dry run successful. This step will push the git tags.
- Application icon is from a collection designed by AIGA, in the public domain. It is available here.
- Godot game engine is from https://github.com/godotengine/godot
- Accept icon is from https://uxwing.com/accept-icon/
- Controller Icons Library for Godot is from https://github.com/rsubtil/controller_icons